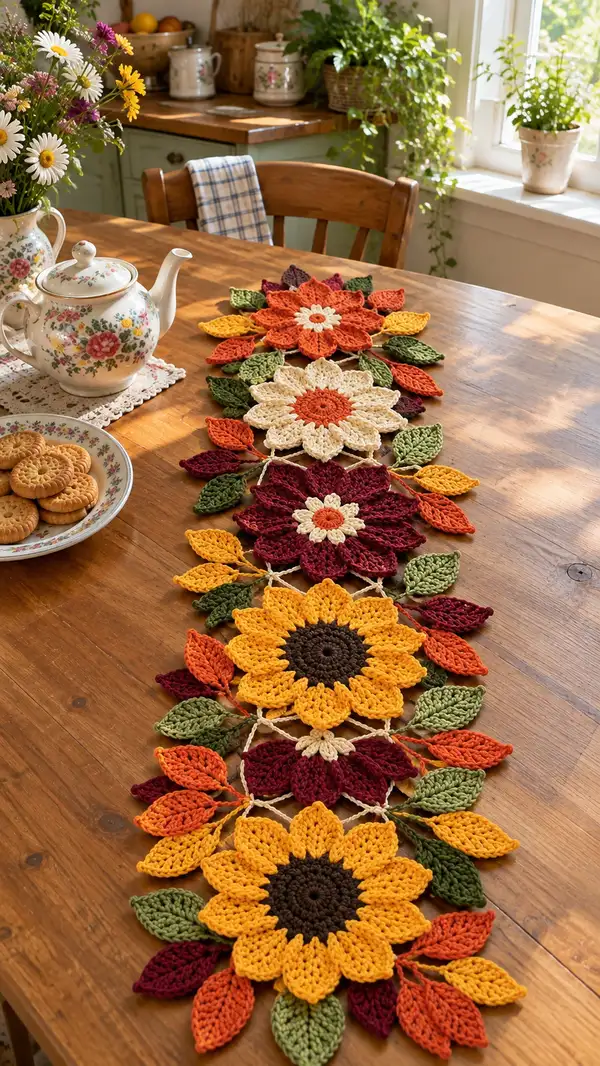
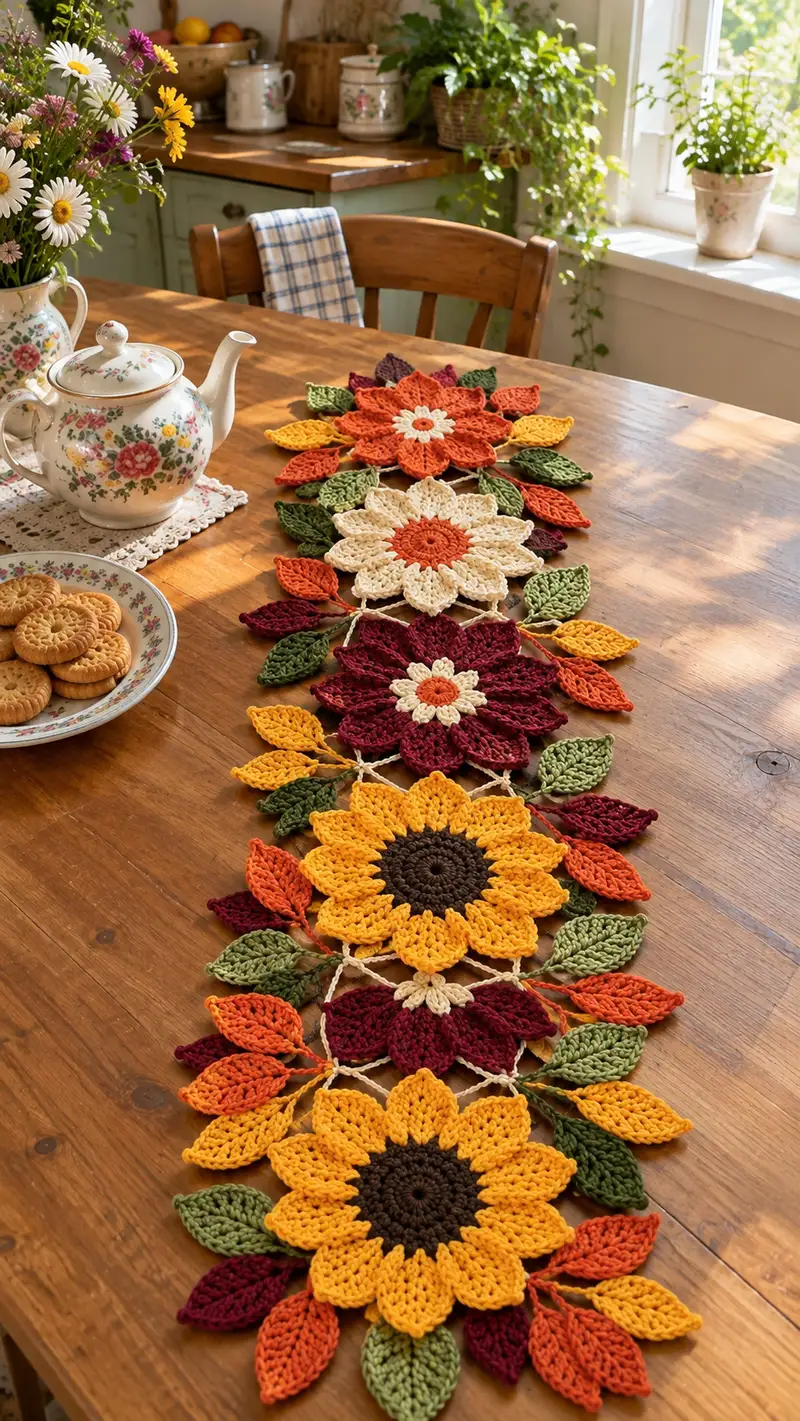
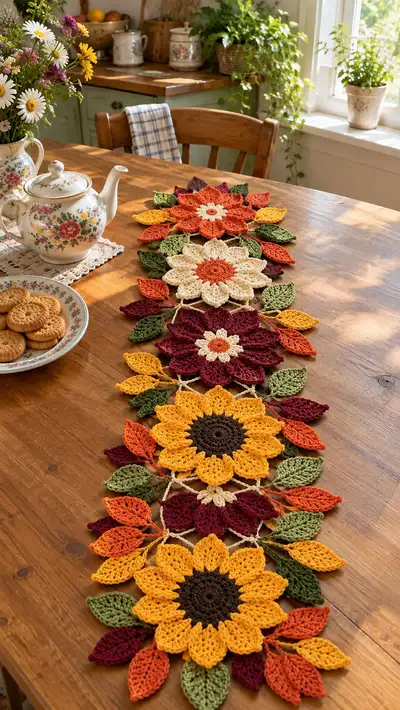
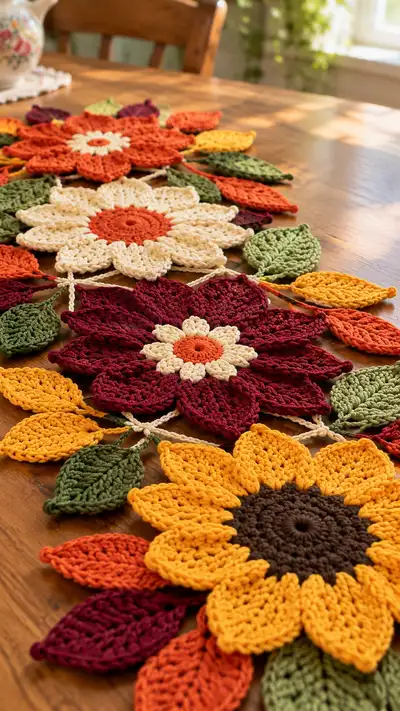
Create a warm, botanical table runner inspired by late-summer sunflowers and autumn blooms. This pattern uses modular floral motifs (sunflower, daisy-like blooms, and layered petals) with separate leaf elements joined by braided connectors to form a long runner. Rich autumn colors—gold, rust, cream, burgundy and olive—give this runner a cozy, vintage farmhouse look perfect for seasonal tablescapes.
Progress Tracker
0% Complete
— Abbreviations & Notes :
Info :
Work in continuous rounds unless instructed to join with sl st. Use stitch marker to mark first stitch of each round. When changing colors, finish the last yarn over of the previous stitch with the new color to create a neat join. All rounds show total stitch count in parentheses. Adjust hook size if your fabric becomes too loose (use smaller) or too tight (use larger). Cotton yarn provides a crisp, sculptural finish for petals and leaves.
— Sunflower Motif (Make 2 or more depending on runner length) :
Round 1 :
With dark brown, 6 sc in mr (6)
Round 3 :
(1 sc, inc) x 6 (18)
Round 4 :
(2 sc, inc) x 6 (24)
Round 5 :
(3 sc, inc) x 6 (30)
Info :
Begin forming the central disk. Keep rounds neat and tight so the dark center appears dense. If your yarn spreads, decrease hook to 3.5mm for rounds 1-5 for a firmer center.
Round 6 :
1 sc in each st (30)
Round 7 :
1 sc in each st (30)
Round 8 :
Change to gold/mustard color in last yarn-over of last stitch. (Info: secure the color by pulling through with new color)
Round 9 :
*(ch 3, sk 1 st, dc in next st); rep from * around to form 15 ch-3 loops; sl st to join at base (15 ch-3 loops - step for petal bases)
Info :
These ch-3 loops form the base for sculpted petals. Place marker at the start of each petal base to keep track. If you prefer stronger petals, you may substitute ch-4 loops.
Round 10 :
*Work petal: (sc in ch-3 sp, 1 hdc, 3 dc, 1 hdc, sc in same ch-3 sp), sl st to next ch-3 loop base; rep from * around (15 petals)
Round 11 :
1 sc in back of each petal base around (30) (This secures petal underside)
Info :
At this stage petals will be upright. Pin petals gently during blocking so they lay slightly outward. If you want deeper petals, add an extra round of dc clusters for height before joining into next round.
Round 12 :
Change to a second gold/rust shade for outer petal accent. In FLO of each petal top stitch, work (sc, hdc) across to create a ridge for next petal round (30)
Round 13 :
*In space between petals, 1 sc, ch 2, (3 tr) in center top of previous petal, ch 2, 1 sc in same space; sl st to move to next space; rep from * around to create elevated outer petal bases (15 shells)
Round 14 :
*Work large outer petal over shell: (sc, hdc, 5 dc, hdc, sc) in shell; sl st to next shell; rep from * around (15 larger petals)
Info :
Work petals firmly; keep center stitches anchored so outer petals do not pull the center. Block these petals flat and slightly cupped toward the center so the sunflower reads dimensional rather than flat.
Round 15 :
1 sc in each stitch across petal bases to tidy edge and create small picot tip: (sc in next 2 sts, ch 2, sl st in 2nd ch from hook) x 15 for decorative tips (counts vary by tension; aim for 15 petal tips)
Round 16 :
Info: Fasten off and weave in ends. Block large sunflower motif flat and shape petals so they are evenly spaced. Make at least 2 large sunflower motifs for the runner or as many as needed for desired length.
— Large Layered Flower Motif (Make 2-3) :
Round 1 :
With rust/orange, mr, 6 sc in mr (6)
Round 2 :
Inc into each st (12)
Round 3 :
(1 sc, inc) x 6 (18)
Round 4 :
(2 sc, inc) x 6 (24)
Round 5 :
1 sc in each st (24)
Info :
These rounds create a slightly smaller central disk compared to the sunflower. The layered flower uses two petal rounds with staggered petals for a full look.
Round 6 :
*(ch 4, sl st in next st) around to form 12 ch-4 loops; sl st to join (12 loops)
Round 7 :
*Over each loop work: sc, hdc, 3 dc, hdc, sc; sl st to next loop; rep from * around (12 medium petals)
Round 8 :
1 sc in each st around petal bases to tidy (48) (st count depends on petal size; count equal for evenness)
Round 9 :
Change to cream for inner starburst. In spaces between petals, ch 3 and sc into petal tip row to create 12 ch-3 picot loops; sl st to join (12)
Round 10 :
*Into each picot loop work: (sc, dc, sc) to make small cream petals; sl st to join; rep (12 small petals)
Info :
For extra dimension, make the small cream petals stand proud by blocking them slightly upward while leaving main petals flatter. Use a few pins to shape during blocking.
Round 11 :
Return to rust and in FLO of petal row, work 1 sc in each st around to create an under-edge for joining later (48)
Round 12 :
Fasten off leaving long tail for joining. Weave ends and block motif. Make 2-3 of these motifs spaced alternately with sunflowers along the runner.
— Cream Daisy-Like Motif (Make 2-3) :
Round 1 :
With orange center color, mr, 6 sc in mr (6)
Round 3 :
Change to cream, (1 sc, inc) x 6 (18)
Round 4 :
*(ch 3, sk 1 st, dc in next st) around to create 9 ch-3 loops; sl st to join (9 loops)
Round 5 :
*Over each loop work: sc, hdc, 4 dc, hdc, sc; sl st to next loop; rep from * around (9 petals)
Round 6 :
1 sc in each stitch around to tidy (36)
Round 7 :
Info: Add decorative picots between petals: (ch 3, sl st in base) between each petal to form small lace edges if desired
Round 8 :
Fasten off leaving long tail for joining and weave ends. Block gently to openness similar to other motifs.
— Large Leaf Motif (Make 18-24) :
Round 1 :
With olive green, ch 10, sl st to form ring (10 ch)
Round 2 :
Ch 1, sc in each ch around (10)
Round 3 :
Ch 2, 2 hdc in next 2 sts, 3 dc in next 2 sts, 2 hdc in next 2 sts, ch 2, sl st into last st to shape one side; rotate to work other side back along foundation chain: 2 hdc, 3 dc, 2 hdc; sl st at base to join and create leaf shape. (count depends on stitches but aim for symmetrically mirrored sides)
Info :
Work leaves flat; the large leaf uses an elongated center and mirrored increases to form pointed teardrop shape. Pin and steam-block for crisp shaping. For visible vein, use surface slip stitch contrasting yarn later.
Round 4 :
Edge: sc around leaf edge working 3 sc in each outer point to keep shape steady. Fasten off and leave tail for sewing. Make required number of leaves in multiple green shades for variation.
— Small Leaf Motif (Make 20-30) :
Round 1 :
With green or accent color, ch 8, sl st to join (8 ch ring)
Round 2 :
Ch 1, sc in each ch (8)
Round 3 :
3 hdc in next 2 sts, 2 hdc in next 2 sts, 1 hdc in next 2 sts, sl st to base to form point (counts vary by tension; aim for pointy leaf with 3-2-2-1 shaping)
Round 4 :
Edge with sc around; fasten off leaving long tail for attachment
Info :
Small leaves are used to fill gaps and decorate between motifs. Work these in multiple colors (mustard, terracotta, dark green) to achieve the layered fall look.
— Leaf Vein Surface Crochet (Optional Detail) :
Round 1 :
With contrasting darker green, insert hook at leaf base, ch 1, sl st in center of leaf from base toward tip to create a vein; reverse and sl st back in the same line to strengthen vein
Info :
Work surface sl sts gently to avoid puckering. If you want a raised vein, use a thicker yarn or two strands together for surface stitch.
— Braided Chain Connectors (Make many to join motifs) :
Round 1 :
With cream or natural color, ch 40 (or desired length between motifs; typical spacing uses 30-50 ch depending on your blocked motif sizes)
Round 2 :
Row: sc in 2nd ch from hook and across to create a flat, slightly raised chain-braid (39 sc). Fasten off leaving long tail for sewing.
Info :
Make connectors in varying lengths to allow motifs to sit slightly separated; these connectors are sewn between motif edges to mimic the airy lattice seen in the photo.
— Joining Method: Lattice Tie (Used between all motifs) :
Info :
Pin motifs in desired order on blocking board. Use braided chain connectors to tie petals and leaves together at the points indicated: usually between petal tips and leaf bases. Use whip stitch with matching yarn tail to stitch connectors to underside so top shows clean joins. Keep connectors slightly slack to avoid flattening petals.
Round 1 :
To attach connector: Thread long tail through tapestry needle and whip-stitch connector end through 2-3 stitches on motif underside; secure with 4-6 passes and then weave tail back into motif for 2 inches before trimming.
Info :
When positioning connectors between a sunflower and an adjacent flower, attach connector to the underside center of a petal on each motif so they appear linked at the base of petals rather than mid-petal, achieving the airy lattice look in the photograph.
— Decorative Petal Tip Vine (Optional) :
Round 1 :
In cream, ch 15, sl st to create small chain. Fasten off and use as small decorative ties between clustered leaves.
Info :
These small chains are used in photo to create an airy diamond lattice between motifs. Use 12-20 per runner depending on length.
— Border and Finishing Edge :
Round 1 :
Once all motifs are joined in desired sequence, work a single crochet edge along any exposed motif edges to unify appearance: sc around perimeter, making 2 sc in outer petal tips to maintain shape.
Round 2 :
*Optional decorative scallop: (sl st in next st, 5 dc in next st, sl st in next st) around any long straight edges to create a gentle scallop; fasten off and weave in ends.
Info :
Blocking after joining is recommended to set the runner flat. Use steam or wet blocking and pin gently without stretching; let dry completely before use.
— Stitch Count & Assembly Summary :
Info :
Example stitch counts (approx): Each sunflower center rounds 1-7 create a dense disk ~30 sts; petal system adds ~15 large petals. Large layered flower center ~24-30 sts with 12 medium petals + 12 small inner petals. Daisy-like motif ~9-12 petals. Leaves vary from 8-24 sts depending on size. Make motifs in the sequence sunflower, layered flower, burgundy layered, cream daisy, and repeat to create a runner around 90-140 cm long depending on number of motifs. Use braided connectors between motifs to achieve the photographed spacing.
Info :
Final runner in photo uses 5 major circular floral motifs with clusters of 3-5 leaves surrounding each motif and multiple small leaves filling the gaps. Adjust quantities to desired length and fullness.
— Care Instructions :
Info :
Hand wash recommended in cool water with mild detergent. Reshape and lay flat to dry. Cotton yarn may soften over time; re-block if edges loosen. Avoid heavy soiling; use as a decorative runner or seasonal table accent.
This autumn flower table runner brings handmade charm to any table with layered petals, textured leaves, and an airy braided lattice. Each motif is a little garden — rich colors and careful blocking give professional polish. Enjoy assembling each floral section and watching the runner bloom under your hands. 🧶🍁 Display it for seasonal dinners, cozy afternoons, or as a year-round vintage accent. Happy stitching and proud displaying! ✨