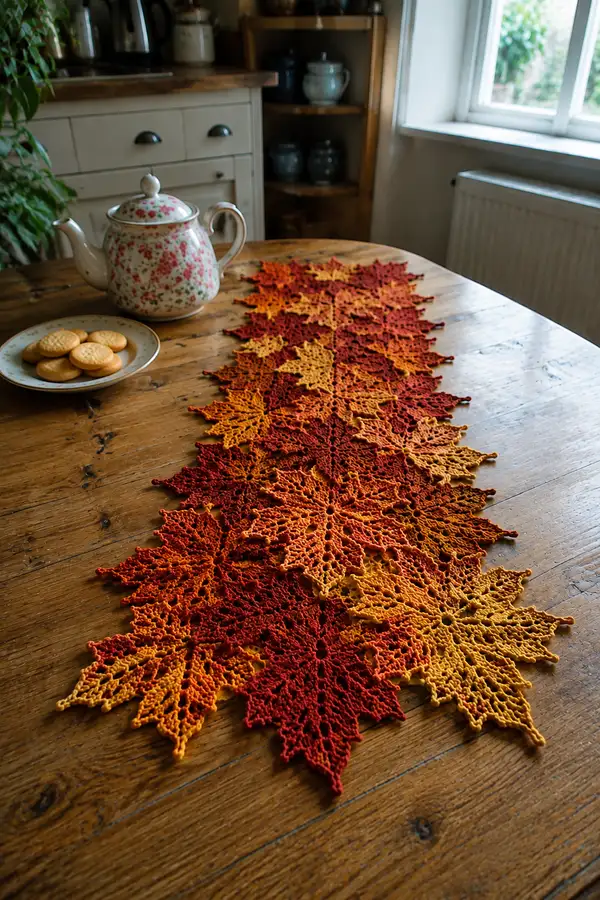
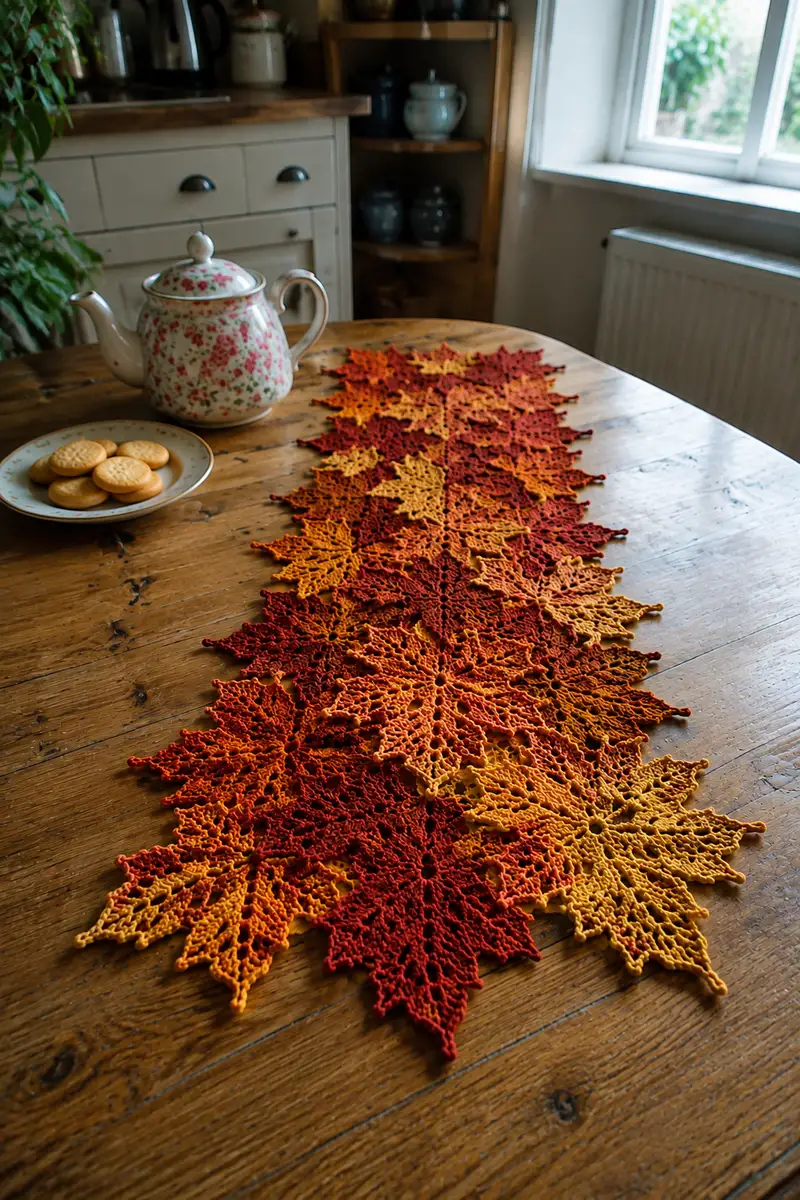
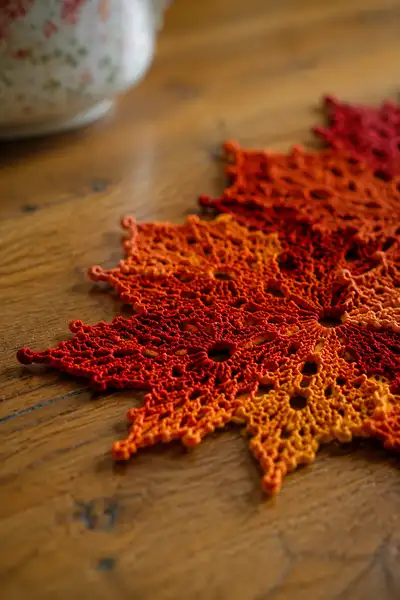
Create a stunning autumn table runner made of interlocking maple-leaf lace motifs in rust, burnt orange and golden yellow. Each delicate leaf motif mirrors the shape of a real maple leaf with lacy veins, pointed lobes and picot tips for a charming vintage look. The runner in the photo is constructed from repeated full and half-leaf motifs, joined edge-to-edge to form a long centerpiece perfect for seasonal decor. This pattern walks you through making each motif, joining, edging and finishing for a professionally blocked result.
Progress Tracker
0% Complete
— Overview and Gauge :
Info :
This pattern creates modular maple leaf motifs approximately 14-16cm (5.5-6.5in) point-to-point when worked in fingering weight cotton with a 2.5mm hook. Final runner length depends on how many motifs you join; the pictured runner is composed of 12 full motifs and 8 half-edge motifs for a finished length of roughly 100-110cm (39-43in) and width 20-22cm (8-8.5in). If using thicker yarn or larger hook, motif size will increase proportionally. Work tension consistently for a flat lace and always block motifs before joining.
Info :
Throughout this pattern, each leaf motif is worked in rounds and is made of 8 lobes (points). We use multiples of 8 for increases and repeats so all stitch counts remain consistent. Use stitch markers at the start of each lobe repeat to avoid miscounts.
— Full Maple Leaf Motif :
Round 1 :
Make a magic ring, ch1, work 8 sc into ring. Pull tight. (8)
Round 2 :
Work 1 sc in each st around, placing a marker in first st of round for reference. (8)
Round 3 :
(1 sc, inc) x 8 around — place marker at the end of the round. (16)
Round 4 :
(2 sc, inc) x 8 (24)
Round 5 :
(3 sc, inc) x 8 (32)
Info :
Rounds 1-5 build a circular center that will anchor the leaf veins. Keep tension relaxed but even so the center does not ripple. If you prefer a smaller hole, use an adjustable ring and tighten slightly more before working round 2.
Round 6 :
(4 sc, inc) x 8 (40)
Round 7 :
1 sc in each st (40)
Round 8 :
*Ch5, sk next 4 sts, sc in next st* — repeat from * to * around to create 8 ch-5 loop bases for lobes. You will have 8 ch5 loops. (Base round: 40 sc and 8 ch-loops)
Info :
Place markers at each ch-5 loop if you find it easier to count lobes. These chain loops will be the anchoring points for the leaf points. Do not fasten off — you will work petals into these loops.
Round 9 :
*Into each ch5 loop: sc, ch3, (2 dc, tr, 2 dc) in loop, ch3, sc in same anchor* — repeat for all 8 loops to form the first layer of lobes. Work a sc into the anchor st between loops to keep shape. (8 lobes formed)
Round 10 :
Working around petals: ch1, sc in first sc of petal base, *ch4, (3 dc cluster over next 4 sts of petal),ch4, sc in next base* — repeat across all lobes. This begins the pointed shape. (8 pointed lobes)
Round 11 :
Into each petal chain-spaces: ch1, sc, hdc, dc, tr, dc, hdc, sc to mirror a tapered petal shaping. Anchor each petal with sc to center base between petals. (8 petals)
Round 12 :
Extend points: ch1, sc, (2 hdc, 3 dc, 2 hdc) worked into central top of each petal, ch2, sl st into next anchor. This adds length to the point. Repeat for all 8 petals.
Info :
At this stage you should notice a clear star shape with eight lobes. If one lobe seems larger or smaller, gently tug and redistribute stitches before continuing and place a temporary pin to hold the lobe while working the next round.
Round 13 :
Point finishing row: work (sc, ch3, picot, ch3, sc) at the tip of each petal to form the picot tip; sl st back down to the side anchor and sc in anchor to secure. Repeat for 8 tips. (8 picot tips)
Round 14 :
Reverse shaping veins: ch1, sc around center ring and over bases of petals to reinforce join — work 1 sc in each st and 1 sc in each anchor where petals meet center. This creates a stable lace leaf with reinforced inner veins. (approx. 56 sc and anchor sc total)
Round 15 :
Decorative lace round: *ch3, sk 2 sts, sc in next st, ch3, sc in next* across joins between lobes to introduce openwork veins. Repeat for entire round (8 vein sections).
Info :
Add a contrasting color here if desired: change to burnt orange or gold by finishing the last sl st of round 15 with new color. Carry or fasten off previous color as you prefer. Changing colors between these rounds creates subtle variegation in veins.
Round 16 :
Work a decorative outer scallop: *(sc in next 2 sts, ch5, sc in next 2 sts, picot)* at the base of each tip to emphasize the lacy edge. Repeat across all 8 points producing 8 scallops.
Round 17 :
Edge refinement: 1 sc in each sc and 3 sc in each ch5 scallop to fill gaps and produce a continuous outer edge. (Edge counts will vary depending on previous ch-spaces; expect approx. 88-96 stitches placed around leaf.)
Round 18 :
Final shaping round: *Work 1 sc into each edge st, make 3 picots spaced evenly along each lobe edge (picot = ch3, sl st into same st) to accent points, then sl st to next lobe base* — repeat to finish motif and fasten off, leaving 25-30cm tail for joining. Block motif flat to the size above. (Final decorative round crisped into place by blocking.)
Info :
Fasten off and weave in ends or leave long tails for mattress-stitch joining. Wet blocking and pinning each lobe's point and scallops open will define the shape and ensure uniform size across motifs before assembly.
— Half-Edge Leaf Motif (for straight runner edges) :
Round 1 :
mr, ch1, 4 sc into ring to make half-center (4)
Round 2 :
(1 sc, inc) x2 (6)
Round 3 :
(2 sc, inc) x2 (8)
Round 4 :
1 sc in each st (8)
Round 5 :
*Ch5, sc in next st* across to create 4 loop bases for 4 half-lobes (4 ch-spaces)
Info :
This half motif mirrors the full motif but with 4 lobes to create a straight edge when joined to full leaf motifs. Use these along the runner sides to square the runner edges while keeping a lacy border.
Round 6 :
Form 4 half-lobes: Into each ch5 loop work sc, ch3, (2 dc, tr, 2 dc), ch3, sc. Anchor with sc between lobes. (4 half-lobes)
Round 7 :
Extend half-lobes with hdc and dc rows to shape edges: ch1, sc in base, (hdc,2dc,hdc) in top of each half-lobe. Repeat across all 4. (4 shaped lobes)
Round 8 :
Edge picots: at the tip of each half-lobe work (ch3,sl st into same st) to make small picot tips; continue sc along straight edge side to prepare for joining. Fasten off and block. Leave generous tail for joining.
Info :
Make as many half-edge motifs as necessary to create the runner width you desire; they sit along the outer edges of the layout, providing a straight border that reads like the tips of leaves but keeps the runner rectangular overall.
— Small Connector Motif (optional, for staggered join points) :
Round 1 :
mr, ch1, 6 sc into ring (6)
Round 2 :
(1 sc, inc) x 3 (9)
Round 3 :
1 sc in each st (9)
Round 4 :
*ch5, sl st into next sc* x3 to create 3 small chain loops spaced evenly. Fasten off leaving tail for sewing. This small wheel motif fills small gaps and offers extra attachment points when joining rows of leaves.
Info :
Use connector motifs between staggered leaves if your layout requires an offset. They're small and help unify negative spaces while echoing the lacy texture.
— Joining Motifs (Slip-stitch and Mattress Join Methods) :
Info :
Pin your entire runner layout on blocking board or towel. Decide whether you will join motifs with a slip-stitch join (crochet) for a continuous look or mattress-stitch sew for a more invisible seam. The following rounds provide a slip-stitch join method plus sewing tips.
Round 1 :
Lay two full motifs side-by-side with blocked edges aligned. From the right-hand motif, join yarn at the picot of the first lobe with a sl st to secure and ch1. (Anchoring)
Round 2 :
Working through both motifs' edge stitches where picots and scallops meet, *sl st in motif A edge, sl st in motif B edge, ch1* — continue around the touching edge to create a neat ladder-like join. Fasten off at the end of seam. Repeat for each adjacent pair of motifs to create a horizontal row. (This join uses 1 sl st per paired edge stitch.)
Info :
Keep joins loose enough that lace still drapes but snug enough that motifs don't gap. If using contrasting yarn, the join becomes decorative; use same-color yarn for an invisible seam. A blunt tapestry needle and mattress stitch will be less visible but slower.
Round 3 :
Joining rows vertically: Position next row of motifs offset so that half-edge pieces interlock with full motifs. Join at the top of half-lobes into the corresponding full-lobe base using the same sl st ladder technique or whip stitch through blocked picot tips for a decorative raised seam. Secure ends and weave in tails on the wrong side.
Round 4 :
For staggered joins where small connector motifs are used, pin connector in the gap and whip stitch connector to three adjacent motifs using the long tail. Sew slowly to keep tension equal across surrounding edges; this prevents puckering.
Info :
When joining many motifs, join in stages: first join all motifs side-by-side to produce strips, then join strips together. This reduces handling distortion and makes it easier to maintain straight rows.
— Decorative Outer Border and Edge Rounds :
Round 1 :
With runner fully assembled and pinned flat, choose a main border color (in photo, darkest rust at center edges and golden on outer tips). Join border yarn at an outermost picot tip with sl st, ch1.
Round 2 :
Work 1 sc evenly around the entire perimeter in each edge stitch to create a clean base for the decorative scallop (count total stitches as you go to ensure even distribution; expected approx. 300-380 sc across full runner depending on motif count).
Info :
Use a smaller hook (2.25mm) for the border rounds to tighten edges and create crisp lines that prevent curling. Keep stitches even and avoid pulling too tightly, which can shrink the runner.
Round 3 :
Scallop row: *(sc in next 3 sts, ch5, sl st in 2nd ch from hook to create a small loop, sc in same base)* repeat around perimeter to form repeating loops for a lacy outline. Adjust ch count if scallops are too large for your gauge.
Round 4 :
Picot trim: Into each ch5 scallop work: sc, ch3, sl st into first ch (picot), sc in next base — this creates a fine picot-edged scallop accent along each lobed edge. Continue around and join with sl st. Fasten off and weave ends.
Round 5 :
If you want extra weight to help the runner lay flat, work a final round of 1 sc in each st using a doubled thread of the same yarn color to create a slightly heavier rim. Alternatively, add small glass-bead tassel points at outer tips for a decorative weighted finish by sewing beads onto the long tails at selected picot points.
Info :
Test border on a single motif to ensure scallop size and picot spacing suit the overall pattern before working around the entire runner. Making adjustments early prevents having to pick apart long seams later.
— Finishing, Blocking and Final Touches :
Round 1 :
Weave in all ends securely using mattress stitch or hidden ends technique: thread tail onto tapestry needle, weave back and forth across several stitches in the same color area, then trim close. For joins, weave ends through join stitches to prevent slippage.
Round 2 :
Blocking: Soak runner gently in lukewarm water with a touch of wool wash for 15 minutes. Do not agitate. Press gently to remove excess water. Lay runner flat on blocked surface and pin each lobe tip and scallop point to the measured dimensions to ensure consistent shape. Let dry completely (12-24 hours).
Info :
Blocking is essential for this lacy motif — it opens the stitchwork and aligns points so the entire runner reads as an elegant continuous fabric. Use rustproof pins and a firm surface (blocking mats, thick towels, or foam boards).
Round 3 :
Optional embroidered veins: Using contrasting fine cotton and a lengthwise couching stitch, embroider along the center veins of each lobe to accentuate shape. Use small running stitches following the central line of petals. This is decorative and optional.
Round 4 :
Final pressing: If desired, very lightly steam the runner from the wrong side to set blocked shape if using cotton — avoid direct iron contact on delicate picots. Allow to dry fully before laying on your table.
Info :
Store runner flat or rolled to preserve blocked shape. Avoid folding on strong scored lines to keep picot tips crisp. If runner is used often, refresh blocking occasionally to restore lost shape.
— Optional Variations and Scaling :
Info :
To make a runner longer or shorter, add or remove full motifs in the central column and adjust half-edge motifs accordingly. To make a square placemat, use a centered cluster of 4-6 full motifs and 4 half motifs for edges. Thicker yarn increases motif size—reduce hook size by 0.25-0.5mm if you want the same crispness with thicker yarn.
Info :
If you prefer a continuous tone rather than gradient, alternate color changes every 2-3 motifs to create a subtle stripe. When changing color mid-motif, finish a round and change color on final sl st for cleaner transitions.
This autumn maple leaf lace runner brings the season to your table with gorgeous warm tones and delicate lacy detail. As you join each leaf motif you’ll see a dramatic, organic arrangement come to life — a handmade centerpiece perfect for cozy gatherings. The final blocking really makes the points sing and gives the runner a professional finish. 🧶🍁 Enjoy the meditative repetition and the dramatic result — it's a project you'll be proud to display. Happy stitching and don't forget to share your photos! 📸