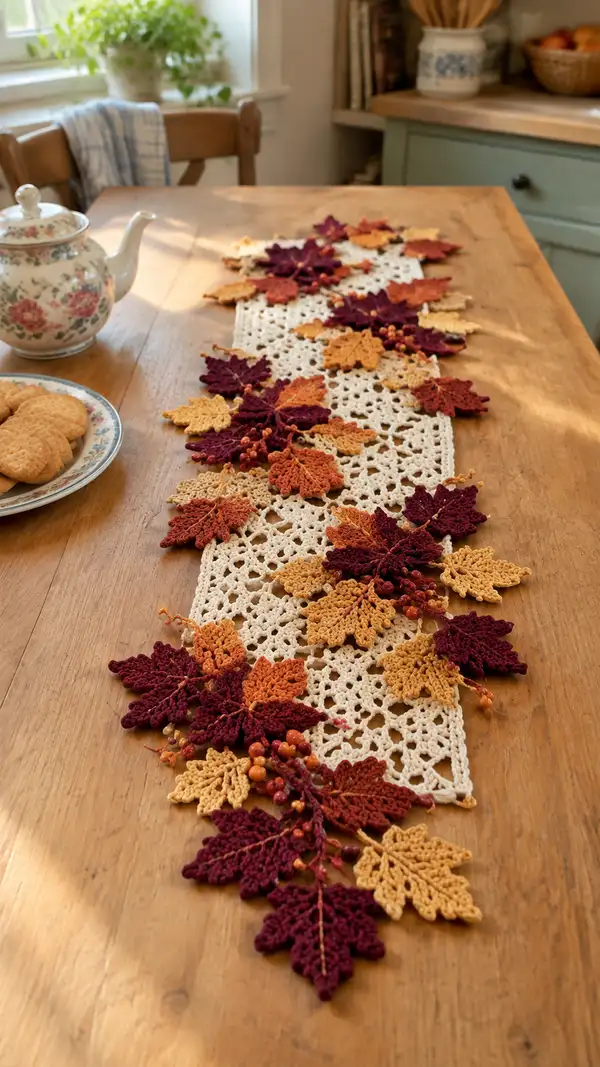
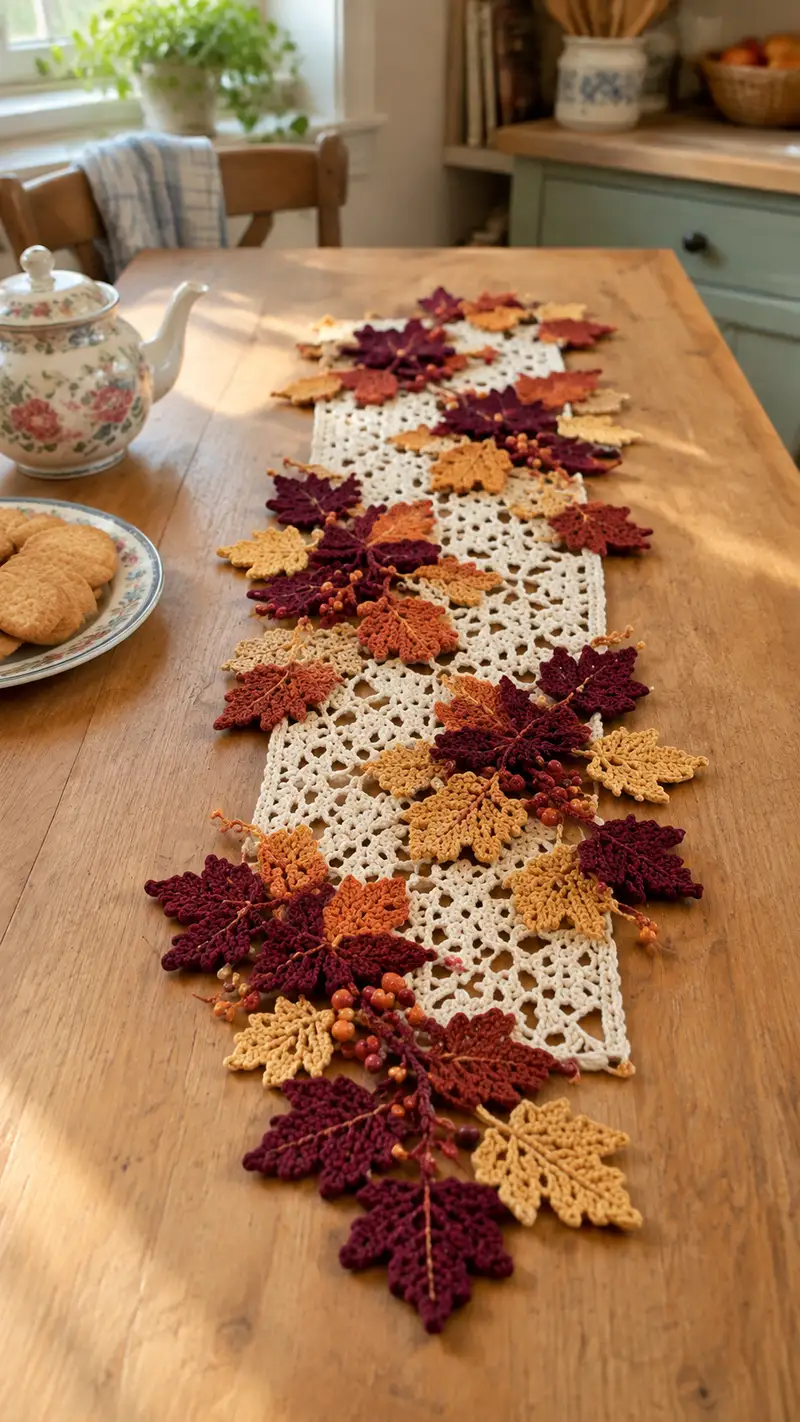
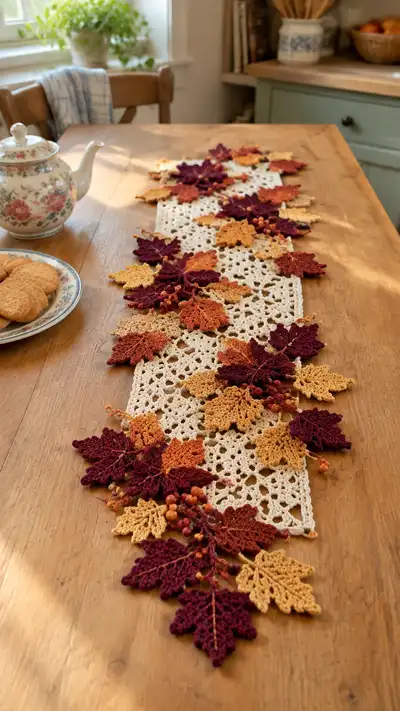
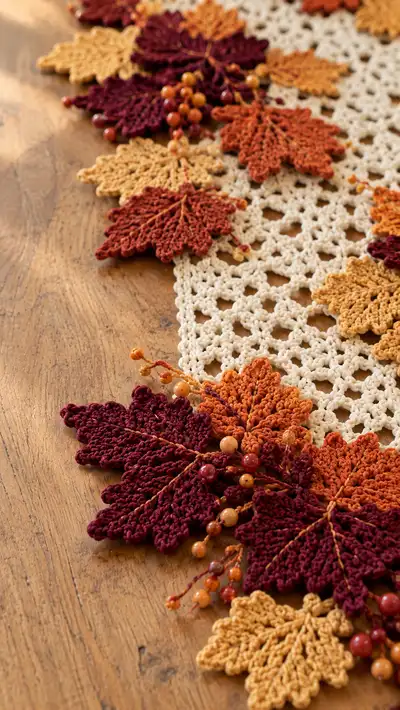
A warm, vintage-style table runner circling fall with lacy cream mesh and layered crochet maple leaves in deep burgundy, rust, and mustard. The runner features delicate openwork for the center panel and many three-dimensional leaves attached at the edges with tiny bead berry clusters for a natural, seasonal look. Perfect for a centerpiece that brings autumn color to the table.
Progress Tracker
0% Complete
— Overview :
Info :
This pattern is written for a long rectangular table runner with a central lace panel and attached maple leaf motifs along both long edges. The lace panel creates the neutral background; separate maple leaves in two sizes are made and then sewn on in layered clusters. The pattern is modular: you may change the length of the lace panel to fit your table, and increase/decrease number of leaves per side accordingly.
Info :
Gauge is flexible for decorative items. Using recommended yarn (DK cotton) and a 3.5mm hook, the sample runner's central panel measures approximately 12" wide by 48" long before leaves are attached. Leaves are about 3.25"-4.25" tip to tip depending on size and yarn tension.
— Materials Notes :
Info :
Use mercerized cotton DK or sport for crisp stitch definition and a flat runner. If using lighter or heavier yarn you will need to adjust hook size and recommended counts; leaves may become more delicate or bulky accordingly.
— Lace Base Panel :
Round 1 :
Chain 99 (multiple of 12 + 3) loosely. Turn, ch3 (counts as first dc), dc in 4th chain from hook, *ch3, skip 3 ch, (3 dc) in next ch; rep from * across to last 3 ch, ch3, dc in last ch. (This forms a row of shells separated by ch-3 mesh spaces)
Info :
You may substitute chain 87 or 111 to adjust width; keep multiple of 12 + 3 so repeats match for the shell/mesh pattern in subsequent rows. Keep the foundation chain slightly loose to avoid a tight edge.
Round 2 :
Ch3, turn. Dc into the top of the first dc, *ch3, 3 dc into the center dc of each shell from the previous row, rep across, ending with dc in the turning ch. (Maintain same repeat count as Row 1)
Round 3 :
Ch1, turn, sc in first dc, *ch4, skip cluster, sc in top of next cluster (placing single crochet into center top of shell), rep across. This creates a little taller mesh and an airy texture.
Round 4 :
Ch3, turn, dc in first sc, *ch2, 2 dc around the ch4 space from previous row, 2 dc in next sc, rep across. (Begin establishing the lacy flower-like motif that gives the vintage look)
Info :
Keep an even tension for the lace panel—if you see the edges pulling in, try going up a hook size for just the foundation chain row only, then work the lace with the recommended hook to maintain structure.
Round 5 :
Ch3, turn. Dc in first st, *ch3, (1 dc, ch2, 1 dc) in center of next ch4 space, ch3, dc in top of next shell top; rep across. This forms open floral spaces framed by small shells.
Round 6 :
Ch1, turn. Sc in each dc and in each ch-3 space across for a dense hold row (this will anchor motifs), total st count equals the number of visible stitch points across (maintain same number each row).
Round 7 :
Ch4 (counts as tr), turn. *Tr into center of shell, ch1, tr in same sp, ch2, skip to next anchor, rep across. This adds height and a lacy scallop edge internally.
Info :
Add stitch markers at both short-edge corners (first stitch of each row) to keep the rectangle true and to mark where you will attach leaves later.
Round 8 :
Ch1, turn. Sc into first tr, *ch3, skip next tr cluster, sc into next tr cluster top; rep across to form a mesh row again (same stitch count as Row 6).
Round 9-20 :
Repeat Rounds 2-8 two more times (this establishes a repeating 8-row pattern). Maintain stitch counts consistently across repeats. After Round 20 you will have built a firm, decorative center panel approximately 14" long (adjust with extra repeats as desired).
Info :
If you prefer a longer runner, continue repeating the 8-row pattern until you reach desired length. For the sample shown, the panel repeats produced a 48" long panel; for a shorter table use 3 repeats (24").
Round 21 :
Ch3, turn. Work a round of simple dc around panel edge to create a clean border: 2 dc in each corner turning space, 1 dc in each stitch along long edges, placing 2 dc where needed to keep edges flat.
Round 22 :
Ch1, turn. Sc in each st around the entire rectangular panel (work 3 sc in each corner) to provide a neat edge for sewing leaves on. Fasten off and block the panel flat to measurements—pin to shape and lightly steam or wet-block with cloth between iron and yarn if using mercerized cotton.
Info :
Blocking is essential for the lace panel. Pin the panel square and allow to dry fully. This creates crisp openings so leaf motifs lie flat and attach cleanly.
— Maple Leaf Motif (Large) :
Info :
Make Large Leaf A as follows. This leaf uses texture created by alternating hdc and sc with strategic increases to form lobes. Leaves are worked flat in rounds (reads as rows). Use 3.25mm-3.5mm hook for denser texture. Make 10 large leaves in assorted colors (burgundy and rust preferred).
Round 1 :
Start with magic ring. Ch1, 6 sc in magic ring (6). Pull ring closed and place marker at first sc.
Round 2 :
Inc in each st around (12). (6 inc total)
Round 3 :
(1 sc, 1 inc) x6 = 18. Work evenly to create a round disc base that gives the leaf center enough body.
Round 4 :
(2 sc, 1 inc) x6 = 24. This round sets the platform for the primary lobe shaping to begin.
Round 5 :
(3 sc, 1 inc) x6 = 30. Turn the work so that the next rows will shape as a pointed leaf rather than a circular medallion.
Info :
At this point you have a round disc. We will start to elongate to form lobes by working along half the stitches to make the tip, then returning to make the other side symmetrically.
Round 6 :
Ch1, work 1 sc in next 15 sts (this marks the right half). Ch3, turn so you will now form the right leaflet tip; you will work along these 15 sts as if they were the center spine for several shaping rows. (15 sc across right side)
Round 7 :
Ch2 (counts as hdc), hdc in next 3, (hdc2tog) once at the narrow point if necessary to create curvature, then (hdc in next 4) increasing by (hdc, inc) at two points to create a ridge—end with hdc into the top of the ch-3 turning chain. This forms the beginning of the pointy lobe. (Stitch counts will vary slightly but target 12-14 sts along this tip segment)
Round 8 :
Return along the underside of the lobe: ch1, sc into each stitch back across to the round join. Continue with sc in the next 15 sts of left half to mirror the right lobe (do not fasten off). This creates one side of the leaf with a raised center spine opportunity.
Info :
Use a stitch marker to mark the top center stitch at the tip; this will be used later for surface slip-stitch vein work. The leaf at this stage looks slightly heart-shaped; subsequent rows will add lobes and serrated edges.
Round 9 :
Ch2, hdc in next 6 sts along right lobe, *(hdc, ch1, hdc) in one stitch to create a small serration*, continue to tip, turn and repeat on left side symmetrically. End with sc in the base join. This adds the first row of serrated edges. (Approx 30 sc/hdc across entire leaf)
Round 10 :
Ch1, sc across all stitches working into backs of previous stitches where needed to create slightly raised ridges along the lobes. At the outer lobes, work (sc, ch2, sc) to create small picot-like teeth that mimic maple leaf serrations.
Info :
If you prefer a crisper serration, switch to a smaller hook for this round only (e.g., 3.0mm) to pull the points in more sharply—then return to the regular hook.
Round 11 :
Ch1, work (sc in next 2, dec) across the upper half points to begin narrowing toward tip; on the opposite side mirror these decreases. This shapes the lobe intersections and sharpens tip definition. Target stitch count falls by 4-6 sts.
Round 12 :
Ch2, turn. Work 1 hdc in each st around but at three evenly spaced positions along each side work (hdc, ch2, hdc) to create deeper points between leaf lobes. This emphasizes typical maple leaf silhouette.
Info :
At this stage you should see 5 distinct lobes: a central top point, two upper side lobes, and two lower side lobes. Use your fingers to shape as you go and block later for crisp edges.
Round 13 :
Ch1, sc in each st across. Work (sc, ch3, sc) at each lobe tip to form pronounced serrated tips. Keep tension slightly tighter during these chains so the leaf doesn't fan too far out.
Round 14 :
Ch1, turn. Surface-slip stitch along the center rib from base to top: insert hook from front to back through the stitch at the base, sl st up through the top-center stitches forming a continuous visible spine. Use contrasting mustard yarn for a realistic vein if desired. Fasten off leaving long tail for sewing.
Info :
To create a more dimensional leaf, gently fold the leaf along the center spine and run a couple of gathering stitches with the tail along the base; cinch slightly and weave in to create a gentle cupped shape like a real leaf.
Round 15 :
Make 10 Large Leaves in colors of your choice (recommend 5 burgundy, 3 rust, 2 dark orange). For variety, after Round 10 you may add one extra picot point to each upper lobe for increased detail (this variant is described in the next section).
— Maple Leaf Motif (Small Variant) :
Info :
Small leaves follow the same shaping but with fewer rounds for a smaller finished size. Use the 3.5mm hook and lighten increases to keep scale smaller. Make 14 small leaves (a mixture of mustard and light rust).
Round 1 :
Magic ring, ch1, 6 sc in ring (6). Pull closed.
Round 2 :
Inc in each st (12).
Round 3 :
(1 sc, inc) x6 = 18.
Round 4 :
Work along half the stitches for short tip shaping: sc in next 9 sts, ch3, turn and work back along same sts with sc to form a short tip. Continue across second half mirroring the first. Finish with surface slip stitch down the center to form vein. Fasten off leaving sewing tail.
Info :
Small leaves will be used to fill gaps and create layered clusters. Because they have less shaping, they attach flatter and are excellent for layering under large leaves for depth.
— Leaf Vein and Texture Details :
Round 1 :
Use a contrast yarn (golden mustard) and a 3.0-3.25mm hook. With leaf flat, join yarn at base of leaf on front side. Ch1, *surface sl st along center stitches up to the tip, place 1 sl st at each point where the leaf forks into lobes to emphasize veins*. Fasten off leaving long tail.
Info :
You may also use embroidery thread or thin yarn held doubled for a delicate gold vein. Work slowly to place stitches evenly; the vein is decorative and helps visually anchor leaves when sewing to the panel.
Round 2 :
With needle and yarn, run a few short stitches radiating outwards from the central vein toward lobe edges to suggest secondary veins. Do not pull taut; these are surface stitches for texture only.
Info :
If you want a raised vein, place the sl sts slightly outside the center and then couch a thin, twisted length of yarn or embroidery floss over them, stitching through at intervals to secure the raised line.
— Bead Berry Clusters :
Info :
The photo shows small bead sprigs tucked between leaf clusters. You can purchase faux-berry picks or make stitched bead clusters yourself. Below are instructions for crocheting bead stems and attaching small beads to mimic berries.
Round 1 :
Thread 6-10 small beads onto a length of doubled yarn or craft wire (approx 6" length). If using yarn, knot the end to hold first bead. For wire, bend a loop at the base to anchor beads.
Round 2 :
With yarn: ch10 (or desired length), slide a bead up to the hook, slip-stitch around the bead to secure, ch3, slide next bead, repeat until all beads are secured along chain. Fasten off, leaving long tail for stitching into runner beneath leaf clusters.
Round 3 :
For a more realistic twig look, wrap a second thin contrasting yarn around the bead chain and tack in place with small stitches of the same yarn to create a thicker twig appearance. Fasten off leaving long tails.
Info :
If using florist wire, twist wire to secure beads and then coil a thin yarn 1-2 times around the base to disguise the wire and make sewing to the runner easier. Make 8-12 bead sprigs for a runner of standard length; use more for a fuller look.
— Edge Leaves Placement Guide :
Info :
Lay the blocked lace panel flat with the longest edges up and down. Arrange clustered compositions of leaves along each long edge. Space clusters approximately every 6-8 inches, offsetting clusters on either side so the runner looks balanced but informal.
Round 1 :
Start placement at one short end. Arrange 2 large leaves overlapping slightly with 1-2 small leaves tucked beneath them. Add one bead sprig emerging from beneath the lower leaf. Pin in place with sewing pins.
Round 2 :
Continue arranging clusters along the edge, staggering the leaf tips so they point both outward and slightly diagonally along the runner length. Plan for 6-8 clusters per side for a 48" runner (12-16 clusters total) depending on density desired.
Info :
Consider alternating color flow between clusters (burgundy cluster, then rust cluster, then mustard/burnt orange cluster) to mimic a natural scattering of autumn leaves across the runner.
— Attaching Leaves (Sewing) :
Round 1 :
Use a length of matching leaf-color yarn, or, for invisible joining, a cream thread that matches the base if you want stitches hidden in the lacy openings. Thread yarn onto tapestry needle.
Round 2 :
Sew leaves onto panel by stitching through the leaf base (where rounds began) and through a few adjacent stitches of the sc border of the base. Use small whip stitches or mattress stitch for an invisible join. Make sure the leaf lies flat and the stitches are not visible from the top.
Round 3 :
Sew each leaf with at least 4 secure stitches: two at the base and one on either side of the base. For large leaves use 6-8 stitches to ensure they are stable. Knot securely and weave in tails through multiple leaf rows to hide and lock stitches.
Info :
Do not over-sew: allow leaf tips to float free of the panel so they can be fluffed slightly; only secure the base area that will not be visible from the top.
— Assembly Sequence (Detailed) :
Round 1 :
Layout all leaves and bead sprays first. Move pieces until the composition is balanced; photograph or sketch placement to replicate on the opposite side. Begin at one short edge and work across, attaching leaves cluster by cluster.
Round 2 :
Attach largest leaves first at the planned base points. Once largest leaves are secured, layer small leaves under or over them as planned and tack them in place. Sew bead sprigs last, inserting the long tails/ends under already-sewn leaves and securing with a few tack stitches into the panel.
Round 3 :
For asymmetric organic look, offset clusters at different distances from the panel edge. Mirror only the general placement on the opposite side to keep the runner visually random rather than perfectly symmetrical.
Info :
Use only very small, inconspicuous stitches through the panel mesh to avoid visible thread lines from the underside. If a visible stitch is necessary, use cream thread matching the panel color so it blends into the lace pattern.
— Optional: Stiffening and Finishing Touches :
Round 1 :
If you prefer leaves that hold shape permanently, lightly stiffen them before attaching using a fabric stiffener spray or diluted PVA glue brushed thinly on reverse. Allow to dry flat on a curved form to keep a natural cupped shape.
Round 2 :
After all pieces are sewn on, give the entire runner a final light blocking to flatten any seams and set leaf placement. Trim and weave in any remaining tails.
Info :
Test stiffening on a spare leaf first—some yarns react differently and may darken slightly when treated.
— Variation: Denser Runner (Optional Extra Steps) :
Round 1 :
To make a fuller cascading look, double the number of small leaves and add 4-6 additional bead sprigs. Make 8 extra small leaves and position them tightly in between the large leaf clusters.
Round 2 :
Use additional sewing stitches to anchor extra leaves to several points along the base and to adjacent leaves for stability. This results in a fuller, richer edge similar to the most abundant section of the pictured runner.
Info :
Be mindful of weight: a very dense cluster may cause edges to sag when the runner is placed; use fewer heavy beads or more frequent anchor stitches to distribute weight evenly.
— Troubleshooting & Tips :
Info :
If a leaf looks uneven, remove a few anchoring stitches and gently re-position before re-securing. Keep a spare set of leaves in case you want to swap colors while assembling. When sewing through the lace panel, try to stitch within existing mesh openings to avoid visible thread along a row of dcs.
Round 1 :
Final inspection: check both runner sides for loose threads, and tug lightly at leaf tips to confirm they are secure. Remove pins and give the runner one more gentle steam if needed to flatten seams.
Info :
Store runner flat or rolled to avoid crushing leaves. If storing long term, wrap in tissue to protect beadwork and keep away from direct sunlight to avoid color fading.
This table runner brings the warmth of an autumn afternoon to your home with layered yarn leaves and delicate lacework—each stitch creates texture and nostalgia. Arrange the clusters to make it uniquely yours; it’s a slow, satisfying project that makes a big impact on your table. I hope making this piece fills your home with the cozy colors of the season and gives you a lovely heirloom centerpiece to enjoy. 🍁🧶