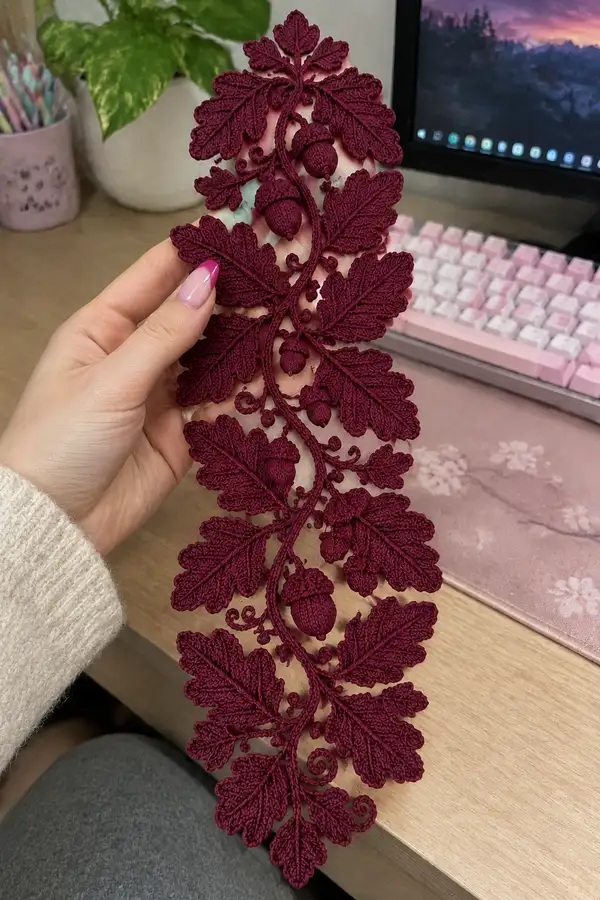
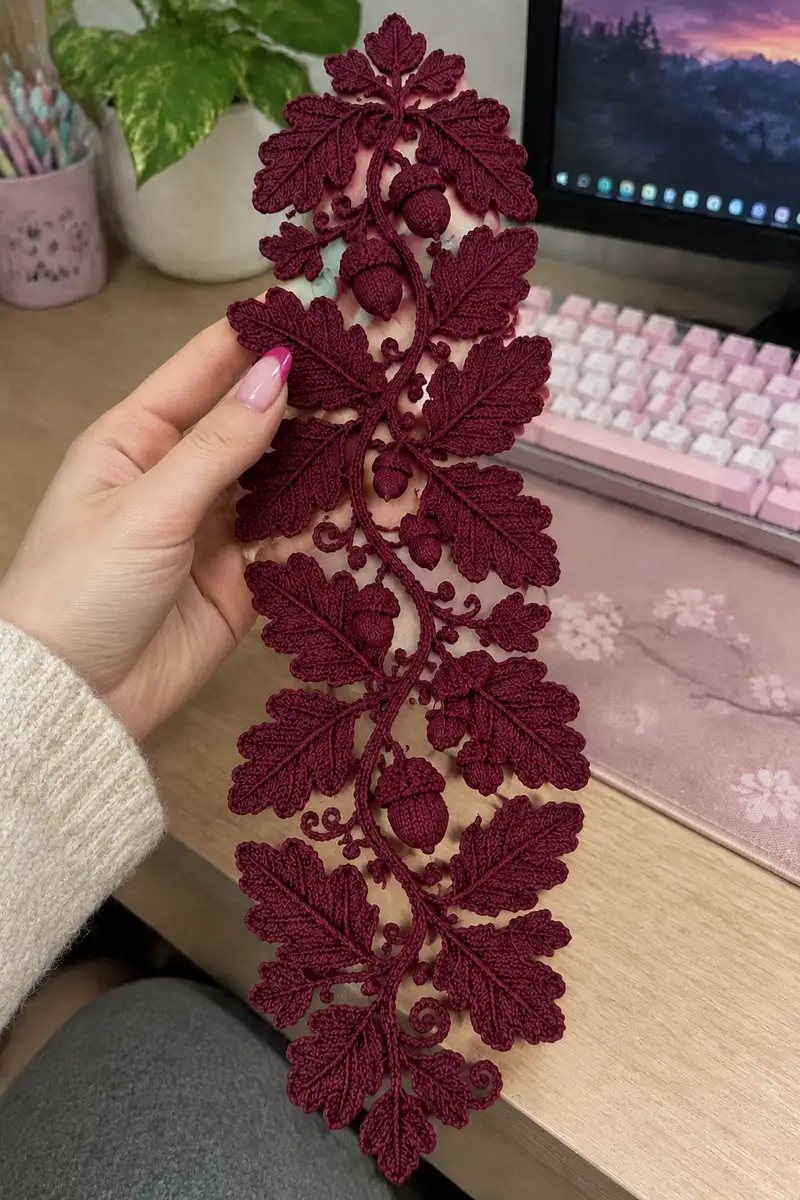
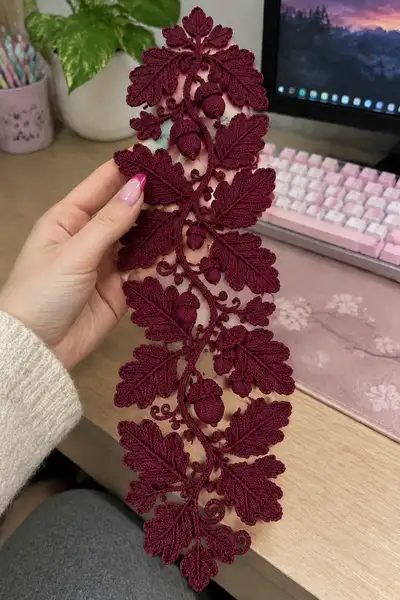
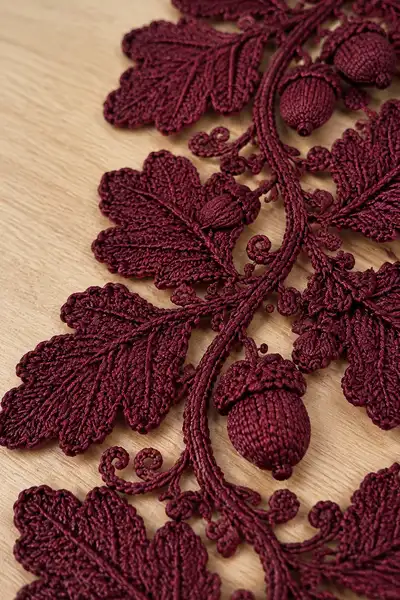
Create an exquisite burgundy oak leaf and acorn vine runner inspired by delicate Irish-style crochet motifs. This pattern teaches how to make textured oak leaves, three-dimensional acorns, tiny berry picots and the braided vine that joins them into an elegant table runner. Worked in fine mercerized cotton thread with a small hook, the finished piece has crisp veins, raised caps and a lacy open background ideal for seasonal decor.
Progress Tracker
0% Complete
— Notes and Preparation :
Info :
This design is worked in many small motifs then joined to form a continuous vine. Use mercerized cotton thread size 10 and a 1.25mm hook to reproduce scale. Maintain firm but even tension; motifs should be crisp and hold blocking. Make a gauge sample: 10cm of corded vine should measure similarly to sample photo; adjust hook size if necessary.
Info :
Terminology: 'stem' refers to the braid-like central vine, 'leaf' refers to the large oak motif, 'acorn' has two parts — cap and body — and 'berry' refers to small picot nodes between leaves. We'll present patterns for each motif. Count stitches carefully; math is accurate for each round.
— Vine Stem (make 1 long length or repeat segments):
Round 1 :
Ch 48 (foundation chain for a 20 cm runner segment — make multiple segments to desired length)
Round 2 :
Sl st in 2nd ch from hook and each ch across to the end, working a thin cord. At end, ch1, turn and work on opposite side of foundation chain: 1 sl st in each ch back to the start (48)
Info :
Working sl st cords on both sides of a foundation chain creates a thin tubular vine. For extra body, work 1 sc in each ch along one side and return with sl sts to create a plump cord. Make segments 20cm long and join later by single crochet join.
Round 3 :
1 sc evenly across one side of the foundation chain (48)
Round 4 :
1 sl st across the opposite side returning to start (48)
Round 5 :
Rep Round 3 to make vine slightly raised: 1 sc in each st (48)
Info :
To create a twisted braided look as in the photos, periodically (every 6-8 cm) work a small spiral: ch6, sl st into the base of the vine creating a curled loop. These spirals form the small curled tendrils visible between leaves.
Round 6-12 :
Continue 1 sc in each st along vine, adding spirals as: ch6, sl st to base every 6th st to create curled tendrils (48)
Info :
Make as many vine segments as needed to match runner length. Blocks of vine segments are joined with a flexible seam (sl st through both ends then a small invisible whip stitch). Keep vine slightly arched rather than perfectly straight to mimic natural sagging of a real twig.
— Oak Leaf (make 10–14 as repeating motifs):
Round 1 :
mr, 6 sc in mr (6)
Round 3 :
(1 sc, inc) x 6 (18)
Round 4 :
(2 sc, inc) x 6 (24)
Round 5 :
(3 sc, inc) x 6 (30)
Info :
These first rounds form a small oval base — we will elongate the leaf by working half-round increases on one side and establishing ridged veins with BLO surface slip stitch later.
Round 6 :
1 sc in each st around (30)
Round 7 :
(4 sc, inc) x 6 (36)
Round 8 :
1 sc in each st around (36)
Round 9 :
(5 sc, inc) x 6 (42)
Round 10 :
1 sc in each st around (42)
Info :
We will now start shaping the leaf into an elongated form by working increases only along the central spine side to create a teardrop/leaf shape. Count stitches carefully so both sides of the leaf match when folding.
Round 11 :
*Working along the edge that will become the leaf tip: (1 sc, inc) x 6; continue 1 sc along remaining stitches* (48)
Round 12 :
1 sc in each st (48)
Round 13 :
*Along tip edge: (2 sc, inc) x 6; remainder: 1 sc in each st* (54)
Round 14 :
1 sc in each st (54)
Info :
Now the leaf is wide enough — we'll create subtle lobes by working small scallops at the edge and then define veins using surface slip stitch and FLO ridges. Pin the leaf flat to block shape before continuing if you prefer crisp edges.
Round 15 :
Begin scalloped edging: *sc 3, picot, skip 1, sc 3* repeat around to create scalloped margins (54)
Round 16 :
1 sc in each st BLO to create a raised rim (54)
Info :
Working 1 sc BLO gives a visible ridge along the edge which helps the leaf maintain its silhouette after blocking. Keep loops neat and consistent for an even scallop appearance.
Round 17 :
Surface vein foundation: Join thread at stem base (center bottom), ch1, sl st up centerline for 16 sl sts to the tip; fasten off. This creates a base for ribs.
Round 18 :
Rejoin at base and work 4 surface slip stitch ribs: work FLO sl st ribs by inserting hook under FLO of edge and slip-stitch a line adjacent to the center rib. Space ribs evenly: 4 ribs per side.
Round 19 :
Reinforce ribs: 1 sc along each rib back to base to thicken ribs (do not change total st count) (54)
Info :
Use a fine yarn needle to weave tail along the underside of ribs to hide ends. Block flat using pins and a light steam from a distance; do not press directly on thread. Pin scallops slightly lifted to hold shape.
Round 20 :
Fasten off leaving a 12cm tail for attaching to vine. Weave through 8–10 edge stitches at base to make a small loop for secure join.
Info :
Repeat leaf pattern for required quantity (the runner in the photo shows 8–12 leaves clustered in pairs along the vine). Alternate left/right leaf placement for a natural composition.
— Small Leaf / Lobed Filler (make 12–20):
Round 1 :
mr, 6 sc in mr (6)
Round 3 :
(1 sc, inc) x 6 (18)
Round 4 :
(2 sc, inc) x 6 (24)
Round 5 :
1 sc in each st around (24)
Round 6 :
Scalloped edge: (sc 2, picot) x 6 around (24)
Info :
These compact lobed leaves are perfect to tuck under large leaves and between acorns. Work them quickly and block flat. Leave a long tail for sewing to vine.
— Berry Picot Nodes (make 20–40):
Round 1 :
mr, ch1, 6 sc in mr (6)
Round 2 :
1 sc in each st around (6)
Round 3 :
Picot top: ch3, sl st to 1st ch (makes a tiny loop). Fasten off leaving a tail for attachment.
Info :
Work berries in clusters of 2–4 and attach them along vine using the tail. Pin cluster placements before sewing to ensure even spacing and natural grouping between leaves and acorns.
— Acorn Body (make 6–8):
Round 1 :
mr, 6 sc in mr (6)
Round 3 :
(1 sc, inc) x 6 (18)
Round 4 :
(2 sc, inc) x 6 (24)
Round 5 :
1 sc in each st around (24)
Round 6 :
(3 sc, inc) x 6 (30)
Round 7 :
Rounds 7-14: 1 sc in each st (30) — work 8 rounds to form a slightly elongated organ shape for the acorn body
Info :
Begin stuffing lightly after Round 9. Stuff gradually, using very small amounts of fiberfill to avoid lumps; acorns should be firm but smooth. Reserve a small opening for attaching cap later.
Round 15 :
(3 sc, dec) x 6 (24)
Round 16 :
(2 sc, dec) x 6 (18)
Round 17 :
(1 sc, dec) x 6 (12)
Round 18 :
6 dec (6). Fasten off leaving long tail for sewing to cap (6)
Info :
Weave remaining tail to close any tiny hole and shape the bottom of the acorn into a slight point. Make sure the top opening remains neat for cap attachment.
— Acorn Cap (make same number as bodies):
Round 1 :
mr, 6 sc in mr (6)
Round 3 :
(1 sc, inc) x 6 (18)
Round 4 :
(2 sc, inc) x 6 (24)
Round 5 :
1 sc in each st around (24)
Round 6 :
Work texture row: (sc 1, hdc 1, dc 1) across to create raised caps (24)
Round 7 :
BLO: 1 sc in each st BLO to form a ridged rim (24)
Round 8 :
Attach to acorn body: place cap over top of filled acorn body and sew through cap base and acorn top with whip stitch around. Fasten thoroughly (no stitch count change)
Round 9 :
Decorative edge: sc 3, picot around cap edge to create a scalloped textured look (approx. 8 picots)
Info :
If you prefer a more sculpted cap, use very small amount of craft glue inside the cap to keep it glued to the top of the acorn before sewing for extra stability. Ensure glue does not show outside.
— Braided Vine & Joinery (joining leaves, acorns, berries):
Round 1 :
Work vine as continuous sl st cord (see Vine Stem pattern). Plan motif placement: leave 6 sl sts free between motif joins for natural spacing.
Round 2 :
Attach leaf by sewing base tail to vine: insert tail through 8 vine sl sts and secure with 8 tidy whip stitches. Repeat at desired placement alternating sides.
Round 3 :
Attach acorn: sew acorn cap base to vine by placing cap slightly over vine and securing with running stitch around 10-12 attachment points. Add a couple of small stitches into the acorn body for stability.
Round 4 :
Attach berries: place clusters of 2–3 picot berries along vine in crescent groups and sew securely by the base. Use small hidden stitches so attachment appears to grow from vine.
Info :
Work assembly alternately: attach one leaf, then berry cluster, then acorn, repeating. Pin everything in place first on a flat surface before sewing to achieve the natural staggered look in photos.
Round 5 :
To hide join edges and reinforce, crochet a narrow slip-stitch 'backbone' along the vine across the join area: sl st through vine and through 1–2 rib stitches on each attached motif (no stitch count change)
Round 6 :
Optional stiffening: apply diluted fabric starch and block. Pin runner into shape with leaves splayed and acorns slightly popped up. Allow to dry fully before final trimming.
Info :
For long runners, create two parallel vine lines and connect them with small joining bars of ch3 and sl st to support heavier motifs; this distributes weight and reduces sagging at the joins.
— Edging & Finishing Touches :
Round 1 :
Work a narrow decorative border along outermost motifs: join thread at edge, sc evenly around open spaces with picot accents at each scale (approx. 1 sc per 3mm of edge)
Round 2 :
Scallop finish: (sc 4, picot) repeat around runner periphery for a unified edge (no stitch count applied globally as per length)
Info :
Weave in all tails on the reverse side using a fine blunt needle; hide ends into ribs and vine cord. Trim close to work but not flush to avoid slipping through stitches.
Round 3 :
Final blocking and shaping: steam lightly while pinned. For more durable runner, spray a thin fabric stiffener according to product instructions and allow to dry fully before use.
Info :
Inspect seams and re-stitch any loose joins. For decorative hanging, add small loops at ends of the vine by sewing a stable chain loop at each end of the runner.
— Summary of Repeats & Counts :
Info :
Make motif counts to taste: recommended set for a 60–80cm runner: 10 large leaves, 6 acorns, 18 small leaves, 28 berries. Adjust vine length and spacing as desired. Each large leaf took 20 rounds, each acorn body 18 rounds, cap 9 rounds, small leaf 6 rounds and berry 3 rounds — total rounds across the project exceed 120 when making a full runner; adjust as necessary.
Info :
Keep a logbook of rounds and motif counts to maintain symmetry. When reversing side placement, arrange leaves in mirrored pairs along each vine section for balanced composition.
Finishing this oak leaf and acorn vine runner is incredibly satisfying — every leaf and tiny acorn cap is a little victory of patience and technique! The deep burgundy thread gives the piece a rich, warm elegance that makes any table feel curated. I love how light blocking transforms soft stitches into crisp leaves that look almost sculpted. 🧶🍂 Place it on a sideboard or runner and enjoy the compliments — this is the kind of handmade piece people notice. 🌟