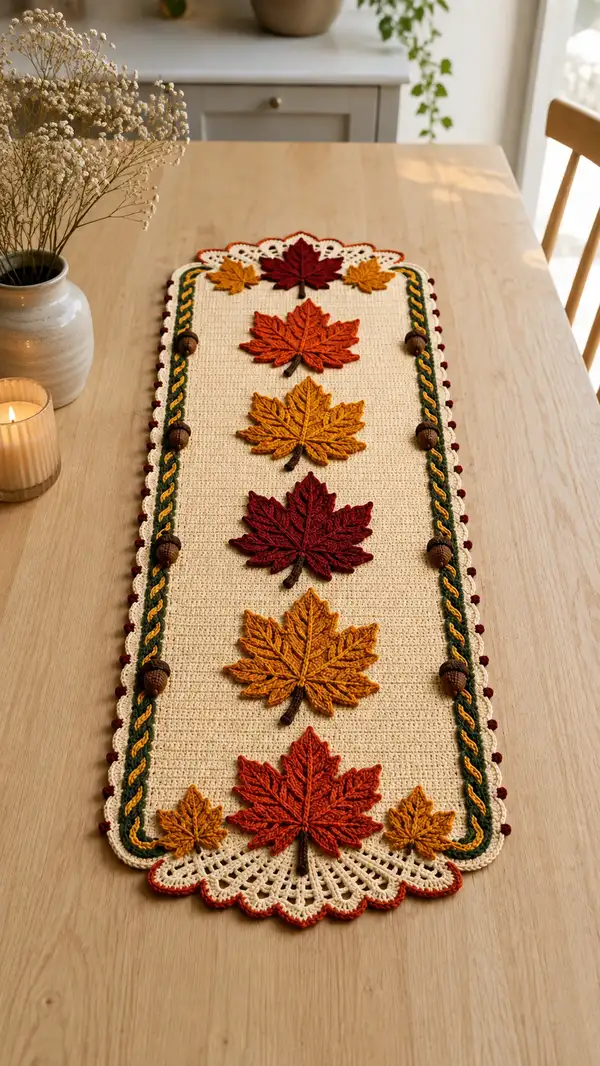
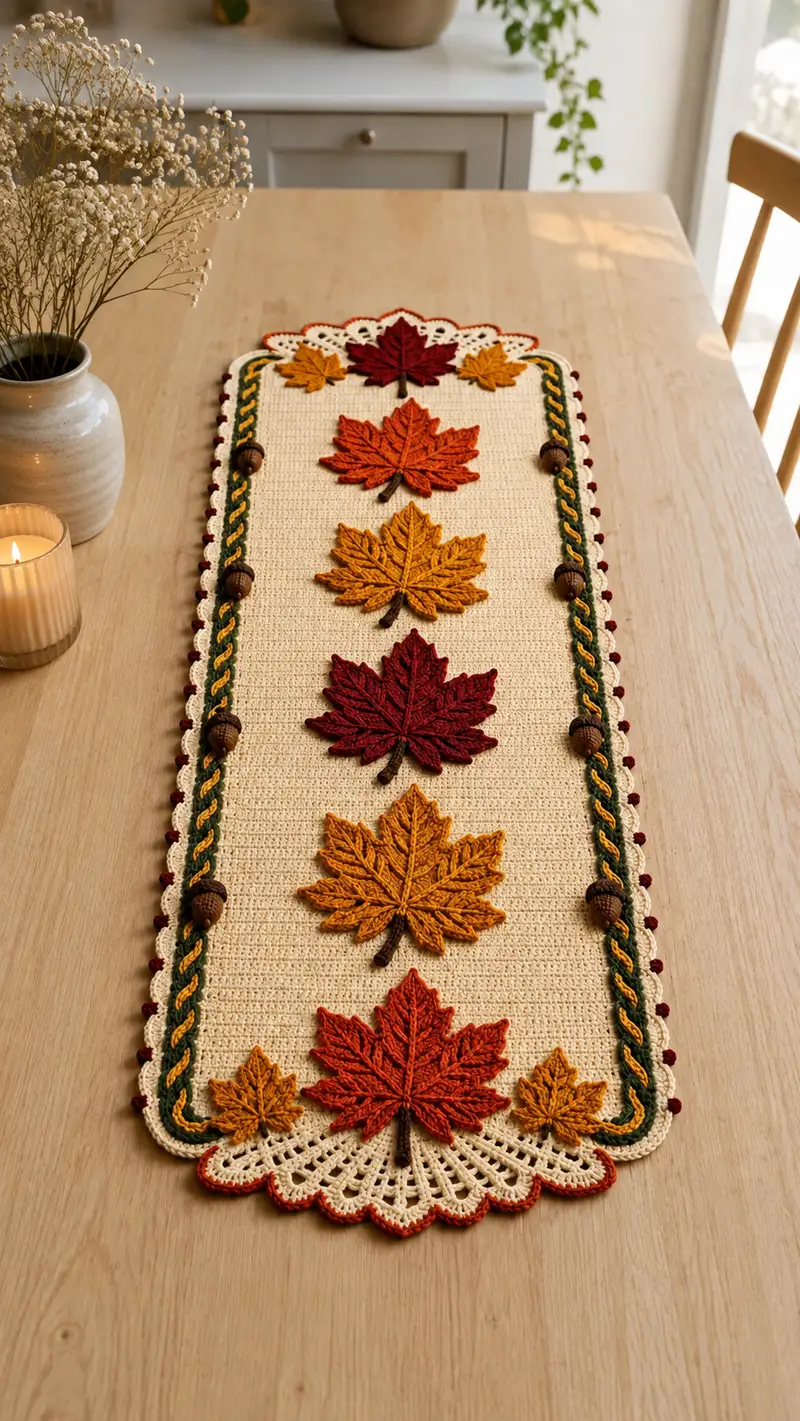
A warm, autumn-inspired crochet table runner featuring layered maple leaf appliques, acorn accents and a scalloped lace fan at each end. The neutral cream ground showcases rich rust, burgundy and mustard leaves framed by a braided green-and-gold cord and tiny bobble trim. Perfect as a seasonal centerpiece, this pattern includes step-by-step instructions for panel, leaves, acorns, braided border and finishing touches.
Progress Tracker
0% Complete
— Materials & Gauge :
Info :
Recommended yarn: worsted weight (#4). Gauge: 18 sc x 24 rows = 10cm/4in in single crochet using 3.5mm hook. Gauge is important to maintain the runner width and motif scale; adjust hook size if needed.
— Base Panel (Work flat in rows) :
Setup :
Using Cream yarn, chain 101 (this creates a working width of approximately 30-34cm depending on gauge). This foundation produces a balanced width for appliques placement. If you prefer a wider runner, add multiples of 2 ch to retain edge symmetry.
Round 1 :
Sc in 2nd ch from hook and in each ch across. Turn. (100)
Round 2 :
Ch1, sc in each st across. Turn. (100)
Round 3 :
Ch1, sc in each st across. Turn. (100)
Round 4 :
Ch1, sc in each st across. Turn. (100)
Info :
Maintain a tightish tension to ensure the ground is firm and does not show stuffing from underneath appliques. If your stitches are loose, drop one hook size for the base panel.
Round 5-10 :
Ch1, sc in each st across. Turn. (100)
Round 11 :
Ch1, sc in each st across. Turn. (100)
Round 12-20 :
Ch1, sc in each st across. Turn. (100)
Info :
At this point the runner is establishing its fabric. Measure length as you go; the sample has 70 rows plus a decorative end fan per side. The base continues until you have completed 70 rows in total; for the sample finished runner length before edging is around 110-120cm. Adjust number of rows to suit your desired final length.
Round 21-30 :
Ch1, sc in each st across. Turn. (100)
Round 31-40 :
Ch1, sc in each st across. Turn. (100)
Info :
If you prefer an even denser texture, work the main field in hdc instead of sc. For consistency with the sample, continue in sc for a flatter, tighter ground suitable for appliques.
Round 41-50 :
Ch1, sc in each st across. Turn. (100)
Round 51-60 :
Ch1, sc in each st across. Turn. (100)
Round 61-70 :
Ch1, sc in each st across. Turn. (100)
Info :
Fasten off after Row 70 and weave in starting tail if you are pausing. Blocking the panel flat will help the final assembly—gently steam or wet block to even out the edges and rows.
— Scalloped Fan Ends (Make 2, one for each short end) :
Info :
Each fan is worked separately and then sewn to the short edges of the runner. Work fans in cream to match base, adding a contrast outer picot edging later.
Round 1 :
Join cream to the center of the short edge (or to a looped chain attached at edge), ch4 (counts as tr), 11 tr into same join. (12 tr)
Round 2 :
Turn fan: ch3, dc in next st, *ch1, skip 1, dc in next* across forming arches, end with dc in last. (6 dc, 5 ch-1 spaces)
Round 3 :
Ch1, 2 sc in first dc, *(sc, ch2, sc) in each ch-1 sp forming a shell, 2 sc in next dc* across. (6 shells)
Round 4 :
Ch1, in each shell work (sc, hdc, 3 dc, hdc, sc) to create a full scallop. Space scallops evenly across. (6 scallops)
Info :
Make sure the fan width matches the short edge width. If the fan pulls in or stretches, adjust number of scallops to match edge length—fans can be lengthened by adding an additional small scallop in the center.
Round 5 :
Edge round: continue working sc around outer edge of each scallop to create a tidy join surface. (approx 68 sc around fan edge)
Round 6 :
Switch to Rust or Burnt Orange and work a round of sc along outer scallops to highlight the edge. Sl st to join and fasten off. (approx 68 sc)
Info :
Pin fan to short end of base panel aligning center point with central leaf placement. The sample places fans so that the large leaf sits directly over the join. Sew by whip stitch through fan base and the final row of the panel.
— Large Maple Leaf Applique (Make 5) :
Info :
Each large maple leaf is worked in rounds from a small magic ring center and shaped into lobes using increases and worked shaping. Use front post and back post stitches to create raised midrib and veins. The leaf body will be worked in the chosen leaf color (rust, burgundy, mustard etc) and the short stem in dark brown.
Round 1 :
With chosen leaf color, make a magic ring. Ch1, 6 sc into ring. Pull tight. (6)
Round 2 :
(1 sc, inc) x 6 around. (9)
Round 3 :
(2 sc, inc) x 6 around. (12)
Round 4 :
(3 sc, inc) x 6 around. (15)
Round 5 :
(4 sc, inc) x 6 around. (18)
Info :
These rounds create a circular base that will be sculpted into the central leaf body. Keep rounds tight; this base acts as the central vein anchor for later post-stitch shaping.
Round 6 :
Ch1, sc in next 3 sts, [ch3, sk 1, sl st in next] place small picot-like indent to begin lobe shaping; continue sc around performing 2 sc in spaces where lobes will be formed. (18)
Round 7 :
Begin lobe formation: *In next st work (sc, hdc, 3 dc, hdc, sc) to form a pointed lobe, sl st to next base stitch* repeat for 5 lobes around leaving central top lobe space for later shaping. (5 lobes)
Round 8 :
Ch1, sc in each st and in sl st joins to stabilize lobes. (approx 30 sc accounting for lobe stitches)
Info :
Use stitch markers to mark the tips and valleys of each lobe. This helps later when placing the raised veins using FPdc and BPdc techniques. Position the leaf so that one lobe is pointing upward for consistent appliqué placement on the runner.
Round 9 :
With right side facing, create central midrib: ch1, work a column of FPdc from center base up into the top lobe by inserting hook around the front post of the designated stitches (work 6 FPdc). This creates a raised midline.
Round 10 :
Back to flat: ch1, sc around the leaf including around raised midrib area to lock post stitches into place. (approx 34 sc)
Round 11 :
Sculpt side veins with BPdc and FPdc: working three short veins on each lobe (each vein = 3-5 FPdc/BPdc worked in a small diagonal). Secure each vein with a reverse sc at its base to hold shape. (detail work, stitch count varies ~34)
Info :
Veins are worked into the body of the leaf using post stitches and short vertical bars of dc/tr to create texture. If you prefer, you can also embroider veins after appliqué using surface slip stitch or tapestry needle and contrasting yarn.
Round 12 :
Edge round: ch1, sc in each st around leaf edge; around lobe points work (sc, picot, sc) to create crisp tips. (approx 40 sc including picots)
Round 13 :
Switch to Dark Brown for stem: join at base center, ch1, sc in next 3 sts making a short tapered stem. Fasten off leaving a long tail for sewing. (3 sc stem)
Info :
Weave in a small amount of stuffing into the lower center area only if you want a lifted central ridge. Most leaves are unstuffed but rely on post stitches to create dimension. Leave the tail long for sewing onto the panel.
Round 15 :
Optional surface embroidery: with same color or slightly darker thread, embroider additional tiny veins radiating from midrib using yarn needle and surface slip stitch. Secure ends at back of leaf.
Round 16 :
Blocking: pin leaf to flat shape with lobes opened, spritz lightly and allow to dry to set shape before sewing to panel.
Info :
Make 5 large leaves in varying colors. Place them evenly spaced down the center of the runner, leaving about 10-12 rows of base between each leaf for consistent rhythm as in the sample.
— Small Maple Leaf Applique (Make 2) :
Round 1 :
Make a magic ring with Mustard yarn. Ch1, 6 sc into ring. (6)
Round 2 :
(1 sc, inc) x 3. (9)
Round 3 :
Form three small lobes by working (sc, hdc, 3 dc, hdc, sc) into 3 spaced sts around. (3 small lobes)
Round 4 :
Edge with sc around, add a tiny brown stem of 2 sc. Fasten off leaving tail for sew. (approx 18 sc)
Info :
These small leaves sit at both ends beside the fan and complement the large leaf composition. Pin in place and sew carefully with invisible ladder stitch.
— Acorn Motif (Make 6) :
Round 1 :
With brown, make a magic ring. Ch1, 6 sc into ring. (6)
Round 2 :
Inc in each st around. (12)
Round 3 :
(1 sc, inc) x6. (18)
Round 4 :
Sc in each st around. (18)
Round 5 :
Switch to darker brown for cap: sl st to join, ch1, sc around cap area for 6-7 stitches to create a tidy cup. (18)
Round 6 :
Work textured cap: *(sc, ch1, sc) in each st across to form a basket-weave cap with small holes on the edge* (6 mini bumps around cap)
Round 7 :
Fasten off leaving long tail. Fill the bottom half lightly with securing fiberfill (very small). Sew base closed with whip stitch to form a rounded acorn body. (approx 18)
Round 8 :
Cut a short stem from dark brown: ch4, sc back in chain to form a short stub, leave long tail to attach to cap center. Sew stem to cap, then sew acorn onto braided border at designated positions. (3 sc stem)
Info :
Space acorns evenly along the green braided border (sample uses 3 per side) and use a tapestry needle with yarn tail to attach securely through braid and base panel, anchoring with additional stitches behind the border to prevent sagging.
— Braided Cord Border (Make 2 long cords to run along both long sides) :
Info :
The braided cord is worked as three long chains (two colors plus cream accent) that are then twisted and braiding-like sewn into place. This creates the raised, twisted rope look seen in the sample. Alternatively, you can crochet an I-cord or use a three-strand crochet chain technique for a similar effect.
Round 1 :
Using Leaf Green, ch a length equal to the runner long side + 12cm (to allow for corners) - about 220 ch. Fasten off leaving long tail. Make a second chain in Golden Ochre the same length. Make a third narrow chain in Cream roughly same length (for the inner highlight).
Round 2 :
Lay three chains parallel and seam them together at one end. Twist two color chains around the cream highlight forming a loose braid; secure with a few mattress stitches every 20cm to keep twist in place. (no stitch count)
Info :
The sample cord is sewn onto the panel approximately 6 sts in from the long edge. Pin the cord in place then tack with small invisible stitches, working around corners by folding gently and securing to the runner's sides.
— Side Border & Picot/Bobble Round :
Round 1 :
With Cream, join at one short corner and work sc evenly around the entire runner edge (top long side 100 sts, side 70 rows, bottom long side 100, other side 70 rows). To prevent curling, work 4 sc in each corner (corner increases). Total stitches around approx 344. (344)
Round 2 :
Ch3 (counts as dc), work 1 dc in each sc around to create a raised border; in corner places work 2 dc to keep corners flat. (approx 344)
Round 3 :
Switch to Leaf Green and work 1 sc in each st around inside the dc round to create a recessed channel for the braid. (approx 344)
Round 4 :
With Golden Ochre, work a decorative chain loop on the outer edge of the green channel: *sk 2 sc, 5 dc in next st, sk 2 sc, sl st in next* repeat around—this produces a series of subtle arches; adjust repeat to fit exact stitch count. (approx 68 arches)
Round 5 :
With Burgundy, add small bobble/picot accents along outermost edge: *sc in next 4 sts, (ch3, sl st into base) as picot* repeat around to create tiny burgundy dots. (approx 68 picots)
Info :
When placing bobbles, count spacing visually and keep them evenly spaced. The sample places a bobble every 6-7 sc depending on exact dimension; pin in place before stitching to verify spacing.
— Decorative Joining Round and Final Edge :
Round 1 :
With Cream, work one more sc round along outermost edge to tidy all layers: sc around, catching braid on inner edge and securing fan base at short ends. (approx 344)
Round 2 :
Edging contrast: With Rust, work (sc, picot) across the outermost edge to provide a subtle colored rim that matches large leaf accents. Fasten off and weave in all ends. (approx 344)
Info :
Trim and tidy all yarn tails. If the runner is asymmetrical after sewing, block again to even out edges and smooth seams before placing under decorative weights or centerpieces.
— Assembly & Placement of Motifs :
Info :
Layout is crucial for a balanced look: mark the center line of the runner lengthwise with removable clips or pins. Position the large leaves spaced evenly (sample uses roughly 10-12 rows between centers) and small leaves at both ends adjacent to the fan. Pin acorns along the braided border spaced evenly (3 per side). Once happy with placement, sew motifs securely using matching yarn and tapestry needle, stitching through both applique base and the top few strands of the border where applicable.
Round 1 :
Attach first large leaf: position its stem approximately 6 rows in from the fan seam touching the fan's center leaf; sew around the base of the leaf with an invisible whip stitch. Repeat for the remaining leaves, maintaining even spacing. (sewing step)
Round 2 :
Sew small leaves to each end aligning with fan scallops, then secure acorns along braid by threading yarn through the acorn base, through braid, and back through acorn; pull taut and knot at back. (attachment step)
Info :
To secure heavier beads for acorn bodies, stitch through the bead and braid with a doubled yarn tail to keep bead firmly in place. Reinforce with extra stitches behind braid on the back of the runner.
— Surface Vein Embroidery (Optional but recommended) :
Round 1 :
Using a tapestry needle and a single strand of contrasting or darker yarn, embroider additional veins from midrib to lobe tips with backstitch or surface slip stitch. Follow the raised post stitches placed earlier to guide direction. (embroidery)
Info :
Work embroidery with the leaf pinned flat to avoid drawing or pulling the fabric. Keep stitches short and neat—this will enhance realism and definition on each leaf.
— Finishing Touches :
Round 1 :
Weave in all remaining yarn tails with tapestry needle, tucking tails into nearest sts and trimming close to work. Steam-block the assembled runner flat to relax stitches and set motif shapes.
Info :
Consider adding small non-slip pads beneath the runner if used on a smooth tabletop to prevent sliding. For gifting, pair with a matching set of crocheted coasters or napkin rings using the same leaf motif colors.
This Autumn Maple Table Runner brings warmth and texture to any table—each maple applique and acorn accent adds seasonal charm with a handmade touch. Working the long panel then switching to sculptural motif work is so satisfying; you'll love the contrast between the neat base and the raised, detailed leaves. Lay it out beneath your favorite centerpiece and enjoy the cozy glow it brings to fall gatherings. 🍂🧶