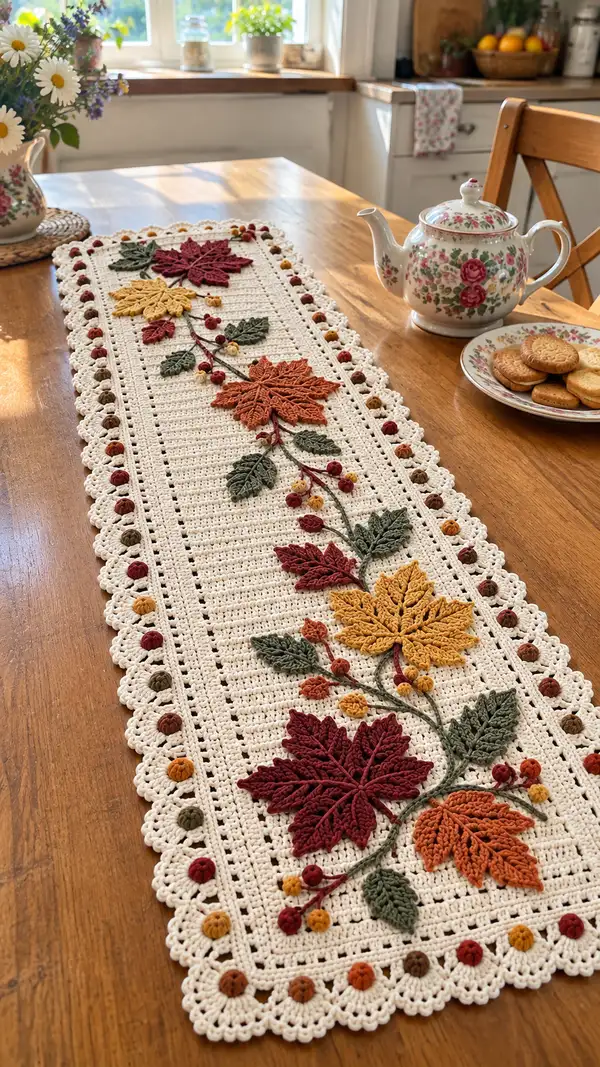
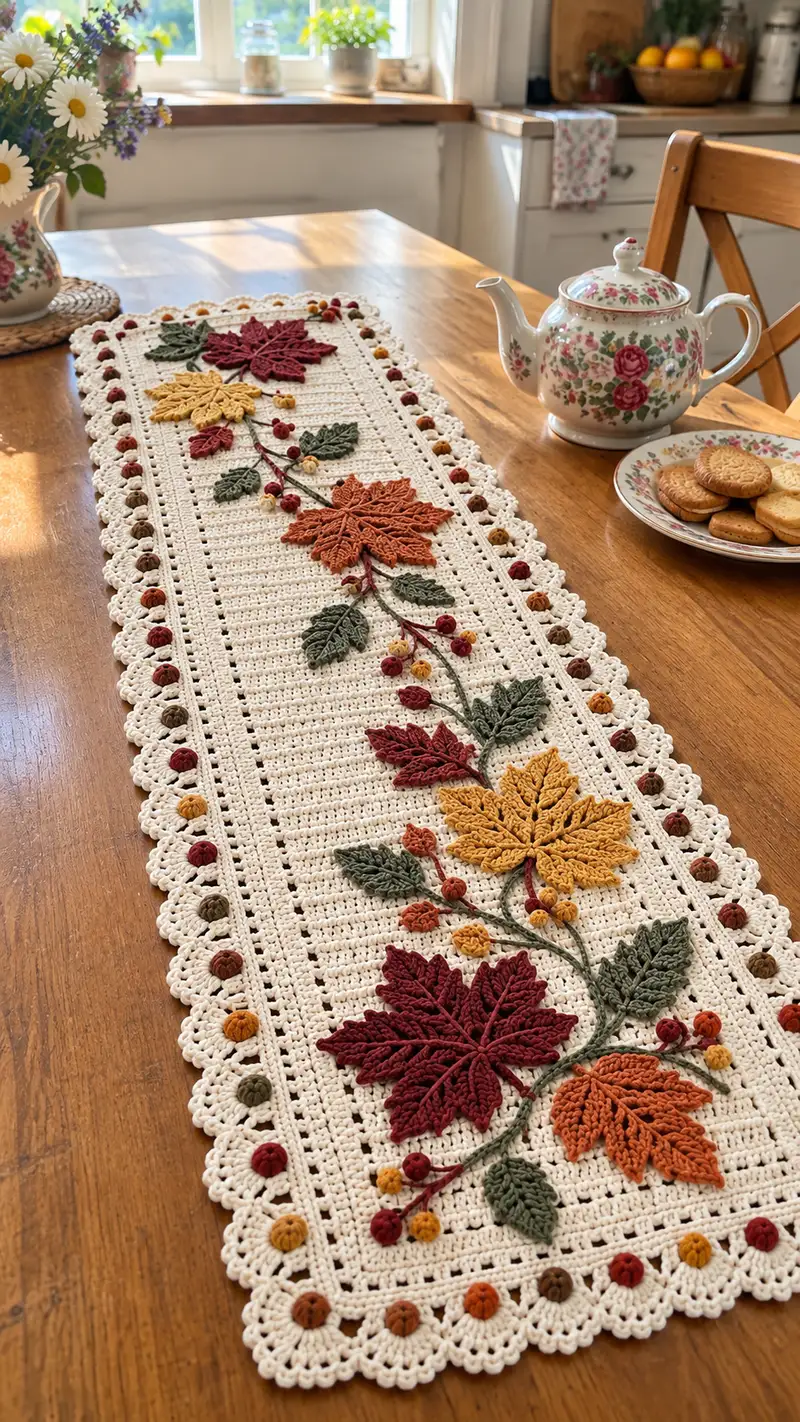
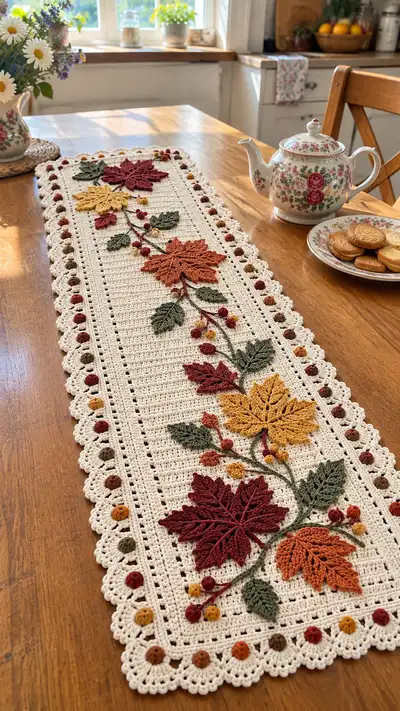
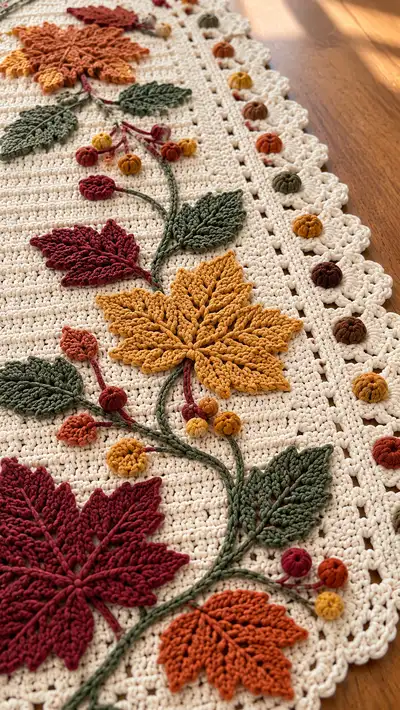
A warm, vintage-inspired rectangular table runner decorated with layered crocheted maple leaves, textured berries and a scalloped border. Worked in a neutral cream base with deep red, mustard, burnt orange and olive appliqued details, this runner adds cozy fall charm to any table. The runner in the photo features raised leaves and bobble pumpkins that create a 3D botanical centerpiece.
Progress Tracker
0% Complete
— Finished size & gauge :
Info :
Finished runner in the photos measures approximately 36" x 10.5" (91 x 27 cm). Gauge is not critical for width, but try to match tension: 18 sc x 16 rows = 4" in worsted weight cotton using 3.5mm hook.
— Base Rectangle (Main Panel) :
Round 1 :
Foundation chain 81 (or ch 81, turn). This gives a long narrow rectangle base width of approximately 10.5" - adjust multiple of 1 to your desired width (81 ch for sampled runner).
Round 2 :
Row 1: 1 sc in 2nd ch from hook and in each ch across (80 sc). Turn. (80)
Round 3 :
Row 2: ch1, 1 sc in each st across (80). Turn. (80)
Round 4 :
Row 3: Repeat Row 2 (80)
Round 5 :
Row 4: ch1, 1 sc in each st across (80). Turn. (80)
Round 6 :
Row 5: ch3 (counts as dc), sk first st, 1 dc in each st to end, working last dc in top of turning ch (80 dc equivalent). Turn. (80)
Info :
Introduce a dc row occasionally to give subtle ridges as shown. This pattern alternates dense sc rows and occasional dc rows to mimic the photographed texture.
Rounds 7-10 :
Work 4 rows even in sc (ch1, sc across). Keep stitch count 80. (80)
Round 11 :
Ch1, sc in next 8 sts, ch3, sk next 3 sts, sc in next 26 sts, ch3, sk next 3 sts, sc in last 40 sts. Turn. (80 with two ch-3 mesh-spaces formed)
Info :
These two mesh windows align along the runner length to echo the photographed grid that frames the leaves. Adjust positions symmetrically if you changed foundation chain length.
Rounds 12-16 :
Ch1, sc across each st and over ch-3 spaces working 3 sc into each ch-3 to maintain count (80). Keep even rows to build height. (80)
Round 17 :
Ch1, sc 10, ch3, sk3, sc 26, ch3, sk3, sc remainder (80). Turn. (80)
Rounds 18-22 :
Sc across each row for five rows (80). This creates a band of solid background between mesh windows. Keep tension consistent. (80)
Info :
Measure your runner length as you go. The photographed runner used 60+ body rows before the border. You can work 60 rows for a similar look; this pattern will use Rows 1-70 for the main panel to reach approx 36" length.
Rounds 23-70 :
Repeat a sequence: 8 rows even sc, 1 row mesh as in Round 11 (sc across, ch3, skip 3 to create two ch-3 windows at same positions), then 5 rows sc. Continue until you have completed Row 70 from foundation chain (80 each row). (80)
Info :
Keep row counts to ensure symmetry and to place applique motifs later. Place stitch markers at each mesh window edge on Row 70 to guide border alignment.
Round 71 :
Ch1, sc evenly around entire rectangle edge to prepare for join-to-border (work 1 sc per row-end and 1 sc in each row-end turning stitch). For the long sides this will be 70+ sc along each side; for the short ends work even counts to maintain corners. (Continue maintaining stitch count around)
Info :
After completing base, block the rectangle flat with pins and a damp cloth or steam gently. Blocking ensures the scalloped border lays evenly and appliques will align properly.
— Scalloped Border & Bobble Pumpkin Row :
Round 1 :
Working from RS around the base: join cream yarn with sl st at any corner. Ch1, 1 sc in same st, work 1 sc in each st up long side to corner, 3 sc in corner to turn, 1 sc across short end, 3 sc in next corner. Continue around to join with sl st to first sc. This establishes a neat edge round. (St count varies with block, keep even tension)
Info :
Use marker to note the center of each long side; you will place bobble spacing evenly between markers for symmetrical decoration.
Round 2 (Bobble placement prep) :
Ch1, *sc in next 3 sts, ch3, sk next 3 sts* repeat along long sides to create 12 mesh-spaces along each long side (these will sit under the scallops). Work short ends in sc evenly. Sl st to join. (pattern repeat to produce spaces)
Info :
These ch-3 spaces are where you will anchor the bobble/pumpkin motifs later; spacing every 6 sts gives a regular dotted border as shown in the photo.
Round 3 (Scallops) :
Ch1, *work 1 sc into the ch-3 space, (ch2, 4 dc, ch2) into next ch-3 space as a scallop shell, sl st into space between scallops*, repeat around long sides. On short ends work 5 dc shells evenly spaced. Sl st to join. (approx 14 scallops per long side depending on spacing)
Info :
Scallops should be shallow to match the runner. Adjust number of dc in shells if your stitches are bigger or smaller. Keep shells consistent around the whole runner.
Round 4 (Anchors for bobble pumpkins) :
Working in the back loop of the scallop row, sl st to the center of each scallop and make 6 sc tight around that point (this creates a small cup to anchor a bobble later). Work across all scallops on both long sides and short ends. Sl st to join.
Info :
If you prefer a flatter look, work fewer sc (4 sc) into each scallop center. The sample uses 6 sc cups so that bobbles sit slightly raised.
Round 5 (Finish border) :
Fasten off and weave tails. You will add bobble pumpkins separately and sew into these cups for stability. After sew-on, weave through cups again to secure bobbles.
Info :
Before adding bobbles, pin them in place to check spacing and color balance. The photographed runner alternates 4 autumn colors around the scallops.
— Bobble Pumpkins (Make 36 total; spacing: approx one per scallop) :
Round 1 :
Using color A (mustard/rust/burgundy/olive), mr, ch1, 8 sc in magic ring. Pull tight and join with sl st to first sc. (8)
Round 2 :
Ch1, (2 sc in next st) around to increase to 16. Join. (16)
Round 3 :
Ch1, sc in each st around but work every 2nd sc as a puff: *1 sc, puff in next st* across so you have 8 puffs interspersed with sc. (16 with 8 puffs)
Round 4 :
Ch1, sc around tightening to form a rounded pumpkin. After finishing, pull tightening yarn to slightly gather center. Fasten off leaving a 14-16 cm tail for sewing. (16)
Info :
Stuff bobbles very lightly with a small pinch of fiberfill if you want them more domed. Overstuffing will appear as lumps on the runner.
Round 5 :
With tail, sew bobble into the scallop cup made previously. Stitch through the cup holes several times to secure. Repeat for all scallops, alternating colors in a pleasing progression. Make 36 bobbles total or enough to fill each scallop.
Info :
For a slightly ribbed pumpkin effect, wrap a strand of thread around the bobble center after sewing to define segments, knot on the backside.
— Large Maple-style Leaf (Make 4 prominent leaves similar to photo) :
Info :
Leaves are worked in rounds from center and then branches are made with elongated front-post stitches to create veins and lobes. Use a slightly smaller hook (3.0mm) than the base for crisp definition. Make 4 large leaves (two in burgundy, one mustard, one burnt orange) and 4 medium leaves in olive for the filler leaves.
Round 1 :
With leaf color, mr, ch1, 6 sc in mr. Pull tight and join with sl st. (6)
Round 2 :
Ch1, inc in each st around (12). Join. (12)
Round 3 :
Ch1, (1 sc, inc) x6 (18). Join. (18)
Round 4 :
Ch1, (2 sc, inc) x6 (24). Join. (24)
Round 5 :
Ch1, sc around but work FLO for this round to create a raised ridge for next shaping (24). Join. (24)
Info :
Working the FLO in Round 5 gives a clean edge for the lobes to be worked on the next rounds. Keep rounds joined or work continuously depending on your preference for seam visibility.
Round 6 :
Ch1, *sc 3, (ch2, sk1, 3 sc) into next st to start forming the first lobe*; repeat to create 6 wedge-lobes around (30 sts including ch loops). Join. (count depends slightly on ch loops)
Round 7 :
Work each lobe individually: attach yarn at base of first lobe, ch1, (sc 2, hdc 2, 3 dc, hdc 2, sc 2) across lobe, sl st back to base; repeat for remaining lobes. This rounds each lobe and gives fullness. (Lobe counts vary; overall leaf size increases)
Info :
Use elongated front post stitches to simulate veins: insert hook under two loops of a previous row and pull up loop, then complete hdc/dc to create raised ribs. Two or three veins per leaf center give a realistic look.
Round 8 :
Return to center and work a decorative slip-stitch vein: using contrasting darker shade of same color (or same), surface-slip stitch from base to tip to create a central vein. Secure and fasten off leaving long tail for sewing (approx 20 cm). Pin leaf flat and block for a few minutes.
Info :
Large leaf finished size approx 5.5" across (14 cm) when blocked. For large maple shapes, you can lengthen lobes by working extra dc at the tip of each lobe.
Round 9 :
Optional: Add small picot edging around each lobe tip: *sl st, ch3, sl st in top dc* around lobe tips for decorative finish. Fasten off and weave in ends. Make 4 large leaves as instructed above.
Info :
Make an additional 3 medium leaves in olive using same rounds but reduce increases at Rounds 3-4 (work to 18 sts instead of 24) for slightly smaller size.
— Small Veined Leaf (Make 8-12 small filler leaves) :
Round 1 :
With olive, mr, ch1, 6 sc into mr, join. (6)
Round 2 :
Ch1, inc in each st (12). Join. (12)
Round 3 :
Ch1, *sc 2, inc* x3 making 15 sts. Join. (15)
Round 4 :
Work one side of leaf in sc decreasing to shape: sc 6, turn, sc 3, ch1, sc 3 back along other side to create pointed leaf shape. Fasten off leaving tail for sewing. Block flat. Make 8-12. (leaf size approx 2.5"-3")
Info :
These small leaves tuck under larger leaves and along the vine branches. Work surface slip-stitch veins with a darker green for realism once leaves are pinned.
— Curving Vine & Stem (Surface Crochet) :
Round 1 :
Cut long lengths of olive (approx 120-160 cm each per vine line) and work surface slip stitch along the path you want the vine to take on the RS of the runner. To surface slip stitch: with RS facing, insert hook from front to back into the fabric at chosen start, pull up a loop, ch1, then working on the surface, insert hook into next stitch on base, pull up loop and sl st through previous loop, creating a raised line. Continue forming flowing curves. Make 3 long vines of different lengths to mimic photo. Secure ends on WS and leave tails for sewing over if needed. (This is one continuous 'round' per vine.)
Info :
Use two or three surface rows placed side-by-side for thicker stems, or twist two strands and crochet over to simulate a rope-like stem. Anchor ends under large leaves with whip stitch.
Round 2 :
To create thicker branch junctions, use chain-stitched cords of 30-40 ch each, fasten down with sc at the ends and beneath leaf bases. This produces gently raised stems similar to the sample photograph.
Info :
Plan vine path before sewing appliques. Pin all leaves and small berries/vines in place to ensure aesthetic balance—you can adjust lengths and placement before final stitching.
— Small Berries & Berry Clusters (Make approx 20 clusters) :
Round 1 :
Small berry (single): mr, ch1, 6 sc in mr, pull tight, do not join. Fold slightly and work a second round: 1 sc in each st (6). Fasten off leaving long tail for sewing. (6)
Round 2 :
For a puffed berry: Work a 5-puff ring: ch2, (yo insert pull up loop) x5 times in same st, yarn through all loops, ch1 to close and repeat to make a hardware-look puff. Fasten off and leave tail. (puff cluster)
Info :
Tuck berries in clusters of 2-4 along vine and at leaf junctions. Use three colors (mustard, rust, burgundy) to echo photograph. Sew each berry carefully through the base and into the runner for a secure anchor.
Round 3 :
Berry cluster assembly: group berries on a short chain (ch6), sl st back along chain to gather into cluster, whip stitch cluster stem onto vine using the long tail. Make 20 clusters or as many as you need to fill the central vine path.
Info :
For a more dimensional berry, make the round one berry then wrap with a contrasting strand to create visible segment lines like a tiny pumpkin.
— Decorative Raised Veins and Leaf Detailing :
Round 1 :
To create prominent veins on large leaves, use a length of same color or slightly darker yarn and work raised slip-stitches up each lobe from base to tip: insert hook from RS into the leaf at base, pull up loop, working on top of the leaf surface, sl st to form a thin raised ridge. Repeat 2-3 times per lobe to produce the ribbed effect you see. Fasten off and weave tails on WS. (Surface technique, no counted sts)
Info :
Alternatively use a chain-stitched cord and stitch it onto the leaf surface with small invisible stitches for stronger ribs if you're concerned about wear and tear.
— Assembly & Placement (Layout before sewing) :
Info :
Layout your blocked base on a flat surface. Arrange large leaves along the central vine at approx 8-10" spacing to mimic the photo: 1 near each end, and 2-3 staggered in the middle. Add medium olive leaves to fill spaces. Place berry clusters at stem forks and between lobes. Pin everything in place to approve composition.
Round 1 :
Sew leaves using whip stitch and mattress stitch with long tails. Attach stems by sewing through base of leaf and through the base fabric using several passes to secure. Ensure leaves lay flat and that the underside sewing is tidy. Use extra stitches where vine meets leaf to hide the joint. Repeat until all appliques are attached.
Info :
When sewing, stitch from leaf center outwards to avoid bunching edges. Keep stitches small and tight. If you want less permanent attachment you can tack leaves with a few slip stitches, but sewing ensures longevity.
— Final Finishing Touches :
Round 1 :
Weave in all loose ends on WS using yarn needle. Trim stray fibers. Re-block the entire runner lightly to even scallops and ensure all appliques sit correctly. Allow to dry completely before use.
Info :
Optionally add small hand-stitched French knots with embroidery floss at berry cluster centers for a little contrast bead-like shine. Do not wash too often; spot clean as needed.
Round 2 :
Enjoy your runner! For storage, roll gently and place between acid-free tissue to prevent flattening the bobble detail.
Info :
This pattern yields a highly textured piece. If you want a flatter look, reduce bobble size or omit the bobble pumpkins and replace with flat picots or sewn-on buttons.
This lovely autumn table runner brings seasonal charm in soft cream with layers of warm leaves and tiny pumpkin bobbles. Each applique is worked separately and sewn on for a handcrafted, textured centerpiece you can be proud of. The scalloped border and raised berries make this piece an eye-catching focal point for holiday gatherings or everyday cozy mornings. 🍂🧶 Display it on a wooden table to let the colors sing — and enjoy the compliments that follow! 😊