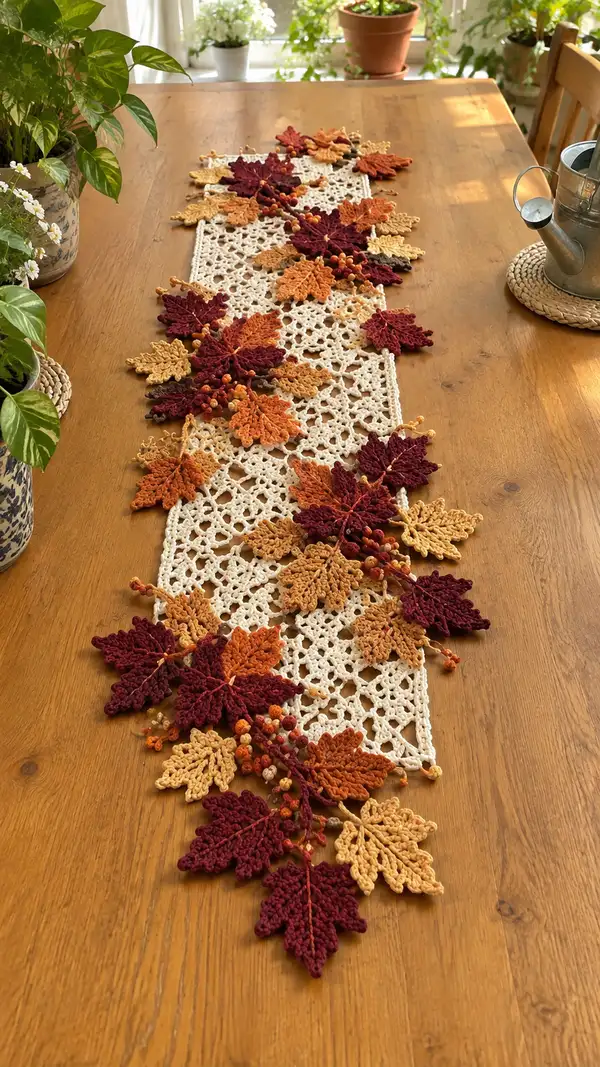
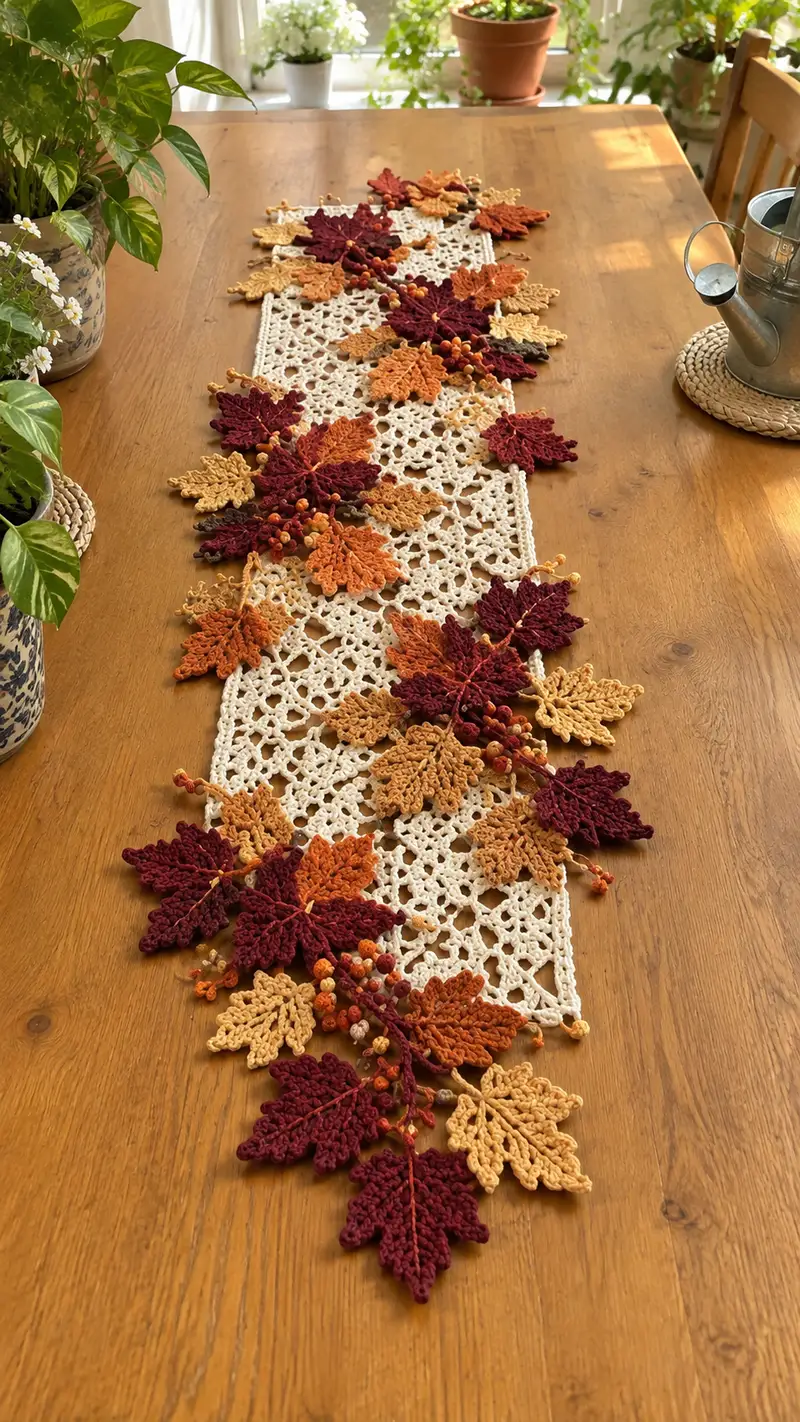
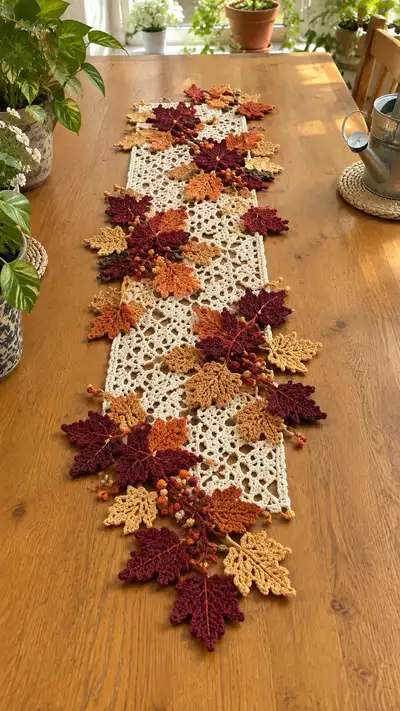
A warm, lacy table runner with layered crochet maple leaves and berry clusters in rich autumn tones. The central cream lace panel provides an elegant, openwork base while burgundy, rust, mustard and amber leaves are arranged along both edges to create a natural, cascading look. This pattern recreates the layered, dimensional effect with detailed leaf shaping, stems and beaded berry clusters for a realistic seasonal accent.
Progress Tracker
0% Complete
— Materials & Gauge :
Info :
Gauge is not critical for a runner but aimed gauge for lace panel: 20 sts x 10 rows over large lace motif measured after blocking equals approximately 10 cm x 10 cm using 3.5mm hook and fingering/sport weight cotton. Adjust hook size if needed to get similar openness.
Info :
Work loosely for the lace panel (to let it drape) and slightly tighter for leaves so they hold crisp shape. Block the lace panel and lightly steam or shape leaves after assembly as desired.
— Lace Motif (make 12 motifs to form runner center) :
Info :
The central runner is made from a repeated medallion/lace motif joined in rows (3 motifs across by 4 motifs long for a total of 12 motifs). Each motif is worked in rounds and joined as you go or seamed after blocking. Motif measures approximately 11cm square after blocking.
Round 1 :
MR, ch3 (counts as first dc), 11 dc into ring, sl st to top of ch3 to close (12 dc) (12)
Round 2 :
Ch3, dc in same st, *ch3, skip next dc, 2 dc in next st; rep from * around to make 6 ch-3 sps between each 2-dc pair, sl st to top of ch3 (12 pairs + 6 ch sps) (24 dc + 6 ch sps)
Round 3 :
Ch1, sc in same st, *ch5, sc in center of next 2-dc pair (this creates lacy petals), rep from * around, sl st to first sc (6 ch-5 sps, 12 sc)
Round 4 :
Ch1, sc in same st, * (ch3, dc, ch3) in next ch-5 sp, sc in next sc; rep from * around. End sl st to first sc. This produces 6 openwork arches (12)
Round 5 :
Ch3 (counts dc), 2 dc in each ch-3 corner arch, ch3 between arches, 3 dc in next arch, sl st to top of ch3. (If you had 6 arches, you will make 6 groups of 3 dc with 6 ch-3 sps between) (36 dc + 6 ch-3 sps)
Round 6 :
Ch1, sc in same st, *ch7, sc into center dc of next 3-dc shell; rep around to form larger lacy loops. Sl st to first sc. This creates 6 ch-7 loops for mounting points (12)
Round 7 :
Ch1, sc in same st, * (sc, hdc, 3 dc, hdc, sc) into each ch-7 loop to define petal; rep around. Sl st to first sc. This increases to a circumference of approx 48 stitches (48)
Round 8 :
Ch1, sc in each st around working into the petals evenly; (48)
Round 9 :
Ch3, *sk 1 sc, dc in next sc, ch1, sk 1 sc, dc in next sc, ch3, sl st into ch-7 loop at base to lock pattern; rep around to accent open diamonds (48 plus chains)
Round 10 :
Ch1, sc in each dc and sc around to tidy up motif edge. (48)
Round 11 :
Ch4 (counts as tr), *sk next st, (2 tr, ch2, 2 tr) in next st (small fan), sk next st, tr in next; rep around forming 6 larger fans and intervening tr arches. Sl st to top of ch4. (approx 36 tr plus 6 fans)
Round 12 :
Ch1, sc into each tr and into the center spaces of fans to create a scalloped solid edge. (approx 48 sc)
Round 13 :
Ch3, dc in next 2 sts, ch2, sk 2 sts, dc3 in next st; rep around to reshape into a square-ish motif with lace windows (48)
Round 14 :
Ch1, sc in each st around, evenly placing sc in ch spaces to maintain 48 sc total. (48)
Round 15 :
Ch5, sk 2 sc, sc in next sc, *ch5, sc in next sc; rep around making 6 chain arches along each side. Sl st to first sc.
Round 16 :
Working into arches from outside edge, (sc, hdc, 3 dc, hdc, sc) into each ch-5 arch to balance motif and provide points for joining. (roughly 48)
Round 17 :
Ch1, sc in each st around to tidy up. (48)
Round 18 :
Fasten off leaving a long tail for joining motifs. Block flat to required dimensions before joining.
Info :
Make 12 motifs total. Arrange them 3 across and 4 down in your desired layout. You may join motifs with whip stitch along blocked edges or use a slip-stitch join working through corresponding outer loops. Blocking before joining ensures motifs line up properly.
— Joining Lace Motifs into Runner Center :
Round 1 :
Lay out motif grid (3 x 4). With right sides facing up, join motifs along long side first. Join using whip stitch or single crochet seam: seam through outermost sc rounds matching stitch-to-stitch. Join first row of 3 motifs to make a long strip; repeat for other strips (joining takes approx 1-2 rounds of sewing per seam depending on method).
Round 2 :
Once three strips are made, join the strips together by matching seams. Use mattress stitch or slip-stitch join to create a flat, flexible seam. We recommend whip stitch with tapestry needle for invisible join.
Round 3 :
Edge the long runner panel with 1 round of sc evenly around to tidy join edges: ch1, sc around, working 2 sc in each corner point (approx 160-200 sc depending on seam method). Sl st, fasten off and weave ends.
Info :
Block the joined panel flat and press gently to set the lace shape before attaching leaves. This step makes alignment of leaf clusters easier.
— Large Maple Leaf (Make 12 large leaves; each leaf listed individually to assist placement) :
Info :
Each large maple leaf is worked from the center vein outwards on a foundation chain and worked back along the chain forming symmetrical lobes. Use 3.0-3.5mm hook and slightly tighter tension than lace panel so leaves hold shape. Tie off and leave long tail for sewing. Make 12 large leaves in burgundy and rust tones as pictured.
Leaf 1 - Round 1 :
Ch 13. (This foundation chain will form half the leaf - you will work back along the opposite side to complete the leaf)
Leaf 1 - Round 2 :
Sc in 2nd ch from hook and each ch across to last ch (11 sc). Turn - do not join. (11)
Leaf 1 - Round 3 :
Ch2 (counts hdc), hdc in next st, dc in next 3 sts, tr in next 1 (center lobe start), dc in next 3, hdc in last 2 sts, ch1, turn. (Total 11 shaping sts plus turning chain)
Leaf 1 - Round 4 :
Work along opposite side of foundation chain: sc in first 2 ch (mirroring), hdc in next 2, dc in next 3, tr in next 1 (center top), dc in next 3, hdc in next 2, sc in remaining chain. Do not join. The leaf now has symmetric lobes and a defined tip. (approx 22 stitches worked including other side)
Leaf 1 - Round 5 :
Ch1, along edges work finishing row: *(sc, hdc, dc) in the bottom outer sc, sc in next st* around the outline to create a scalloped leaf edge. Fasten off leaving long tail for stem attachment. (edge stitches approx 28-32)
Leaf 1 - Info :
Optional: use BLO on Round 5 to create a ridge along the center by working the edge on only one side before closing. To shape lobes, lightly wet-shape or steam and pin to a leaf template.
Leaf 2 - Round 1 :
Make as Leaf 1 (ch13 foundation). Repeat all rounds for Leaf 2.
Leaf 3 - Round 1 :
Make as Leaf 1 (ch13 foundation). Repeat all rounds for Leaf 3.
Leaf 4 - Round 1 :
Make as Leaf 1 (ch13 foundation). Repeat all rounds for Leaf 4.
Leaf 5 - Round 1 :
Make as Leaf 1 (ch13 foundation). Repeat all rounds for Leaf 5.
Leaf 6 - Round 1 :
Make as Leaf 1 (ch13 foundation). Repeat all rounds for Leaf 6.
Leaf 7 - Round 1 :
Make as Leaf 1 (ch13 foundation). Repeat all rounds for Leaf 7.
Leaf 8 - Round 1 :
Make as Leaf 1 (ch13 foundation). Repeat all rounds for Leaf 8.
Leaf 9 - Round 1 :
Make as Leaf 1 (ch13 foundation). Repeat all rounds for Leaf 9.
Leaf 10 - Round 1 :
Make as Leaf 1 (ch13 foundation). Repeat all rounds for Leaf 10.
Leaf 11 - Round 1 :
Make as Leaf 1 (ch13 foundation). Repeat all rounds for Leaf 11.
Leaf 12 - Round 1 :
Make as Leaf 1 (ch13 foundation). Repeat all rounds for Leaf 12.
Info :
Make twelve large leaves in a mix of burgundy and rust shades. Block each leaf lightly on a leaf template to sharpen lobes. You may press with low steam or pin damp for 20-30 minutes. Leave long tails for sewing to the panel or stems.
— Medium Maple Leaf (Make 10 medium leaves) :
Info :
A slightly smaller leaf uses ch 11 foundation to create slimmer lobes used as filler pieces along edges.
Round 2 :
Sc in 2nd ch from hook and across to last ch (9 sc). Turn. (9)
Round 3 :
Ch2, hdc in next, dc in next 3, hdc in next 2, ch1, turn. Work back along other side mirroring to complete leaf. Fasten off leaving tail. (9 mirrored)
Round 4 :
Edge with sc around both sides forming a small scallop; fasten off. (edge approx 20-24 sts)
Info :
Make 10 medium leaves in mustard yellow and amber to balance the runner. Block lightly as above.
— Small Oak-Style Filler Leaf (Make 8 small leaves) :
Round 2 :
Sc in 2nd ch from hook and across to last ch (5 sc). Turn. (5)
Round 3 :
Ch2, hdc in next 2, dc in center, hdc in next 2, ch1, turn; mirror on other side to close. Edge with sc and picots for texture. Fasten off leaving tail.
Info :
Make 8 small filler leaves in light gold and pale amber shades. These are useful to tuck under large leaves and soften clusters.
— Leaf Veins & Stem (Individual stems for each leaf cluster) :
Round 1 :
Using dark brown or deep rust yarn, ch 25 for a long stem (adjust length as required for cluster). Sl st back along chain to thicken stem: sl st in 2nd ch from hook and each ch back to beginning, fasten off leaving long tail for sewing. This forms a corded stem approx 12cm long.
Round 2 :
For leaf vein: use surface slip stitch or chain-stitched running stitch using yarn needle to embroider a central vein through the center of each leaf. Secure with small backstitch knots on underside.
Info :
If you want poseable stems, insert thin floral wire through the sl-stem before finishing; wrap yarn around wire and sew leaf tail over the end to hide wire. Ensure wire ends are bent and secured away from tabletop.
— Berry Cluster (Make 10 clusters) :
Round 1 :
Using small amounts of worsted or sport yarn in marigold/amber, ch4 and join to make a small ring: MR or sl st to form small bead-like ball
Round 2 :
Into ring work 6 sc (6). Sl st to first sc. Fasten off leaving long tail for sewing. Optionally use a small wooden or glass bead inside before finishing for weight and shape.
Round 3 :
String several of these tiny berries on a beading needle and tail yarn, or sew each berry onto a short ch-2 stem (ch2, sl st back) to form a cluster of 4-6 berries. Sew cluster at base into leaf stems or directly to lace edge.
Info :
Make 10 berry clusters, varying bead counts. Use contrasting tones for realism. Secure each bead or ball with a few stitches and a small knot on the underside to avoid loosening.
— Edging & Decorative Leaf Fringe Around Panel :
Round 1 :
Working along the outer edge of the blocked runner panel, join cream yarn at a corner. Ch1, sc in same st and evenly around panel working (sc in each st along sides; 2 sc in corner points). This creates a tidy base for leaf placements. (Approx 160-200 sc depending on seam/joins.)
Round 2 :
*Ch5, skip 2 sc, sl st in next sc; rep around creating picot loops every few stitches to anchor leaf stems later. Fasten off and weave ends.
Info :
These picot loops are the anchor points for stems and allow you to attach leaves in an even, natural-looking spacing. You can adjust spacing according to your layout (every 4-6 cm is a good starting point).
— Assembly & Placement Rounds (Detailed placement for each visible cluster) :
Round 1 :
Lay the blocked runner flat. Decide on overall composition: the pictured runner has denser clusters at both ends and sparser clusters in the middle. Start at one end and arrange 3 large leaves, 2 medium leaves and 1 berry cluster overlapping naturally. Pin each leaf with rust-proof pins to the cream panel to visualize spacing.
Round 2 :
Sew leaves to panel: using the long tail left on each leaf, whip-stitch through the leaf tail and into the picot/ch-arch on the panel at the desired point. Make 6-10 small, close stitches around the base of each leaf to anchor firmly. Tie a secure knot on underside and weave tail into panel for invisibility.
Round 3 :
Attach stems: sew sl-stem or corded stem onto cream panel where stems naturally fall, then sew leaves to stems to give a gathered, sprig-like appearance. Sew berry clusters at junction points where several stems meet for a realistic cluster effect.
Round 4 :
Continue placing leaves along one side of the runner approximately every 8-12 cm alternating colors and sizes. Mirror placement on the opposite side but do not make perfectly symmetrical - natural clusters look more organic when slightly offset.
Round 5 :
For overlapped leaves, sew only at the base of the top leaf and a small stitch to the leaf below (not through the whole body) so the top leaf can lift slightly for depth. Use small invisible stitches through adjacent lobes to prevent excessive flipping.
Info :
Use spare yarn tails to make small anchor stitches through the lace motif under the picot loops; avoid stitching over large lace holes that will distort motif. Keep stitches neat and hidden on underside.
— Finishing Touches & Optional Stabilizing Steps :
Round 1 :
Secure beads: either string beads on tail of berry pieces and sew through multiple points or glue beads inside tiny crocheted berries then tack closed. For extra security, double stitch over bead holes and weave ends through at least 6 stitches before trimming.
Round 2 :
Check all leaf points and lobes for loose threads. Use a tiny dab of fabric glue on underside knots to prevent slipping if table runner will be handled frequently.
Round 3 :
Lightly steam-block the leaves in their final positions if you want them flattened or stiffen slightly with starch spray to hold a shaped curve. Do not over-stiffen if runner will be laundered. If using wire, ensure ends are wrapped and hidden within seams.
Info :
Weave in all tails at least 5cm into surrounding stitches. Trim close to work. For a professional finish, use a matching thread or very fine yarn to make final invisible stitches into nearby motifs.
— Care Instructions :
Info :
Hand wash or gentle machine wash in a mesh bag on delicate with mild detergent. Reshape and block while damp; air dry flat. Avoid tumble drying to preserve beads and shape. Store flat if possible to prevent crushing leaf clusters.
Info :
If beads are wooden or painted, avoid soaking for long periods; spot clean bead clusters if necessary. Remove delicate decorative items before machine wash if concerned.
Completing this table runner is such a rewarding project — the lacy center and clustered leaves create an autumnal centerpiece that looks like it was gathered from a fall walk. Each leaf and bead adds personality and texture, making it a seasonal heirloom you can use year after year. Enjoy arranging and rearranging the clusters until it feels just right — then sit back and admire your work! 🍁🧶