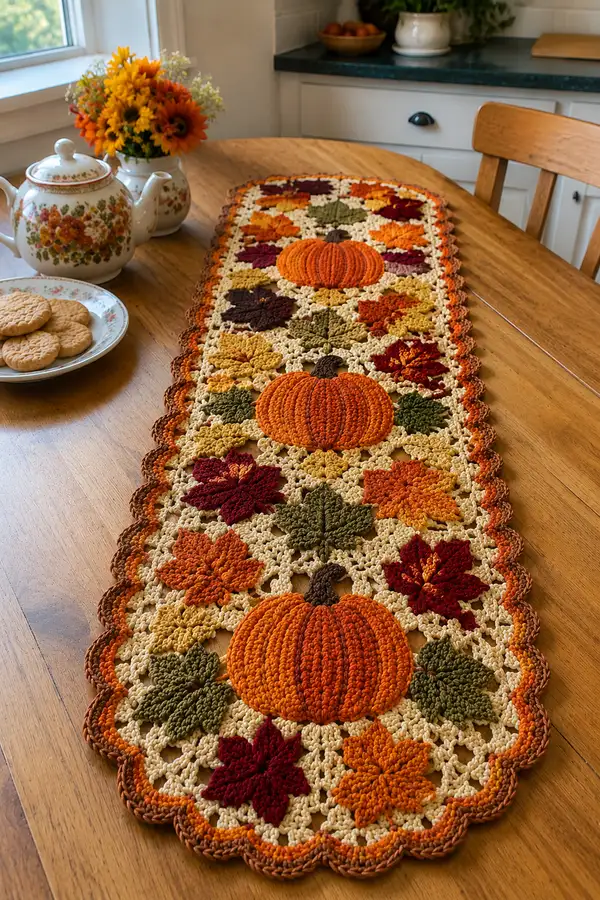
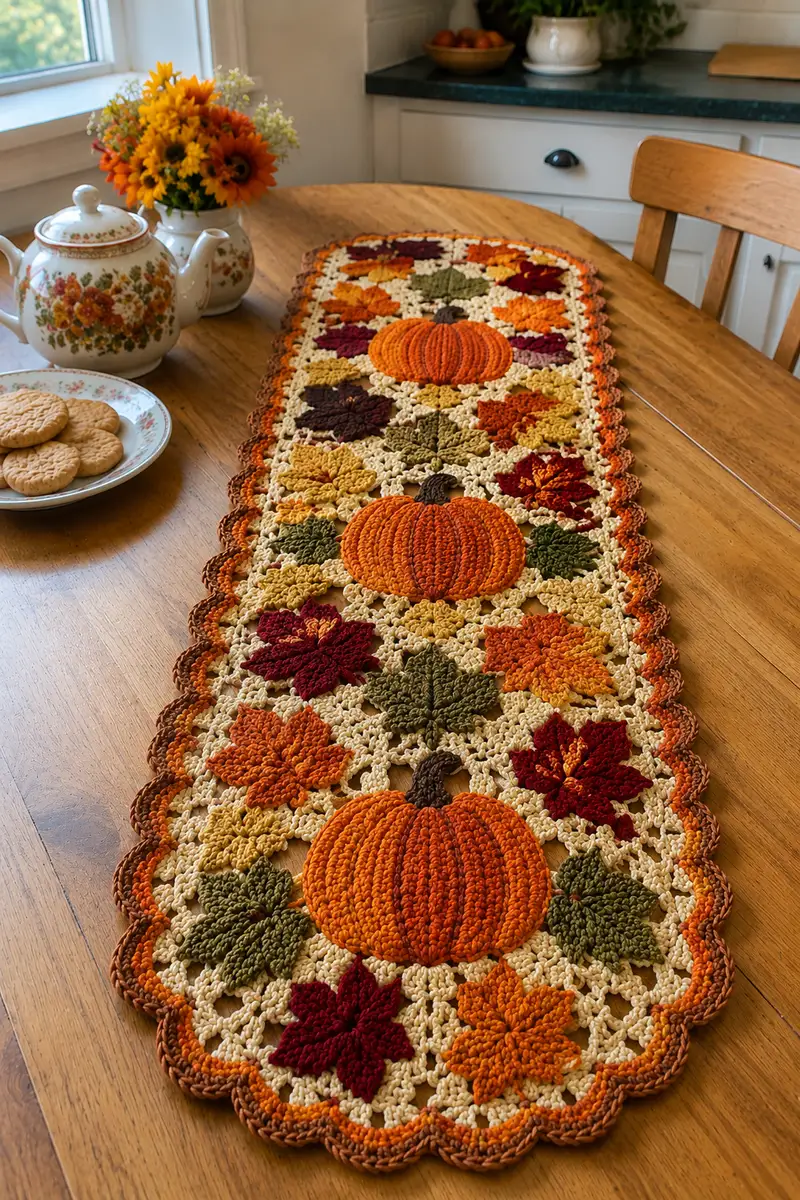
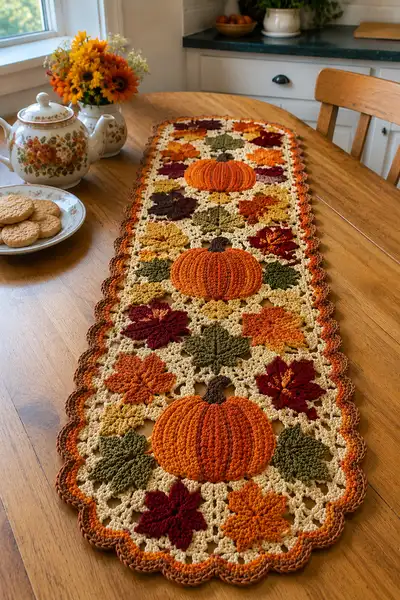
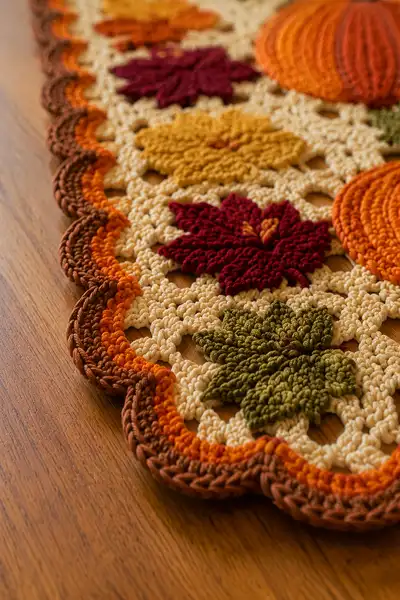
A warm, textured table runner featuring puffed pumpkins and raised maple leaves on a cream lattice. Rich autumn tones—pumpkin orange, mustard, olive, burgundy and chestnut—are arranged in repeating motifs with a scalloped multicolor border. The runner lays flat and is perfect for a harvest table, entry console, or seasonal centerpiece. Detailed instructions guide motif construction, joining and an elegant scalloped edging for a polished finish.
Progress Tracker
0% Complete
— Overview :
Info :
This pattern builds the runner from three primary motif types: pumpkin medallions (large, textured), maple-style leaves (raised, 8-point), and a small 4-petal filler motif. Motifs are worked separately and joined into a staggered rectangular grid. The cream lattice is achieved by working a joining round when assembling each motif into place. Finally a multicolor scalloped edging is worked around the assembled runner. Use worsted cotton or cotton blend for crisp stitch definition. Gauge is motif-dependent; adjust hook if needed to match motif sizes.
— Pumpkin Medallion (Make 3) :
Round 1 :
6 sc in magic ring (6)
Round 3 :
(1 sc, inc) x 6 (18)
Round 4 :
(2 sc, inc) x 6 (24)
Round 5 :
(3 sc, inc) x 6 (30)
Round 6 :
(4 sc, inc) x 6 (36)
Round 7 :
(5 sc, inc) x 6 (42)
Round 8 :
(6 sc, inc) x 6 (48)
Round 9-12 :
1 sc in each st around (48)
Info :
This establishes a flat circular base for the pumpkin. Use these rounds to check overall diameter. If your circle is significantly smaller/larger than pictured, change hook size accordingly. Place a stitch marker at the start of round and move it each round.
Round 13 :
BLO 1 sc in each st around (48)
Round 14 :
1 sc in each st around (48)
Round 15 :
Change to pumpkin orange. (1 sc in next 3 sts, 1 fpdc around next st) x 12 (48)
Round 16 :
Working fpdc from previous round: (1 sc in next 3 sts, 1 fpdc around corresponding post) x 12 (48)
Round 17 :
Repeat Round 16 to build post ribs (48)
Info :
These front post double crochets create the raised ribbing that forms pumpkin lobes. Keep tension slightly firmer on post stitches so ribs hold shape. There are 12 ribs created across rounds 15-17 — count groupings of 4 regular sts then a post stitch.
Round 18 :
(1 sc in next 3 sts, 1 fpdc) x 12 (48)
Round 19 :
1 sc in each st around (48)
Round 20 :
1 sc in each st BLO (48)
Round 21 :
(6 sc, 1 dec) x 6 (42)
Round 22 :
(5 sc, 1 dec) x 6 (36)
Info :
Begin gentle stuffing with small amounts of polyfill placed into the center; the ribs should start to puff. Stuff moderately — firm enough to hold lobes but not so firm that stitches stretch open.
Round 23 :
(4 sc, 1 dec) x 6 (30)
Round 24 :
(3 sc, 1 dec) x 6 (24)
Round 25 :
(2 sc, 1 dec) x 6 (18)
Round 26 :
(1 sc, 1 dec) x 6 (12)
Info :
Fasten off leaving a 12–18" tail. Pull tail to close and weave into back of pumpkin to secure. Use tail to flatten and shape base if needed. Do not overstuff; the pumpkin should have visible ribbed lobes from the fpdc rows.
Stem (Make 3) :
Join chestnut/brown yarn to center of closed pumpkin.
Round 1 :
ch 2, 3 hdc in same st, turn (3)
Round 2 :
1 hdc in each st across, ch 1, turn (3)
Round 3 :
1 sc in each st, fold stem and sl st through back loops to form a short stem, fasten off, leave long tail for sewing
Info :
Sew stem to pumpkin center, angle slightly forward so pumpkin sits with stem visible; secure with several passes and weave tail into pumpkin interior.
— Raised Maple Leaf Motif (Make 12-16 depending on spacing) :
Round 1 :
6 sc in magic ring (6)
Round 3 :
(1 sc, inc) x 6 (18)
Round 4 :
(2 sc, inc) x 6 (24)
Round 5 :
1 sc in each st around (24)
Round 6 :
ch 1, *(sc, ch 2, sc) in same st (picot cluster for leaf base), sk 2 sts, sl st in next st* rep around to create 6 points; sl st to join (12 clusters)
Round 7 :
Working into each cluster point: join yarn to a cluster ch-2 space, (ch 2, 3 dc, ch 2, sl st) to form a petal base; rep for each cluster (6 large petals)
Info :
For leaf texture, work alternating front and back post stitches along petal edges to simulate veins. Use slightly smaller hook if petals feel loose.
Round 9 :
Work each petal: (ch 1, 1 sc, 1 hdc, 3 dc, 1 hdc, 1 sc) all into same petal base. Repeat for all petals (6 petals)
Round 10 :
Return to central 24-st round with sl st into base, 1 sc in each st around to tidy join (24)
Round 11 :
Switch to contrasting tone for leaf center 'vein' detail. Using a tapestry needle and long tail, stitch a central vein across each petal with duplicate stitch or surface slip stitches; leave visible raised line.
Info :
Block each leaf flat after finishing to open petals and set shape. Leaves are raised but relatively flat for joining. Use pins to shape vein ridges during blocking.
Round 12 :
Fasten off and weave in ends. Leave a long tail for sewing into lattice when joining motifs into runner.
— Small Filler Motif (Make 18-24) :
Round 1 :
6 sc in magic ring (6)
Round 3 :
(1 sc, inc) x 6 (18)
Round 4 :
ch 1, *sl st in next st, ch 3, sl st in next st* repeat 6 times to create small looped petals; fasten off (18)
Info :
These make the 4-to-6 petal filler pieces seen in the lattice intersections and help stabilize motif joins. Work in mustard, olive or burgundy for color pops.
— Background Lattice Join Motif (Make enough to connect motifs into rows) :
Round 1 :
With cream/ivory yarn, ch 6, join to form loop with sl st (or work a small ring: 6 sc in magic ring)
Round 2 :
ch 3 (counts as dc), 11 dc into ring, sl st to top of ch-3 (12 dc)
Round 3 :
ch 1, *1 sc in next dc, ch 3* around, sl st to join creating 12 ch-3 loops
Round 4 :
In each ch-3 loop: (sc, hdc, 3 dc, hdc, sc) to create a 12-petal motif; sl st to join
Info :
These small lattice rosettes function as join points between pumpkin and leaf motifs. When assembling the runner, you will position a lattice motif at each intersection between motifs and whipstitch them together through back loops for an open lattice look.
Round 6 :
1 sc in each st around (60) - this creates a sturdier join surface
Round 7 :
Fasten off leaving a long tail for joining.
— Layout & Joining Sequence :
Info :
Layout for pictured runner: three pumpkin medallions arranged along the center spine spaced evenly. On each side of the pumpkins are alternating leaf motifs and small filler motifs arranged in a grid of 3 motifs across and 7 rows long (exact count depends on desired runner length). Use blocking to square motifs if needed so edges meet cleanly. Pin entire layout onto flat surface following photo reference before sewing.
Join Step 1 :
Begin by joining motifs row by row using whip stitch to connect corresponding outer sc rounds. Place lattice rosettes at intersections and sew each motif to adjacent motifs through back loops only to create the open lattice effect. Use cream yarn for most joins so it blends into background.
Join Step 2 :
Work across the first row: align three motif edges (pumpkin, leaf, pumpkin layout depending on row). Sew from center outward to prevent distortion. Make 5-6 small stitches per 1" of edge for secure seam (adjust for yarn thickness).
Join Step 3 :
After completing each row, sew the row below to the previous row by aligning lattice rosettes and securing with whip stitch through the back loops of both rosettes and motif edges. Keep tension even so runner lays flat.
Info :
As you join, periodically flip runner over and check for puckering. If seam is tight, take out a few stitches and redistribute; if loose, add a few extra securing stitches. Use pins to hold motifs in place while sewing.
— Scalloped Multicolor Border :
Info :
Border is worked in rounds around the entire assembled runner. Work 3-color gradient from bright orange to burnt orange to chestnut. For each color change, fasten off and join new color at the start of a round. Carry yarn along edge if you prefer continuous gradient without tails, but for crisp stripes change and weave tails.
Round 1 :
With cream yarn, single crochet evenly around entire runner edge placing 1 sc in every stitch and 3 sc in each corner or curve to keep edge smooth. Aim for a multiple of 6 stitches around to simplify scallops. (Estimate total stitches: measure as you go)
Round 2 :
Working into each st around, 1 sc in next 2 sts, ch 1 to create small picot points for texture; repeat around. Fasten off cream and join bright orange.
Round 3 :
With bright orange: *sk 1, 5 dc in next st (shell), sk 1, sl st in next st* — repeat around creating scallop shells at regular spacing; adjust spacing so shells fall over lattice openings (approx every 6 sts)
Round 4 :
1 sc in each st around to secure shells and even edge (work into shell peaks for consistent look)
Round 5 :
Change to burnt orange: in each shell peak work (ch 2, 3 tr, ch 2, sl st) to add height and ruffle; between shells work 2 sc for reinforcement
Round 6 :
Change to chestnut brown: working into shell bases, *1 sc, 1 hdc, 3 dc, 1 hdc, 1 sc* to create a deep scallop with a raised ridge; repeat around
Round 7 :
Finishing round: slip stitch around to tidy edge, then weave in all ends. If desired, block entire runner again to make scallops lie flat and edges even.
Info :
For crisp gradient look, crochet entire bright orange round before switching. Use a tapestry needle to weave color change tails along backside of border so they are not visible from front.
— Finishing Touches :
Info :
Inspect the runner front and back for any loose tails. Weave each tail at least 2" into the fabric and trim. Lightly steam-block the assembled runner on a protected surface using steam or a warm iron on low with a cloth between iron and crochet; do not press hard to preserve texture. If desired, secure a thin non-slip fabric strip to underside center to prevent slippage on wooden tabletops.
Round 1 :
Optional surface embroidery: Use small stitches in mustard and burgundy to add central leaf veins or pumpkin highlights. Use two strands of cotton for clear surface embroidery on worsted cotton yarn.
Info :
Care instructions: Hand wash cold and lay flat to dry for best color retention and to preserve shape. Cotton tends to soften and may relax after washing — reshape gently while damp.
Completing this runner is such a satisfying autumn project — the textured pumpkins and layered leaves bring seasonal coziness to any table. Each motif is a tiny moment of craft, and the scalloped edge ties everything together beautifully. I hope you enjoy making it as much as I enjoyed designing the layout. 🍁🧶 Add fresh warm colors and layering for a perfectly styled harvest table. Happy stitching!