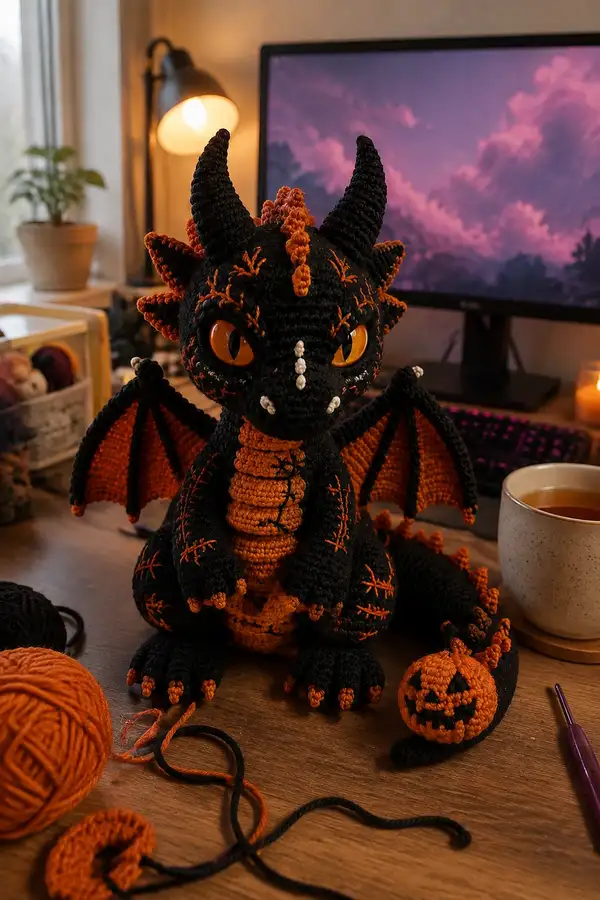
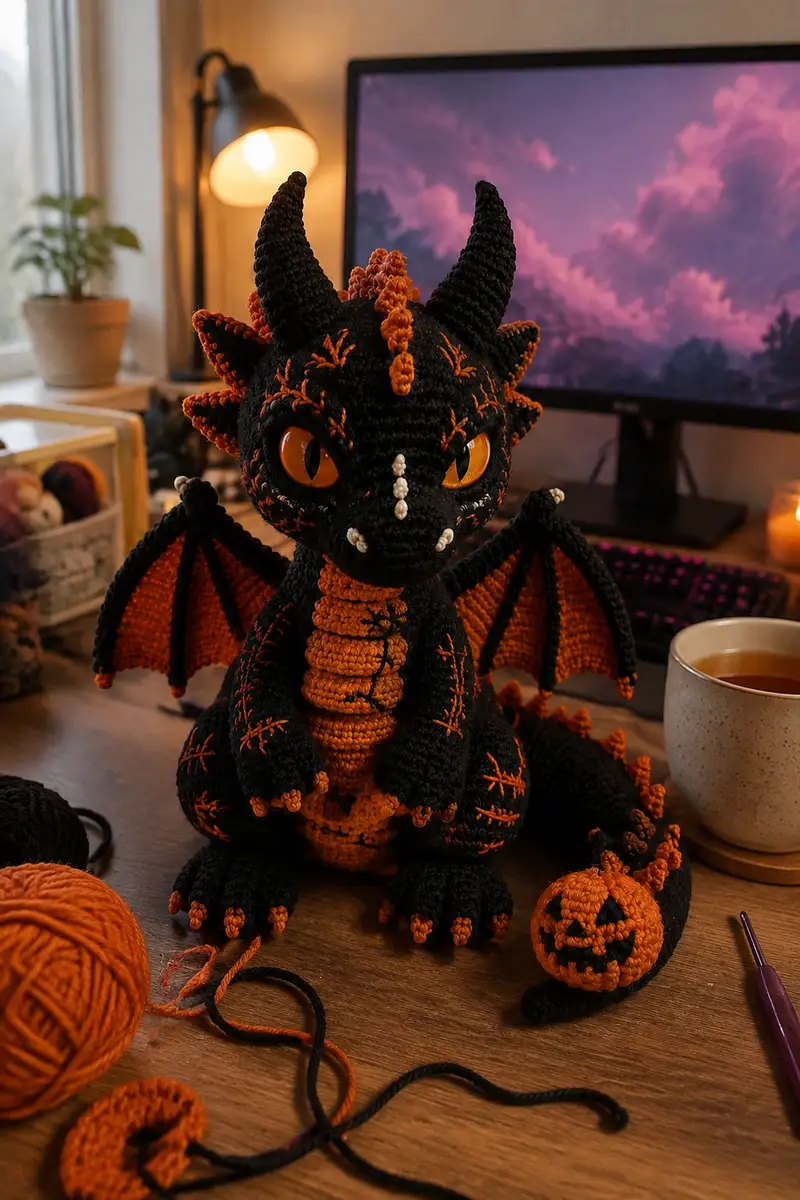
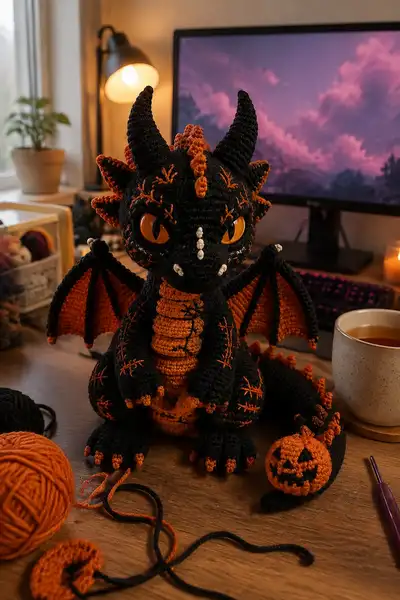
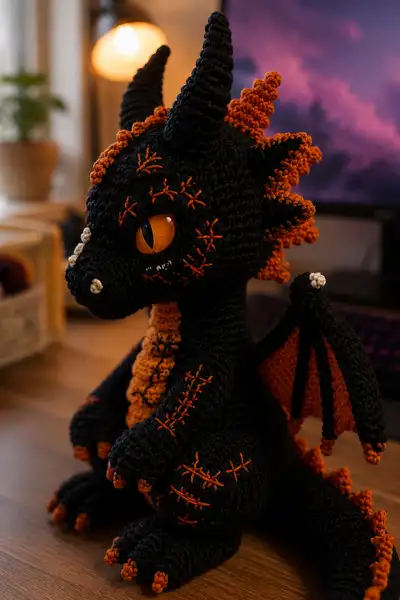
Create a dramatic black-and-orange spooky dragon amigurumi inspired by the images. This Halloween-themed dragon features expressive amber safety eyes, curled horns, scalloped orange spikes, embroidered stitch details, wing membranes in contrasting orange, and a little jack-o-lantern on the tail. The pattern uses worsted weight yarn and tight amigurumi construction for a sturdy, poseable finished friend.
Progress Tracker
0% Complete
— Head :
Round 1 :
6 sc in magic ring (6)
Round 3 :
(1 sc, inc) x 6 (18)
Round 4 :
(2 sc, inc) x 6 (24)
Round 5 :
(3 sc, inc) x 6 (30)
Round 6 :
(4 sc, inc) x 6 (36)
Round 7 :
(5 sc, inc) x 6 (42)
Round 8 :
(6 sc, inc) x 6 (48)
Round 9-12 :
1 sc in each st (48) (work 4 rounds) — Builds height for forehead and eye sockets
Info :
Place safety eyes between rounds 13-14 (see eye placement below). For large amber eyes place the center of each eye approximately 10-12 stitches apart across the front of the head. Use pins to check expression before locking washers.
Round 13 :
1 sc in each st (48)
Round 14 :
1 sc in each st (48)
Info :
If adding eyelids or stitched detail over the eye, leave long tail for later embroidery. Stop and pin eyes now to visualize eyebrow placement and stitched scars.
Round 15 :
(6 sc, dec) x 6 (42)
Round 16 :
(5 sc, dec) x 6 (36)
Round 17 :
(4 sc, dec) x 6 (30)
Info :
Begin stuffing head lightly around the eye sockets but leave center less stuffed so the face will shape naturally. Use small amounts of stuffing to avoid lumps.
Round 18 :
(3 sc, dec) x 6 (24)
Round 19 :
(2 sc, dec) x 6 (18)
Round 20 :
(1 sc, dec) x 6 (12)
Round 21-24 :
1 sc in each st (12) (work 4 rounds) — neck stub, leave opening to attach to body later
Info :
Do not fasten off. Leave a long tail (approx 30-40cm) for sewing head to body. Final stuffing should be done through the neck opening; fill firmly but leave a little give for a natural head tilt.
Round 25 :
Fasten off leaving long tail for sewing. Weave in the last few stitches so the opening remains tidy (12)
Info :
Embroider face scars and stitches now or after attaching eyes and horns. Use stranded embroidery in contrasting orange for the signature stitch patterns shown in the photo.
— Muzzle / Snout (make 1, sew to head) :
Round 1 :
6 sc in magic ring (6)
Round 3 :
(1 sc, inc) x 6 (18)
Round 4-6 :
1 sc in each st (18) — lengthen snout (3 rounds)
Round 7 :
(2 sc, dec) x 6 (12)
Round 8 :
(1 sc, dec) x 4, 1 sc in remaining 4 sts (8) — shape nostril area
Round 9 :
1 sc in each st (8)
Info :
Stuff snout moderately firm and sew it to the front lower portion of the head aligning center with the eye line. Use the long tail to secure with invisible ladder stitch.
— Nostrils & Teeth (small details) :
Round 1 :
3 sc in magic ring (3) for each nostril (make 2) (3)
Round 2 :
Fasten off leaving tail for sewing. Position on snout tip and stitch in place.
Round 1 :
4 sc in magic ring for each tooth (make 6 small teeth) (4)
Round 2 :
Fasten off leaving tails and sew teeth along upper and lower jaw as shown, using cream yarn for contrast.
— Ears / Side Crests (make 2) :
Round 1 :
6 sc in magic ring (6)
Round 3 :
(1 sc, inc) x 6 (18)
Round 4 :
(2 sc, inc) x 6 (24)
Round 5-6 :
1 sc in each st (24) — flatten and shape forward
Info :
Sew ears to the sides of the head between rounds 10-14, angling slightly forward. Use pins to check symmetry before stitching.
— Spiral Horns (make 2) :
Round 1 :
6 sc in magic ring (6)
Round 3 :
(1 sc, inc) x 6 (18)
Round 4-6 :
1 sc in each st (18) (work 3 rounds) — horn base
Round 7 :
(2 sc, dec) x 6 (12)
Round 8-11 :
1 sc in each st (12) (work 4 rounds) — elongate spiral by working tight stitches
Round 12 :
(1 sc, dec) x 4, 1 sc in remaining 4 sts (8)
Round 13-14 :
1 sc in each st (8) (work 2 rounds)
Info :
Optionally insert a short length of craft wire or pipe cleaner for a poseable horn; wrap wire in yarn tail before stuffing. Sew horns to top of head between rounds 4-8, pointing slightly backward and outward like in the photo.
— Crown of Spikes (make 9-11 small spikes) :
Round 1 :
4 sc in magic ring (4)
Round 2 :
1 sc in each st (4)
Round 3 :
1 sc in each st BLO (4) — creates a curved ridge
Round 4 :
Fasten off leaving tail for sewing. Stuff lightly and sew in a row from forehead down the nape. Use orange contrast for outer ridges where needed.
Info :
Alternating colors (orange spikes over black base) create the scalloped ridge effect visible in the photos. Space spikes about 3-4 stitches apart along the center back of the head.
— Body :
Round 1 :
6 sc in magic ring (6)
Round 3 :
(1 sc, inc) x 6 (18)
Round 4 :
(2 sc, inc) x 6 (24)
Round 5 :
(3 sc, inc) x 6 (30)
Round 6 :
(4 sc, inc) x 6 (36)
Round 7 :
(5 sc, inc) x 6 (42)
Round 8 :
(6 sc, inc) x 6 (48)
Round 9-14 :
1 sc in each st (48) (work 6 rounds) — base girth and seat shaping
Info :
If making the orange belly panel, change to orange yarn now by finishing the last stitch of round 8 with orange. Carry black along inside if you prefer not to fasten off, or break and rejoin black later.
Round 15 :
1 sc in each st (48) (work in orange for belly center 18 sts; keep black stitches on sides)
Round 16 :
1 sc in each st (48)
Round 17 :
(6 sc, inc) x 6 (54) — gentle increase to create rounded belly
Round 18-22 :
1 sc in each st (54) (work 5 rounds) — body height
Info :
Begin stuffing body firmly through the top opening after round 20. Add stuffing gradually, focusing more in the lower belly so the dragon can sit upright without tipping forward.
Round 23 :
(6 sc, dec) x 6 (48)
Round 24 :
(5 sc, dec) x 6 (42)
Round 25 :
(4 sc, dec) x 6 (36)
Round 26 :
(3 sc, dec) x 6 (30)
Round 27 :
(2 sc, dec) x 6 (24)
Round 28 :
(1 sc, dec) x 6 (18)
Round 29 :
6 dec (6) — reduce to small opening for neck join
Info :
Before fully closing the body, position the head’s neck stub (12 sts) over the body opening and sew through both pieces with the long tails. Spread the 12-stub evenly across the 6-st body opening by lining edges and sewing with mattress/ladder stitch to create a firm seam.
— Front Belly Scales (worked in orange, make 1 panel) :
Round 1 :
Ch 12, starting in 2nd ch from hook: 11 sc across (11)
Round 2 :
Ch1, turn, 11 sc (11)
Round 3-8 :
Repeat Round 2 (11) (work 6 rounds) — creates a panel of belly ridges
Info :
Sew the panel to the front center of the body aligning lower edge to round 14 and top to round 8. Use black thread to embroider vertical join-lines if desired.
— Arms (Make 2) :
Round 1 :
6 sc in magic ring (6)
Round 3 :
(1 sc, inc) x 6 (18)
Round 4-6 :
1 sc in each st (18) — form small paw
Round 7 :
(2 sc, dec) x 6 (12) — taper into wrist
Round 8-12 :
1 sc in each st (12) (work 5 rounds) — lower arm
Info :
Stuff hands firmly, push filling into paw pads with a stuffing tool or pencil. Leave top of arm opening unstuffed until attachment to ensure clean seam.
Round 13 :
(1 sc, inc) x 6 (18) — increase for upper arm
Round 14-17 :
1 sc in each st (18) (work 4 rounds)
Round 18 :
Fasten off leaving long tail for sewing. Add light stuffing to upper arm; arms should be moderately stuffed to allow slight posing during sewing.
Info :
Sew arms to sides of body at approximately rounds 16-18 on the body, spacing them evenly. Use pins to get a natural relaxed forward pose before sewing.
— Paw Toes (Make 10 small toes to add to each paw) :
Round 1 :
3 sc in magic ring (3)
Round 2 :
Fasten off leaving tail and sew 3 toes to each paw front, spacing evenly. Use orange for visible claw tips.
— Legs (Make 2) :
Round 1 :
6 sc in magic ring (6)
Round 3 :
(1 sc, inc) x 6 (18)
Round 4 :
(2 sc, inc) x 6 (24)
Round 5-8 :
1 sc in each st (24) (work 4 rounds) — foot base
Round 9 :
(3 sc, dec) x 6 (18) — tuck toe area
Round 10-14 :
1 sc in each st (18) (work 5 rounds) — ankle and lower leg
Round 15 :
(1 sc, inc) x 6 (24) — increase into thigh
Round 16-20 :
1 sc in each st (24) (work 5 rounds) — thigh height
Round 21 :
(3 sc, dec) x 6 (18)
Round 22 :
(2 sc, dec) x 6 (12)
Round 23 :
Fasten off leaving long tail for sewing. Stuff foot very firmly so the dragon sits well; legs should be stable and heavy compared to arms.
Info :
Position legs roughly at bottom rounds 4-6 of the body, spaced about 12-14 stitches apart. Sew securely using ladder stitch and reinforce with extra passes for stability.
— Wing Membranes (make 2) :
Round 1 :
Ch 20, starting in 2nd ch from hook: 19 sc (19)
Round 2 :
Ch1, turn, 19 sc (19)
Round 3 :
Ch1, turn, (1 sc, inc) across to end to increase by 5 sts evenly (24)
Round 4-5 :
1 sc in each st (24) (work 2 rounds)
Round 6 :
1 sc in each st BLO (24) — creates slight curve
Info :
Work membranes in orange for the inner wing and reserve black for the ribbing. The membranes should have a gently curved peak at the outer edge to mimic bat-like wings.
— Wing Ribs & Edging (make 2) :
Round 1 :
With black, ch 1 at wing base, sc across edge attaching to the membrane edge: 24 sc (24) — work along the membrane outer edge
Round 2 :
1 sc in each st (24)
Round 3 :
Ch 1, *sl st 3, hdc in next 3, sl st 3* along outer edge to form scalloped tips (24 total stitches used as spacing; adjust evenly)
Round 4 :
Fasten off leaving long tail for sewing. Create raised ribs by embroidering 3-4 lines of black yarn from wing base to outer edge. Use backstitch technique to anchor.
Info :
Sew wings to body at approximately rounds 12-14 on the sides, slightly behind the arms. Angle them so they sit partially open for a display look.
— Tail :
Round 1 :
6 sc in magic ring (6)
Round 3 :
(1 sc, inc) x 6 (18)
Round 4-8 :
1 sc in each st (18) (work 5 rounds) — taper length
Round 9 :
(3 sc, dec) x 3 (15)
Round 10-15 :
1 sc in each st (15) (work 6 rounds) — elongate tail
Round 16 :
(2 sc, dec) x 3 (12)
Round 17-20 :
1 sc in each st (12) (work 4 rounds)
Round 21 :
(1 sc, dec) x 4 (8)
Round 22 :
1 sc in each st (8)
Round 23 :
Fasten off leaving long tail for sewing. Stuff tail lightly; tail should be flexible but hold shape. Add internal wire if you want poseable tail.
Info :
Sew small scalloped spikes down the tail by attaching the small spike pieces every 3-4 stitches along the length. End the tail with a pumpkin accessory for a Halloween look.
— Pumpkin Tail Accessory :
Round 1 :
6 sc in magic ring (6) using orange (6)
Round 3 :
(1 sc, inc) x 6 (18)
Round 4 :
(2 sc, inc) x 6 (24)
Round 5 :
1 sc in each st (24)
Round 6 :
(3 sc, dec) x 4 (20)
Round 7 :
(2 sc, dec) x 4 (16)
Round 8 :
1 sc in each st (16)
Round 9 :
(1 sc, dec) x 4 (12)
Round 11 :
Fasten off leaving tail for sewing. Embroider jack-o-lantern face with black yarn before closing completely: triangular eyes and a toothy grin. Use small amounts of stuffing before final closure.
— Decorative Surface Embroidery (Scars & Stitches) :
Info :
Using stranded orange yarn and a yarn needle, stitch large X-style patch stitches across the shoulders, thighs, and cheeks as shown in the photo. Use long running stitches for a stitched scar effect and small French-knots for anchoring ends. Work symmetrical patterns so the dragon’s left and right sides mirror each other.
— Final Assembly & Finishing Touches :
Info :
Pin all major parts in place before any permanent sewing. Sew head to body using the head tail and body tail, then sew arms and legs. Attach wings and tail last. Add embroidered stitches, glue washers on safety eyes if desired, and hide all tails.
Info :
For final texture, create tiny bobble clusters along the wing tips and tail with small 3-4 sc bobbles in orange to mimic the decorative bumps in the images. Use consistent spacing and the same stitch size for a cohesive look.
This Halloween dragon amigurumi brings together sculptural shaping, bold orange accents, and playful embroidered scars to create a spirited seasonal companion. Each carefully worked piece — from spiraled horns to the tiny pumpkin tail — adds to the personality and charm of your finished dragon. The detailed instructions will help you build a sturdy, display-ready figure you can be proud of. 🧶🎃✨