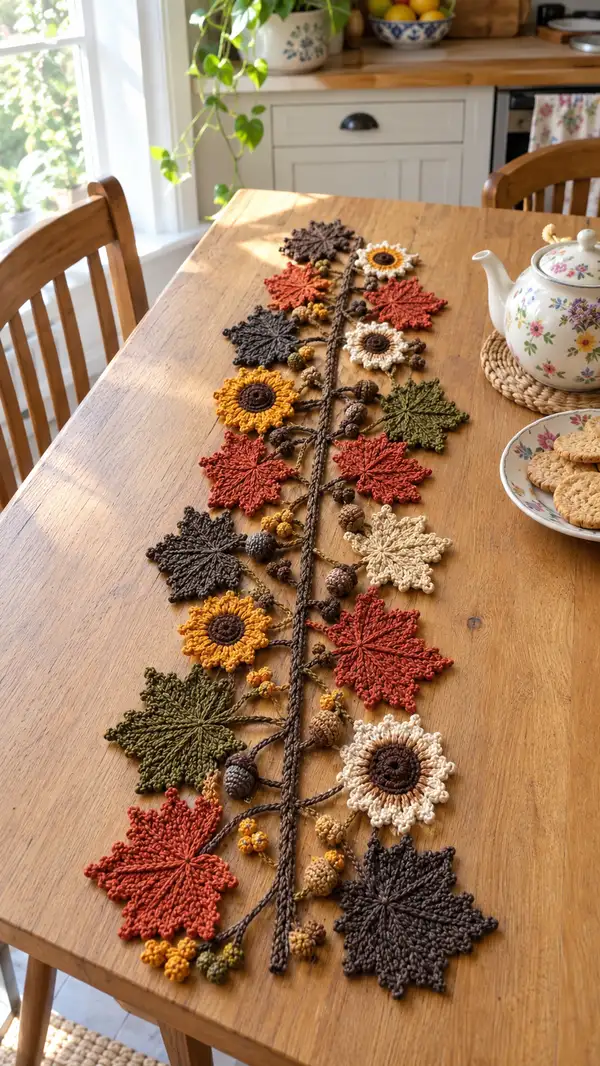
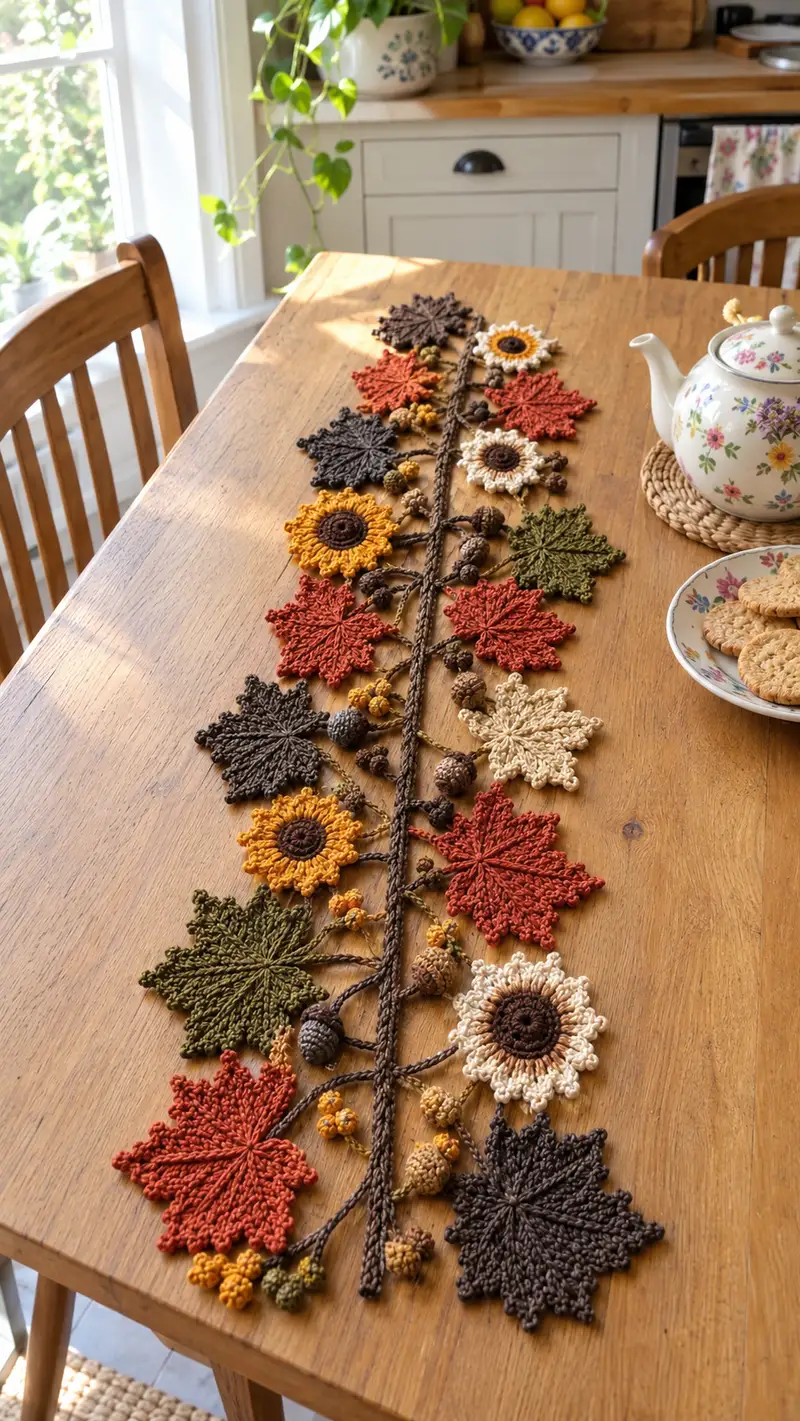
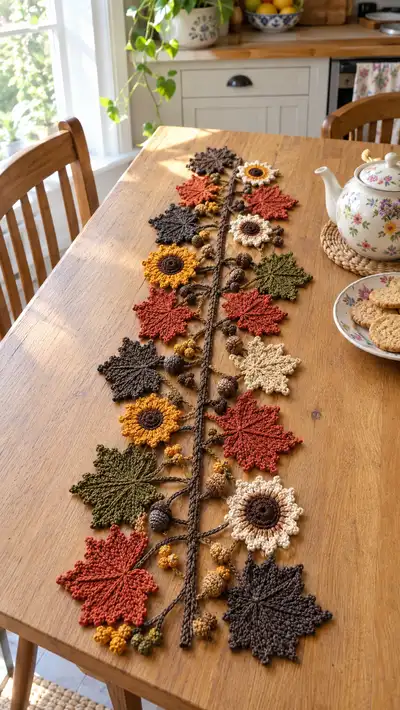
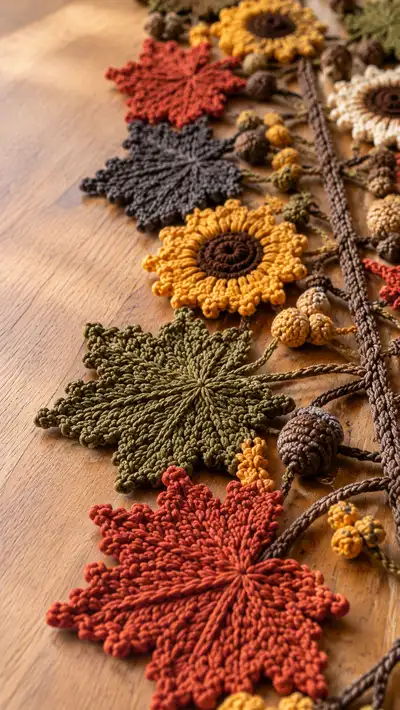
This long, decorative table garland features crocheted maple-style leaves, textured sunflowers, acorns and berry clusters joined along a braided stem. Warm autumn shades—rust, olive, mustard, cream and cocoa—create a cozy seasonal centerpiece. The pattern is modular so you can make as many motifs as you like and arrange them along a long runner or shorter vignette. Detailed stitch-by-stitch instructions and assembly notes help you recreate the layered, dimensional look shown in the photos.
Progress Tracker
0% Complete
— Overview & Notes :
Info :
This pattern is modular: make leaf motifs, sunflower motifs, acorn bodies and caps, and berry clusters. Join them along a long central braided stem or crocheted cord. Use worsted weight cotton for crisp stitch definition. The sample uses 12 leaf motifs, 4 sunflowers, about 10 acorn elements (caps + bodies), and 12 small berry clusters. Match your table length and repeat motifs as needed.
Info :
Gauge is not critical; stitch counts are provided to keep motifs consistent. Where motifs are repeated, maintain exact stitch counts for symmetry when joining. Block flat motifs lightly before assembly for a polished look.
— Maple-Style Leaf (Make 12 - assorted colors) :
Round 1 :
Start with mr, 6 sc into ring (6)
Round 3 :
(1 sc, inc) x 6 (18)
Round 4 :
(2 sc, inc) x 6 (24)
Round 5 :
(3 sc, inc) x 6 (30)
Info :
These first rounds form the leaf center; keep tension even. Change to desired leaf color if working from a different color for centers.
Round 6 :
(4 sc, inc) x 6 (36)
Round 7 :
(5 sc, inc) x 6 (42)
Round 8 :
(6 sc, inc) x 6 (48)
Info :
Now we have a round base with 48 sts. The next rounds form radiating ribs for the leaf and the points. Use stitch markers to mark 12-stitch segments that will become leaf lobes (48/6 = 8 segments, or mark every 6 sts if you want 8 lobes). In the sample leaves we create 8 deep ribs and 8 outer points; pick a division you like and keep consistent across leaves.
Round 9 :
*1 sc in next 3 sts, fpdc around next st, 1 sc in next 3 sts* rep across to total 48 (48)
Round 10 :
1 sc in each st (48)
Info :
Use fpdc (front post double crochet) to make slight raised ribs that radiate. On R9 place fpdc at the approximate rib location (every 6th stitch). This creates the central veins in the leaf when worked in later rounds with elongated stitches.
Round 11 :
(BLO) 1 sc in each st (48)
Round 12 :
*Ch3, sk 1 st, 1 dc in next 4 sts, ch2, sl st in base to form small arch for point; rep around to form point arches. Work total 8 arches (counts remain 48 as ch and sl do not consume a stand-alone st)*
Round 13 :
Working into arch spaces: *(sc, hdc, dc, tr, dc, hdc, sc) into each arch space to form a pointed lobe; sl st into next base st to anchor* x 8 (48 worked elements, but stitch count across base remains 48)
Info :
Each lobe uses taller stitches to create the point. Keep the number of base anchors equal so the base stitch count remains 48. Stretch each lobe flat and place pins when blocking to sharpen points.
Round 14 :
Picot edge: sl st into first st of a lobe, *(sc, ch2, sl st in 2nd ch for picot, sc) across outermost stitches of each lobe to add a tiny scallop* x 8. Fasten off leaving a 12-15cm tail for joining (48 anchors)
Info :
Fasten off and block leaf on foam with pins, shaping each lobe to a crisp point. Repeat for each leaf motif in chosen colors. If you prefer a shallower leaf, omit the tr in round 13 and use dc instead for a softer point.
— Textured Sunflower Motif (Make 4) :
Round 1 :
With chocolate brown, mr, 6 sc into ring (6)
Round 3 :
(1 sc, inc) x 6 (18)
Round 4 :
(2 sc, inc) x 6 (24)
Round 5 :
1 sc in each st around (24)
Info :
This creates a tight sunflower center. We will work a spiral of front loops to give the center a coiled look. You can work an additional round of brown sc if you prefer a larger center before switching color.
Round 6 :
With brown, 1 hdc in each st BLO (24) - this creates a subtle ridge (24)
Info :
Change to mustard/gold for petals. Fasten off brown and join gold in any stitch to start petal construction.
Round 7 :
Join mustard, *ch2, puff into same st (yarn over 4 times, insert, pull up loop, yarn over and draw through loops twice to form puff), ch1, sl st into next st* rep around to form 24 puff petals (This alternates puff and sl st into next st; total anchor points remain 24)
Round 8 :
Into each puff space: *(sc, hdc, dc, tr, dc, hdc, sc) to form fuller petal; sl st to next anchor* x 24 (anchoring maintains structure)
Info :
For extra texture, work petals in back loops of the base round to make the center sit proud. Keep loops tall and stitch tightly into puff spaces — the dense petals create the sunflower silhouette.
Round 9 :
Picot round: sl st along petal outer edges and make a small ch2 picot at the tip of every other petal for a delicate scalloped edge. Fasten off, leaving long tail for joining.
Round 10 :
Optional back layer: If you want a two-row petal for depth, rejoin mustard at the back of petals and repeat Round 8 but slightly shorter (sc, dc, dc, sc) into each petal base to create a fuller flower. Fasten off and block.
Info :
Block sunflower so petals sit flat. You can lightly steam-block cotton yarn. If your petals curl, pin them flat and spray with water to set, letting dry overnight.
— Acorn Body (Make 8) :
Round 1 :
With chocolate brown, mr, 6 sc in ring (6)
Round 3 :
(1 sc, inc) x 6 (18)
Round 4 :
(2 sc, inc) x 6 (24)
Round 5 :
1 sc in each st around (24)
Round 6 :
(3 sc, inc) x 6 (30)
Info :
At this point you have a small rounded capsule. Continue to grow height by working even rounds or doing slight increases then decrease to shape a tapered bottom.
Round 7 :
1 sc in each st around (30)
Round 8 :
(4 sc, inc) x 6 (36)
Round 9 :
1 sc in each st around (36)
Round 10 :
(4 sc, dec) x 6 (30)
Round 11 :
(3 sc, dec) x 6 (24)
Round 12 :
(2 sc, dec) x 6 (18) - begin stuffing lightly to form rounded acorn shape
Round 13 :
(1 sc, dec) x 6 (12)
Round 14 :
6 dec (6) - finish stuffing as needed, fasten off leaving long tail for sewing to cap (6)
Info :
Stuff the acorn body lightly — we want a plump yet soft piece. Fasten off and weave the tail through remaining sts to close. Set aside for assembly.
— Acorn Cap (Make 8) :
Round 1 :
With a lighter brown or tan, mr, 6 sc in ring (6)
Round 3 :
(1 sc, inc) x 6 (18)
Round 4 :
(2 sc, inc) x 6 (24)
Info :
The cap uses textured bobble and popcorn stitches to mimic the rough acorn cup. You will work several textural rounds to create that look.
Round 5 :
*(bobble in next st, sc in next 2 sts)* repeat around to create a bobble textured band. Total base anchors: 24 (24)
Round 6 :
1 sc in each st around (24)
Round 7 :
*(sc2tog over next 2 sts, bobble in next st, sc in next st)* repeat around to shape edge for snug fit (18)
Round 8 :
1 sc in each st around (18)
Round 9 :
Fold cap over acorn body to check fit. Make any adjustment rows here: if cap is large, add a decrease round: (2 sc, dec) x 6 (15)
Info :
Sew the cap to the body using the long tail from the body. Add a small stem by chaining 6 and closing into a loop, or add a short chain tail sewn into cap top for a realistic acorn look.
— Tiny Berry Cluster (Make 12 clusters; each cluster contains 3 small berries) :
Round 1 :
With mustard or coordinating color, mr, 6 sc in ring (6)
Round 3 :
1 sc in each st around (12)
Round 4 :
Start bobble: *(yarn over, insert, pull up loop) x 3 around same st, yarn over and pull through all loops to form small bobble*, sl st to next st; rep to make 3 bobbles attached to a short chain (the cluster)
Info :
Construct berry clusters as small bobbles attached on a 6-ch stem. Make 3 berries per cluster and tighten tails to anchor. Leave tails long for sewing and arranging along stem.
— Long Braided Stem (Make 1 - length to suit table; sample length ~160cm) :
Round 1 :
With chocolate brown, ch 400 (or desired length for your table runner; sample used chains totaling approx. 160cm), do not join unless you prefer a looped cord (long chain)
Round 2 :
Using 3.0mm hook, sc in 2nd ch from hook and in each ch across to create a firm single-crochet cord. This creates one flat cord that will become one of three strands for braiding. (chain count = 399 sc)
Round 3 :
Make two more identical cords (total 3 cords) to braid, each starting with same chain length and sc along chain. Keep the ends long for finishing.
Info :
Alternatively, make a single thicker cord by using a smaller hook and crocheting in the round into the chain to create a rope. The sample used three cords braided together for a natural twisted branch look. Ensure all three cords are equal length for a neat braid.
Round 4 :
Join the three cords by aligning ends and tying a temporary knot 6cm from the end. Braid the cords together tightly for the length of the garland. Finish by whipping the end with yarn for a neat closure. Leave tail for attaching motifs.
Info :
To make the stem look more organic, twist one cord slightly before braiding and vary tension slightly. For a stiffer stem, insert a thin wire down one cord before braiding (fold wire ends into a loop to prevent sharp points).
— Joining & Connecting Motifs (Assembly Prep Rounds) :
Round 1 :
Lay out the braided stem on a flat surface and arrange motifs in desired order. In the sample the order repeats as: leaf, small berry cluster, sunflower, acorn cluster, leaf, leaf, sunflower, etc., creating asymmetry for natural look.
Info :
Pin motifs to stem with sewing pins or tapestry needles to test balance. The sample alternates colors so warm tones cluster toward the center and cooler olive leaves provide contrast at edges.
Round 2 :
Attach motifs using long tails left when finishing motifs. Thread tail onto yarn needle and sew the motif to the stem by passing needle through the braid and through the motif base several times. Use whip stitch underneath to create invisible seam.
Round 3 :
For dangling acorns and berries, leave a short chain stem from the motif (6-10 ch) before attaching to the main braid so they hang naturally. Knot securely and weave ends into braid to hide tails.
Info :
Use double sewing passes for heavier elements like acorns to avoid sagging. If using cotton yarn, a small dab of craft glue at the knot helps keep stems secure over time.
— Detailed Joining Sequence (step-by-step across ~20 actions) :
Round 1 :
Step A: Position first leaf about 10cm from the braided stem end. Using 12-15cm tail, sew through braid core and leaf base with 10 evenly spaced stitches. Fasten off and weave in tail for a hidden join.
Round 2 :
Step B: Attach a 3-berry cluster next to the leaf. Create a 6-ch stem from the berry cluster long tail and weave the chain through a gap in the braid, knotting tightly and burying tail inside braid by sewing around it twice (no visible knots).
Round 3 :
Step C: Attach a sunflower. Center the sunflower so its back meets the braid; use a long tail and whip-stitch around the inner brown center through braid. Make 12 small stitches around the center to hold it flat. Add an extra anchoring stitch through the petals on each side so it does not flop.
Round 4 :
Step D: Dangle two acorns and one berry cluster from the same region for a small cluster. Use a 10-ch length for each acorn stem and tie to the braid with a tight knot. Sew over knot with a few stitches to hold in place; hide ends inside braid.
Round 5 :
Step E: Add another leaf 6-8cm away from the cluster, alternating leaf color and orientation (flip some leaves to have points facing inward, others outward). This prevents visual repetition and creates a natural fall-leaf look.
Info :
Spacing: In the sample, motifs are roughly 8-12cm apart center-to-center. For a denser runner, reduce spacing to 5-6cm; for a sparse look, increase spacing to 15cm or more.
Round 6 :
Step F: Continue the pattern down the braid, repeating clusters of sunflower + acorn + leaf, occasionally reversing order to avoid symmetry and achieve organic appearance. Keep a visual rhythm: three heavier clusters alternating with two lighter single leaves.
Round 7 :
Step G: Secure the final motifs within 10cm of the braid end and finish by whipping the braid end and tucking tails inside. Add a small hanging loop if you intend to hang the garland instead of laying flat.
Info :
Check all joins on back side: make sure any sewn tails are fully woven in and that no stuffing or loose yarn shows through. Use small backstitches around heavy motifs to stabilize them for transport.
— Optional Decorative Extras & Finishing Rounds :
Round 1 :
Add embroidered veins: with contrasting darker yarn, use long straight stitches from center to tip of each leaf, 6-8 veins per leaf depending on shape. Knot behind and hide tails inside motif using tapestry needle.
Round 2 :
Optional stiffening: for a more permanent table runner (not to be laundered frequently), use diluted fabric stiffener sprayed over pinned motifs and allowed to dry flat. Do not stiffen braided stem if you want flexibility.
Info :
For a subtle sheen, block cotton motifs with a spray starch and iron on low heat through a pressing cloth. Test on a scrap first.
Round 3 :
Edge trimming: create short tassels at each braid end by folding 8 strands of yarn (approx. 10cm each), attaching to braid with lark's head knots and trimming ends even for a polished finish.
Round 4 :
Final inspection: pin the completed garland along a ruler to ensure it lies flat; make small adjustments in joins if any motifs pull the braid to one side.
Info :
When cleaning, spot-clean motifs with damp cloth. Avoid machine washing if you used stiffener or if the acorns were glued. Store flat to preserve shape or roll gently with tissue between motifs.
This autumn runner brings warmth and texture to any table — an easy way to celebrate seasonal color and handcrafted detail. Each leaf, sunflower, acorn and berry is a tiny piece of art that, when joined, creates a lush, layered centerpiece perfect for family gatherings or quiet mornings with tea. I love how customizable the layout is — make yours long for a dining table or short for a console. 🧶🍁 Happy stitching and enjoy the cozy finish! 🍂