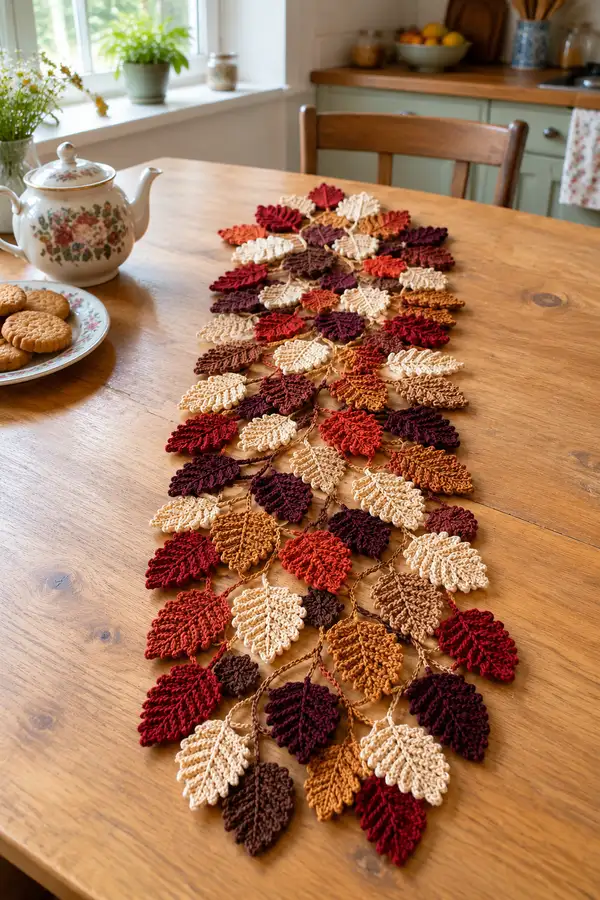
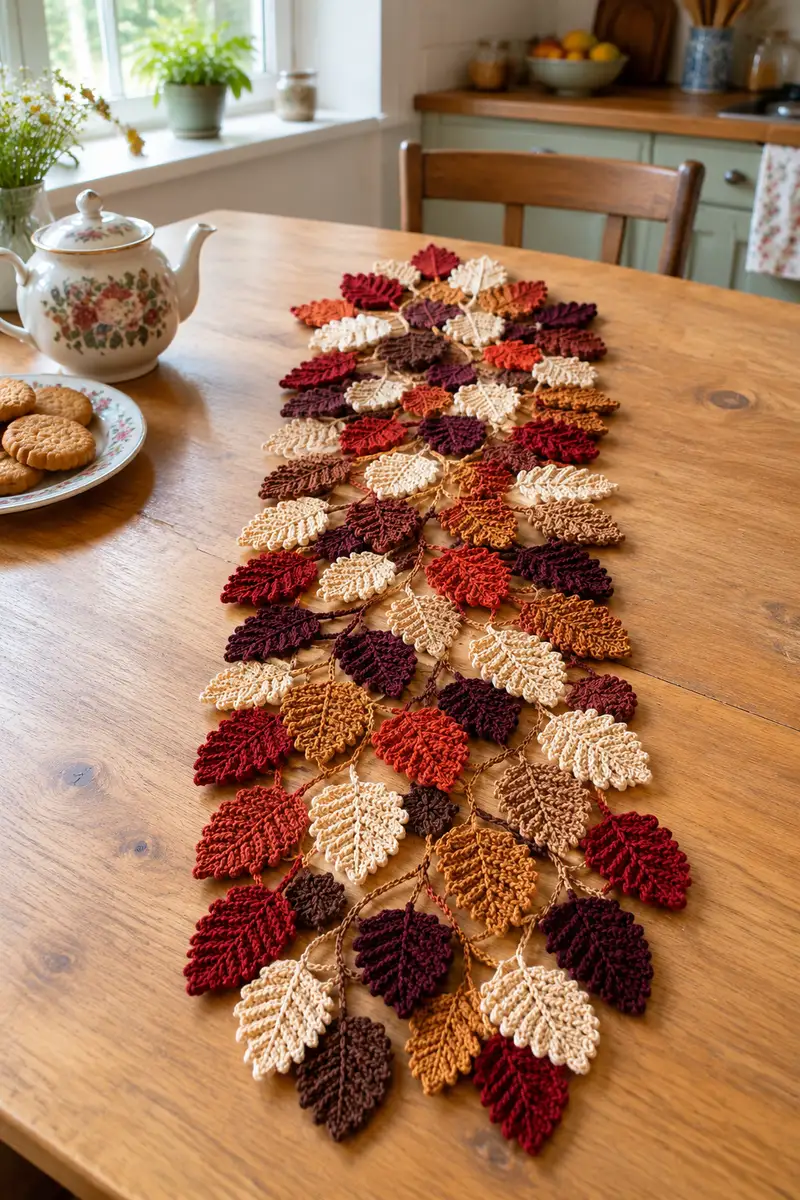
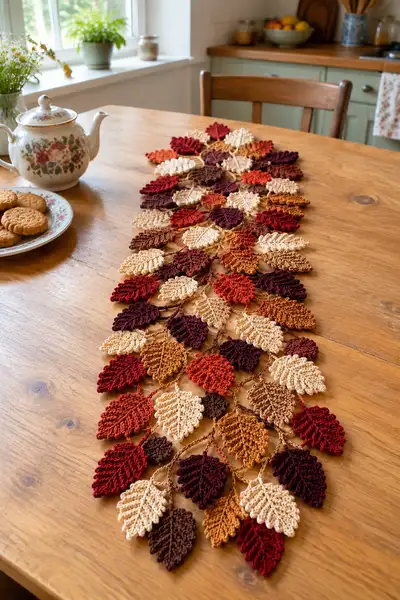
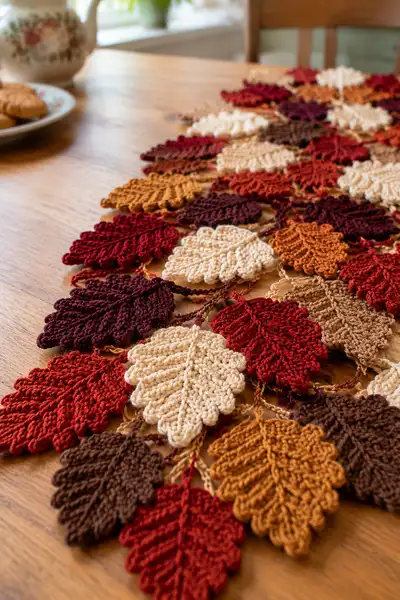
Create a warm, seasonal table runner made from hand-crocheted leaves in rich autumn tones. This pattern shows how to crochet individual layered leaves in several sizes and join them with delicate braided vines to form a long runner. The finished piece features warm reds, rust, mustard, cream and chocolate leaves with a natural staggered layout perfect for fall tablescapes or mantel displays.
Progress Tracker
0% Complete
— Notes & Overview :
Info :
This pattern is modular: make leaves in three sizes (Large, Medium, Small) and join them with braided connectors and short vine chains to create a runner. Stitch counts are given as total stitches across the entire flat leaf. Work each leaf flat in rounds that travel around the edge of the leaf (forming a rounded leaf profile). Use the same hook and yarn for consistency. Block leaves lightly for best shape before assembling.
Info :
Tension guide: With 3.5mm hook and worsted cotton, a large leaf measures roughly 10-11 cm tall and 8-9 cm wide. Adjust hook for smaller or denser fabric. Photos show an approximately 90cm runner using 48 leaves of mixed sizes—scale as desired.
— Large Leaf (Make 18) :
Round 1 :
Ch 11. 1 sc in 2nd ch from hook and next 8 ch (9), 3 sc in last ch (turning tip), now working back along opposite side of foundation ch sc9 (Total 21)
Round 2 :
Ch1, 1 sc in first 3 sts, inc in next st, 1 sc in next 6 sts, 3 sc in tip st, 1 sc in next 6 sts, inc in next st, 1 sc in last 3 sts (Total 25)
Round 3 :
Ch1, 1 sc in first 4 sts, inc, 1 sc in next 8 sts, 3 sc in tip, 1 sc in next 8 sts, inc, 1 sc in final 4 sts (Total 29)
Round 4 :
Ch1, 1 sc in first 5 sts, inc, 1 sc in next 10 sts, 3 sc in tip, 1 sc in next 10 sts, inc, 1 sc in last 5 sts (Total 33)
Round 5 :
Ch1, 1 sc in first 6 sts, inc, 1 sc in next 12 sts, 3 sc in tip, 1 sc in next 12 sts, inc, 1 sc in last 6 sts (Total 37)
Info :
These early rounds build the leaf outline. Maintain an even rhythm and watch the tip where 3 sc give a smooth rounded point. Use a stitch marker at the start of each round to keep track.
Round 6 :
Ch1, 1 sc in first 7 sts, inc, 1 sc in next 14 sts, 3 sc in tip, 1 sc in next 14 sts, inc, 1 sc in last 7 sts (Total 41)
Round 7 :
Ch1, 1 sc in first 8 sts, inc, 1 sc in next 16 sts, 3 sc in tip, 1 sc in next 16 sts, inc, 1 sc in last 8 sts (Total 45)
Round 8 :
Ch1, 1 sc in first 9 sts, inc, 1 sc in next 18 sts, 3 sc in tip, 1 sc in next 18 sts, inc, 1 sc in last 9 sts (Total 49)
Round 9 :
Ch1, 1 sc in each st (49) — establish widest point, begin textured ribs next rounds
Info :
From Round 9 we will add ribs via alternating front-loop and back-loop stitches to suggest leaf veins. These ribs are created as short rows of FLO and BLO across the midsection; keep counts even this round so ribs sit centered.
Round 10 :
Ch1, 1 sc BLO in first 4 sts, *1 hdc FLO over next 3 sts, 1 sc BLO in next 4 sts* rep across until tip, work 3 sc in tip as usual, continue mirrored across other side to end (49)
Round 11 :
Ch1, 1 sc in each st (49) — even round, check that ribs align centrally
Round 12 :
Ch1, *sc BLO 3, dc FLO 3, sc BLO 3* across center section; 3 sc in tip; mirror across (49)
Info :
Use longer stitches (hdc/dc) in FLO to create raised ribs. Do not increase stitch count on rib rounds; working in FLO/BLO only changes texture, not overall count.
Round 13 :
Ch1, 1 sc in each st (49)
Round 14 :
Ch1, 1 sc BLO in first 5 sts, *1 hdc FLO next 4 sts, 1 sc BLO next 5 sts* rep to tip, 3 sc in tip, mirror back (49)
Round 15 :
Ch1, 1 sc in each st (49)
Round 16 :
Ch1, 1 sc in first 9 sts, dec, 1 sc in next 18 sts, 3 sc in tip, 1 sc in next 18 sts, dec, 1 sc in last 9 sts (Total 45)
Info :
Begin shaping the tip back toward the base. This preserves the leaf silhouette while keeping ribs visible. Start checking symmetry: count stitches on each side of the tip regularly.
Round 17 :
Ch1, 1 sc in first 8 sts, dec, 1 sc in next 16 sts, 3 sc in tip, 1 sc in next 16 sts, dec, 1 sc in last 8 sts (Total 41)
Round 18 :
Ch1, 1 sc in first 7 sts, dec, 1 sc next 14 sts, 3 sc in tip, 1 sc next 14 sts, dec, 1 sc last 7 sts (Total 37)
Round 19 :
Ch1, 1 sc in first 6 sts, dec, 1 sc next 12 sts, 3 sc in tip, 1 sc next 12 sts, dec, 1 sc last 6 sts (Total 33)
Round 20 :
Ch1, 1 sc in first 5 sts, dec, 1 sc next 10 sts, 3 sc in tip, 1 sc next 10 sts, dec, 1 sc last 5 sts (Total 29)
Info :
At this stage begin forming the short base stem: after final round leave a 20-30cm tail to use as the vine attachment or finish off and attach a separate braided stem.
Round 21 :
Ch1, 1 sc in first 4 sts, dec, 1 sc next 8 sts, 3 sc in tip, 1 sc next 8 sts, dec, 1 sc last 4 sts (Total 25)
Round 22 :
Ch1, 1 sc in first 3 sts, dec, 1 sc next 6 sts, 3 sc in tip, 1 sc next 6 sts, dec, 1 sc last 3 sts (Total 21)
Round 23 :
Ch1, 1 sc in first 2 sts, dec, 1 sc next 4 sts, 3 sc in tip, 1 sc next 4 sts, dec, 1 sc last 2 sts (Total 17)
Round 24 :
Ch1, 1 sc in first st, dec, 1 sc next 2 sts, 3 sc in tip, 1 sc next 2 sts, dec, 1 sc last st (Total 13)
Round 25 :
Ch1, dec across base both sides after 1 sc each side, 3 sc in tip (Total 9)
Round 26 :
Ch1, sl st loosely around base to tidy, fasten off leaving 25-30 cm tail for stem attachment (No change)
Info :
Weave in short interior ends, but do not bury the long tail — it will be used to braid and join leaves into vines. Block leaf flat, pinning the tip upward and flattening ribs for best effect.
— Medium Leaf (Make 18) :
Round 1 :
Ch 9. 1 sc in 2nd ch from hook and next 6 (7), 3 sc in last ch, sc7 back (Total 17)
Round 2 :
Ch1, 1 sc in first 2 sts, inc, 1 sc next 4 sts, 3 sc in tip, 1 sc next 4 sts, inc, 1 sc last 2 sts (Total 21)
Round 3 :
Ch1, 1 sc in first 3 sts, inc, 1 sc next 6 sts, 3 sc in tip, 1 sc next 6 sts, inc, 1 sc last 3 sts (Total 25)
Round 4 :
Ch1, 1 sc in each st (25)
Round 5 :
Ch1, 1 sc BLO 3, *hdc FLO 3, sc BLO 3* repeat across center and back at tip (25)
Round 6 :
Ch1, 1 sc in each st (25)
Round 7 :
Ch1, 1 sc in first 4 sts, dec, 1 sc next 10 sts, 3 sc in tip, 1 sc next 10 sts, dec, 1 sc last 4 sts (Total 21)
Round 8 :
Ch1, 1 sc in first 3 sts, dec, 1 sc next 8 sts, 3 sc in tip, 1 sc next 8 sts, dec, 1 sc last 3 sts (Total 17)
Round 9 :
Ch1, 1 sc in first 2 sts, dec, 1 sc next 4 sts, 3 sc in tip, 1 sc next 4 sts, dec, 1 sc last 2 sts (Total 13)
Round 10 :
Ch1, dec two sides after first sc each side, 3 sc in tip. Fasten off leaving 20-25 cm tail for stem (Total 9)
Info :
Medium leaves take less yarn and provide visual contrast when mixed with large leaves. Use the same rib technique but slightly fewer FLO/BLO repeats to keep a balanced texture.
— Small Leaf (Make 12) :
Round 1 :
Ch 7. 1 sc in 2nd ch from hook and next 5 (6), 3 sc in last ch, sc6 back (Total 15)
Round 2 :
Ch1, 1 sc in first 2 sts, inc, 1 sc next 2 sts, 3 sc in tip, 1 sc next 2 sts, inc, 1 sc last 2 sts (Total 17)
Round 3 :
Ch1, 1 sc in each st (17)
Round 4 :
Ch1, sc BLO 2, *hdc FLO 2, sc BLO 2* rep to tip, 3 sc in tip, mirror back (17)
Round 5 :
Ch1, 1 sc in each st (17)
Round 6 :
Ch1, 1 sc in first 2 sts, dec, 1 sc next 6 sts, 3 sc in tip, 1 sc next 6 sts, dec, 1 sc last 2 sts (Total 15)
Round 7 :
Ch1, dec both sides after 1 sc, 3 sc in tip, finish with sl st to neat edge. Fasten off leaving 15-20 cm tail (Total 13)
Info :
Small leaves are excellent fillers and give the runner a delicate edge. Use cream or light colors for contrast against darker leaves.
— Tiny Accent Leaf (Make 8) :
Round 1 :
Ch 5. 1 sc in 2nd ch from hook and next 3, 3 sc in last ch, sc3 back (Total 9)
Round 2 :
Ch1, 1 sc across, 3 sc in tip, sc across back (Total 9)
Round 3 :
Ch1, dec gently on both sides after first sc, 3 sc tip, finish and leave 12 cm tail (Total 7)
Info :
Tiny accents add texture in tight spaces; make in the darkest color so they read as depth between larger leaves.
— Center Vein & Surface Ribbing :
Round 1 :
With matching or slightly darker yarn, starting at the base tail, use a tapestry needle to surface crochet a chain of sc along the leaf center from base to tip and back (no numeric stitch count)
Round 2 :
Surface crochet short offshoot ribs: take 6-10 mm stitches outward from center on alternating sides to suggest secondary veins. Secure ends and weave in (Variable)
Info :
Surface crochet is optional but gives an elegant, raised center vein. Work lightly—do not distort the flat leaf surface; anchor at several points to keep the line straight.
— Braided Vine Connector (Make many) :
Round 1 :
Using two or three strands of different colors held together for a heathered effect, ch 45 (or desired connector length). Slip stitch into final ch to form a flexible chain if you prefer a closed loop, otherwise leave chain open for sewing (No change)
Round 2 :
Optionally single crochet along chain to thicken: sc in each ch across (45) — work with same tension for consistency
Round 3 :
To make a braided look, divide chain into three even strands and braid loosely, tie ends with a small knot and hide tails inside braid (No change)
Info :
Braided vines are lightweight and lie flat between leaves. Make different lengths to vary the staggered layout. Leave 10-15 cm tails at each end to stitch into leaves for stability.
— Joining Leaves into Clusters :
Round 1 :
Arrange leaves in clusters of 3-5 with a large leaf at center and medium/small around. Use long tails from each leaf's base to whip stitch through braid or vine chain, sew 6-8 secure passes per attachment point to distribute stress (No numeric change)
Round 2 :
Overlap leaf tips slightly for a natural stagger. When sewing, catch only the base rows and a few edge loops to avoid puckering the leaf body (No change)
Info :
Pin pieces first and determine symmetry. Work on a blocking mat so leaves remain flat and aligned while you attach vines and connectors.
— Creating the Runner Grid :
Round 1 :
Decide on runner width (sample: 6 leaves across) and length (sample: 48 leaves joined in rows). Create a center spine of braided vine running the full length and stitch clusters alternately on each side to create a diamond/overlapping layout (No change)
Round 2 :
Work in sections: make short cross-vines to connect adjacent clusters by sewing small braided bits between base tails of leaves. Secure each connection with 4-6 stitches and knot inside the braid end (No change)
Round 3 :
Repeat until runner reaches desired length. For a balanced look, stagger colors in repeating palettes down the runner: dark-light-medium-light-dark, etc. (No change)
Info :
Assembly is the most time-consuming part—measure twice, sew once. Working in small sections prevents tangling and lets you adjust density as you go.
— Edge Finishing & Decorative Border :
Round 1 :
Optional: With contrast color, sc around the outermost leaves' edges where they meet the tabletop to give a finished look. Work 1 sc in edge loops with small spacing (estimate 3-4 sc per leaf edge section, variable)
Round 2 :
Optional decorative picot: *ch3, sl st to base* every 3-5 sc to add tiny leaf-like points around perimeter (variable)
Info :
Edge finishing is optional but helps visually contain the runner. Use a single strand of darker yarn for gentle contrast and crisp definition.
— Blocking & Final Press :
Round 1 :
Lightly wet-block each leaf separately by pinning to a flat surface shaping the tip and base, steam or mist and allow to dry. This will open ribs and flatten edges (No change)
Round 2 :
After assembly, block the full runner if space allows, or press gently with steam from the back through a pressing cloth to settle joins and remove curl (No change)
Info :
Blocking is essential for consistent appearance. If using cotton, steaming lightly is very effective but avoid direct high heat contact which may flatten braided vines excessively.
— Variations & Color Placement Guide :
Round 1 :
Alternate warm and cool autumn tones across each row to create depth: e.g., burgundy, cream, burnt orange, chocolate, mustard. Keep darkest shades on alternate rows to create visual shadow (No change)
Info :
You can scale the runner by changing the number of leaves across or the length of connector vines. For a table centerpiece like the sample, aim for 6 leaves across at the widest point and repeat pattern down the length for an elongated diamond composition.
— Final Weaving & Tidy Up :
Round 1 :
Weave in all long tails through the braid and stem bases, then trim close. If any vine ends are visible, tuck under adjacent leaves and secure with a few small stitches (No change)
Round 2 :
Give the runner a final check for loose loops or gaps; add a few stitches where pieces feel unstable. Hide knots inside braided connectors where possible (No change)
Info :
Store runner flat or rolled loosely; avoid folding which creases the braided connectors and ribs.
This autumn leaves table runner brings a handmade seasonal touch to your home and is a joy to stitch. Each textured leaf is simple to make and satisfying to arrange into a flowing runner full of autumn color and depth. The modular construction lets you scale the project up or down to suit your table and taste. Gather your yarn, brew a pot of tea, and enjoy stitching a cozy piece you’ll be proud to display. 🍂🧶