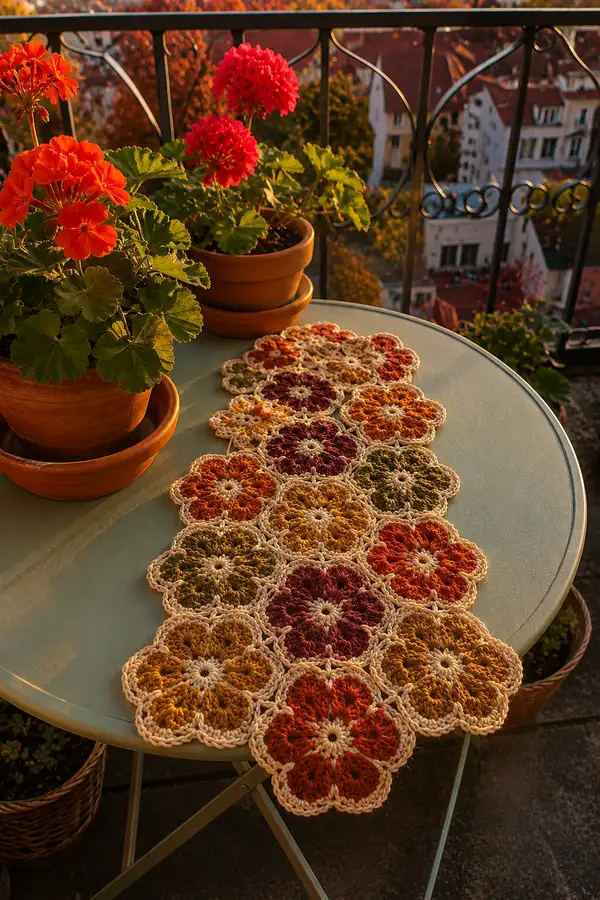
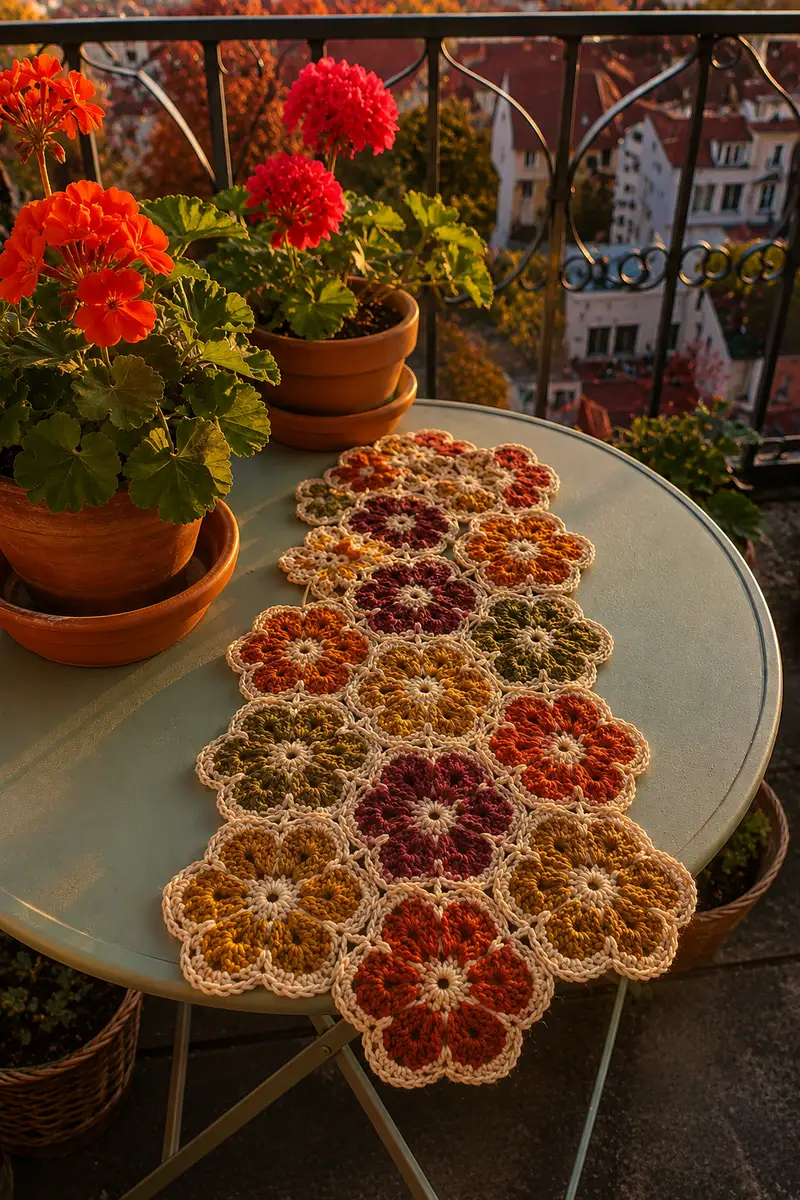
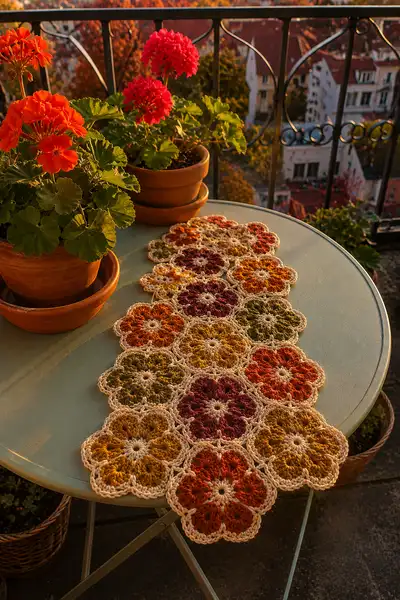
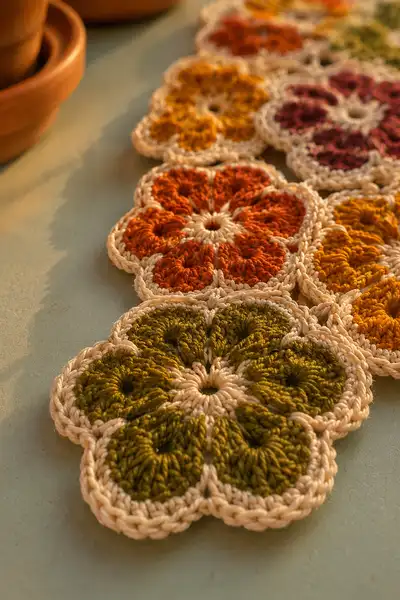
Create a warm, autumn-inspired table runner made from linked floral medallions in rich fall tones. Each flower features a textured puff-petal center and a soft cream joiner that creates a scalloped edge. The runner assembles from repeating 7-petal motifs and a narrow decorative border to make a stunning seasonal accent for tabletops or consoles.
Progress Tracker
0% Complete
— Gauge & Notes :
Info :
Gauge for one completed motif (before blocking): approx 11.5-12.5 cm (4.5-5 in) across tip-to-tip using stated yarn and 4.0mm hook. Use smaller or larger hook to adjust motif size. Work tightly on puff/dc clusters so center remains defined and to avoid gaps in the join. When color-changing to the cream join color, pick up the yarn behind the work and carry short tails to be woven in later.
— Materials and Color Plan :
Info :
Main palette: Autumn Rust (A), Mustard Gold (B), Olive Green (C), Deep Berry (D). Join/Edging color: Natural Cream (E). Optional contrast center: Dark Chestnut (F). Plan motifs in a repeating sequence or randomize for a scattered look like the sample.
— Flower Motif (make multiple) :
Round 1 :
Using color A (or chosen petal color): mr, ch2 (counts as hdc), work 13 hdc into ring, pull ring closed and join with sl st into top of first ch2. (14 hdc)
Round 2 :
*2 hdc in next st, ch3, sk 1 st* repeat from * to * around 7 times so you have 7 ch3 spaces; sl st to first hdc of round to join. (14 hdc + 7 ch3 sps)
Round 3 :
Work petals: Insert hook in first ch3 space, ch1, (7 dc in ch3 space) sl st into next ch3 space; rep to make 7 petals. Sl st to base where you joined first petal. (7 petals)
Info :
Ensure each petal cluster has the same tension. Use a consistent pull on each dc to keep petals uniform. If a petal seems loose, remove and rework to match others.
Round 4 :
Working around petals' bases: join last petal area and with the same color or switch to a slightly lighter/darker shade of the petal color if desired. *sl st into top of first dc of petal, ch3, (sl st into top of last dc of same petal) sl st into next petal top* repeat around making small chain arches between petals. You will make 7 arches total. Sl st to join. (7 arches)
Round 5 :
Switch to cream color E (Info: change to Natural Cream now for join-ready edge). Attach cream with sl st to the base between any two petals. ch1, sc evenly around base working 3 sc into each arch and 1 sc around each petal tip where required to create an even edge. Aim for a total of 28 sc around (approx 4 sc per petal zone). (Approx 28 sc)
Info :
This round creates the structural edge for joining motifs. Keep tension crisp but not tight; this will give a uniform background ridge for the cream to sit on.
Round 6 :
1 sc in each sc around (28 sc). Join with sl st. This evens the base and prepares defined points for scallops. (28 sc)
Round 7 :
*ch3, sk 3 sc, sc in next sc* repeat around to form small raised arches; you will have 7 ch3 loops. Sl st to join. (7 ch3 loops)
Round 8 :
In each ch3 loop make: (ch1, 5 dc, ch1, sl st into next sc) — this defines a subtle outer petal ridge. Work around 7 times. Sl st to join. (7 small rounded petals)
Round 9 :
Switch to cream E if you used petal color in round 8. Walk around motif with 1 sc in each st, and at the tip of each small rounded petal (the top of the 5 dc group) work *sc, ch2, sc* to create a join point; there will be 7 such join points. Total stitches approx 42 sc + 7 ch2 picot-style join loops.
Info :
The small ch2 join loops are the exact places you will perform join-as-you-go connections with previously made motifs. Keep them uniform and place them centered over each petal tip; pin if necessary while you make the first few motifs.
Round 10 :
1 sc in each sc and in each ch2 loop work (sc, ch1, sc) to tighten the join loops. End with sl st to first sc. This finishes the motif edge and readies it for joining. (Approx 56 fabric units including chain spaces)
Round 11 :
Optional center contrast: With dark chestnut F, pull up a loop in the center hole and work 12 sc into the center ring, join with sl st. Fasten off and weave tail in or change color back to cream for final edge. (12 sc)
Info :
Blocking tip: At this stage you can lightly block the motif to regularize the petal points. Use pins on a towel and spray lightly. Blocking creates consistent join geometry when linking multiple motifs.
— Decorative Petal Puff Detail (optional, repeat per motif) :
Round 1 :
Return to petal color and insert hook behind first petal base (from round 3), ch1, work a puff stitch formed by pulling up loop 5 times with each loop of approx same height, yarn over and draw through all loops, ch1 to close puff. sl st into next base point. Repeat to place one puff stitch on each petal midline. (7 puffs)
Round 2 :
Ch1, sc in each st across the petal ridge, working 1 sc between each puff to anchor; join. (Approx 28 sc)
Info :
Puff complexity creates the textured, plush look seen in the photos. Keep all puff loops the same size and keep tension slightly loose on the poufs themselves so they fluff after blocking.
Round 3 :
Using cream E, 1 sc in each sc around to unify puff area and begin join-handling. (Approx 28 sc)
Round 4 :
Ch2, *sk 2 sc, 3 sc in next sc* repeat until you have small scalloped ridges on each petal tip; sl st to join. This accent helps the outer join edge look like petals have a soft cream outline. (Approx 28-32 sc clusters)
Info :
If you do not want the puffy texture, skip this Decorative Petal Puff Detail section and proceed to the join rounds; motifs will remain flatter and more lace-like.
— Join-As-You-Go Instructions (JAYG) for Running Layout :
Info :
We recommend linking motifs in rows to build a runner. The sample runner is 3 motifs wide and 8-10 motifs long depending on desired runner length. Each motif has 7 outer join loops (round 9). When joining a new motif to already-made motifs, you will connect the cream ch2 loops to corresponding ch2 loops of neighboring motifs using sl st through both loops as you go.
Round 1 :
Place first motif flat. Make second motif up through Round 9 (complete its join loops) but do not slip stitch closed at the final join point. When you reach a ch2 join loop that should attach to an existing motif, insert hook through the existing motif's corresponding ch2 loop, yarn over with cream and sl st through both loops to join; continue around joining each connecting ch2 loop where motifs touch. For a linear edge motif that touches another on one or two join points, only join those points and leave others unattached. (Number of joins varies by placement)
Round 2 :
When joining three motifs in a triangular cluster (as in the sample where motifs form adjacent hex packing), you may encounter a spot where one new motif must attach simultaneously to two previously placed motifs: work sl st through new motif loop, sl st through loop on motif A, sl st through loop on motif B, then continue. This triple-sl st secures all three motifs neatly. (Triple join done at shared junctions)
Info :
Maintain the same tension while performing sl sts through two or three loops. If joins pull the cream too tightly, the motif will cup; if too loose, gaps will show. Adjust by practicing on two motifs first.
Round 3 :
Continue adding motifs row by row. For a runner, add a motif to the long edge of the existing assembly, joining all adjacent ch2 join loops that contact an existing motif (usually 2 or 3 joins per motif depending on position). Keep motifs oriented the same way so petal tips align in visual rows. (Runner assembly ongoing)
Round 4 :
Info: When adding motifs to the center area (touching above and below motifs), you'll make 4-6 join sl sts to attach it fully; count joins per motif so the runner lies flat. If a motif is placed at the very edge it will typically be joined at 2 places; corner-edge motifs join at up to 3 spots.
Round 5 :
After joining a row, check alignment by laying flat. If minor curvature appears, gently block row by row and pin into shape before adding more motifs. Adjust a single join by unpicking one sl st and reworking more loosely or tightly as required. (Assembly-adjustment step)
Round 6 :
For the sample runner layout: arrange 3 motifs across for width and alternate joining points so seams fall naturally in offset rows (brick layout). Keep a note: center row count determines runner length. (Layout tip)
Info :
Use pins to temporarily hold motif placement when creating the first few joins. This ensures you avoid accidental rotations or misalignments as you add motifs.
— Leaf Accent Motif (optional small leaf medallions to scatter) :
Round 1 :
With green C: ch4, join to ring, ch1, 8 sc into ring, join (8 sc)
Round 2 :
*ch3, sk 1 sc, sc* repeat to create 4 elongated leaf lobes; sl st to join. (4 ch3 loops)
Round 3 :
In each ch3 loop: (sc, 3 dc, sc) to give leaf shape. Join with sl st and fasten off. Use cream E to make a single sc round to match motif edges if you will tack them to the runner. (4 leaves per small motif)
Info :
Scatter these small leaf motifs between main flowers for added visual interest and to mimic scattered leaves in the sample photo. Attach with a few invisible whip stitches or place and join with a single sl st through both pieces.
— Decorative Outer Border for Runner :
Round 1 :
Once all motifs are joined in desired layout, work one continuous round of cream E around the entire assembled shape: start at a corner and sc evenly along exposed edges, making 2 sc into each exterior petal tip and 1 sc into every join seam area. Maintain an even stitch count so the final border lays flat. (Stitch count varies by runner size)
Round 2 :
1 sc in each sc around, join with sl st. This evens the edge and creates a base for scalloped rounds. (Evening round)
Info :
When you encounter the small triangular holes within the cream joins, place single crochets across to close them if you prefer a more solid border; leave them if a lacy look is desired.
Round 3 :
*(sc, ch3, sc) in next sc, skip 2 sc* repeat around to create scalloped picot arches centered on each petal tip. End with sl st. (Approx one scallop per petal tip)
Round 4 :
In each ch3 arch: (sc, 5 dc, sc) to create a pronounced scallop. This builds the lush scalloped outer edge seen in the photos. Join and fasten off. (Scallop round)
Round 5 :
Optional final ridge: Using 3.5mm hook and cream E, work 1 round of reverse single crochet (crab stitch) along the outer scallops to create a braided ridge. Work tight but not stretched. This gives a finished, durable edge. (Ridge round)
Info :
Reverse single crochet is worked left-to-right for right-handed crocheters (reverse sc). This decorative edging also helps the runner keep shape and protects edges from fraying over time.
— Blocking & Finishing :
Round 1 :
Pin the entire runner on a blocking mat to exact desired proportions using rust-resistant pins. Pull scallops out gently to match neighbor scallops and spray lightly with water until moist. Allow to dry fully. (Blocking step)
Round 2 :
Weave in all loose ends using a tapestry needle, threading yarn into the cream join rows and hiding tails by stitching back along the seam for at least 3 cm (1 in) before trimming. Secure ends with a few small back stitches. (Finishing step)
Info :
If you want extra weight so the runner lies flat, sew a narrow strip of cotton fabric on the underside using a running stitch before final blocking. This is optional and will make the piece less flexible but more stable on windy surfaces.
— Alternate Layout & Scaling :
Round 1 :
To make a shorter runner or a placemat, reduce motif count. For a wide table centerpiece use 4-5 motifs across. Ensure join geometry remains brick-staggered to maintain flatness. (Layout scaling)
Round 2 :
To scale up motif size for a broader runner: use aran or bulky yarn and a 5.0mm hook; consider adding an extra outer round of sc before scallops to maintain proportions. Recalculate yarn needs accordingly. (Scaling tip)
Info :
When changing materials, make a 2-3 motif swatch to determine new gauge. This prevents surprises in final runner size and yarn requirements.
Completing this runner is a delightful mix of repetitive meditative crochet and creative color-play — you’ll love seeing the warm petals come together into a single cohesive piece. Each motif adds personality, and the cream border unifies the whole for a classic autumn accent. Pin, block, and admire your handiwork — it makes a beautiful seasonal centerpiece or gift. 🧶🍂💛