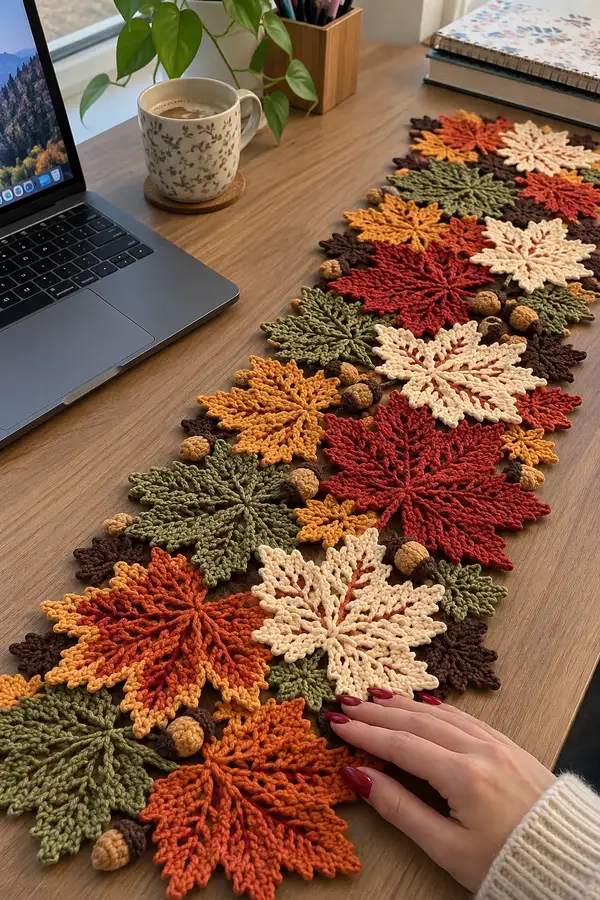
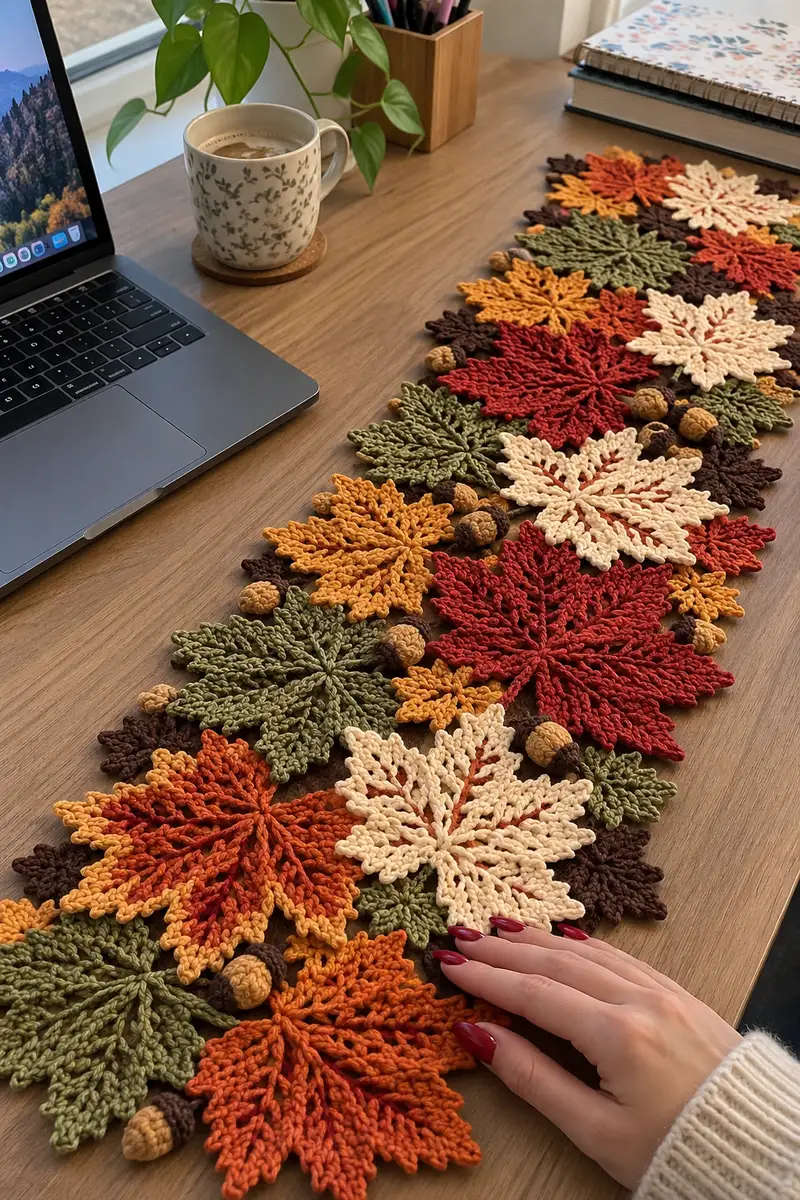
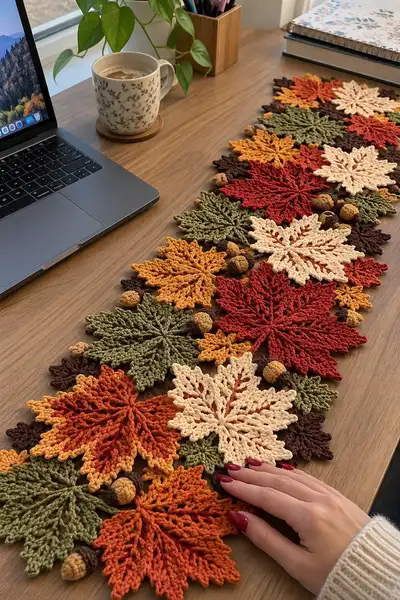
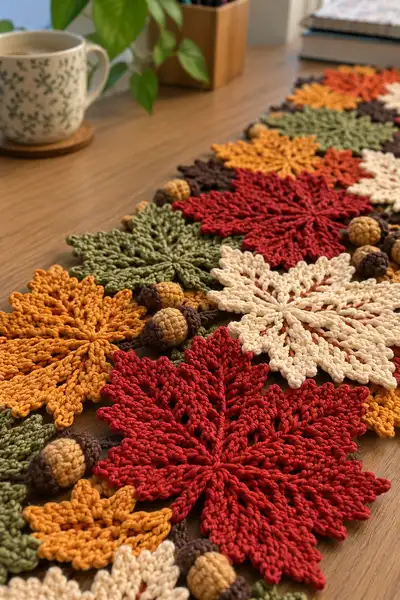
Bring the warmth of fall to your table with this layered autumn leaves table runner. The design features large star-point maple leaves, smaller accent leaves and crocheted acorns in rich autumn tones—deep red, pumpkin orange, olive green, mustard gold and chocolate brown. The runner is made from modular motifs worked individually then joined into a flowing, natural arrangement. Perfect for seasonal decor or a cozy centerpiece.
Progress Tracker
0% Complete
— Large Maple Leaf (make 6-8 in assorted colors) :
Round 1 :
Begin in a magic ring. Work 6 sc into the ring. Pull tight and place marker (6)
Round 2 :
Inc in each st around (12)
Round 3 :
(1 sc, inc) x 6 (18)
Round 4 :
(2 sc, inc) x 6 (24)
Info :
These first rounds form the compact center from which the leaf points radiate. Keep tension slightly looser than usual to allow the center to sit flat; too tight creates a cup shape. Place marker at start of each round.
Round 5 :
(3 sc, inc) x 6 (30)
Round 6 :
(4 sc, inc) x 6 (36)
Round 7 :
1 sc in each st (36)
Round 8 :
1 sc in each st (36)
Info :
We will now start creating 12 pointed lobes (maple-like points) by forming 'spokes' that become petals. The technique uses chained arches that will be filled in on following rounds; keep the base stitches tidy.
Round 9 :
*(Ch 8, sl st into next st) repeat from * around to make 12 arches (note: you will make an arch into every 3rd stitch — place arches evenly — arches:12)
Round 10 :
Work into each ch-8 loop as follows: sl st into loop, ch2 (counts as hdc), 1 hdc in same loop, 1 dc, 2 tr, 1 dc, 1 hdc, 2 hdc into final loop space, sl st to base. Repeat for each loop to form 12 petals. (This round builds petal bodies; petal counts vary but you should have 12 full petals)
Info :
When working into loops, insert your hook around both strands of the chain loop so petals are anchored strongly. Keep petals symmetric by counting stitches in each petal as you go.
Round 11 :
Turn each petal into a pointed lobe: in each petal, ch1, sc across the first 3 sts of petal, hdc, 2 dc at tip (to form the point), hdc, sc across last 3 sts, sl st to base. Repeat for all 12 petals.
Round 12 :
Work 1 sc in each st around the center between petals to tidy base (36)
Round 13 :
Working into the body of each petal only, make a set of post stitches to create the raised vein: *(sc into next base stitch, ch 6, 1 sc into the center of petal at 2nd stitch from base, 3 dc down the center over the previous row's tip, then 1 sc to anchor) x 12 (this creates a pronounced raised row on each petal)
Info :
If you prefer a subtler vein, substitute dc with hdc. For sharper points, use an extra dc at the tip. Work slowly on these rounds to keep petals identical.
Round 14 :
1 sc in each st around center to secure veins and tidy the back (36)
Round 15 :
BLO: 1 sc in each st BLO around to create a ridge at the base of petals (36)
Info :
Working BLO here lifts the base and makes the leaf lie flatter. If you want a thicker ridge, make two rounds BLO.
Round 16 :
Change color if creating a two-tone leaf edge: Info : Change to contrasting yarn now. Carry unused yarn along the back or break and weave in later.
Round 17 :
Work a decorative shell between petals: *(ch3, sk 1 base st, sl st into next base st) x 12 to make small scalloped edge around the leaf
Round 18 :
Step up row for texture: Into each shell, work (sc, hdc, dc, hdc, sc) to give each lobe a ridged textured edge
Info :
These rows create the serrated, layered effect visible in the photos. You can alter the stitch heights for sharper or softer serrations. Keep stitch counts consistent across shells.
Round 19 :
1 sc in each st around to tidy edges and anchor shells (count will vary slightly; expected approx 72) (est. 72)
Round 20 :
Work a final defining row: *(ch2, sl st into center of petal between shells) x 12 to create deep valleys between points
Round 21 :
Sc evenly around entire motif to create uniform outer edge. Count and adjust to keep shape symmetrical (est. 72)
Info :
At this stage, wet-block each leaf flat and pin the points out to maximum spread. This step is crucial for the crisp maple shape seen in the photos. Allow to dry completely before joining motifs.
Round 22 :
Optional fringe of tiny points: Into the valley between each petal tip, make (ch4, sl st) to add small spikes. Repeat around (12 spikes)
Round 23 :
Secure all ends by working 1 sl st in base stitch and fasten off, leaving 20-25cm tail for joining.
Info :
Weave tail through the back of the motif for invisible joining. Trim extra yarn after sewing motifs into runner layout. Make 6-8 large leaves: arrange colors like photo for balance (red, cream, orange, mustard, green).
— Medium Leaf (make 8-12 in assorted colors) :
Round 1 :
Magic ring, 6 sc into ring (6)
Round 2 :
Inc in each st (12)
Round 3 :
(1 sc, inc) x 6 (18)
Round 4 :
(2 sc, inc) x 6 (24)
Info :
These medium leaves are simplified versions of the large maple leaf and will sit between large motifs. Keep centers flat and consistent.
Round 5 :
*(Ch6, sl st into next base st) x 8 to form 8 arches for lobes (arches:8)
Round 6 :
Work into each ch-6 loop: sl st into loop, ch2 (hdc), 1 hdc, 1 dc, 1 dc, 1 hdc, sl st to base. Repeat across 8 loops (creates lobes)
Round 7 :
Shape tip: In each lobe work (sc, hdc, 2 dc at tip, hdc, sc) to give sharper points
Round 8 :
1 sc in each base st around to tidy (approx 32)
Info :
Block these motifs as well; medium leaves serve to fill spaces and bridge large leaves. Alternate colors to create natural variety.
Round 9 :
Work a center vein: Into each lobe sc, ch4, 3 dc along center, sc to anchor. Repeat for each lobe (8 veins)
Round 10 :
Sc around the edge to tidy and fasten off, leaving long tail for joining (est. 32)
Info :
Make 8-12 medium leaves depending on desired fullness. They add mid-size texture between the large focal leaves.
— Small Accent Leaf (make 12-16 in greens and browns) :
Round 1 :
Magic ring, 6 sc (6)
Round 2 :
Inc in each st (12)
Round 3 :
(1 sc, inc) x 6 (18)
Round 4 :
Work a single pass of petals: *(ch5, sl st) x 6 to make 6 tiny loops
Round 5 :
Into each loop work (sc, hdc, dc, hdc, sc) to make tiny lobes (6 lobes)
Round 6 :
1 sc around to tidy, fasten off and leave long tail for joining (est. 24)
Info :
Small leaves are quick to make and important for visual density; use olive green and chocolate brown to mimic the photo. They can be layered under larger motifs when sewing the runner.
— Acorn Nut (make 10-14 nuts) :
Round 1 :
With tan/light brown yarn: magic ring, 6 sc in ring (6)
Round 2 :
Inc in each st (12)
Round 3 :
(1 sc, inc) x 6 (18)
Round 4 :
1 sc in each st around (18)
Round 5 :
(4 sc, dec) x 3 (15)
Round 6 :
(3 sc, dec) x 3 (12)
Info :
Stuff very lightly with a teaspoon of fiberfill to give slight roundness. Acorns in the photo are small and dense—use tight tension. Do not overstuff; they should be slightly squishy but hold shape.
Round 7 :
(2 sc, dec) x 3 (9)
Round 8 :
Dec around to close partially (5-6). Fasten off and leave tail for sewing. Finish closing with needle and yarn tail. (Close to 0)
Info :
Make the nuts first; caps will be worked separately and sewn on top. If you want a firm acorn, you may add a small bead inside before closing to create weight and roundness.
— Acorn Cap (make 10-14 caps in dark brown) :
Round 1 :
With dark brown: magic ring, 6 sc in ring (6)
Round 2 :
Inc in each st (12)
Round 3 :
(1 sc, inc) x 6 (18)
Round 4 :
Work in BLO: 1 sc in each st BLO around (18). This creates a 'rim' texture to sit over the nut
Round 5 :
*(sc2tog, sc) around to create a shallow cup shape (12)
Round 6 :
Fasten off leaving long tail. Sew cap onto top of acorn nut, overlapping slightly to create the characteristic acorn shape. Add a small stem of 3-4 ch and sl st to base of the stem into the cup if desired.
Info :
Sew caps on securely using whip stitch around the lip. If you like, add a tiny loop of brown yarn into the stitching to mimic the ball-like texture seen in the photo by wrapping a few extra threads on top of the cap.
— Joining Motifs and Layout Preparation :
Info :
Before sewing, arrange all motifs on the table to create a natural, staggered runner similar to the image. Alternate large leaves with medium leaves, tuck small leaves under edges, and place acorns in clusters and along seams. Take a photo of your layout for reference.
Step :
Pin motifs lightly to blocking mat or directly to the tabletop with rustproof pins. Aim for overlapping edges so seams are hidden. Typical layout will use 6 large leaves, 8 medium leaves, 12 small leaves and 10 acorns for a runner approximately 90-110cm long depending on spacing.
Round 1 :
Using a long tail from a leaf, whip-stitch the back edge of a large leaf to the adjacent medium leaf along 6-8 evenly spaced sewing points. Use the tapestry needle and invisible ladder stitch for a close join.
Round 2 :
Sew the small leaves into the negative space along the runner; tack them down with two or three tiny stitches each so they appear naturally nested under big leaves.
Info :
For a more secure runner, join motifs with a single crochet seam worked through both motifs: place right sides together and sc through both layers around the seam area. This produces a visible edge and is more durable for a tabletop piece.
Round 3 :
Sew acorns in clusters of 2-3 along the runner, focusing on junctions between leaves. Secure each acorn through the cap to the base motif with multiple passes for stability.
Round 4 :
Where motifs meet at strange angles, use a small connecting loop: ch6, sl st into adjacent motif base, then secure both ends. This creates a decorative connecting string like tiny ivy tendrils.
Info :
Pin and stitch in small sections and check the runner frequently against the layout photo to preserve composition. Adjust spacing until happy—it's easy to undo a few stitches before committing.
— Edging and Final Firming :
Round 1 :
With dark brown yarn, work a narrow crochet edging around the entire assembled runner by sc around edges where motifs meet, working evenly to smooth sharp joins. Use 1 sc per 5-6mm of edge or measure to keep tension even.
Round 2 :
Optional decorative border: *(ch3, skip 1 sc, sl st) around to add small scallops where space allows
Info :
This final border adds contrast and hides raw joins on the underside. If you want a flat runner for heavy centerpieces, stitch through points to anchor them down more firmly.
Round 3 :
Weave in all tails: use a yarn needle and weave each tail through the back of the nearest motif for 3-4cm and trim. Press with steam if using cotton yarn, but do not overheat decorative bits with synthetic yarns.
Round 4 :
Final blocking: re-wet and pin entire runner on blocking board or tabletop to exact shape and edges, paying special attention to leaf points. Let dry completely for the crispest look.
Info :
If you plan to launder the runner later, choose a washable cotton and test a small join before full assembly. Store flat or rolled to avoid distorting points.
— Alternative Variations and Size Scaling :
Info :
You can scale the runner by varying the number of motifs: 4 large leaves = small runner (50-60cm), 6-8 large leaves = medium (90-110cm), 10+ = long table piece. Using thicker yarn and a larger hook produces a bolder, chunkier look. For a lace-like runner, use lighter yarn and a 3.0mm hook and allow spacing between motifs.
Extra Tips :
To achieve the exact look in the photos, use mercerized cotton that blocks crisp and shows stitch definition. Keep your workspace flat when assembling to maintain an even plane. Photograph your layout before sewing so you can revert if you change your mind.
This autumn leaves table runner brings the colors of the season to every meal and gathering. The modular motifs allow you to personalize colors and length, and the textured veins and acorn clusters add charming, handmade character. I hope it gives your table an instant cozy, seasonal upgrade—enjoy every stitch and show it off at your next get-together! 🧶🍁