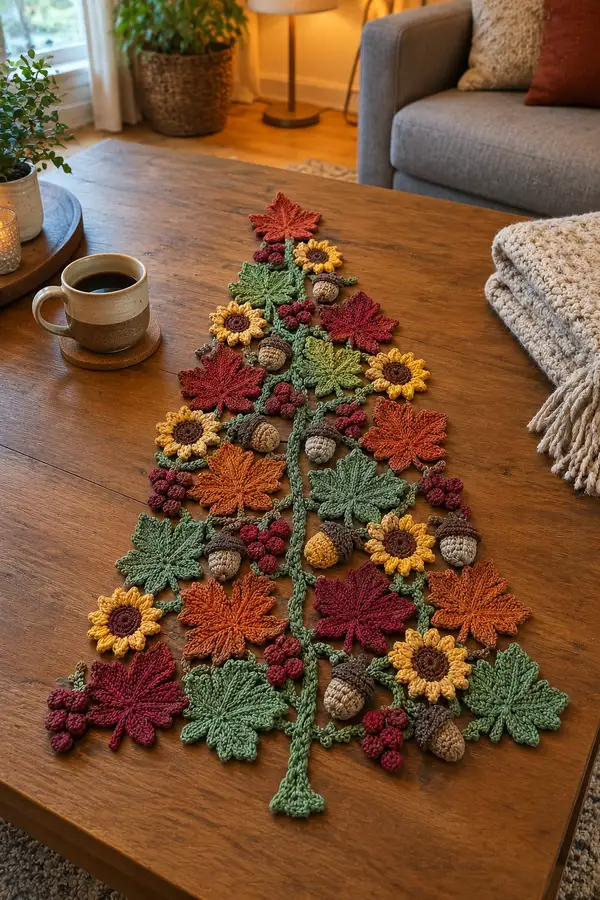
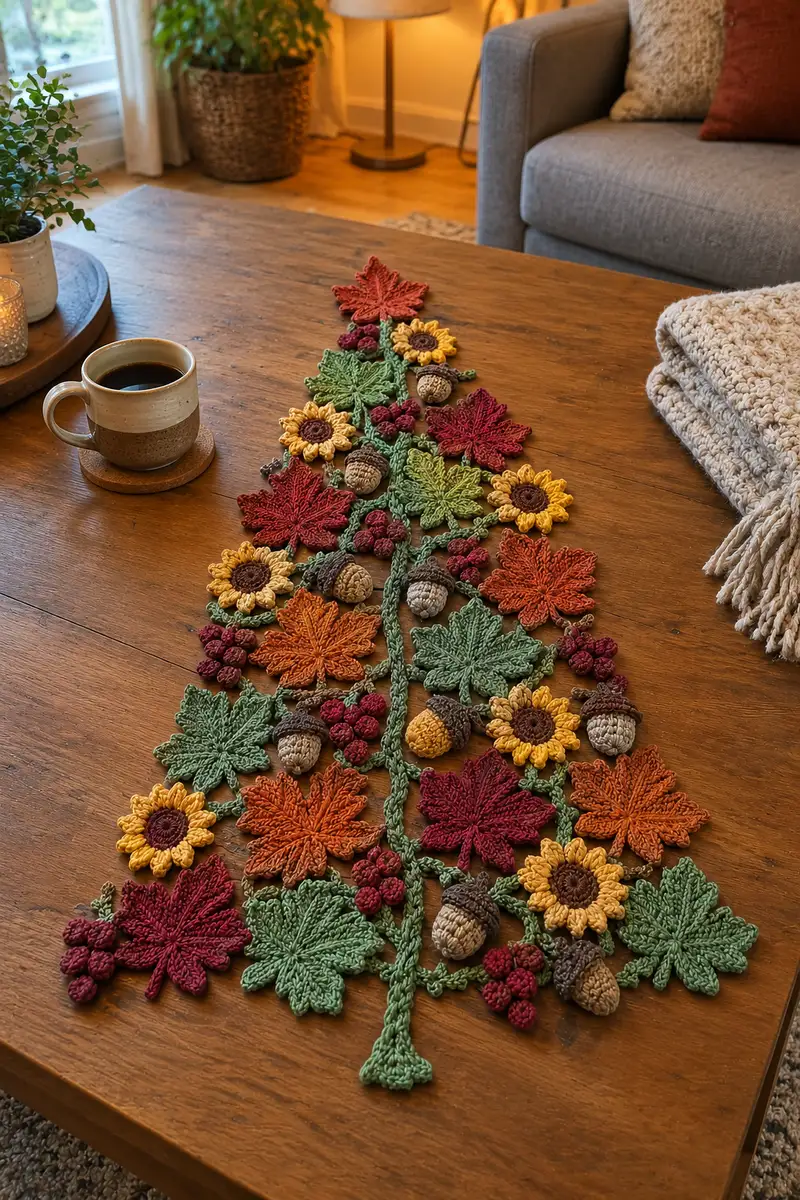
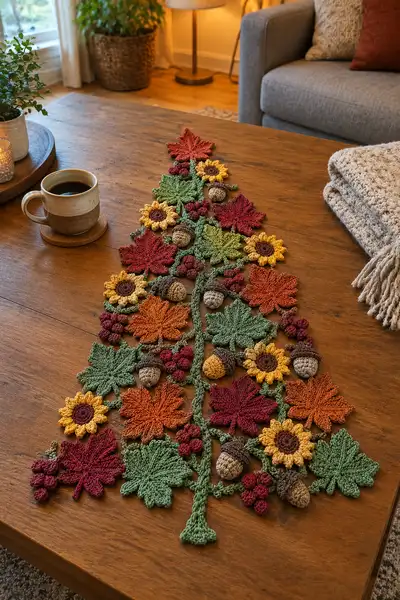
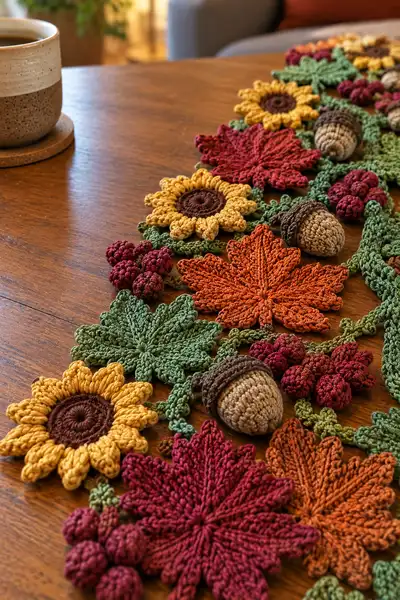
A beautiful detached-motif table runner arranged into a Christmas tree silhouette using autumn leaves, sunflowers, acorns, and berry clusters. This pattern teaches individual motifs and how to join them into a seasonal centerpiece. Rich fall colors and textured stitches create a three-dimensional, cozy centerpiece perfect for holiday or autumn tables.
Progress Tracker
0% Complete
— Overview :
Info :
This pattern is a detached-motif table centerpiece arranged into a triangular 'tree' shape. Make multiple motifs (maple leaves, small leaves, sunflowers, acorns, berry clusters) and join them with crocheted vines. I provide one full maple-style leaf, a small simple leaf, sunflower (petals + center), acorn (cap + body), berry cluster unit, and the vine join instructions. Multiply motifs as desired to create the density shown in the photos. All stitch counts are given for each motif. Block each motif lightly before assembly for the neatest joins.
— Materials & Gauge Notes :
Info :
Use worsted weight (#4) cotton or cotton-blend for crisp texture. With 3.5mm hook a finished large maple-style leaf will measure approximately 10-12 cm (4-4.7 in) across at the widest points. Gauge is not critical but matching yarn/hook will produce similar scale to the sample centerpiece. Keep tension slightly firm so small pieces hold shape.
— Maple-Style Leaf (Make 10-12, mix colors) :
Round 1 :
6 sc in magic ring (6)
Round 3 :
(1 sc, inc) x 6 (18)
Round 4 :
(2 sc, inc) x 6 (24)
Round 5 :
(3 sc, inc) x 6 (30)
Info :
Work in a small spiral; do not join rounds unless you want visible seam lines. This center creates a rounded base for the leaf veins to radiate from.
Round 6 :
(4 sc, inc) x 6 (36)
Round 7 :
(5 sc, inc) x 6 (42)
Round 8 :
(6 sc, inc) x 6 (48)
Round 9 :
1 sc in each st (48)
Round 10 :
(6 sc, dec) x 6 (42)
Round 11 :
(5 sc, dec) x 6 (36)
Info :
We're establishing a disk that will be shaped into a leaf using radiating post stitches and picot points. If you prefer sharper lobes make shallower decreases over the next rounds.
Round 12 :
1 sc in each st (36)
Round 13 :
*(ch3, sl st into next st) rep across to make 6 chain loops evenly spaced – this creates the base for leaf points (36 with loops)
Round 14 :
Join yarn at first chain loop. Into each loop: (ch2, 3 dc, ch2, sl st into loop) make a petal-like point; repeat 6 times around. After last sl st continue with next round in base disk stitches (no stitch count change)
Round 15 :
1 sc in each base st and in between petals to secure (36)
Round 16 :
Work leaves' veins: *FPdc around next 3 sts, 1 sc in next st* repeat across the round to create raised ridges (36)
Info :
Front post double crochets form the raised veins. Pull slightly on each FPdc as you finish to fan the texture outward. If you find FPdc bulky, use FPhdc instead and increase counts accordingly.
Round 17 :
(1 sc, (ch4, sl st back into ch4 base forming a small picot), 4 sc) repeat across to create 6 elongated lobes. End of round will align with 36 base sts
Round 18 :
Work each lobe individually: *In next 6 sts work (1 sc, 1 hdc, 2 dc, 1 tr, dec) to taper a lobe* repeat 6 times (36)
Round 19 :
Secure between-lobe valleys: (3 sc, 1 dec) x 6 (30)
Round 20 :
(2 sc, 1 dec) x 6 (24)
Round 21 :
(1 sc, 1 dec) x 6 (18)
Info :
Fasten off leaving a long tail for sewing or weaving. Pinch the small tail area at the base to form a tapered point (leaf stem). Block the leaf gently to sharpen the lobes and press veins outward.
— Small Simple Leaf (Make 10-14, mix green shades) :
Round 1 :
6 sc in magic ring (6)
Round 3 :
(1 sc, inc) x 6 (18)
Round 4 :
1 sc in each st (18)
Round 5 :
*(ch5, sl st into same st to make a point), sl st into next st* repeat around to make 6 points (no count change on base)
Round 6 :
Work into each point: (sl st, 3 sc, sl st) to bulk up the point. Continue around (base still 18)
Round 7 :
1 sc in each base st and into point bases to secure (18)
Info :
Small leaves are intentionally simpler and flatter. Block to shape and make uniform before laying out in the tree.
Round 8 :
Fasten off leaving tail for sewing.
— Sunflower Petal Ring (Make 6-8 sunflowers) :
Round 1 :
6 sc in magic ring with dark brown (center) (6)
Round 3 :
(1 sc, inc) x 6 (18)
Round 4 :
1 sc in each st (18)
Round 5 :
Change to yellow/gold yarn. Info : Change to gold yarn now, carry brown inside if preferred.
Round 6 :
*Into next st: (ch3, 3 dc, ch3, sl st) to form a petal base* repeat 18 times around - you will form 18 short petals (18 petal bases)
Round 7 :
Work each petal: in each petal base work (sl st, 1 sc, 2 hdc, 2 dc, 1 tr, sl st) finish and repeat around (no change to base count)
Round 8 :
Work one round of sc around the base of petals to secure them: 1 sc in between petals (18)
Round 9 :
Optional raised center: join brown in center and work 1 sc in each center st BLO for a dented center (18)
Info :
Stuff sunflower center lightly with a bit of fiberfill if you want a small domed look. If you prefer flat, do not stuff; instead weave ends on back and block slightly.
Round 10 :
Fasten off leaving tails for sewing. Weave ends and flatten petals slightly with light steam or spray blocking.
— Acorn Body (Make 6-8) :
Round 1 :
6 sc in magic ring with tan/beige (6)
Round 3 :
(1 sc, inc) x 6 (18)
Round 4 :
1 sc in each st (18)
Round 5 :
(2 sc, inc) x 6 (24)
Round 6 :
1 sc in each st (24)
Round 7 :
(3 sc, dec) x 6 (18)
Round 8 :
(2 sc, dec) x 6 (12)
Round 9 :
Begin stuffing lightly: distribute fiberfill to round shape, keep slightly firm but not squashed
Round 10 :
(1 sc, dec) x 6 (6)
Round 11 :
6 dec (3) - fasten off leaving long tail. Close opening tightly and weave tail through a few back-and-forth stitches to secure. Round counts are minimal because tapering to 3 sts tightens into a small dome.
— Acorn Cap (Make 6-8) :
Round 1 :
6 sc in magic ring with dark brown (6)
Round 3 :
(1 sc, inc) x 6 (18)
Round 4 :
1 sc in each st (18)
Round 5 :
Work texture round: *(ch2, sl st into next st), sc in next st* repeat to create a scorched texture around the base (18)
Round 6 :
Edge: 1 sc in each st BLO to create a neat rim (18)
Round 7 :
Slip stitch around to create slight dome and join cap to acorn body: place cap over body and sew with mattress stitch through the inner loops; if you want more bulk, add a small amount of fiberfill inside cap before sewing.
Info :
Acorn cap can be sewn on securely: use a whipstitch around the cap’s inner rim, pulling tightly so the cap holds the acorn firmly but still shows the textured cap surface.
— Berry Cluster (Make 8-12 clusters) :
Round 1 :
6 sc in magic ring with deep burgundy (6)
Round 3 :
1 sc in each st (12)
Round 4 :
*Make bobble: (FPdc around next st, then BPdc around same st) to create a 3D bobble. Repeat 3 times with small sl st spacing between bobbles to form a mini cluster (12 base)
Round 5 :
Fasten off leaving tail. Make 3-5 small berries per cluster (each berry is a small 3-4 round bobble) and stitch them together with tail ends to create a bunch of 3-5 berries. Secure and weave ends.
Info :
Each berry is tiny and slightly stuffed or left unstuffed. For a realistic look, vary the number of berries per cluster and slightly vary yarn tension to create natural irregularities.
— Vine / Central Stem (Make 1 long vine plus short connectors) :
Round 1 :
With green yarn, ch60 (or desired length for the main runner for your table) - this is a chain foundation used as the tree's center vine
Round 2 :
Turn, sc in 2nd ch from hook and across (59 sc). This creates a slightly wider vine that lies flat (59)
Round 3 :
BLO round: 1 sc in each st BLO across (59) - creates distinct top ridge for sewing motifs
Round 4 :
Edge round: ch1, sc around entire chain piece to tidy the sides: work 1 sc in each end st and 2 sc into chain ends for smooth corner turns (approx 122 sc total including ends, exact count depends on chain length)
Info :
Make short connector vines (ch8-14, sc back) to stitch between motifs where photo shows little sprigs. Vary lengths for a natural layout. Leave ends long for sewing to motifs.
— Sunflower Center (Alternate/Optional Raised Center) :
Round 1 :
6 sc in magic ring (6)
Round 3 :
1 sc in each st (12)
Round 4 :
Work 12 bobbles around (make bobble as: (5 dc cluster in same st) close cluster and sl st into next st). This gives a knobby center for sunflowers (12)
Info :
Secure this center to the brown disk used in the sunflower petal ring; stitch through the back to keep the bright gold petals intact.
— Small Decorative Leaf Stem (Make many) :
Round 1 :
ch10, sc in 2nd ch from hook and across (9)
Round 2 :
ch1, turn, 1 sc in each st (9)
Round 3 :
BLO: 1 sc in each st BLO to create a tiny ridge (9)
Round 4 :
At each end make a small leaf: attach yarn to end and make 6 sc in magic ring, finish and sew to the stem end. Repeat for other side if desired. Fasten off.
Info :
Short stems attach between motifs to give the effect of vines connecting leaves and flowers in the triangular layout. These small stems are flexible and easy to pin into position while sewing.
— Assembly & Joining Motifs :
Info :
Block each motif lightly so edges lie flat. Lay out a triangular tree shape on a large blocking board or flat table: center vine (long piece) forms the trunk, then arrange leaves, sunflowers, acorns and berry clusters symmetrically on either side in graduated rows. Take a photo of your layout before sewing so you can reference orientation and spacing while attaching.
Round 1 :
Sew motifs to the vine: using long tail from each motif, whipstitch the motif to the vine along the back ridge created by BLO rounds so stitches are hidden. Use small, even stitches and tie off neatly at the back of the runner.
Round 2 :
For overlapping motifs, stitch in a spiral across edges - catch loops from both motifs and the vine to create a secure flat seam (use your yarn needle and the long tails for neat stitching).
Round 3 :
Attach acorns and berries last: these are dimensional and should sit on top of leaves or between petals. Use a few extra passes of the needle through acorn base and runner to secure because they may be handled more frequently.
Info :
Once sewn, re-block slightly to ensure the whole assembly lies flat. If seams are bulky, press gently or adjust placement of stitches to lie flush. Consider a few strategically placed invisible stitches under large motifs to stop rolling.
Round 4 :
Add small connector chains to mimic vines visible in the photo: attach connector ch pieces between motifs using slip stitches at the attachment points. These small chains help hide joins and create a natural feel.
Round 5 :
Weave in all ends thoroughly across the back side of the runner. Trim ends close but not so close they slip out. Optionally tack a few ends with fabric glue for extra security on heavily handled runners.
— Finishing Touches & Blocking :
Info :
Wet-block your finished runner lightly: pin to shape on a towel and mist with water, allow to dry completely. This sets motifs to lay neatly on the table. When dry, remove pins and check for any loose stitches—secure as necessary.
Round 1 :
Optional: Add a small hanging loop at the top of the tree if you want to hang the runner as wall decor—make a ch12 loop and sew it to the back of the topmost motif.
— Tips & Variations :
Info :
Use different yarn weights to scale the runner up or down — sport weight will yield a more delicate runner, heavier aran or bulky yarn will make a chunkier, larger centerpiece. Swap sunflower colors with muted creams for a softer look, or add metallic thread sparingly into a few petals for subtle shimmer.
Info :
Make duplicates of any motif you love and reduce others if you prefer more of one element (e.g., many leaves, few sunflowers). Keep the trunk long and tapering to create that triangular tree silhouette.
Completing this centerpiece is such a joyful process — each tiny maple leaf, sunflower, and acorn becomes a tiny treasure when combined into the tree shape. The layered textures and autumnal colors make a perfect cozy statement on any table. I hope stitching each motif brings you as much warmth as arranging them did for me. 🧶🍁✨