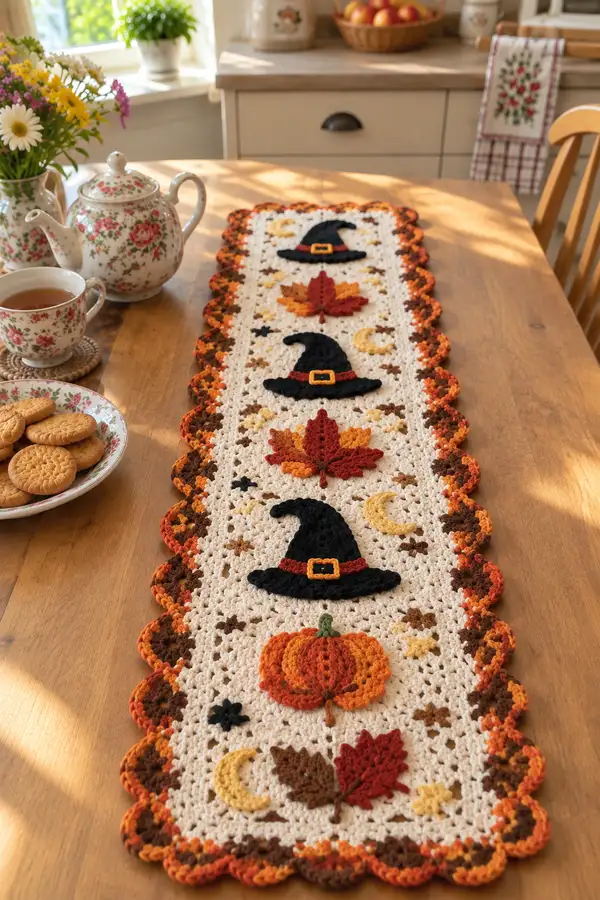
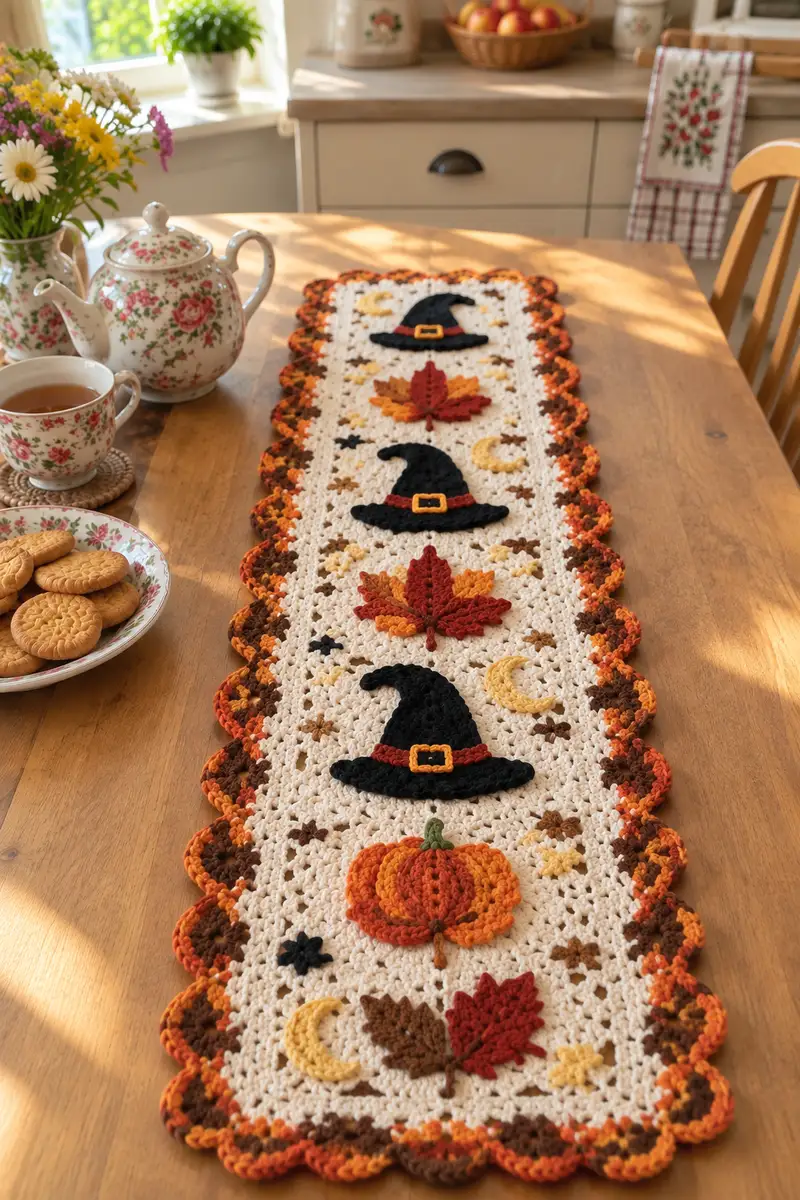
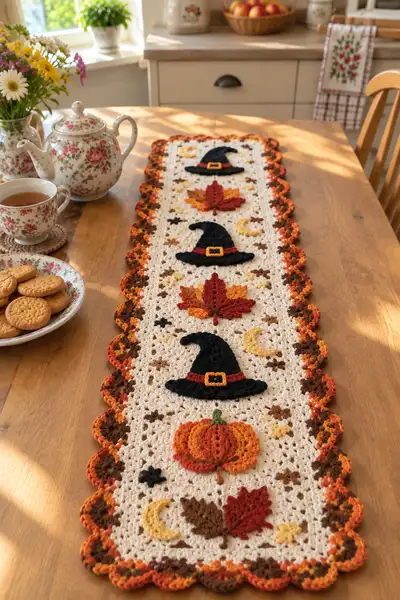
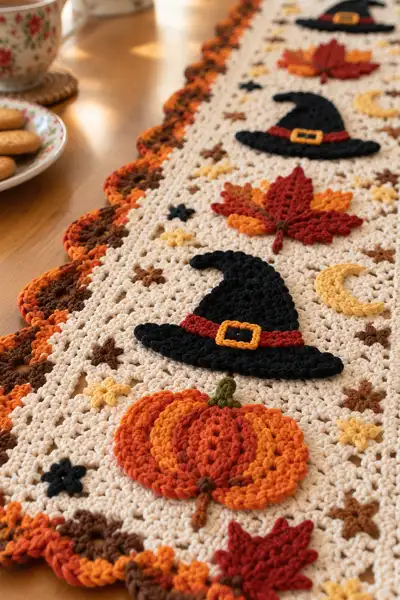
Bring warm harvest tones to your table with this textured Autumn Harvest table runner. The runner features layered appliques — pumpkins, witch hats, maple leaves — set on a soft cream lacy background with a scalloped multi-color border in rust, orange and chocolate. Designed to sit beautifully on a dining table or as a decorative dressing for sideboards, this pattern uses basic stitches with thoughtful shaping for lovely dimensional appliques.
Progress Tracker
0% Complete
— Materials and Gauge :
Info :
Gauge is not critical for this decorative runner but for reference: 10 cm = 14 dc stitches x 8 rows in worsted weight with 4.0 mm hook. Final runner measured on sample = approximately 14 in (width) x 40-44 in (length) depending on placement of appliques; adjust starting chain to desired width.
— Main Panel (Lacy Background) :
Row 1 :
Foundation chain 121 (this sets runner width; change to any odd multiple +1 to adjust). Turn. (121)
Row 2 :
Ch 3 (counts as dc), dc in 4th ch from hook, *ch 1, sk 1 ch, dc in next ch; rep from * across to last ch, dc in last ch. (approx 121 dc spaces including ch-1 spaces, maintain count by working a dc in each paired space)
Row 3 :
Ch 3, turn. *Dc in next dc, ch 1, sk ch-1 sp, dc in next dc; rep across to end. Maintain established lacy V pattern. (121)
Info :
Keep right side facing up. Use a stitch marker at the start of each row until border is attached to help keep stitch counts consistent. The background is worked in a repeating V/lacy dc pattern to allow the appliques to sit neatly.
Row 4 :
Repeat Row 3. (121)
Row 5 :
Repeat Row 3. (121)
Info :
Place light blocking pins after about 8 rows so the panel will remain consistent in width; this is particularly helpful before you attach appliques so they sit evenly.
Row 6 :
Ch 3, turn. Dc in each dc across, working ch-1 spaces as single dc bases (no ch made at row end). (121)
Row 7-10 :
Repeat Row 3 (lacy V pattern) for 4 rows. (121)
Info :
After 10 rows you have established the pattern repeat. Keep a small notebook of row numbers to mark where each applique will begin. The pictured runner places the first horizontal motif set (pumpkin/hat/leaf trio) roughly centered with equal spacing between motifs.
Row 11 :
Ch 3, turn. Dc in each dc across. (121)
Row 12-16 :
Repeat Row 3 (lacy V pattern) for 5 rows. (121)
Info :
Mark the central vertical columns where appliques will be placed: divide chain width into three equal vertical segments (left, center, right) and mark the central stitch of each segment on the RS using removable stitch markers or safety pins to keep placement consistent for multiple motifs along the length.
Row 17-20 :
Work 4 rows of dc even to create a flat band across the panel which will help anchor appliques. (121)
Row 21-26 :
Work 6 rows of the lacy V pattern (Row 3 repeat). This creates breathing room between motif rows. (121)
Info :
The runner pictured contains three major applique rows spaced evenly: from bottom up: pumpkin area, middle hat/leaf arrangement, top hat. Plan spacing roughly every 12-14 rows for large motifs and 6-8 rows for small connecting motifs.
Row 27-28 :
Work 2 rows dc even. (121)
Row 29-34 :
Work 6 rows lacy V pattern. (121)
Info :
If you prefer a longer runner, repeat the established 12-row interval (2 rows dc, 6 rows lacy V, 4 rows dc) to add length before continuing to border rounds.
Row 35-40 :
Work 6 rows of alternating dc and lacy V pattern to reach the approximate center for the next set of appliques. (121)
Row 41-44 :
Work 4 rows dc even to set a flat band under the top motifs. (121)
Row 45-50 :
Work 6 rows lacy V pattern as final decorative ground before edging. (121)
Row 51-56 :
Work 6 rows dc even to finish panel body squarely and stabilize edge stitches before border. Fasten off and weave in ends on wrong side. (121)
Info :
At this stage block the panel to the final dimensions: pin to a flat surface stretching gently to even out lace pattern. Allow to dry thoroughly before proceeding with appliques and border to ensure consistent placement.
— Pumpkin Applique (Make 3 identical) :
Info :
Each pumpkin is worked in rounds to create three dimensional ribbed segments. Use orange for the body, darker orange/rust for accent ribs, brown for the stem and small tendril, and use light stuffing only inside the central portion if you want lift. Applique size: approx 3.5" wide x 2.75" high after blocking.
Round 1 :
With orange, make a magic ring, ch 1, 6 sc in ring. Pull tight. (6)
Round 2 :
Inc in each st around (2 sc in each) (12)
Round 3 :
(1 sc, inc) x 6 (18)
Round 4 :
(2 sc, inc) x 6 (24)
Info :
Switch to working in FLO for Round 5 to create a subtle ridge that will help define pumpkin ribs later. If you prefer a flatter pumpkin, skip FLO and work regular sc.
Round 5 :
Work 24 sc in FLO (24)
Round 6 :
(3 sc, inc) x 6 (30)
Round 7 :
1 sc in each st around (30)
Info :
At this point add very small amount of polyester fill to the center — just enough to give lift to the ribs; do not overstuff or the applique will be puffy. You want a gentle dome.
Round 8 :
(4 sc, inc) x 6 (36)
Round 9 :
1 sc in each st around (36)
Round 10 :
(5 sc, inc) x 6 (42)
Round 11 :
1 sc in each st around (42)
Info :
Now we will define vertical ribs. Using front post hdc or front post dc (as preferred), work ribbing rows over pairs of stitches to create the pumpkin rib effect. Count 6 ribs across the pumpkin — mark every 7th stitch with a removable marker to help locate rib positions.
Round 12 :
Work 6 evenly spaced rib panels: *FPdc around next 7 sts, sk marker, rep from * to end (42). (This creates 6 raised panels)
Round 13 :
Round of sc even in orange to smooth edges (42)
Round 14 :
Switch to rust/darker orange and work 1 rnd BLO sc around just the outermost stitches to create a shadow ring (42)
Round 15 :
Fasten off leaving a long tail for sewing onto panel. Using brown, make a tiny stem: make magic ring, 5 sc in ring, pull tight, ch 2, sl st into ring, fasten off leaving tail for sewing. Sew stem to top center of pumpkin with yarn needle. (Stem = 5 sc small nub)
Info :
Sew pumpkins onto the panel at your pre-marked locations using the long tail from Round 15, stitching through the back loops of the pumpkin and into lacy spaces of panel to maintain a low profile seam. Stitch around twice for security.
— Pumpkin Rib Accent (Optional light stuffing and embroidery) :
Round 1 :
With dark orange, using a darning needle, bring yarn up through center of pumpkin and down along rib lines to create embroidered rib stitching; make 6 small running stitches from top to bottom along each rib to emphasize shape. Fasten off and weave in ends.
Info :
Do these embroidered ribs after sewing the pumpkin down; this prevents pulling on the body while attaching. Keep stitches small and neat. Add a brown tiny tendril of a 6-ch chain sewn in place if desired.
— Witch Hat Applique (Make 3) :
Info :
Each witch hat is worked flat in rows to create a curved cone and brim. Use black yarn for hat, rust for hat band, and golden yellow for buckle outlines. Size target about 3.75" wide x 2.5" high.
Row 1 :
With black, ch 18, sc in 2nd ch from hook and in each ch across (17 sc). Turn. (17)
Row 2 :
Ch 1, sc in first 3 sts, hdc in next 2 sts, dc in next 3 sts, tr in next 3 sts, dc in next 2 sts, hdc in next st, sc in last 3 sts. (17)
Row 3 :
Ch 1, turn. Sc across 17 sc working slightly tighter at edges to curve the top; in the middle 7 sts work 1 tr cluster each to build cone shape. (17)
Info :
Work Row 2 and 3 two to three times with slight shaping (use fewer tr later) to create a tapered cone profile; the cone is formed by using taller stitches in the center and shorter at edges.
Row 4 :
Repeat Row 2 but dec 1 sc at each edge (work sc2tog at each edge). (15)
Row 5 :
Ch 1, turn. Sc across 15, in center 5 stitches work one tr each to deepen curve. (15)
Row 6 :
Ch 1, turn. Sc across 15. Fasten off cone section leaving long tail for sewing. (15)
Row 7 :
Brim: With black, pick up stitches along last row edge: join with sl st at edge, ch 2 (counts as hdc), 2 hdc in same sp, *sk 1 st, 3 hdc in next st; rep across until you reach starting point, working 3 hdc clusters to create a broad brim. Sl st to join. Fasten off leaving tail for attaching to cone. (Brim width approx 4-5" when stretched)
Info :
Sew the cone to the brim with whip stitch, curving the cone slightly so the tip leans. Add the hat band: work a small chain strap in rust color long enough to wrap around the base of cone then stitch across; create a small buckle with golden yarn by embroidering a square and filling center with black yarn.
Row 8 :
Hat Band: With rust, ch 18, sl st into back of hat base along seam to attach; fasten off. Buckle: With golden yellow, ch 6, sl st into a small square, embroider center with black. Sew buckle to hat band. (decorative)
Info :
Place hats centered in their marked positions. Use long tail to sew hat firmly to the background at several points along the brim to prevent lifting and to keep cone centered.
— Maple Leaf Applique (Make 4) :
Info :
Leaves are worked flat in rounds and shaped with increases and decreases to produce pointed lobes. Use rust and darker red for layered leaves as shown. Target size: approx 3" wide.
Round 1 :
With rust, make magic ring, ch 1, 6 sc in ring. Pull tight. (6)
Round 2 :
Inc in each st around (2 sc in each) (12)
Round 3 :
(1 sc, inc) x 6 (18)
Round 4 :
Ch 1, turn and form leaf lobes: *Work 3 dc in next 3 sts, sl st back toward center to create a point; rep across to form five lobes. Fasten off. (This creates textured points)
Info :
Sew a smaller leaf in darker red on top of the rust leaf for depth. Use small running stitches in olive or brown to create the central vein from top to bottom of the leaf before sewing to panel.
Round 5 :
Using darker shade, repeat Round 1-3 on smaller scale (start magic ring with 5 sc, inc to 10, then shape three mini lobes) and sew centered over larger leaf to create layered look. Leave a small tail to sew leaf to panel at marked locations. Fasten off and weave ends. (approx 10-12)
— Small Motifs: Stars and Crescent Moons (Make several) :
Star (make 10) :
With mustard yellow, ch 6, sl st into first ch to form ring, *ch 2, (tr, sl st) in ring to make a spike; rep 5 times to make 5 spikes; fasten off and weave ends. Size approx 0.5" across.
Moon (make 6) :
With pale yellow, ch 8, 1 sc in 2nd ch from hook, hdc next, dc next 3, hdc next, sc last. Do not join; curve into crescent and seam ends with sl st to form crescent shape. Fasten off leaving tail for sewing.
Info :
Small motifs should be attached after large appliques are sewn and while panel is still pinned flat. Stitch carefully so the stitches are not visible from the front; use tiny invisible whip stitches. Space small motifs to fill negative spaces between the larger elements.
— Scalloped Border (Multi-color, work around entire panel) :
Info :
Border is worked directly onto the blocked panel. Start at one narrow end and work around both long edges and the opposite end, joining with sl st. Use a gradient color sequence: chocolate brown, rust, orange, and a final outer scallop in rust/orange variegate for the pictured layered look.
Round 1 :
With brown, join with sl st in corner stitch at RS, ch 1, sc evenly around the entire edge working 3 sc into each corner to keep it flat. Count stitches along one long edge and mark center; repeat for other long edge so both match. (approx 250 sc around entire panel depending on width)
Round 2 :
With brown, ch 2, *sk 2 sc, (5 dc) in next sc, sk 2 sc, sl st in next sc; rep across long edge; in corners work (3 dc, ch 2, 3 dc) into corner stitch. This creates large scallop clusters. Fasten off at corner. (approx 1 scallop per 6 stitches)
Info :
Ensure you maintain an even number of scallops along both long edges or the runner will curl. If necessary, add or remove 1-2 dc from corner cluster to rebalance. Keep work slightly loose on the border to allow scallops to lay flat after blocking.
Round 3 :
With rust, join into center of each large scallop and work *ch 1, sl st into center, ch 1, 7 sc into center (small round puff), sl st to secure; rep in each scallop around entire runner. Fasten off. (creates a two-tone scallop effect)
Round 4 :
With orange, work outer shell: join with sl st to the outer edge of each small scallop, work (sc, hdc, 3 dc, hdc, sc) into each scallop center to create final pronounced shell. Fasten off and weave in tails. (creates layered scallop edge)
Round 5 :
Optional color accents: With small amount of variegated yarn, make a picot edging across peaks by joining in each peak and working (sc, ch 3, sl st in same st). This gives a delicate finish; block again lightly to set scallops. Fasten off. (decorative)
Info :
Check that the scallops lay flat. If shell peaks flip up, spray lightly with water and pin to blocking board until dry. The layered colors add depth; if you prefer a subtler look, skip one of the outer color rounds.
— Attaching Appliques and Finishing Touches :
Info :
Before sewing, arrange all appliques on the blocked panel, using the earlier marker points to line up center columns. Leave small motifs to fill gaps but attach larger ones first (pumpkins, hats, leaves). Pin securely through wrong side without flattening shape.
Step 1 :
Using long tails, sew main appliques to panel with small whip stitch along the back loops only where they sit on the lace so the front shows smooth applique edges. Stitch around each applique twice for durability.
Step 2 :
Sew small motifs next. For moons and stars, use tiny invisible stitches; secure ends tightly and weave tails into the wrong side of the panel at least 2" before trimming.
Info :
Embroider any detail accents (pumpkin ribs, hat buckle outlines) at this stage. Use surface slip stitch or chain-and-embroider technique to keep stitches flat and tidy. Test placement and proportions on scrap yarn before committing to the main piece.
Step 3 :
Weave in all ends on the wrong side. Give one final gentle block if needed to coax appliques into position and ensure scalloped edging sits evenly around the runner.
Info :
For extra stability if the runner will see use, consider backing with a thin cotton fabric cut slightly smaller than the runner and hand stitch in place through the holes of the lace to avoid visible seams. This keeps dinnerware from catching on the lace and offers protection to table surfaces.
Final :
Press very gently with a steam iron from the wrong side or pin firmly while damp to set scallops. Your Autumn Harvest table runner is complete — display with a simple centerpiece to let the appliques shine.
Finishing this runner is such a joyful way to welcome the season — each applique and scallop brings a bit of autumn charm to your table. The layered pumpkins, whimsical hats, and textured leaves create a homey, handmade centerpiece you'll be proud to display. Enjoy the process and take time to savor each stitch — this piece will bring warmth and smiles all season long. 🧶🍂