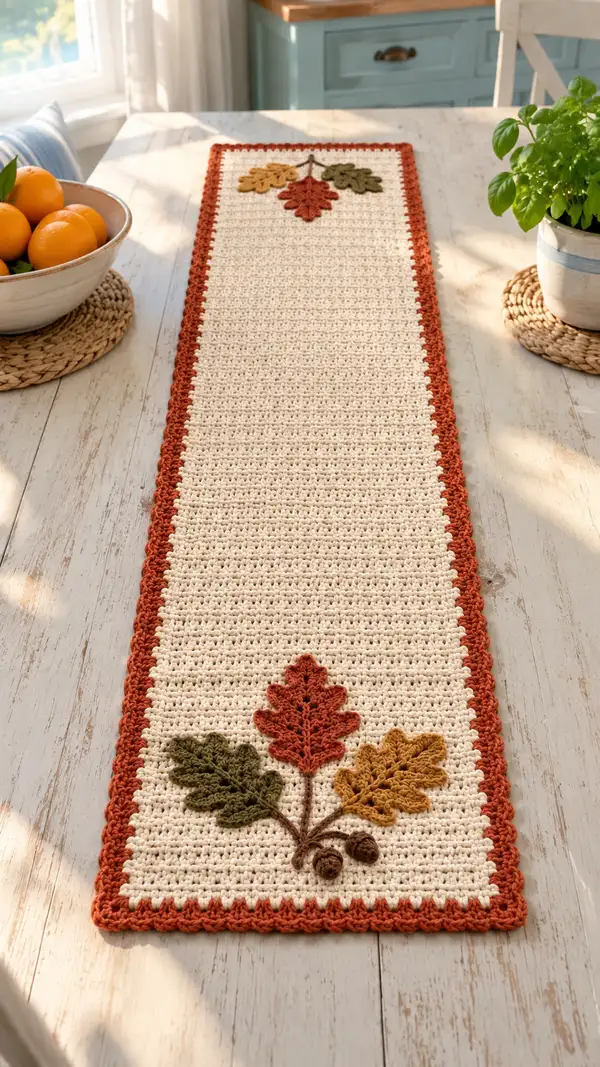
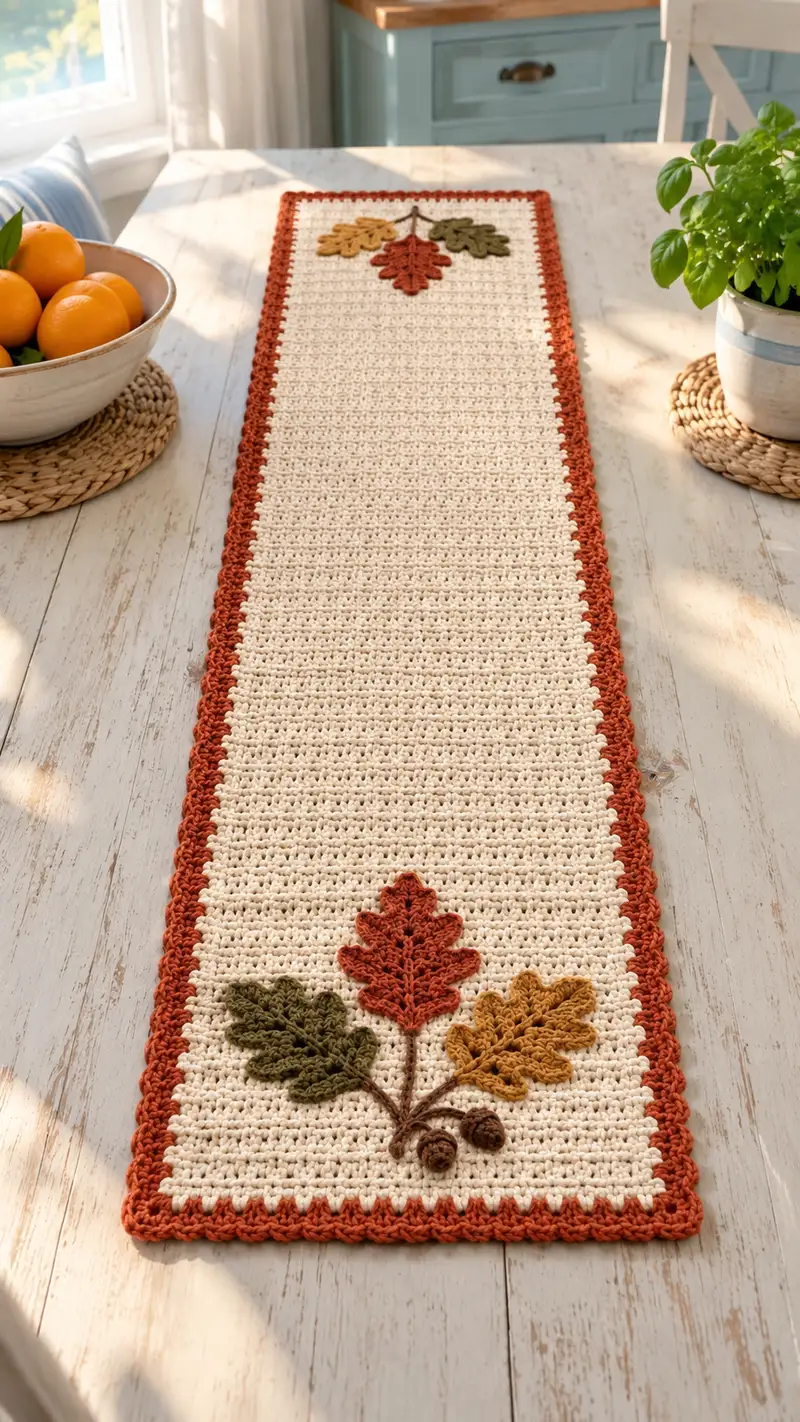
Bring warm fall charm to your table with this long, textured table runner featuring a creamy center, rust scalloped border, and three dimensional oak leaf appliques with tiny acorns. Worked in a simple, repetitive hdc/textured stitch for an even, sturdy fabric, it’s a cozy seasonal accent that layers beautifully with place settings. The runner is long and narrow with a cheerful hand-stitched stem detail connecting the leaves for a natural, rustic look.
Progress Tracker
0% Complete
— Notes & Gauge :
Info :
Finished size: approximately 12" (30 cm) wide by 52" (132 cm) long (measured after blocking). Gauge: 14 hdc x 19 rows = 4" (10 cm) using 4.0 mm hook in worsted weight yarn. Work tightly to create a dense, table-safe fabric. Adjust foundation chain to match your preferred width by keeping the number of chains odd to maintain stitch symmetry.
— Materials & Prep :
Info :
Use a slightly smaller hook than yarn label suggests to create a sturdy fabric (recommended 4.0 mm). Lightly block main panel after completion and before adding scalloped border for neat edges. Keep yarn tails long for sewing appliques and trim after secure weaving.
— Main Panel :
Round 1 :
Foundation chain: ch 101 (this gives a stable, narrow runner approx 12" wide). Ensure chain is not twisted, place a marker in final chain to mark the side if desired.
Round 2 :
Row 1: hdc in 3rd ch from hook and in each ch across — total 99 hdc (99). Turn. (Counts assume ch2 turning does not count as a stitch.)
Round 3 :
Row 2: ch 2, hdc in each st across (99). Turn.
Round 4 :
Row 3: ch 2, hdc in each st across (99). Turn.
Round 5 :
Row 4: ch 2, hdc in each st across (99). Turn.
Info :
Keep your turning chains consistent (ch 2 counts as height for hdc rows). Use a stitch marker at the first st of each row if you prefer avoid miscounts. If your stitch count varies, recount across every few rows to correct early.
Round 6-10 :
Rows 5-9: ch 2, hdc in each st across (99) (repeat for 5 rows). Turn after each row. (99)
Round 11 :
Row 10: ch 2, hdc in each st across (99). Turn.
Round 12-20 :
Rows 11-19: Continue ch 2, hdc in each st across (99). Keep fabric flat; if edges cup, loosen tension slightly. (99)
Info :
At about 8-10 rows, stop and check width. If your hdc rows are taller or shorter than gauge, adjust hook size by 0.25-0.5 mm to bring width to target. Blocking will also relax and even stitches.
Round 21-40 :
Rows 20-39: ch 2, hdc in each st across (99) — work 20 rows straight for a consistent central section. (99)
Round 41 :
Row 40: ch 2, hdc in each st across (99). Turn.
Round 42-60 :
Rows 41-59: ch 2, hdc in each st across (99). Continue repeating until runner measures approx half desired length — around 26" (66 cm) measured from start — then plan for leaf placement at both ends. (99)
Info :
We will work the central area as a continuous panel; appliques are added later. For leaf placement: mark positions approx 6" (15 cm) from each short end so the grouped oak leaves sit away from the edge and centered along the width.
Round 61-80 :
Rows 60-79: ch 2, hdc in each st across (99). At the end of Row 79 check total length; adjust number of rows to suit your preferred runner length. (99)
Round 81-100 :
Rows 80-99: ch 2, hdc in each st across (99). These rows finish the body of the runner; stop when panel reaches 52" or your desired measurement. (99)
Info :
If you prefer a narrower or wider runner, change the foundation chain by increments of 2 or 4 chains keeping the odd foundation if you want full symmetry. For a table runner for a narrow table reduce the starting chain by 20-30 chains and recalc gauge.
Round 101-120 :
Rows 100-119: ch 2, hdc in each st across (99). Work until panel reaches the desired final length minus space for scallop border. Fasten off leaving a long tail for blocking and assemble. (99)
Info :
Before adding the border, block the panel to square edges: pin to measurements on a blocking mat and spray lightly with water or steam. Let dry fully; this ensures neat, even scallops when you work the border.
— Scalloped Border (Rust) :
Round 1 :
With rust color, join with a sl st anywhere along one long edge (or at a corner). Working along the long edges first: ch 1, work 1 sc evenly in each row-end (count the side loops) up to corner — aim for 120 sc on long edges combined per side (counts will vary by blocking; keep sts evenly spaced). Place 3 sc in corner to turn the work neatly. Continue along short edge repeating 1 sc in each row end; place 3 sc in next corner.
Info :
Keep stitches even; if your counts do not divide evenly into scallop repeats, adjust by 1-2 sc at the short ends so scallops align neatly. Use pins to mark four corners before starting border.
Round 2 :
After working all around the panel with sc in each side loop and 3 sc in corners, join with sl st to first sc. Ch 2 (counts as dc), *skip 1 sc, 5 dc in next sc (shell), skip 1 sc, sl st in next sc*; rep around to create scallops. At a corner, work the shell into the corner 3-sc group to keep scallops continuous. Join with sl st to top of ch 2. Fasten off and weave tails. (Spacing of shells depends on sc count around; shells are 5-dc each.)
Round 3 :
Optional: For a more pronounced scallop, change to 3.5 mm hook and work a contrasting slip-stitch picot round: join yarn in the back of any shell, *ch 3, sl st into the 3rd ch (picot), sl st into shell center; rep around.* Fasten off and weave ends.
Info :
If you prefer a more subtle border, replace the shell round with 1 sc in each sc round and a final slip-stitch finish. Blocking again after the border will set the scallops beautifully.
— Oak Leaf Appliques (Make 6: 3 for each end — Leaves A, B, C) :
Info :
Leaves are worked flat in rows to create a pronounced central vein and lobed edges. Each leaf uses front-post stitches and strategically placed increases/decreases to form the oak shape. Use 3.5 mm or 4.0 mm hook depending on desired density.
Leaf A (Rust) - Round 1 :
Ch 12. Row 1: sc in 2nd ch from hook and across (11 sc). (11)
Leaf A - Round 2 :
Ch 1, turn. Inc in first st, sc in next 9 sts, inc in last st (13). (13)
Leaf A - Round 3 :
Ch 1, turn. Inc, sc in 11, inc (15). (15)
Leaf A - Round 4 :
Ch 1, turn. Inc, sc in 13, inc (17). (17)
Info :
These initial increase rows build the base leaf shape. Keep edges neat and count stitches each row to maintain symmetry. Use small, even tension to create crisp lobes later.
Leaf A - Round 5 :
Ch 1, turn. Sc in each st across (17). (17)
Leaf A - Round 6 :
Ch 1, turn. (Sc 2, inc) x 4, sc 1 (21). (21)
Leaf A - Round 7 :
Ch 1, turn. Sc in each st across (21). (21)
Leaf A - Round 8 :
Ch 1, turn. (Sc 3, inc) x 5, sc 1 (26). (26)
Leaf A - Round 9 :
Ch 1, turn. Sc across 26. (26)
Info :
At this point the leaf is broadest in the center. We will begin shaping the lobed tip and create the central vein by working rows with strategic decs and by using surface slip-stitch veins after finishing.
Leaf A - Round 10 :
Ch 1, turn. (Sc 3, dec) x 5, sc 1 — decreases work towards the tip (21). (21)
Leaf A - Round 11 :
Ch 1, turn. Sc in each st across (21). (21)
Leaf A - Round 12 :
Ch 1, turn. (Sc 2, dec) x 6, sc 1 (15). (15)
Leaf A - Round 13 :
Ch 1, turn. Sc in each st across (15). (15)
Leaf A - Round 14 :
Ch 1, turn. (Sc 1, dec) x 5 (10). (10)
Leaf A - Round 15 :
Ch 1, turn. Dec across to close to a point: (dec) x 5 (5). Fasten off leaving long tail for sewing. (5)
Info :
Use the long tail to sew the leaf base to the runner later. Repeat shaping for the opposite mirrored leaf if needed by reversing increases/decreases or simply make another leaf and orient it during assembly.
Leaf B (Olive) - Rounds 1-15 :
Work leaf B identical to Leaf A but use olive colored yarn. Repeat all rows 1-15. Fasten off and leave a long tail. (Leaves made with same stitch counts ensure matched placement.)
Leaf C (Mustard) - Rounds 1-15 :
Work leaf C identical to Leaf A but use mustard colored yarn. Fasten off and leave long tail. (5-26 stitches at center depending on row.)
Info :
For a more textured leaf, work the final few rows using FLO or BLO to create subtle ridges for the lobes. After sewing leaves in place, add surface slip-stitch veins in a darker shade to emphasize the leaf shape.
— Leaf Veining & Surface Detail :
Info :
With brown yarn or a darker shade, thread a tapestry needle and use surface slip-stitch (or surface crochet) to create a central vein: start at the base of the leaf, surface sl st up the center, then work short side veins by surface sl st or embroidery to each lobe. Keep stitches shallow and neat.
— Acorns (Make 4) :
Acorn Cap - Round 1 :
With dark brown, mr, ch 1, 6 sc in ring (6). Pull tight. (6)
Acorn Cap - Round 2 :
(Inc) x 6 (12). (12)
Acorn Cap - Round 3 :
(Sc 1, inc) x 6 (18). (18)
Acorn Cap - Round 4 :
Sc in each st around (18). Fasten off leaving a long tail for sewing and shaping. Slightly gather cap onto the top of the acorn sphere when attaching.
Acorn Body - Round 1 :
With medium brown, mr, ch 1, 6 sc in ring (6). (6)
Acorn Body - Round 2 :
Inc in each st (12). (12)
Acorn Body - Round 3 :
(Sc 1, inc) x 6 (18). (18)
Acorn Body - Round 4 :
Sc around (18). (18)
Acorn Body - Round 5 :
(Sc 2, dec) x 6 (12). (12)
Acorn Body - Round 6 :
Sc around (12). Lightly stuff ball with fiberfill to create a small, rounded acorn. (12)
Acorn Body - Round 7 :
(Dec) x 6 (6). Fasten off leaving a long tail for sewing the acorn to its cap and then to the runner. (6)
Info :
Sew the cap over the top of the stuffed body using the long tails, leaving the cap slightly domed. Add two acorns at each leaf cluster if desired and use stitching to secure them to the runner at the base of the stem.
— Stem & Branch (Make 2 for each cluster) :
Round 1 :
With brown yarn, ch 40 (or desired stem length). Row 1: sl st in 2nd ch from hook and each ch across to create a thin cord (39 sl st). Fasten off leaving long tail for sewing. Repeat for 2 stems per cluster and trim length so stems meet leaves neatly.
Info :
For a sturdier stem use i-cord style: work 3 or 4 chains and work sc into the third chain from hook, continuing in the round to create a tubular cord. Alternatively, use a length of embroidery thread braided and covered with crochet surface stitches.
— Assembly & Placement :
Info :
Decide placement before sewing. For a balanced look, position three leaves (rust center, olive and mustard flanking) near each short end with the center leaf slightly higher. Place stems as natural connectors and add acorns near the base. Use pins to hold pieces while you sew to avoid shifting.
Round 1 :
Pin the rust (center) leaf centered across the width, with its base approx 6" from the short edge. Pin the olive leaf to the lower left and mustard to the lower right so leaves slightly overlap at the bases forming a small bouquet. Slide stems under leaves and pin into place with long tails available for sewing.
Round 2 :
Sew leaves to panel using mattress or whip stitch with the long tail from each leaf; take small stitches through both leaf base and panel fabric to avoid puckering. Secure stems by stitching through their chains into the panel fabric, then hide tails inside the runner on the wrong side with a tapestry needle.
Info :
Sew acorns onto the runner at the base of the stems: place one or two acorns and stitch from the wrong side through the runner and acorn base several times to ensure stability. Trim excess tails and weave cleanly on the wrong side.
Round 3 :
After sewing, add surface slip-stitch veins using brown yarn if desired. Run a central vein up each leaf and short horizontal veins into each lobe to accent shape. Keep surface stitches shallow to avoid pulling the fabric through.
Info :
Once assembly is complete, give the finished runner a light blocking to relax sewn-in pieces and set the scalloped border. Pin carefully and spray lightly or steam from a distance; avoid over-wetting appliques.
— Finishing Touches :
Info :
Weave in any remaining tails. If leaves seem limp, consider a tiny amount of diluted fabric stiffener applied to the underside of the leaves only; press gently into shape and allow to dry. Place runner on table and add seasonal accents. Enjoy!
This autumn table runner brings a handmade touch to seasonal gatherings with its warm rust border and sculpted oak leaves. It's a satisfying project that combines simple rows with decorative appliques — a beautiful fall centerpiece you’ll be proud to display. Whether as a cozy gift or for your own home, it’s a lovely way to celebrate the season with yarn and care. 🍁🧶