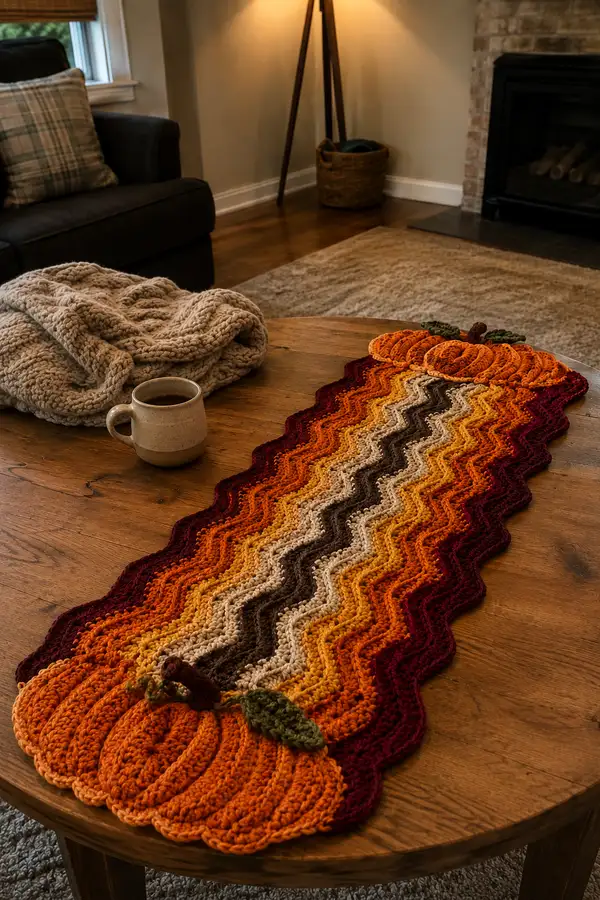
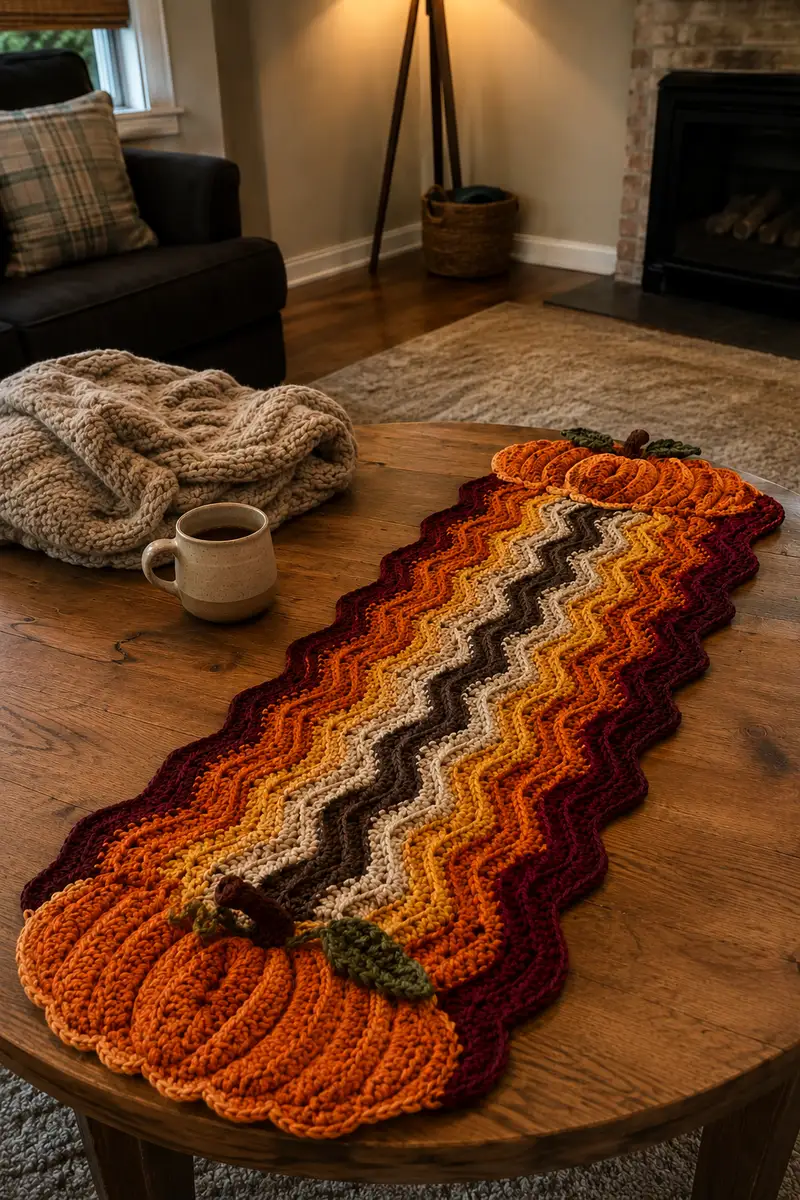
A warm, textured table runner featuring a deep chevron ripple body in sunset hues and sculpted pumpkin ends. Rich burgundy, pumpkin orange, golden mustard, tan and chocolate stripes cascade down a ridged ripple stitch. Each end finishes with a 3D pumpkin motif, rustic stem and leafy accents — perfect for autumn centerpieces and cozy seasonal tables.
Progress Tracker
0% Complete
— Materials & Gauge :
Info :
Gauge is flexible for this runner; sample gauge for texture: 12 dc and 8 rows = 4 in (10 cm) using 5.0mm hook in ripple stitch. Final runner in sample measures approximately 11" wide x 36" long not including pumpkin ends. Adjust foundation chain to make runner longer or shorter — pattern uses a repeat of 14 sts per chevron repeat (chain multiple of 14 + 2 for turning).
— Notes :
Info :
Always work turning ch 3 at beginning of rows counts as first dc. Change colors at start of row unless noted. Carry unused yarn along WS loosely if you want minimal ends; alternatively fasten off and weave in ends for crisp color breaks. Work tightly on pumpkin pieces so stuffing does not show.
— Foundation Chain :
Row 0 :
Ch 100 (multiple of 14 + 2). This gives eight 14-st repeats across the width and 100 total chains including turning chain allowance.
Info :
Change chain length to add more repeats (each additional 14 ch increases runner width by one repeat). Count carefully — the runner stitch repeat depends on exact multiples.
— Ripple Body (Rows 1-120) :
Row 1 :
Dc in 4th ch from hook (counts as first dc), dc in each of next 2 ch, then begin repeat across: (dc in next 2, dc2tog over next 2, dc in next 2, 3 dc in next ch, dc in next 2, dc2tog over next 2, dc in next 3) — repeat until last 3 ch, dc in last 3 ch. End row with turning ch 3. Stitch count remains 98-100 dc across depending on turning conventions (maintain same count each row).
Info :
This repeat is a 14-stitch repeat shaped as: 3 dc, dc2tog (decrease), 2 dc, 3 dc (peak), 2 dc, dc2tog (decrease), 2 dc (total 14). The dc2tog uses two stitches to create the valley; the 3-dc cluster creates the peak, keeping the stitch count stable across rows.
Row 2 :
Turn. Ch 3 (counts as dc), dc in next 2 sts, continue the 14-st repeat as established across the row, ending with dc in top of ch-3 turning. (98-100 dc)
Row 3 :
Repeat Row 2 across. Keep the post-based texture by shifting your hands and checking peaks/valleys align vertically. (98-100 dc)
Row 4 :
Repeat Row 2 across. (98-100 dc)
Row 5 :
Repeat Row 2 across. (98-100 dc)
Info :
Change color at the end of Row 6 for a stripe effect. To change color, complete the last dc of the row until two loops remain on hook, yarn over with new color and finish stitch so the new color begins on next row. Carry the unused yarn on the WS if working multiple rows in the same color block.
Row 6 :
Repeat Row 2 across. Fasten off or carry color depending on stripe plan. (98-100 dc)
Row 7-12 :
Work 6 rows in Color B (next stripe color) repeating Row 2 pattern across. Maintain stitch count and texture by working the dc2tog and 3-dc peak in the same stitch positions each row. (98-100 dc per row)
Info :
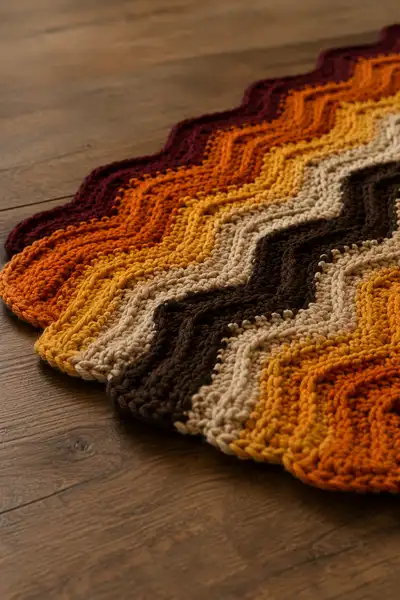
Stripe sequence used in photos: deep burgundy (outer edge) for 6 rows, burnt orange for 6 rows, golden mustard for 6 rows, tan/cream for 6 rows, chocolate brown for 6 rows, pumpkin orange for 6 rows, golden mustard, tan and repeat toward center. The runner pictured works symmetrical stripes down each side; plan the center color to be a darker brown for depth.
Row 13-48 :
Continue repeating the 14-st ripple pattern, changing colors every 6 rows following your color plan. Rows 13-18: Color C, Rows 19-24: Color D, Rows 25-30: Color E, Rows 31-36: Color F, Rows 37-42: Color G, Rows 43-48: Color H. (98-100 dc per row)
Info :
Check measurement at Row 48 — you should be approaching the middle third of the runner. The sample runner uses six stripe blocks per side before reaching the central brown section. If you prefer a longer runner, continue repeats until desired length, keeping symmetry in mind.
Row 49-60 :
Work 12 rows in the central chocolate brown (center stripe), repeating ripple pattern each row. This center block anchors the runner visually and gives a deep focal line. (98-100 dc per row)
Info :
If you want a perfectly symmetrical runner, mirror the color order used on the first half for Rows 61-120. The sample repeats the color blocks used earlier in reverse order to the opposite pumpkin end.
Row 61-120 :
Mirror Rows 1-60 in reverse color order to arrive at the second pumpkin end. Keep the same established ripple repeat for each row. Work in 6-row color blocks and maintain stitch count. End Row 120 in deep burgundy (same color as Row 6) to create matching edges at both ends. (98-100 dc per row)
Info :
The total of 120 rows produces a runner body roughly 36" long (measurements depend on yarn and tension). If you want a shorter runner, reduce the number of row blocks evenly on both sides; for longer, add more 6-row color stripes in the center or extend the central color block.
— Pumpkin Ends (Make 2) :
Info :
Each pumpkin is worked in rounds to create a disc which is then shaped into a plump, segmented pumpkin and sewn to the runner ends. Use a smaller 4.0mm hook for tighter fabric. Work flat in rounds (not continuous spiral) to easily create a round disc and maintain round counts. Use burnt orange main pumpkin color.
Round 1 :
6 sc in magic ring (6)
Round 3 :
(1 sc, 1 inc) x 6 (18)
Round 4 :
(2 sc, 1 inc) x 6 (24)
Round 5 :
(3 sc, 1 inc) x 6 (30)
Round 6 :
(4 sc, 1 inc) x 6 (36)
Info :
The disc will become the face of the pumpkin. After Round 6 the disc is 36 sts — a good base for a medium-sized pumpkin motif approximately 4.5" across. If you want a larger pumpkin, continue increases similarly to 48 or 60 sts by repeating pattern shapes (5 sc, inc) etc.
Round 7 :
1 sc in each st around (36)
Round 8 :
1 sc in each st around (36)
Round 9 :
(4 sc, 1 inc) x 6 (42)
Round 10 :
1 sc in each st around (42)
Round 11 :
(5 sc, 1 inc) x 6 (48)
Round 12-16 :
1 sc in each st around (48) — work 5 rounds even for disc depth
Info :
To create ribs like the sample, we will use surface slip stitches and post stitches after the disc is completed. Before doing surface work, mark 8 evenly spaced spokes to create pumpkin segments — use a stitch marker every 6 sts around (48 / 8 = 6 sts per segment).
Round 17 :
Change to working in BLO for one round to create a slight edge: 1 sc in each st BLO around (48)
Round 18 :
Fasten off leaving 12" tail for sewing. We will close disc by using yarn needle and mattress stitch after stuffing and shaping into a pumpkin bulge. Do NOT stuff yet if you prefer to shape first with surface ribbing; you can add a little stuffing after sewing and before creating final segmentation.
Info :
To make the pumpkin bulge and ribs: mark 8 equal points on disc's edge and use long running stitch through center to pull top and bottom together creating plump segments. Alternatively, crochet 8 surface slip stitch ribs from center to edge by working sl st along RS across the disc in 8 radiating lines.
Round 19 :
With RS facing, use long tail from Round 18 to thread yarn needle. Starting at center, insert needle through center to one marked outer point, pick up sts around edge and pull to fold disc slightly; repeat for each segment until disc forms a dome and plump pumpkin shape. Stuff firmly as you draw segments together. Secure and weave tail inside. (Formed into pumpkin)
Round 20 :
Using a separate length of yarn, create 8 visible ribs: attach yarn at center and surface sl st out to edge at each marked spoke; repeat for all spokes to create low-relief ridges. Optionally work front post slip stitches around disc lines to raise seams more prominently.
Info :
The sample pumpkins show pronounced vertical ridges; achieve this by working 8 evenly spaced surface sl sts and then lightly stuffing and manipulating segments. Be sure to make both pumpkins identical by counting exact stitch intervals.
Round 21 :
Make a small stem: ch 6, sc in 2nd ch from hook to end (5 sc), turn, sc across 5 sts for 6 rows to make a short tube, or sc in each st but do not fasten off. Fold stem in half and sc through both layers to create a thick stem (approx 6 rounds total). Fasten off leaving 12" tail for sewing.
Round 22 :
Leaf (make 2 per pumpkin): With forest green, ch 6, sc in 2nd ch from hook, hdc in next, dc in next, hdc in next, sc in last ch. Sl st into st at leaf base and ch 2. Fasten off leaving tail for sewing.
Info :
Sew stem to pumpkin center using tail from Round 21. Sew leaves to either side of the stem with small stitches and secure ends well. Use pins to position leaves before sewing so they look natural and slightly twisted.
— Pumpkin Segment Sculpting (Detail Work) :
Info :
To emphasize ribs, use a contrasting darker orange yarn to couch a line of sl st into valleys between ribs. Alternatively, use a tapestry needle and running stitches to pull valleys together slightly deeper. Keep stitching neat and consistent on both pumpkins.
— Attaching Pumpkins to Runner Ends :
Info :
Position the pumpkins so that their flat base aligns with the extreme last row of the runner (deep burgundy edge) and slightly overlaps the ripple edge. Pin in place and count stitches to center pumpkin over the middle of the width. Leave about 1/2" of runner fabric tucked under the pumpkin edge for a smooth seam.
Round 1 :
Using long tail from pumpkin disc, hand sew pumpkin base to runner by stitching through pumpkin edge and runner edge stitches evenly around (approximately 36-48 stitches depending on your pumpkin base count). Make sure sewing goes through the edge ROW 120 to anchor firmly. Weave tail and hide inside pumpkin.
Info :
Attach both pumpkins so their stems point inward slightly toward center of runner, matching the look in the images. Sew leaves slightly off-center and angle for an organic look. Check symmetry frequently and pin before committing to final stitches.
— Runner Edging & Scallop Finish :
Info :
To finish the runner edges and emphasize the ripple, work a simple shell scallop edging in deep burgundy all around the runner, working into the sides of rows and the unworked chain edge at the top and bottom.
Round 1 :
Attach burgundy yarn at center of one long edge. Ch 1, sc evenly along edge into ends of rows (work approximately 1 sc per row end — count to match). When you reach the end corner, work 3 sc across the pancake edge to turn and continue along other side. Keep sc count even — the goal is to place shells evenly on the top and bottom scalloped edges.
Round 2 :
Shell row: *skip 2 sc, (3 dc, ch 1, 3 dc) in next sc, skip 2 sc, sc in next sc* — repeat across long edges and around pumpkin attachment junctions to create neat scallops. Work small adjustment shells at corners for smooth transition. Fasten off and weave ends.
Info :
This scallop row helps the runner lay flat and frames the chevrons. If your scallops pull the runner edges, block slightly larger than the runner and pin edges so scallops flatten evenly.
— Optional: Extra Texture Rows (Bobbles & Post Stitches) :
Row 1 :
If you want more texture similar to the sample close-up, add a textured ridge row every 8 rows using the following: on an even row, replace the central dc with fpdc for a raised ridge over the center of each repeat and work bpdc on the row below to emphasize difference. This will create alternating raised and recessed chevrons.
Info :
Work these post stitch rows carefully as they change the hand of the fabric. Use them sparingly — 2 or 3 textured ridges across the runner add interest without making the runner too stiff.
— Finishing :
Info :
Weave in all ends, turn runner RS out and block lightly: dampen, pin flat on blocking mat to even out waves and scallops, let dry completely. Adjust pumpkin positioning if needed and stitch any loose segments. Use a small dab of craft glue under stems if you want extra security (optional).
Info :
Final measurements of sample: approximately 11" wide x 46" long including pumpkins (pumpkins each measure approx 4.5" diameter). Adjust chain multiples or number of rows to suit your table size.
Creating this Autumn Sunset Ripple Table Runner is such a cozy, satisfying project — the ripple rows are rhythmic and meditative while the sculpted pumpkins give a charming seasonal flourish. Once assembled and blocked, the runner lays beautifully on the table with rich autumn colors and textural interest. I love how it doubles as decor and a conversation piece at dinner. Happy stitching and enjoy the warm, handmade centerpiece! 🍂🎃🧶