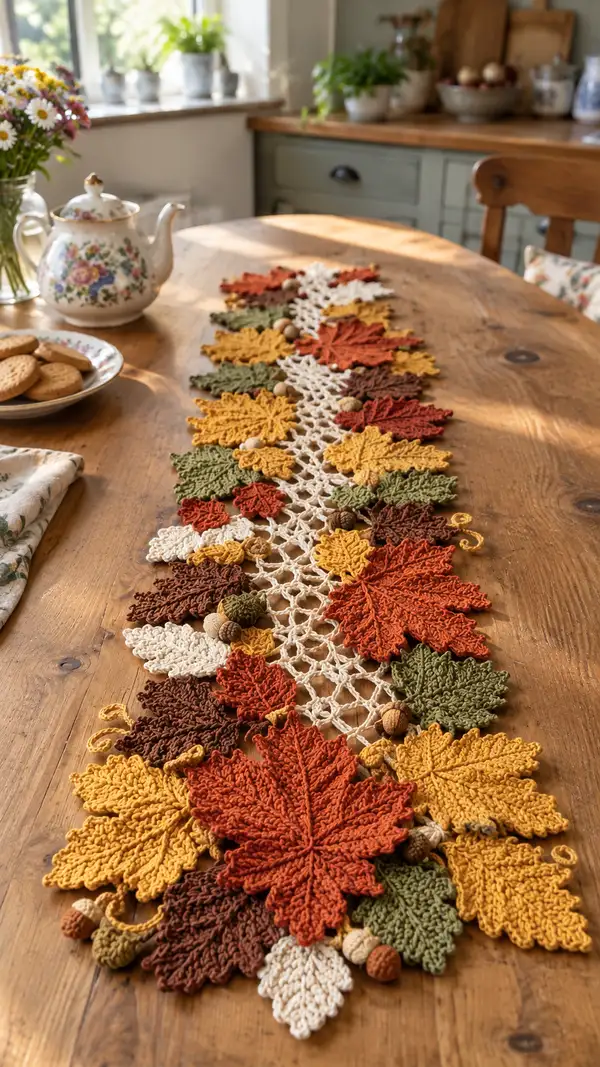
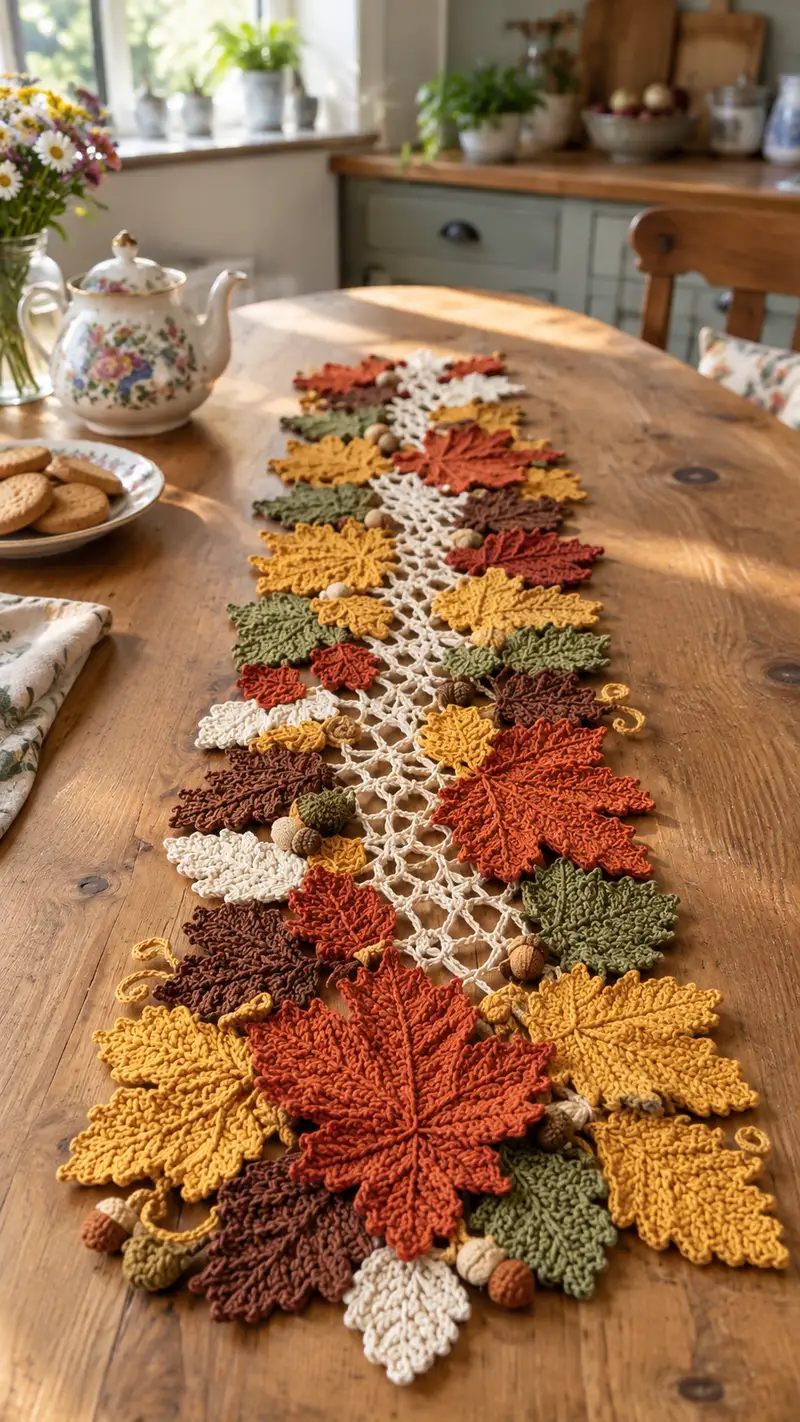
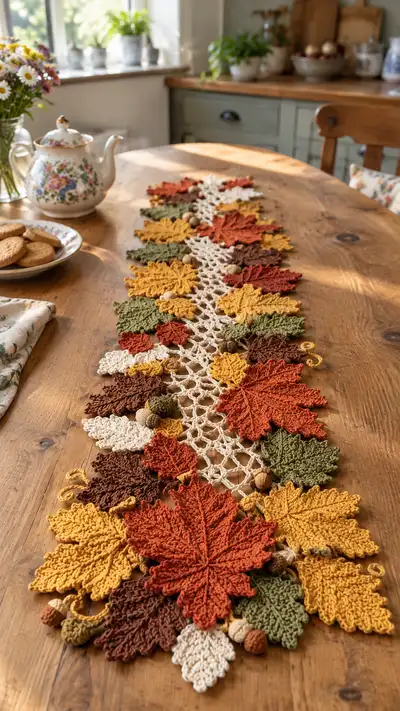
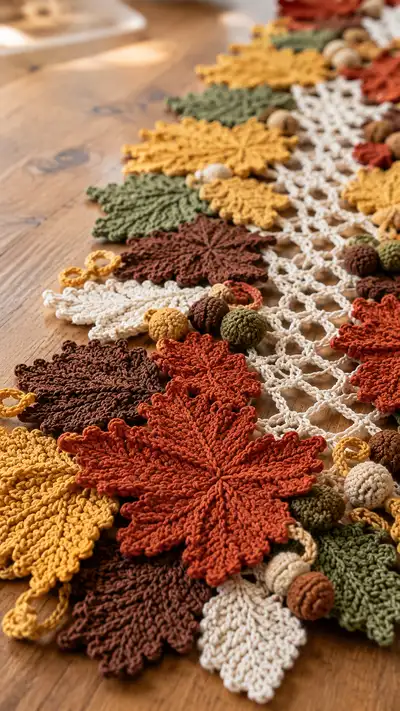
Create a warm, textured fall table runner made from crochet leaves in rich autumn tones. This pattern combines maple-style leaves, delicate openwork lattice, and tiny crocheted acorns for a layered centerpiece. The runner is modular — make as many leaves as you like, then join them with the central mesh strip. Perfect for seasonal decorating and gifting, with plenty of opportunities to play with color and stitch texture.
Progress Tracker
0% Complete
— Materials & Gauge :
Info :
Use DK weight cotton for crisp stitch definition. Gauge is not critical for motif-based runner but 18 sc x 20 rows = 10cm in sc will give similar scale. Leaves measure approximately 11-14cm across for large leaves with 3.5mm hook and DK yarn.
— Large Maple Leaf (make 8-10 or as desired) :
Round 1 :
mr, 6 sc into ring (6)
Round 3 :
(1 sc, inc) x 6 (18)
Round 4 :
(2 sc, inc) x 6 (24)
Round 5 :
(3 sc, inc) x 6 (30)
Info :
These early rounds create a small circular base. Work loosely in the very center; tighten your mr at the end of Round 1 for neatness if desired.
Round 6 :
(4 sc, inc) x 6 (36)
Round 7 :
(5 sc, inc) x 6 (42)
Round 8 :
(6 sc, inc) x 6 (48)
Round 9 :
1 sc in each st (48)
Info :
We will begin forming lobes. Place stitch markers at every 6th stitch to mark the beginning of each lobe (there will be 8 lobes later; we use markers to redistribute stitches later).
Round 10 :
(6 sc, ch3, sl st into 2nd ch from hook to make a picot cluster, 6 sc) repeat across to create small pair sections (48 plus picots - keep base count 48 sc)
Round 11 :
*Work 7 sc, ch5, sk 2 sts, sl st into next st forming a long chain loop for a lobe foundation; rep from * around (48)
Round 12 :
1 sc in each sc and 3 sc into each ch5 loop (create additional body for lobes) resulting in an added 6 x 3 = 18 sts. New count: (48 + 18) = 66
Info :
Use BLO for Round 12 if you want a subtle raised center vein on top of the leaf; otherwise work through both loops for a flatter leaf. Keep note of the 6 lobe foundation loops as reference points.
Round 13 :
(2 sc, inc) x 22 (88)
Round 14 :
1 sc in each st (88)
Round 15 :
*(Work 12 sc, hdc, dc, tr, dc, hdc) in one lobe area to form a pointed lobe tip, join with sl st to base between lobes; rep across for each lobe - this is shaping not an exact count per st but should add visible triangular points)
Round 16 :
Work around the leaf edge with scallops: *(sl st, ch2, 3 dc in next st, ch2, sl st) in every 5th stitch around the perimeter to create serrated edge (final sc-equivalent count varies by shaping)
Info :
At this stage expect the stitch count to vary slightly based on how aggressively you form lobes; the important factor is symmetry. Use a tape measure and shape the leaf to approximately 12-14 cm across. Block each leaf flat for best shaping.
Round 17 :
Work a row of fpdc down the center line to create a raised vein: fold leaf in half matching center, with RS out, insert hook from front into post of corresponding stitches along the center and fpdc across 6-10 posts to form a distinct central vein.
Round 18 :
Add side veins by working diagonal fpdc groups from the center to the edge: pick every 6th stitch and fpdc 3-4 posts diagonally then sl st out to edge; repeat on both sides for a natural look
Info :
Use blocking to coax scallops and points into crisp definition. Spray-block while pinned on a mat, shaping points outward. Allow to dry fully before joining.
Round 19 :
Finishing round: sc evenly around edge working 2 sc in each large scallop peak to accent the tips. Fasten off leaving a 20cm tail for sewing (counts will vary, focus on even edge)
Round 20 :
Optional hanging loop: at the base, ch 12, sl st back into the base st to form a small loop for decorative hang; fasten off and weave in ends
Info :
Large leaf complexity is mostly decorative. Aim for 8-10 large leaves to create a full runner; alternate colors and directions when arranging.
— Medium Leaf (make 10-14) :
Round 1 :
mr, 6 sc into ring (6)
Round 3 :
(1 sc, inc) x 6 (18)
Round 4 :
(2 sc, inc) x 6 (24)
Round 5 :
1 sc in each st (24)
Info :
Medium leaf is quicker: we'll work a shaped flat leaf with 6 main lobes. These are used to fill gaps and add layered depth.
Round 6 :
*(3 sc, ch4, sl st into 3rd ch from hook to make a small loop) rep across to make foundation for lobes (24)
Round 7 :
Work 4 sc into each ch4 loop across (24 + 6*4 = 48)
Round 8 :
(3 sc, inc) x 12 (60)
Round 9 :
1 sc in each st (60)
Round 10 :
Edge shaping: *(hdc, dc, tr, dc, hdc) in each lobe to make points, sl st to next base; rep for each of 6 lobes
Info :
Use FLO for Round 9 to create a slightly puckered center if you prefer a cupped leaf. Block flat afterward for best results.
Round 11 :
Work a central vein with 6 fpdc down the center, anchor with sl st at base and at tip
Round 12 :
Finishing round: sc around edge, adding 2 sc in each point to emphasize lobes. Fasten off leaving a long tail (approx 15-20cm) for sewing (final count varies)
Info :
Medium leaves measure roughly 9-11 cm across when blocked. Use mustard and olive tones for alternating effect.
— Small Leaf (make 12-18) :
Round 1 :
mr, 6 sc into ring (6)
Round 3 :
(1 sc, inc) x 6 (18)
Round 4 :
1 sc in each st (18)
Round 5 :
Work 2 sc, hdc, dc, hdc, 2 sc across to form a small point; turn and mirror on reverse to make an elongated leaf shape (flat worked in rounds but counts variable)
Info :
Small leaves are quick fillers and accent pieces. They should be around 5-7 cm and can remain unblocked if you prefer a softer look.
Round 6 :
Work a single center post: 6 fpdc down the middle to give a vein impression, anchor with sl st
Round 7 :
Finish with 1 sc around the edge; fasten off leaving 10-12cm tail for sewing
Round 8 :
Optional loop: ch 8 at base, sl st back into base to create a small decorative loop. Fasten off
— Lattice Center Strip (make 1 long strip enough for table length) :
Info :
The lattice is worked in rows (we call them rounds for consistency) as an open mesh that the leaves are sewn onto. Make a central strip lengthwise — typical runner in photo is 100-120 cm long. You can make panels and join if needed.
Round 1 :
Using cream yarn, ch 101 (or desired length + 1 for turning), sc in 2nd ch from hook and across (100 sc)
Round 2 :
Ch4 (counts as tr+ch1), *sk 1 st, tr in next st, ch1; rep across, ending with tr in last st, turn (creates foundation mesh)
Round 3 :
Ch4, *tr in top of tr from previous row, ch1; rep across. This builds a ladder mesh. Work until lattice reaches desired width (approx 6-8 cm wide). Typical repeat: work 10 rows of mesh.
Round 4-11 :
Repeat Round 3 (mesh rows) until width approx 6-8 cm (10 rows total including Rnd2)
Info :
For a firm lattice, finish the last mesh row with a reverse single crochet (crab stitch) along each long edge to give a decorative rope border. Block the lattice flat to square it up before joining leaves.
Round 12 :
Reverse sc (crab stitch) along both long edges: attach yarn at corner and work reverse sc evenly (count will equal number of mesh stitches across edge)
Round 13 :
Fasten off, weave ends. The lattice is now ready to be used as a backbone for joining leaves and acorns.
— Small Crocheted Acorn (make 12-16) :
Round 1 :
Using brown (cap) or dark yarn: mr, 6 sc into ring (6)
Round 3 :
(1 sc, inc) x 6 (18)
Round 4 :
1 sc in each st (18)
Round 5 :
(2 sc, inc) x 6 (24)
Info :
At Round 6 we will form the cap. Switch to lighter/tan yarn for the body of the nut if desired; many acorns pictured have textured caps and smoother bodies.
Round 6 :
Change to nut color (or continue same). 1 sc in each st (24)
Round 7 :
(3 sc, dec) x 6 (18)
Round 8 :
1 sc in each st (18)
Round 9 :
(2 sc, dec) x 6 (12)
Round 10 :
Begin stuffing lightly; finish stuffing firmly in Round 11
Round 11 :
(1 sc, dec) x 6 (6)
Round 12 :
6 dec closing to a small hole, fasten off and pull tail through to close. Leave long tail for coiling and sewing to lattice
Info :
To create a textured cap, before Round 6 you can work a row of popcorn stitches in the cap color over every other stitch, then proceed to body color. Alternatively cover small wooden beads with yarn to mimic chunky acorns.
— Large Acorn / Cluster (optional) :
Round 1 :
mr, 8 sc into ring (8)
Round 3 :
(1 sc, inc) x 8 (24)
Round 4 :
1 sc in each st (24)
Round 5 :
(2 sc, inc) x 8 (32)
Round 6-9 :
1 sc in each st (32) - these rounds build a larger nut if desired
Round 10 :
(3 sc, dec) x 8 (32 - 8 = 24)
Round 11 :
(2 sc, dec) x 6 (18)
Round 12 :
Stuff firmly and finish with (1 sc, dec) x 6 (12) then close. Add a textured cap or a wrapped cord for realism.
Info :
Acorns can be topped with a small loop for sewing onto leaves or the lattice; sew caps separately and tack them on for dimension.
— Joining Leaves to Lattice and Each Other :
Info :
Lay out your lattice on a blocking mat. Arrange large leaves at intervals along the runner, filling gaps with medium and small leaves. Alternate colors and orientations for a natural look. Leave small spaces for acorns to nestle in clusters.
Round 1 :
Pin a large leaf edge to the lattice at the placement points using rust-proof pins; ensure leaf tip and base align roughly with lattice holes so the leaf lays flat
Round 2 :
With matching yarn tail, sew leaf to lattice using blind stitch / ladder stitch: insert needle through the lattice hole, then into the base edge of the leaf and back, making even small stitches spaced every 3-4 mm to secure without visible bulk
Round 3 :
For layered areas: overlap medium and small leaves over large ones, sewing only through one leaf edge and catching the lattice underneath so layering sits naturally
Info :
Leave a little slack in sewn joins so leaves are not pulled flat; this creates a lifelike lifted edge. Use matching thread color to reduce visible seams.
Round 4 :
Sew acorns into small clusters: use the long tail from each acorn to tack through lattice and into leaf overlapping areas, secure with several tight stitches and knot discreetly at the back
Round 5 :
For extra hold, add a few stitches attaching underside of leaf midline to lattice center so leaves don't flip while in use
Info :
Take photographs of your layout before sewing to reproduce symmetrical patterns if making multiple runners. Keep a spare lattice piece for testing join points and acorn placement.
— Decorative Edge & Finishing Loops :
Round 1 :
With leftover accent color, pick a point at the runner end and attach yarn; chain 12 and sl st back into base to make a decorative curl or loop. Work several loops spaced around ends.
Round 2 :
For a refined edge, work a crab stitch (reverse sc) around the entire runner perimeter, picking up lattice and leaf edge at attachment points to create a unified edge
Info :
Trim any long tails, weave ends securely into motifs and lattice. If desired, gently press with steam iron through a damp cloth to relax any curl and set the shape.
— Optional Surface Embroidery & Veining :
Round 1 :
Using a tapestry needle and a strand of contrasting yarn, stitch extra veins by running an outline stitch from base to tip and small diagonal stitches outward to mimic natural venation
Round 2 :
Use embroidery to accent acorn caps with crosshatching, or to add tiny dots to leaf body for texture
Info :
Embroidery is optional but adds a handmade artisan look. Keep stitches small and sparse to avoid weighing down motifs.
— Blocking & Final Press :
Info :
Wet block each leaf and lattice panel pinned to shape, pulling points gently to make crisp lobes. Dry fully before assembly. Use pins to maintain symmetry when attaching to the lattice.
Round 1 :
After assembly, check overall runner length and fullness. Add small filler leaves or acorns to any visible gaps. Give a final light steam or cloth-pressed iron to set.
Info :
Store the runner flat to preserve shape; if packing away, place between sheets of tissue and avoid crushing the leaf points.
This autumn leaf runner brings seasonal charm to any table with layered texture, rich colors, and tiny acorn accents. Each leaf is a little piece of slow, mindful craft that comes together into a warm, hospitality-ready centerpiece. Make one for yourself or gift it to someone who loves cozy, handmade home decor. 🍂🧶 Your table will feel instantly more inviting — enjoy the process and the compliments!