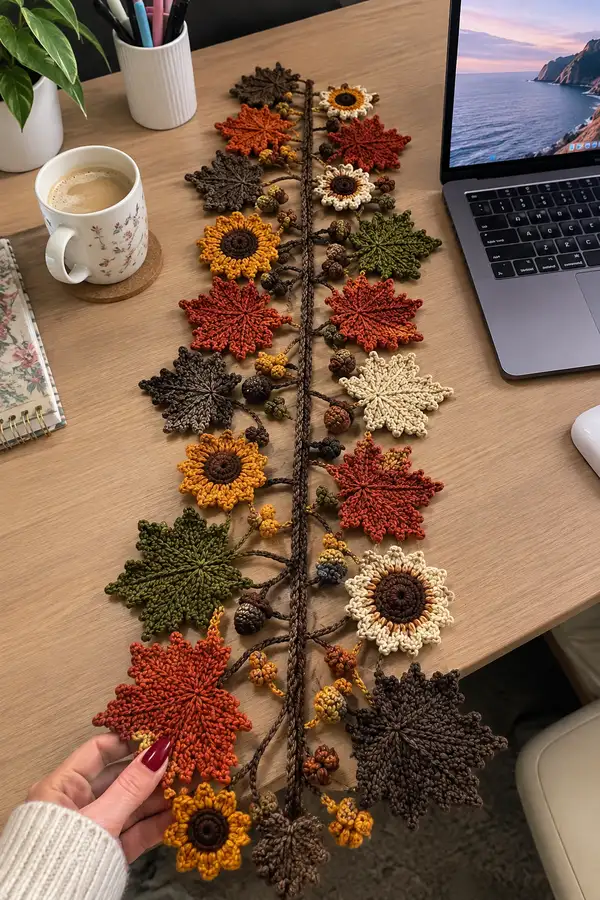
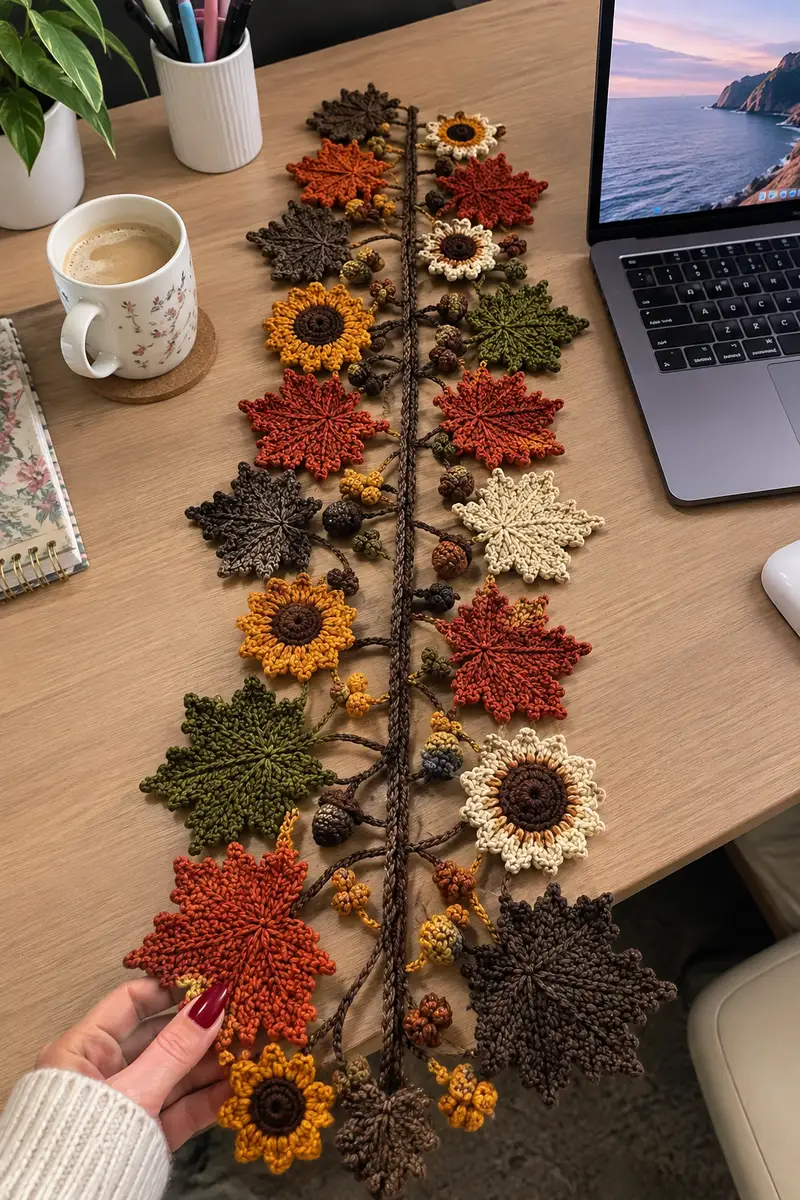
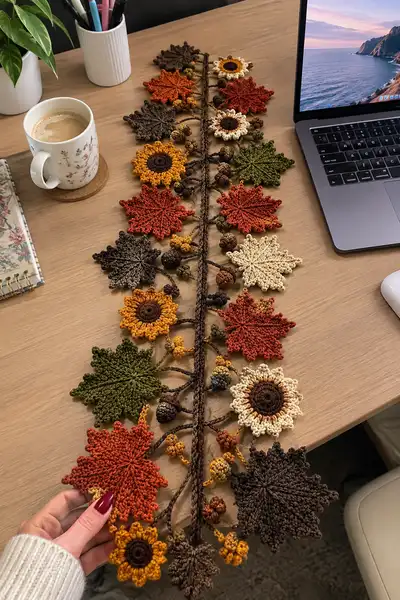
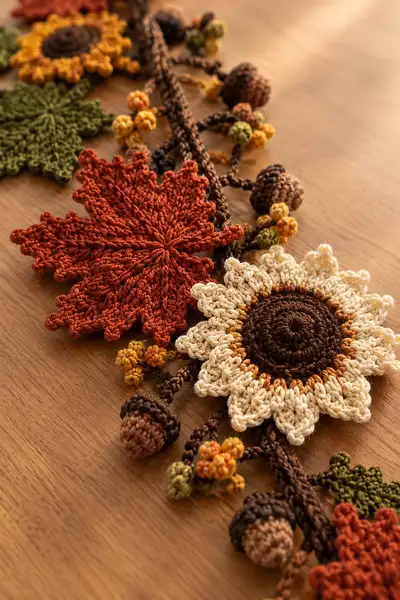
Create a warm, textured fall table garland featuring crochet maple-style leaves, sunflowers, acorns and berry clusters all joined to a braided vine. This pattern uses rustic autumn colors — burnt orange, olive green, mustard, cream and rich chocolate — and is perfect for a mantel or table runner. The finished garland in the photo measures about 28–36 inches (70–90 cm) and has a natural, hand-crafted look.
Progress Tracker
0% Complete
— Notes & General Tips :
Info :
This pattern is modular: you will crochet several motif types and then attach them to a braided stem. Use consistent tension across all motifs for a cohesive look. The sample garland in the photo measures approximately 28–36 inches (70–90 cm) long and contains 12 large motifs and many small elements; adjust motif counts and spacing to taste.
Info :
Abbreviations are US terms. When a motif is listed as 'make 3' or 'make 5', make that many complete motifs following the same rounds. The rounds below include multiple motif versions to give you options; follow counts and assembly guidance at the end.
— Large Maple-Style Leaf (Make 4 - rust/terracotta) :
Round 1 :
Make a magic ring, ch1, 8 sc in ring (8)
Round 2 :
Inc in each st around (16)
Round 3 :
(1 sc, inc) x 8 (24)
Round 4 :
(2 sc, inc) x 8 (32)
Info :
Bloom the leaf base by working the next rounds in FLO to help create a raised central ridge for the leaf ‘vein’.
Round 5 :
1 sc in each st FLO (32)
Round 6 :
(3 sc, inc) x 8 (40)
Round 7 :
1 sc in each st (40)
Round 8 :
'Leaf tip shaping': *ch2, tr in next st, ch2, sl st in next st* across the center top 8 sts to create scalloped tips; continue sc around remaining sts (40)
Info :
Work the tip shaping across the top center only — this produces the pointed lobes of the maple-like leaf. Use markers to indicate the center top 8 stitches before starting Round 8.
Round 9 :
(4 sc, dec) x 8 (32)
Round 10 :
(3 sc, dec) x 8 (24)
Round 11 :
(2 sc, dec) x 8 (16)
Info :
Start working petiole/attachment tail: ch18 from the base (counts as a loop for sewing later) using same yarn and hook. This forms the short stem to attach the leaf to the vine.
Round 12 :
(1 sc, dec) x 8 (12)
Round 14 :
Fasten off leaving long tail for sewing. Flatten leaf and use yarn needle to weave tail into base and secure; if blocking, wet-block and pin points outward to emphasize lobes.
— Medium Star Leaf (Make 4 - olive green) :
Round 1 :
mr, ch1, 6 sc in ring (6)
Round 2 :
Inc in each st (12)
Round 3 :
(1 sc, inc) x 6 (18)
Round 4 :
(2 sc, inc) x 6 (24)
Round 5 :
1 sc in each st BLO (24)
Info :
Working in BLO gives a visible ridge that serves as the central vein on this leaf shape. Keep stitches tight for crisp ridges.
Round 6 :
(3 sc, inc) x 6 (30)
Round 7 :
1 sc in each st (30)
Round 8 :
Form 6 points: *skip 2 sts, sl st in next, ch5, picot (ch3, sl st in 3rd ch), sl st back to same sl st* repeat x6 across the top half, sc around remainder (30)
Round 9 :
(4 sc, dec) x 6 (24)
Round 10 :
(3 sc, dec) x 6 (18)
Round 11 :
(2 sc, dec) x 6 (12)
Round 12 :
Ch14 for petiole, fasten off leaving long tail for sewing
— Small Decorative Leaf (Make 6 - cream & taupe mix) :
Round 3 :
(1 sc, inc) x6 (18)
Round 4 :
1 sc around FLO (18)
Round 5 :
Work scalloped edge: *sc, ch3, sl st in next* around across the top 8 sts, sc around remainder (18)
Round 6 :
Ch10 for a short stem, fasten off, leave long tail for sewing (used to attach to small branches)
Info :
These little leaves act as filler around sunflowers and acorns. Use a thinner yarn color or variegated yarn to add visual interest quickly.
— Sunflower Motif (Make 3 - mustard & cream centers) :
Round 1 :
With dark brown, mr, ch1, 8 sc in ring (8)
Round 2 :
Inc in each st (16)
Round 3 :
(1 sc, inc) x8 (24)
Round 4 :
Switch to tan/caramel yarn. 1 sc in each st (24)
Info :
Change color by finishing last pull-through of the previous round with new color. This creates a clean color join on the right side.
Round 5 :
Switch to mustard yarn: (2 sc, inc) x8 (32)
Round 6 :
1 sc in each st (32)
Round 7 :
Petal foundation: *ch2, 3 dc in next st, ch2, sl st in next st* repeat across 16 petal anchors (32)
Round 8 :
Turn each petal into fuller petals by working 5 dc in each ch2 space from Round 7, sl st at base to secure (32 petals)
Info :
Use slightly tighter tension for petal stitches to help them stand up. Wet-block lightly to shape petals outward if needed.
Round 9 :
Switch to dark brown and work surface slip stitches into the center to create a textured seed look: 3 rounds of sc in spiral (approx 32,32,32)
Round 10 :
Ch8 stem (petiole) in mustard, fasten off leaving long tail for sewing. For layered sunflowers, add an inner ring of smaller petals by repeating Rounds 7–8 with tan yarn and attaching before final petal round.
— Acorn Nut (Make 6 - variegated browns) :
Round 1 :
mr, ch1, 6 sc in ring (6)
Round 2 :
Inc in each st (12)
Round 3 :
(1 sc, inc) x6 (18)
Round 4 :
1 sc around (18)
Round 5 :
(2 sc, inc) x6 (24)
Round 6 :
1 sc around (24)
Round 7 :
(3 sc, inc) x6 (30)
Info :
Begin stuffing: Use small amounts of polyester stuffing to shape the rounded nut. Stuff firmly but not so densely that seams distort.
Round 8 :
(4 sc, dec) x6 (24)
Round 9 :
(3 sc, dec) x6 (18)
Round 10 :
(2 sc, dec) x6 (12)
Round 11 :
(1 sc, dec) x6 (6) — finish stuffing, fasten off leaving long tail for assembly
— Acorn Cap (Make 6 - chocolate brown) :
Round 1 :
mr, ch1, 6 sc in ring (6)
Round 2 :
Inc in each st (12)
Round 3 :
(1 sc, inc) x6 (18)
Round 4 :
1 sc in each st BLO (18) to create a ridge for the cap edge
Round 5 :
(2 sc, inc) x6 (24)
Round 6 :
Work textured stitch round: *sc, bobble (4 dc bobble), sc* across to give cap a nutted texture (24)
Round 7 :
Slip st into base and leave long tail. Place cap over acorn nut and stitch around edge using long tail to secure; hide tail inside nut and weave in.
Info :
For bobble stitch: yarn over twice, insert, pull up, yarn over and pull through two loops repeatedly to form bobble, finish to close. Alternatively use popcorn stitch if more familiar.
— Tiny Berry (Make 12 clusters - mustard/olive blend) :
Round 1 :
mr, ch1, 6 sc (6)
Round 2 :
1 sc in each st (6)
Round 3 :
Switch to popcorn/cluster technique: *bobble in next st, sl st* repeat 3 times around to create chunky look; fasten off leaving tail
Info :
Make clusters by crocheting 3–5 small berries on a short ch6 branch each and sew them grouped together to mimic berry clusters in the photo.
— Long Braided Stem (Central Vine) :
Round 1 :
With dark chocolate yarn, ch250 (adjust length to desired finished garland length). This forms the central braid material; do not fasten off.
Round 2 :
Divide chain into 3 equal strands (approx ch83 each) and secure ends. Braid these 3 chains together gently to create the textured vine. Tie a knot at each end and weave ends into braid to hide tails.
Info :
Alternative: Make three long I-cords (hdc in back bumps) and braid them for a thicker, rope-like stem. I-cord method: ch40, hdc in 2nd ch from hook then across, turn and hdc in FLO along the chain, slide to form tube, continue to desired length.
Round 3 :
Create attachment points every 9–12 cm (3.5–4.5 inches): use 6 ch loops pulled from braid to form branches that will hold leaves, flowers, berries and acorns. To make a branch loop: insert hook under a braid stitch, pull up a loop, ch10–18 and sl st back to same insertion point forming a small branch. Make about 12–16 branches along the braid.
Info :
Space branches alternately left and right to achieve the asymmetrical natural look in the photograph. Vary branch lengths and motif positions for depth.
— Branches & Short Connectors (Make approx 16) :
Round 1 :
At each planned point, insert hook into braid, ch to desired branch length (8–18), sl st back into braid to form a loop. For multiple offshoots (berries), make two or three short ch8 loops grouped close together from the same insertion point.
Round 2 :
To add texture to a branch, work sc along the length of the chain: working into each ch, sc back toward the braid to create a small crocheted twig. Fasten off and leave tail for stitching motifs onto the twig.
Info :
For very secure motifs, slip stitch around the base of the branch into the braid 3 times before fastening off. This anchors the branch firmly when motifs are sewn on.
— Assembly Preparation :
Info :
Lay the braided stem flat and arrange where you want motifs to sit. Use pins to secure motifs temporarily. Create a balanced look by alternating leaf colors and placing sunflowers at 1/3 and 2/3 lengths. Space acorns and clusters of berries near the base of leaves and between sunflower motifs.
Info :
Arrange empty motif placements first then add small filler leaves to even out negative spaces. Take a photo of your layout before sewing so you can re-create spacing if pieces shift.
— Sewing & Final Attachment :
Round 1 :
Using yarn needle and long tails left on motifs, sew each petiole or ch stem to the braid and branch. Use an invisible whip stitch for neat joins and stitch through the braid a few times for strength.
Round 2 :
For acorns: stitch the cap first onto the nut using 4–6 small stitches then attach the acorn’s long tail to the braid, securing it into a branch loop or stitch through the braid directly.
Round 3 :
Attach sunflowers by sewing their petiole to a branch and using additional small stitches through petals where they overlap leaves to secure orientation. Use a few stitches on either side of the petiole to prevent flipping.
Info :
For added realism, sew small berry clusters at branch tips by threading the cluster tail through the braid and knotting on the wrong side. Trim and weave all ends neatly.
Round 4 :
When all pieces are attached, block the whole garland laid flat to ensure leaves and petals sit properly. Pin gently, mist with water, let dry overnight.
Info :
If the braid twists after assembly, use a few strategically placed hidden stitches under motifs to hold the braid flat. Test drape and adjust by moving a few stitches if needed.
— Optional Finishing Touches :
Round 1 :
Add a small loop at one or both ends for hanging: fold end of braid into small ch6 loop and sew closed, or attach a metal ring for a sturdy hanger.
Round 2 :
For a more rustic look, lightly brush edges of leaves with a small amount of fabric paint in darker tones to accent veins. Test paint on scrap yarn first.
Info :
Final weight is light; if hanging vertically use two anchor points. If placing as a table runner, the braid will lie flat and motifs keep low profile for table use.
This autumn garland is a celebration of texture and color — each leaf, sunflower and acorn brings seasonal charm to your home. The braided stem and clustered berries add depth and natural rhythm, making it perfect as a runner or mantelpiece. Enjoy the rhythmic repetition as you stitch each motif and savor the cozy feeling when it comes together. 🍂🧶✨