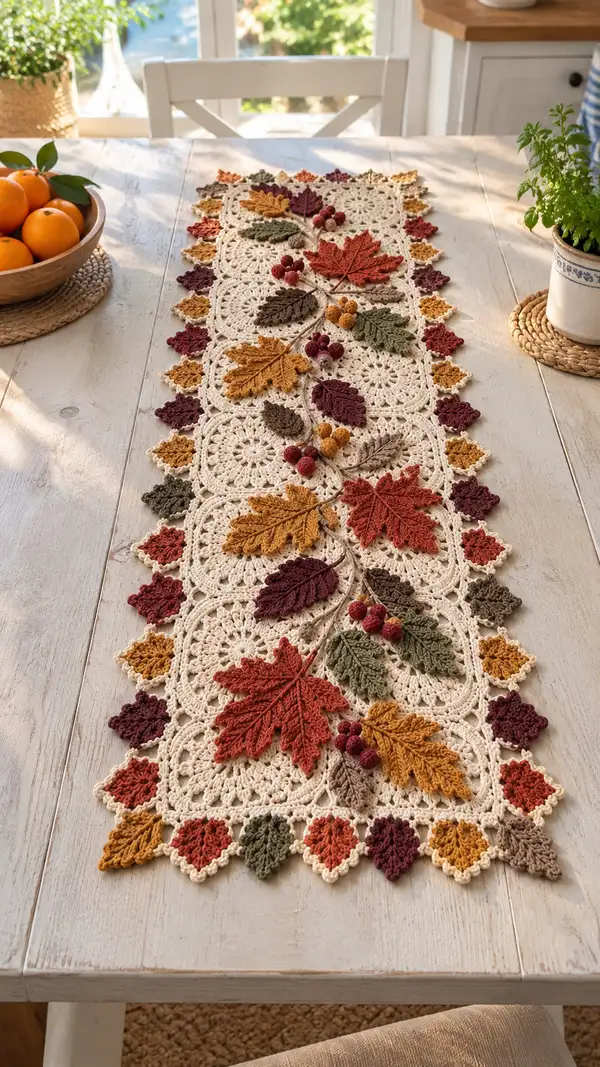
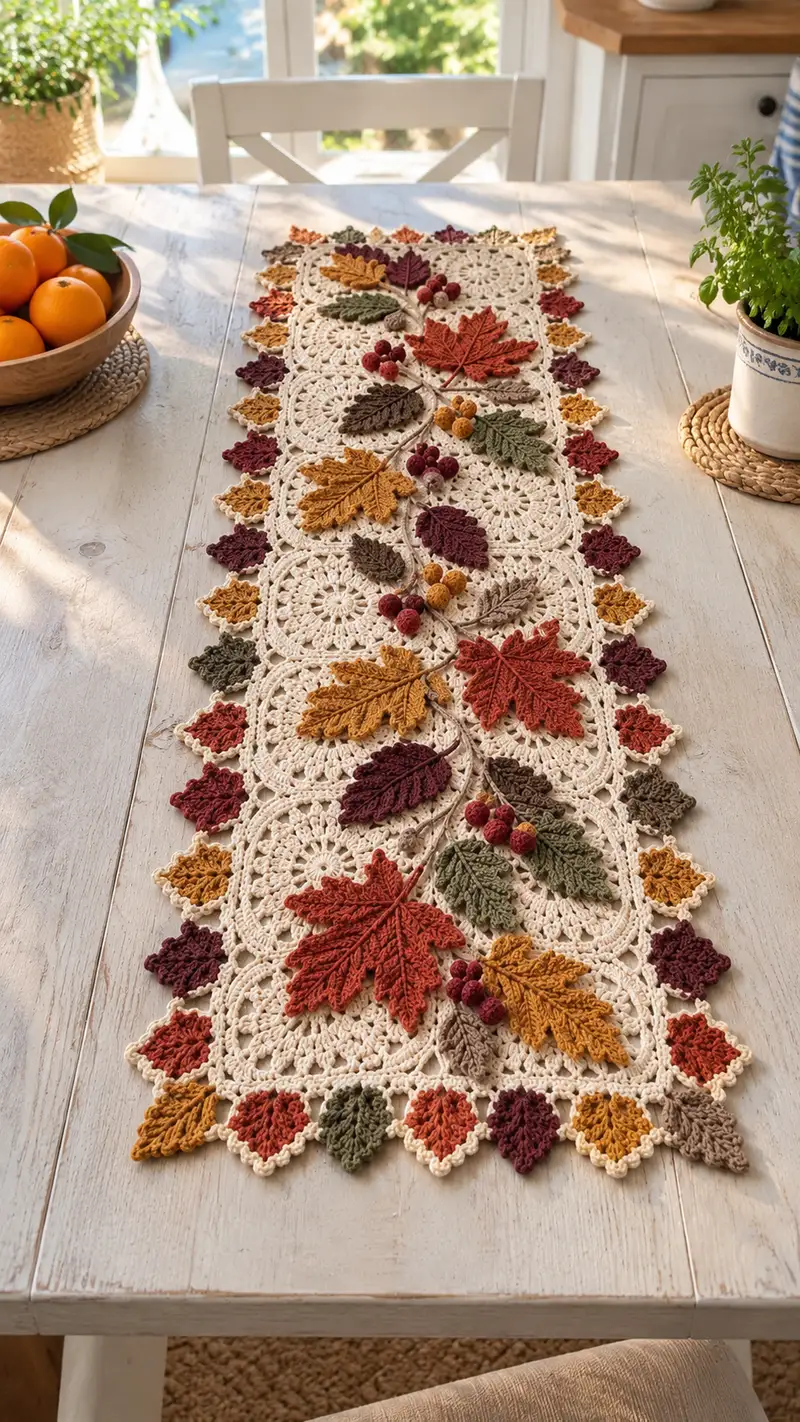
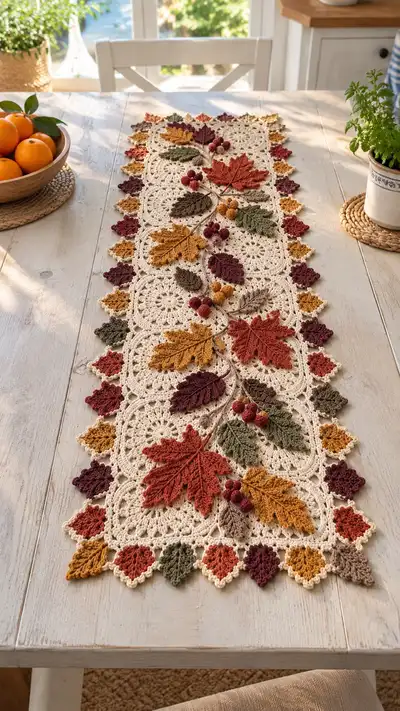
A warm, detailed crochet table runner inspired by fall foliage — features lacy cream medallions, layered textured leaves in rust, mustard, olive and berry tones, and a delicate scalloped edge. This long runner uses joined motifs with embroidered vines and clustered berries for a dimensional, seasonal centerpiece. Clear assembly notes and tips help you place leaves and stems for a polished finished piece.
Progress Tracker
0% Complete
— Materials & Gauge :
Info :
Gauge is not critical for runner width but affects motif size. With 3.5mm hook one medallion measures approximately 22 cm (8.5 in) across after blocking. Adjust hook size for desired size. Make 8 medallions for a runner ~150 cm (59 in); adjust medallion count for length.
— Center Lace Medallion (Make 8) :
Round 2 :
Inc in each st around (12)
Round 3 :
(1 sc, inc) x 6 (18)
Round 4 :
(2 sc, inc) x 6 (24)
Round 5 :
(3 sc, inc) x 6 (30)
Round 6 :
(4 sc, inc) x 6 (36)
Round 7 :
(5 sc, inc) x 6 (42)
Round 8 :
(6 sc, inc) x 6 (48)
Round 9 :
1 sc in each st (48)
Info :
Place 8 evenly spaced stitch markers to mark 8 repeat segments (every 6 sts). These will become the points/corners for square shaping.
Round 10 :
(5 sc, ch 3, sk 1) x 8 across (48 sc + 8 ch-3 spaces)
Round 11 :
In each ch-3 space: (ch3, 3 tr, ch3) to form a tall shell; sc in next 5 sc between shells. Repeat across to form 8 shells (48 main sc still counted between shells)
Round 12 :
Working into space between shells, ch1, sc 3, (ch3, tr-shell into top of shell, ch3, sc 3) x 8 — this begins to square the motif by creating corner arches
Round 13 :
Work 1 sc in each sc and into each ch-space work (2 dc, ch2, 2 dc) for corner shells. Maintain total of 8 corner shells and even scs between to keep edges straight (approx count 64 sts excluding corner chs)
Info :
Tip: Keep tension even and block motif while slightly pulling corners square with pins so all medallions match in size for neat joining.
Round 14 :
Sc evenly around forming small picot or shell edging: *(3 sc, ch2, sl st into ch2 of corner) across*. Aim for balanced stitch count; final count will be approximately 72 sts including shells.
Round 15 :
Optional: Work a decorative lace round: *sc into each st, in corner ch2 work (sc, ch1, sc)* to emphasize corners. Fasten off and weave ends. Block square to 22 cm across.
Info :
Make 8 medallions. Lay them out in a single long strip so pattern repeats form the runner. Blocking each medallion now ensures consistent size and easy joining.
— Small Diamond Leaf Motif for Edge (Make 32) :
Round 1 :
ch 6, join with sl st to form small ring (6 ch)
Round 2 :
Work into ring: ch1, 6 sc around (6)
Round 3 :
(inc, sc) x 3 (9)
Round 4 :
(1 sc, inc, 2 sc) x 3 (12)
Round 5 :
Ch2, turn and work along one side to shape point: (hdc, dc, tr) in next sts then mirror down other side; finish with sl st to base forming diamond point (approx 9 sts on final edge)
Round 6 :
Edging: sc around entire diamond working 3 sc in tip points to accent. Fasten off leaving long tail for sewing (approx 12-14 sts).
Info :
Make 32 small diamonds in a variety of accent colors (rust, mustard, olive, plum). These will be joined into the scalloped border between medallions.
— Small Leaf Accent (Make 12) :
Round 1 :
ch 7, sc in 2nd ch from hook, sc across to last ch (6 sc)
Round 2 :
Turn, ch1, (sc, hdc, dc, hdc, sc) across to form center leaf body (6 sts shaped)
Round 3 :
Working into row ends, sc along one side to tip: sc, hdc, dc; continue down other side mirroring to form leaf edge. Join at base with sl st.
Round 4 :
Surface stitch a center vein using sl st or embroidered chain stitch with contrasting taupe yarn. Fasten off leaving tail for sewing.
Info :
These small leaves are sewn into spaces around the larger leaves to give depth and variation in scale.
— Large Textured Maple-Style Leaf (Make 8 - assorted colors) :
Round 1 :
Start at leaf base: ch 6, sc in 2nd ch from hook and across to last ch to form foundation chain (5 sc)
Round 2 :
Turn, ch1, 1 sc in first st, hdc in next, dc in next, tr in center st, dc, hdc, sc - forming first row peak (5)
Round 3 :
Chain 1, turn, work along edge increasing: sc in first, (sc, hdc) in next st, dc in center, (hdc, sc) mirrored across, sc in last (7)
Round 4 :
Ch1, *work FLO rib rows across to create rib texture: 1 sc in next st BLO across length to center, at center ch1 and reverse back across to create second half. Maintain symmetrical increases at edges (approx 9-11 sts)
Round 5 :
Introduce post stitches for veins: On right side make fpdc (front post double crochet) spaced down center ridge to make raised vein. On left side mirror with bpdc. Continue to increase 2 sts at top of leaf to shape tip (approx 13 sts)
Round 6 :
Increase sides again: work (sc, hdc, dc) into new stitches to widen leaf base; continue fpdc and bpdc veins; chain 1 turn and work back (approx 15 sts)
Round 7 :
At top tip decrease slightly: (sc, dec, hdc) then turn to form pointed tip; continue to texture with front post rows alternating to deepen ridges
Round 8 :
Work a decorative picot edge by: *(sc, ch3, sl st into base of ch3) across outer edge to add serrated leaf texture. Fasten off leaving long tail for sewing. Approximate size after blocking: 12-15 cm wide.
Info :
These leaves are worked flat in rows (recorded here as rounds) using post stitches to create pronounced veins. Work gently and block flat to set final shape. Make 8 in assorted colors.
Round 9 :
Optional: Embroider secondary veins by running a tapestry needle with matching yarn from base to tip creating 3-5 branching veins on each leaf side.
Info :
If you prefer a sturdier leaf, use a 3.0mm hook for leaves and 3.5mm for medallions; this makes leaves slightly denser and easier to position.
— Berry Spheres (Make 18 small berries, 12 medium) :
Round 3 :
(1 sc, inc) x 6 (18)
Round 4 :
1 sc in each st (18)
Round 5 :
(1 sc, dec) x 6 (12)
Round 6 :
6 dec (6) - do not fasten off yet. Stuff lightly with fiberfill then close with yarn needle.
Info :
For medium berries increase to Round 4 holding at 24 sts (use pattern: inc to 24 then two rounds even before decreasing). Make berries in clustered sizes to create natural clusters.
— Stem Vine (Make 3 long vines to run along runner) :
Round 1 :
With taupe yarn ch 200 (or desired vine length), sc into 2nd ch from hook and across to form a narrow tube (199 sc). Join ends only if making individual short stems, otherwise leave as long chain for placement.
Round 2 :
If you prefer a raised vine: work 1 sc in each st along tube working fp sc every 6th stitch to create subtle bump for twig texture. Fasten off leaving long tail for sewing.
Info :
Make at least 3 vines of varying lengths. You can also crochet chain cords and wrap with yarn for thicker vines.
— Joining Medallions (Join-as-you-go method) :
Info :
Lay out 8 medallions in a row, right sides up. We'll join medallions along one side at a time using single crochet join-as-you-go so seams are neat and flat. Work clockwise around runner to connect all motifs.
Round 1 :
Place two medallions adjacent, hold right sides together. Insert hook through edge stitch of medallion A and medallion B, sl st to join. Work sc in each st across joining edge (approx 36 joins depending on your edging). Repeat for each pair across entire runner.
Round 2 :
After joining all medallions into a strip, work one round of sc evenly around entire runner to neaten inner seams: 1 sc in each visible st across seam areas and 3 sc in each corner space.
Info :
Keep joins loose enough to allow some drape. Pin medallions flat and check alignment of corner shells so edges remain square.
— Outer Lace Border (worked around joined strip) :
Round 1 :
With cream yarn and 3.5mm hook work 1 sc across entire outer edge, placing 3 sc in each corner to maintain square corners. Please count to maintain consistent stitch multiple around (aim for 6 sc between each diamond leaf placement). Fasten off.
Round 2 :
Join yarn at a corner and work: *ch3, sk 2, sc in next st* repeat to form small chain loops edging between points. This creates neat anchor points for diamond leaves.
Round 3 :
In each chain loop: join colored diamond leaf motifs (made earlier) by placing diamond with point outwards and sl st through back loop of chain loop and around diamond base (3 sl st). Continue around alternating colors in a repeating sequence (rust, mustard, olive, plum).
Info :
Space diamonds evenly; there will be approximately 4 diamonds per side of medallion where medallions meet so plan color repeats across runner for balance.
Round 4 :
After diamonds are attached across both long sides and short ends, work a decorative shell round over entire edge: *5 dc in next stitch, skip next 3, sl st* repeat around. This creates pointed scallops that frame the diamonds.
Info :
Block the entire runner again after attaching diamonds to relax joins and set final shape; pin points outwards and spray lightly with water.
— Attaching Leaves, Berries and Vines (Placement & Stitching) :
Info :
Arrange leaves, small leaves and berries across medallions in a natural vine composition before sewing. Use pins to experiment with placement. Aim for groupings of 3-5 leaves with 3-4 berries clustered near the base of larger leaves.
Round 1 :
Sew vine cords in gentle S shapes across the runner using taupe yarn: use mattress stitch under sc rows to anchor vine securely to medallion fabric. Stitches approx every 1 cm to prevent shifting.
Round 2 :
Sew large leaves on top of vines using whip stitch through long tail left when fastening off. Tack both leaf base and mid points (3-4 stitches) so leaf shapes lie flat. For realistic lift, sew only base and place a couple of hidden tacking stitches in mid-venation.
Round 3 :
Sew small leaves into gaps around large leaves using smaller yarn needle and 3-4 tiny whip stitches per leaf. Fasten ends and bury tails under medallion stitches.
Round 4 :
Sew berries in clustered groups of 3-5 using yarn tail through berry center and secure to vine with a couple of tight stitches; weave tail inside runner to hide. For extra security apply a tiny dab of fabric glue on interior knot if needed.
Info :
Position leaf veins aligned with vine direction so visual flow reads naturally down the runner. Leave some leaves lifted slightly by placing only a few stitches along their base to create dimensional shadowing.
— Additional Decorative Stitches & Surface Embroidery :
Round 1 :
Using contrasting thread, embroider tiny French knots along vine edges to mimic buds; make knots by wrapping embroidery thread twice around needle and pulling through for tight little bumps.
Round 2 :
Surface stitch additional veins with running stitch or chain stitch down leaf centers for definition; use darker shade for subtle contrast and to emphasize texture.
Info :
Work embroidery sparingly — small stitches read best at tabletop scale. Test color on a scrap medallion first to ensure desired contrast.
— Final Blocking & Finishing :
Info :
Once all pieces are attached, place the runner flat on blocking board, pin gently at scalloped points and steam-block lightly or spray and let dry. This sets lace spaces and flattens joins for an even professional finish.
Round 1 :
Weave in all remaining tails from front to back and trim close. Optionally add small felt pads under large leaves if you want slight lift and protection for tabletop surfaces.
Info :
Check both sides for loose tails and secure them with a few invisible stitches to prevent unraveling during wash. Hand wash gently and lay flat to dry.
Completing this runner is such a satisfying project — each medallion, applied leaf and berry cluster builds a layered seasonal scene that looks both elegant and handmade. The mix of lacy cream motifs and textured colorful leaves creates a beautiful contrast perfect for fall tables. I hope creating this piece brings you joy and becomes a holiday staple or a gift treasured for years. 🧶🍁✨