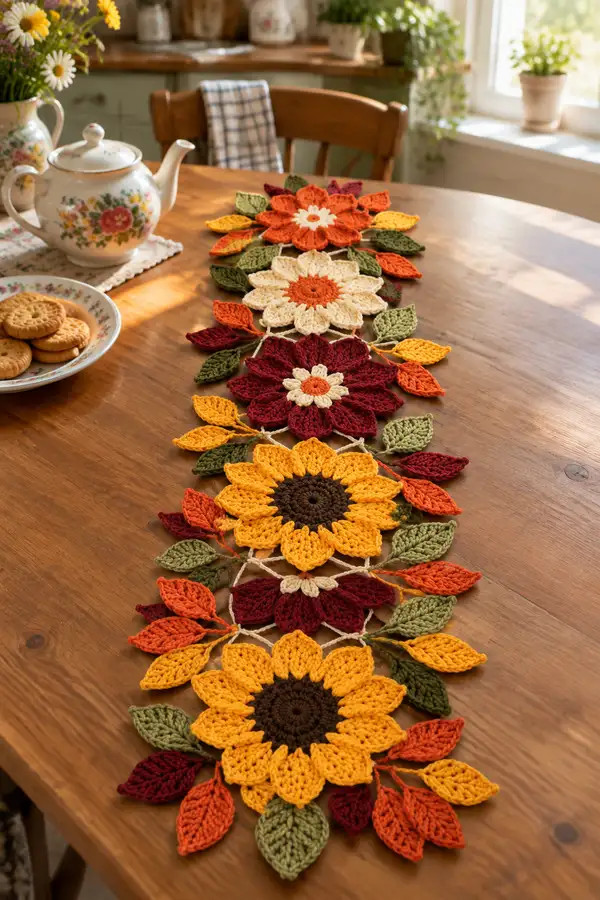
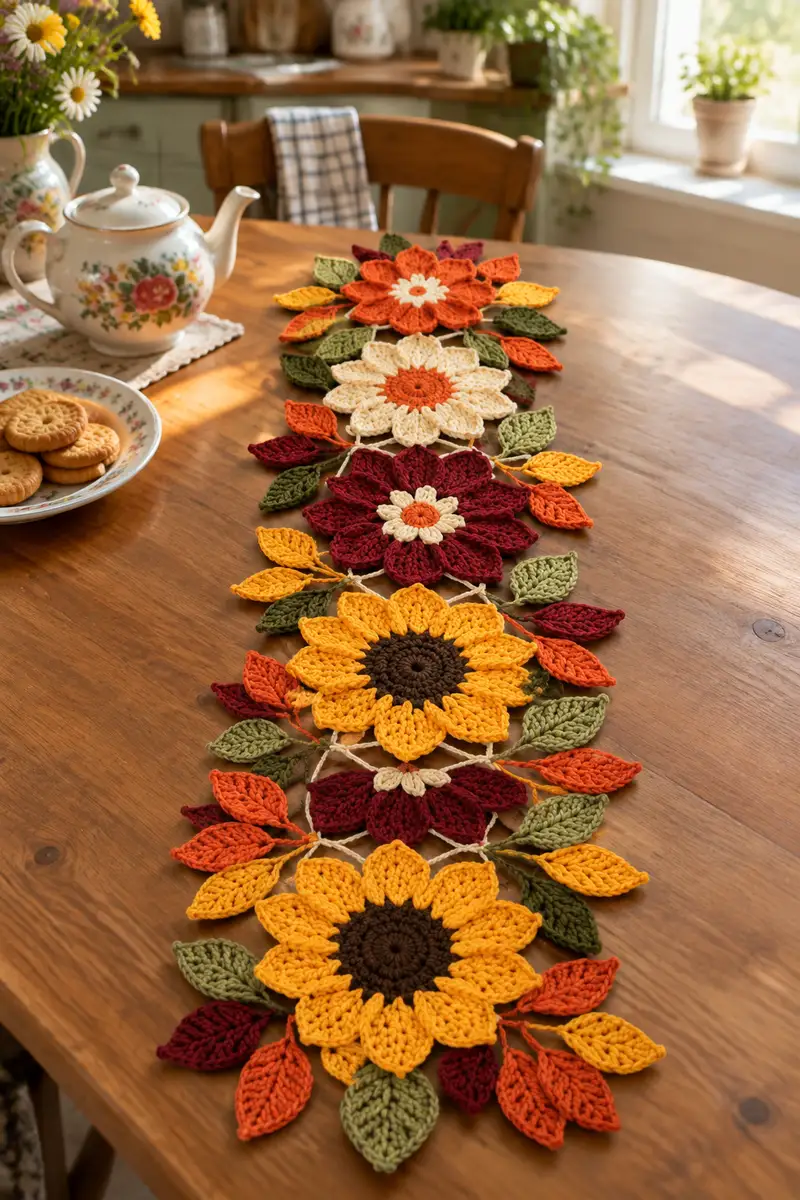
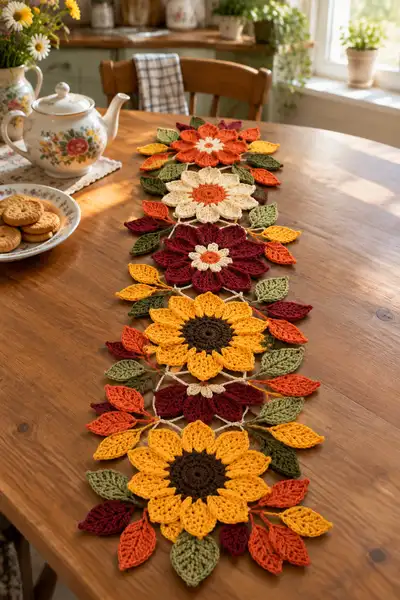
Create a warm, autumn-inspired table runner made of linked floral motifs and sculpted leaves. This pattern features large sunflower centers, layered petals in rich fall hues, and textured leaves joined with airy chains for a delicate, handmade centerpiece. Finished runner shows alternating sunflower and daisy-style motifs in gold, rust, cranberry, cream and olive tones — perfect for seasonal decor or a cozy table setting.
Progress Tracker
0% Complete
— Notes & Gauge :
Info :
Gauge is not critical for this decorative runner, but for consistency a 10 cm/4 in round sunflower motif (center to petal tip) is achieved using worsted weight cotton and a 4.0mm hook. The runner in photos contains five large motifs linked with chain-bridges and numerous leaves; adjust number of motifs to desired length.
Info :
Join motifs as you go by slipping into chain-bridges, or finish motifs and join later with whip stitch for a firmer seam. Block motifs lightly to open petals before joining.
— Sunflower Motif (Large) :
Round 1 :
With brown, mr, 6 sc in magic ring (6)
Round 3 :
(1 sc, inc) x 6 (18)
Round 4 :
(2 sc, inc) x 6 (24)
Round 5 :
(3 sc, inc) x 6 (30)
Round 6 :
(4 sc, inc) x 6 (36)
Round 7-8 :
1 sc in each st (36)
Info :
Keep these two rounds in single crochet to build a dense, stable center for the petal clusters. Place a stitch marker at the start of round 7 to maintain orientation for petal placement.
Round 9 :
Change to gold/yellow. 1 sc in each st BLO (36)
Info :
Working in BLO creates a subtle ridge where petals attach so petals sit forward and have a distinct base. Fasten off brown and weave in ends behind center.
Round 10 :
With gold, ch 2 (counts as hdc), *skip next st, (3 dc, ch 1, 3 dc) in next st (petal base), skip next st, hdc in next st; rep from * around to make 12 petal bases, sl st to top of first ch-2 to join (12 petals total)
Info :
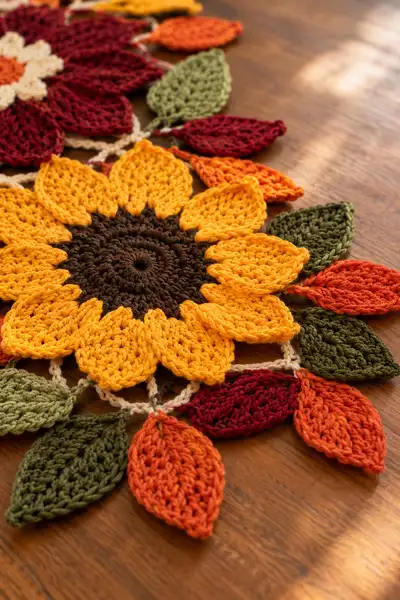
Each petal base (3 dc, ch 1, 3 dc) creates a loop to work petal layers into; mark the front of the motif to always work petals in the same orientation. There should be 12 petal anchors around the center.
Round 11 (Petal Row 1) :
Begin at any petal base: join gold with sl st into ch-1 space, ch 2 (counts as hdc), (hdc, dc, tr, dc, hdc) in same ch-1 space; sl st into next ch-1 and repeat for each petal (12 petals). Fasten off and weave in ends (petal height approx 2.5 cm).
Round 12 (Petal Row 2 — Layering) :
Attach a new strand of gold at the base of each petal (back loop of petal base) with sl st; ch 3, (2 dc in same sp, tr, 2 dc) across center of petal to form a fuller petal; sl st back into base to secure. Repeat around to make petals fuller. Fasten off and weave ends.
Info :
Each petal is worked as a separate cluster to create sculpted, dimensional petals. Work petals consistently so all petals match in size. Block petals gently to open and shape if needed.
Round 13 (Optional Petal Edge) :
With a contrasting light gold, slip into tip of each petal and sc evenly along outer petal edge (approx 7-9 sc per petal depending on petal size). This neatens tips and adds definition. Fasten off.
Info :
There are 12 petals. If you prefer a larger motif, add a third petal row: repeat Round 12 with slightly taller stitches (tr and dtr combinations) to extend petals.
— Deep Blossom Motif (Cranberry) :
Round 1 :
With cranberry, mr, 6 sc in magic ring (6)
Round 3 :
(1 sc, inc) x 6 (18)
Round 4 :
(2 sc, inc) x 6 (24)
Round 5 :
1 sc in each st (24)
Round 6 :
Change to cream for a small inner ring: join with sl st, ch 1, (sc, ch 2, sc) in every 3rd st around to create 8 small chain spaces for decorative inner petals; sl st to join
Info :
This motif intentionally varies the center to create a layered, flower-within-a-flower look. The ch-2 spaces create neat anchors for the inner small petals worked in the next round.
Round 7 (Small Inner Petals) :
Into each ch-2 space: (sc, hdc, dc, hdc, sc) to form 8 small petals. Fasten off cream and weave in ends.
Round 8 :
Back to cranberry, join at the base between small petals: ch 3 (counts as dc), *(skip next 2 sts) in next st work (2 dc, ch 1, 2 dc) to form base for outer petals; rep around to form 8 outer petal anchors; sl st to join (8 outer petals)
Round 9 (Outer Petals Row 1) :
Into each outer petal anchor: join cranberry, ch 2, (hdc, dc, tr, dc, hdc) across anchor; sl st to base to secure. Repeat for all 8 outer petals then fasten off.
Round 10 (Outer Petal Texture) :
Working in FLO around each petal tip, sc evenly around to create a scalloped edge (approx 6-8 sc per petal). Fasten off and weave in ends.
Info :
Because this motif has fewer, larger petals (8), it creates a bold layered look that contrasts with the 12-petal sunflower. Keep petal height consistent for symmetry across motifs.
— Cream Daisy Motif (Medium) :
Round 1 :
With orange rust (small center), mr, 6 sc in magic ring (6)
Round 3 :
(1 sc, inc) x 6 (18)
Round 4 :
Change to cream: 1 sc in each st (18)
Round 5 :
Work petals: *ch 3, (dc, hdc, sc) back into base to form a small petal; rep around into every second stitch to create 12 petite petals; sl st to join
Round 6 :
Edge each petal with a single sc in BLO for light curl and definition. Fasten off and weave in ends.
Info :
This smaller motif works well as an accent between larger flowers. You can work it in a two-tone colorway for contrast.
— Leaf (Make many in mixed colors) :
Round 1 :
With olive, ch 8 (this will form the leaf foundation)
Round 2 :
Sc in 2nd ch from hook, hdc in next, dc in next 2, hdc in next, sc in last ch; now working along the opposite side of foundation chain: sc in last ch, hdc, dc in next 2, hdc, sc in final; sl st to first sc to form small leaf (approx 12 sts around)
Round 3 :
Ch 2, *(hdc, dc, tr, dc, hdc) into the highest point of leaf to build texture; sl st into next stitch to anchor; rep on other side if needed to make symmetrical leaf; fasten off (leaf thickness achieved)
Info :
Leaves are worked flat from a central chain; adjust foundation chain length to create smaller or larger leaves. The sample runner uses leaves approx 6-8 cm long using ch 8 basis and worsted cotton.
Round 4 :
Optional: With a lighter sage, surface slip stitch along center line for vein detail: insert hook into center chain space and work sl st from base to tip. Fasten off.
Round 5 :
Make leaves in a range of colors: olive, light sage, burnt orange and rust. Alternate sizes by changing foundation chain to ch 6 for small leaves and ch 10-12 for larger accent leaves.
Info :
Make a total of 30-40 leaves for a runner of 5 motifs (6-8 leaves around each motif), mixing colors for an organic fall-arrangement look.
— Petal Variation: Tall Sunflower Petal (Alternate method) :
Round 1 :
Identify petal anchor (from Round 10 of sunflower center). Join gold with sl st into ch-1 space; ch 4 (counts as tr), (tr, ch 1, tr) in same space, (tr, ch 1, tr) across mid-section, decrease at tip by working (tr2tog) where indicated; sl st to base. This forms tall, pointy petals for alternate motifs.
Round 2 :
Work a reverse of Round 1 on the back side to add thickness: join yarn on back of petal and sc evenly across back loops to make petals double-layered. Fasten off and weave ends.
Info :
Using this petal variation on alternating motifs gives visual rhythm along the runner: tall petals followed by rounded petals create movement and interest.
— Joining Motifs (Chain-Bridge Method) :
Round 1 :
Decide motif order and orientation; work first motif completely and leave last join point free (do not weave in the short tail used to join).
Round 2 :
When placing second motif adjacent to first, use a neutral cream yarn to create connecting chains: attach cream at the petal base between two petals where you want the bridge, ch 8 (or length required to reach matching petal on neighboring motif), join with sl st into the matching base stitch on neighboring motif. Repeat at 2-3 connection points around each adjacent motif to secure motifs together (typical connection uses 3 bridges per adjacent motif pair).
Info :
Keep chain bridges consistent length to maintain even spacing. For a longer runner you may use 3 connection points between each motif pair: top, bottom and side for stability. Alternatively use whip stitch through petal bases for a stronger join.
Round 3 :
Optionally, after making chain-bridges, slip a small length of the same color through the chains and weave ends for neatness. If the runner may be handled frequently, reinforce bridge knots with a tiny dab of fabric glue on the underside.
Info :
For a delicate look, make single chain bridges; for sturdier join, create a short mesh panel by chaining 8, then turning and working a small mesh row of sc across the chain before joining. Always secure ends by weaving through several stitches.
— Assembly Sequence & Positioning :
Round 1 :
Layout motifs on a flat surface in desired order. Place larger sunflowers alternating with cranberry and cream motifs as pictured for a balanced color-flow. Pepper leaves around each motif, tucking some under petals and some overlapping petal tips.
Round 2 :
Pin each motif in place, then join using chain-bridges or whip stitch as specified above. Attach leaves by sewing base of leaf to underside of petal base with small whip stitches or by crocheting leaves into chain-bridges when creating them.
Info :
Sew leaves in layers: attach a base row of olive leaves first, then add accent orange and burgundy leaves on top for dimensionality. On top-facing leaves, only sew the leaf base so tips lift slightly for a three-dimensional look.
— Edge Finishing & Decorative Lattice :
Round 1 :
Once motifs are joined, tidy edges by working a round of sc around the entire runner with cream yarn, inserting hook into outer loops of petals and leaf edges to create a unified edge. Work evenly to maintain shape.
Round 2 :
For a lacy lattice between motifs, pick cream yarn and in the spaces between petals chain 6, sl st to next motif to create decorative X-shaped links. Alternate these with single sc anchors for stability.
Round 3 :
Work a final round of picot edging if desired: sc around edge, *ch 3, sl st into first ch to form picot, sc in next 3-4 sts; rep around. Fasten off and weave in all ends.
Info :
Blocking the entire runner pinned flat after joining helps the lattice and edges sit uniformly. Use a steam iron held above the work and gentle finger shaping; do not press directly on cotton without a cloth barrier.
— Leaf Cluster Joins (Detailed rounds for many leaves) :
Round 1 :
To make a leaf cluster (3 leaves joined at a little stem): ch 6, join with sl st to motif base, ch 8 and make leaf 1 (follow leaf pattern basics), return to base and ch 8 make leaf 2, ch 8 make leaf 3, sl st back to base and fasten off. Repeat clusters around motif to achieve 6-8 leaves per motif.
Round 2 :
Alternate colors for each leaf in a cluster: main olive, accent burnt orange and deep rust to mirror photo. Trim tails and weave into the underside of motifs for neat appearance.
Info :
The clusters add fullness and hide join points. When crocheting clusters, keep chain lengths the same to ensure each leaf sits evenly from the motif base.
— Detailed Stitch Math Example (Sunflower Petal Anchors) :
Round 1 :
Sunflower center ended with 36 base stitches (Round 9). Petal anchor pattern used every 3rd stitch to produce 12 petal anchors (36/3 =12). Each petal base consumes 3 stitches (anchor, skip, anchor pattern) leaving even spacing.
Info :
If your center rounds differ in count, calculate petal count by dividing total circumference sts by desired petal spacing (e.g., 36 sts divided by 12 petals = anchor every 3rd stitch). Adjust ch and stitch counts accordingly.
— Optional Weighted Backing (For table use) :
Round 1 :
If you want the runner to lay flat on a table, consider attaching a lightweight fabric backing the width of the runner. Pin fabric to underside then whip stitch through outermost sc round every 6-8 mm to secure.
Round 2 :
Alternatively, use small plastic snaps at each corner of the runner to secure to a tablecloth temporarily for holiday use.
Info :
Backing may stiffen the runner; choose an open-weave linen or thin cotton for a natural drape. Do not use heavy interfacing as it will flatten petals.
— Final Blocking & Care :
Round 1 :
Gently hand wash in cool water with mild detergent. Lay flat to dry and pin petals and leaves to desired shape while damp. Avoid tumble drying to preserve shape and color.
Info :
Light starch or fabric stiffener sprayed sparingly on leaf tips helps them hold an upwards curve if displayed in high-traffic areas. Always test stiffener on a leftover scrap first.
Round 2 :
Trim and weave in any remaining loose ends. Admire your runner and rearrange leaves as needed for display.
Info :
For storage, gently fold with tissue paper between motifs to avoid crushing delicate petals. Store flat if possible to maintain shape over seasons.
This autumnal table runner brings together sunflowers, layered blossoms and sculpted leaves to make a handmade centerpiece you'll love. Every petal and leaf adds character to your table, and the warm color palette creates a cozy seasonal atmosphere. Take pride in the texture and hand-stitched connections — it's a beautiful addition for dinners and gatherings. 🧶🍂✨