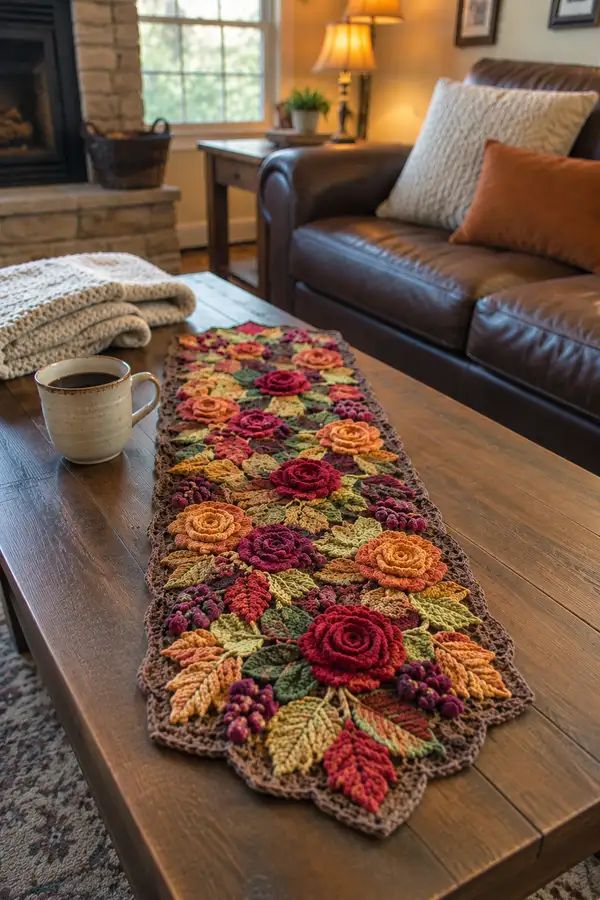
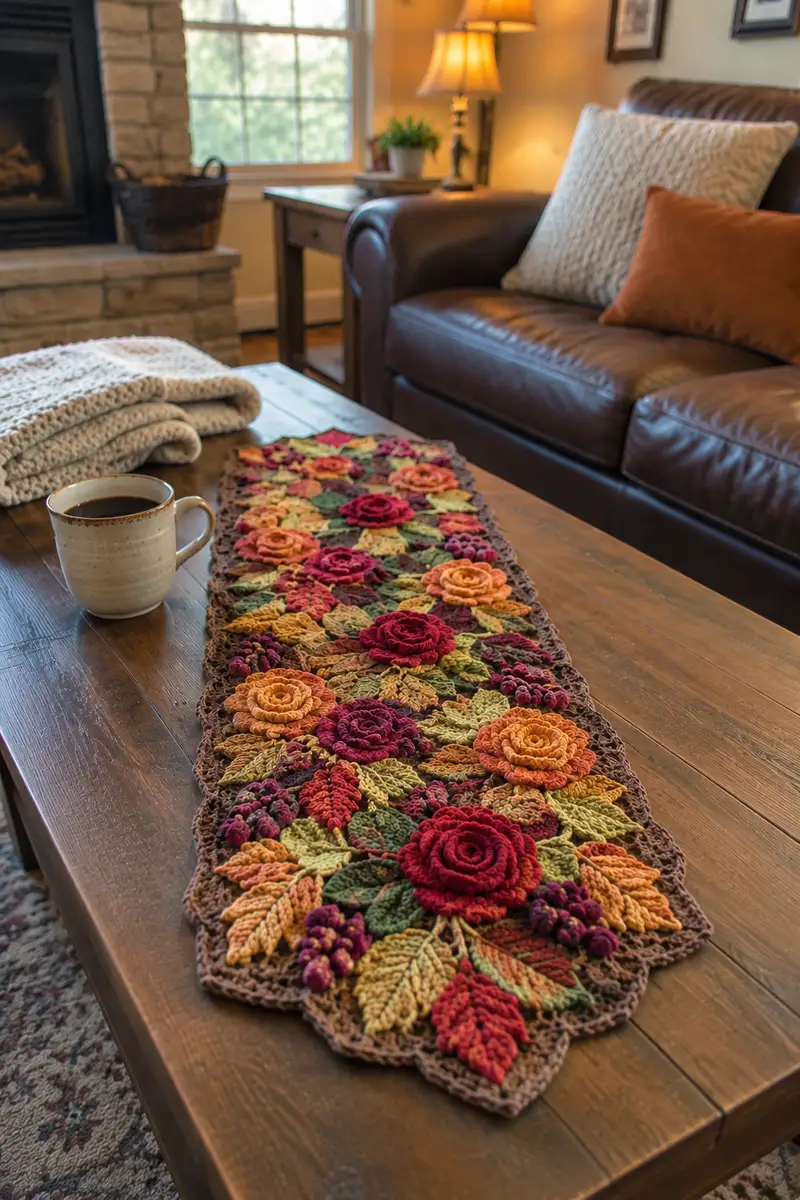
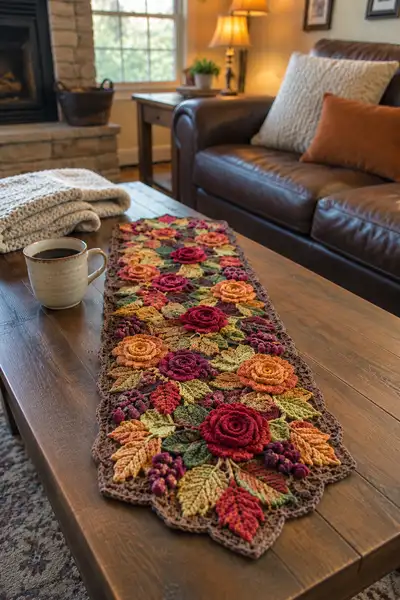
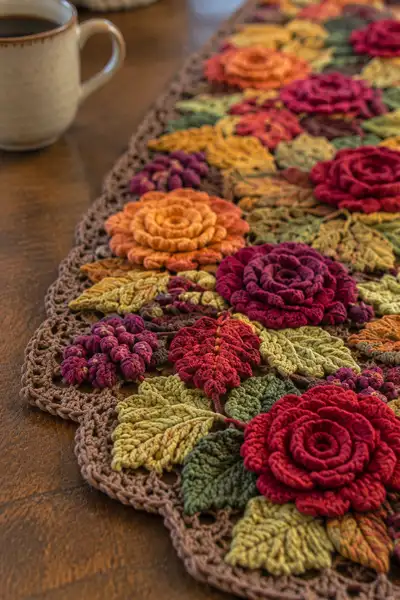
A richly textured table runner inspired by autumn gardens, featuring layered 3D roses, textured leaves and berry clusters arranged along a scalloped border. Warm harvest tones — deep reds, golds, rusts and olive greens — combine into a cozy centerpiece that lays beautifully on dining and coffee tables. The pattern uses motif construction and join-as-you-go techniques so each floral element pops in three dimensions. Perfect for seasonal décor and thoughtful handmade gifts.
Progress Tracker
0% Complete
— Notes and Gauge :
Info :
Gauge is not critical for motif-based runners, but sample a large rose to estimate final size. The sample large rose in worsted weight with 4.0mm hook measures approximately 3.5-4 inches across when blocked. Work tightly enough so motifs keep structure; use a slightly smaller hook for dense bobbles and berry clusters.
Info :
Color placement: alternate warm and cool tones so roses sit next to different hues. Use the background brown for rounds that join motifs and for the final scalloped border for a cohesive frame.
— Large Rose (Make 6) :
Round 1 :
Make a mr, 8 sc into ring (8)
Round 2 :
1 sc in next st, inc around (8 inc) (16)
Round 3 :
(1 sc, inc) x 8 (24)
Round 4 :
(2 sc, inc) x 8 (32)
Round 5 :
(3 sc, inc) x 8 (40)
Info :
These initial rounds form the small base disc. Keep stitches even; this will be the foundation for petal rows.
Round 6 :
1 sc in each st around (40)
Round 7 :
BLO 1 sc in each st (40) — creates a subtle ridge for petal foundation
Round 8 :
*ch 4, skip 1, sl st in next st* repeat around to create 40 ch-4 loops (40 loops)
Info :
Work petals into ch-4 loops. Blooms are made by working several petals in sequence into each loop to create a spiral of layered ruffled petals.
Round 9 :
Into each ch-4 loop: (sc, hdc, 3 dc, hdc, sc) then sl st to next loop — repeat around (creates 40 petals, small)
Round 10 :
Working behind row 9 petals in the space between loops: *ch 3, (2 dc, ch 1, 2 dc) in same sp, ch 3*, sl st into base — creates larger petal arches (40 arches)
Round 11 :
Into each arch from round 10: (sc, 2 hdc, 5 dc, 2 hdc, sc) — work densely to build volume; 40 large petals
Info :
If you prefer a tighter rose, decrease dc counts to 3 instead of 5. Block lightly to open petals if needed.
Round 12 :
Chain off and continue spiral: in the back loop area between petals, sl st to anchor and *ch 5, sl st in next back loop* around creating 40 small loops for a second tier
Round 13 :
Work miniature curled petals in ch-5 loops: (sl st, sc, hdc, 3 dc, picot, sl st) — creates ruffled inner layer of 40 tiny petals
Round 14 :
Slip stitch along base to neaten. Fasten off leaving a 10 inch tail for sewing. Weave in tail under the base and use to sew rose to motif square.
Info :
Work each large rose in the deepest tone (merlot/deep red) for strong focal points. Make 6 large roses and lightly steam-block to set shape.
— Medium Rose (Make 6) :
Round 1 :
mr, 6 sc in ring (6)
Round 3 :
(1 sc, inc) x 6 (18)
Round 4 :
(2 sc, inc) x 6 (24)
Round 5 :
1 sc in each st (24)
Round 6 :
BLO 1 sc in each st (24)
Round 7 :
Ch 3 in each st around (24 ch-3 loops)
Round 8 :
Into each ch-3 loop: (sc, hdc, 3 dc, hdc, sc) — 24 petals
Round 9 :
Sl st around base, fasten off and leave tail for sewing. Shape petals with fingers or light steam. Use pumpkin/orange or golden yellow for these blooms.
Info :
Medium roses are flatter than large ones; vary stitch counts slightly between roses for natural variation.
— Small Rose / Rosette (Make 8) :
Round 2 :
(1 sc, inc) x 3 (9)
Round 3 :
ch 4 in each st around (9 ch-4 loops)
Round 4 :
Into each loop: (sl st, sc, 3 dc, sc, sl st) — creates 9 curled mini petals. Fasten off leaving tail for sewing (small roses look great in mustard or small accent colors)
Info :
Small rosettes are used as infill and look lovely clustered near berry groups.
— Leaf Motif (Make 18-24) :
Round 1 :
ch 8, sc in 2nd ch from hook, hdc in next, dc in next, tr in next, dc in next, hdc in next, sc in last — form leaf base (8 sts span)
Round 2 :
Turn and sc evenly along one side of chain foundation to tip: sc, hdc, dc, tr, dc, hdc, sc. At tip work 3 sc to form point, then work down the opposite side mirroring stitches (creates single leaf)
Round 3 :
Working into leaf surface: BLO around the leaf: *ch 2, (1 sc, ch 1)* along one side to create serrated edge, repeat on other side; ical count depends on spacing (approx 20 small picots)
Info :
Leaf ribs: With contrasting green or darker tone, use surface slip stitch down the center from base to tip to create the central vein. Work neat, even stitches. Make leaves in olive, sage and forest greens for natural variation.
Round 4 :
Surface slip stitch vein: attach yarn at base, sl st up center for length, then fasten off. Optionally, use 2 strands for a more pronounced vein.
Info :
Block each leaf flat with a small pin at the tip to flatten the serrated edge prior to assembly.
— Textured Leaf Variant (Make 12) :
Round 3 :
(1 sc, inc) x 6 (18)
Round 4 :
BLO 1 sc around (18) — this creates a ridge that shapes a short broad leaf
Round 5 :
Work a round of ch-2 picots along the outer edge for texture, fasten off and add surface vein as above
Info :
Textured leaves work well near smaller roses and berries to provide depth.
— Berry Cluster (Make 8 clusters) :
Round 1 :
ch 3, sl st into first ch to form small ring, ch 1
Round 2 :
Make 6 bobbles into ring: (yo, insert, pull up loop, yo, pull through 2 loops) repeat 4 times then finish — refer to your bobble technique; each bobble forms a berry (6 berries per small cluster)
Round 3 :
Ch 1, sl st between bobbles to secure and form cluster. Fasten off leaving tail for sewing.
Info :
Use a rich purple or burgundy for berries. Make clusters of 4-8 berries and group them with small leaves and tiny rosettes for a natural grape-like look.
— Small Filler Motif (Acorn/Pod) (Make 6-8) :
Round 2 :
(1 sc, inc) x 3 (9)
Round 3 :
1 sc in each st around (9)
Round 4 :
Work a bobble stitch around to form cap: (yo, insert, pull up loop) x 3 in each st, finish off — creates textured pod
Info :
Filler pods add visual interest in gaps and complement the berry clusters. Use deep rust or brown shades.
— Base Motif / Join Block (Make 12) :
Round 3 :
(1 sc, inc) x 8 (24)
Round 4 :
(2 sc, inc) x 8 (32)
Round 5 :
ch 3, *dc in next 4 sts, ch 3, skip 2*, repeat to create lacy openings—approx pattern depending on count (32 dc total)
Info :
Base blocks form the background onto which roses and leaves are sewn. Work them in the background brown so the floral elements pop. Make 12 blocks and block flat.
Round 6 :
Work an outer round of shell spaces to create points for joining. *5 dc in same st, skip 3, sl st* repeat to produce a scalloped outer edge (12 shells)
Round 7 :
Sl st around and fasten off. Leave long tails for join-as-you-go sewing.
— Join-As-You-Go Layout and Assembly :
Info :
Plan layout on a flat surface. The pictured runner is a linear cascade of alternating large and medium roses with small roses and clusters filling gaps; leaves radiate outwards. Place 12 base motifs in two staggered rows (6+6) to form a long rectangle. Pin pieces before final sewing.
Round 1 :
Position first two base motifs side by side. With background brown and right sides facing, attach yarn at a shell point on motif A, ch 1 and sl st into corresponding shell on motif B to join; continue around connecting shell points to create a flat seam (approx 6-8 join sl sts per seam)
Round 2 :
Continue joining motifs in the same manner using long tails. Aim for firm but flexible joins — do not pull tightly or shells will pucker.
Info :
Join-as-you-go allows you to add flowers and leaves to each base motif as you create it, or you can make all motifs then sew. I recommend pinning and then sewing to control placement and to avoid crowded clusters.
Round 3 :
Sew each large rose to its assigned base motif: use the long tail from rose and hidden mattress or whip stitch into upper rounds of the base block. Sew only at the base, leave petals free to lift for 3D effect.
Round 4 :
Sew medium and small roses, berries and pods in place around the large roses. Arrange leaves beneath and around blooms to frame each cluster. Use short, even stitches and tack motifs at 3-4 points each so they sit secure but still sculpted.
Info :
Placement tip: balance color and scale — do not place two large roses adjacent; alternate large and medium to keep the eye moving along the runner.
— Border & Scalloped Edge :
Round 1 :
With background brown attached at any edge stitch, ch 1, 1 sc evenly along entire outer edge of joined motifs to create a neat frame. Work 1 sc in each st and 3 sc in each corner shell to maintain shape.
Round 2 :
*Skip 2, (5 dc in next st), skip 2, sl st in next st* repeat around to create scalloped shells. Adjust spacing to maintain even scallops around entire runner—expect 28-34 shells depending on layout.
Round 3 :
Ch 3, *(2 dc, ch 1, 2 dc) into center stitch of each shell, sl st between shells* — this deepens scallop and frames motifs
Info :
For a lacy look, add a final round of picot edging: *sc, ch 3, sl st in same st* repeating around shells for fine points.
Round 4 :
Fasten off and weave in ends along the border. Block entire runner to encourage the scallops to sit flat and petals to open.
— Detailed Stitching Options and Texture Tips :
Info :
Use BLO for inner rose rounds to create a neat base ridge for petals. Use surface slip stitch to add veins on leaves. For berry clusters use tightly packed bobble or puff stitches worked with 2 or more yarn overs for a plump look. Adjust hook size down by 0.5-1.0mm for very dense bobbles.
Info :
Alternate petal designs: work petals as clusters of (hdc, 3 dc, hdc) or (2 hdc, 5 dc, 2 hdc) to vary fullness. Changing petal counts changes final diameter of each rose; plan at least three sizes to create depth.
— Finishing and Blocking :
Info :
Pin runner to blocking board using rustproof pins, shaping scallops and opening petals. Lightly mist with steam or water and allow to dry fully. This relaxes stitches and sets the 3D elements. Press gently with steam — do not flatten petals.
Info :
Secure motifs by sewing bases with invisible ladder stitch and weaving tails through several stitches on underside of runner for durability. Trim threads close to surface then hide with a final weaving pass under base motifs.
— Optional Embellishments :
Info :
Add tiny French knot-like stitches using embroidery thread on berry surfaces for highlight. Use metallic thread sparingly as center accents in small roses for a subtle sheen. Sew on a few seed beads within berries if making decorative-only runner (not for heavy-use table surfaces).
Info :
Edge reinforcement: for runners that will see heavy use, work an additional round of sc in a slightly thicker yarn to strengthen edge. You can also add non-slip dots to underside to prevent sliding on smooth surfaces.
— Troubleshooting Guide :
Info :
If petals collapse, use a smaller hook for petal rounds or block petals over small objects to shape. If motifs stretch when joined, add more joining sl sts or reinforce with a few hidden whip stitch passes across seam. If colors bleed when wet-blocking, test a scrap for colorfastness first.
Info :
Cleaning advice: spot clean only with mild detergent. Hand wash carefully in cool water if necessary, reshape on towel and dry flat to maintain dimensional elements.
Completing this Autumn Rose and Berry Cascade Table Runner is so satisfying — every stitched petal and leaf builds into a warm, harvest centerpiece that feels like a bouquet you can lay on the table. The textured roses and berry clusters create visual depth, while the scalloped border ties everything together. I love how this piece becomes a conversation starter and seasonally beautiful addition to any home. 🧶🍁✨