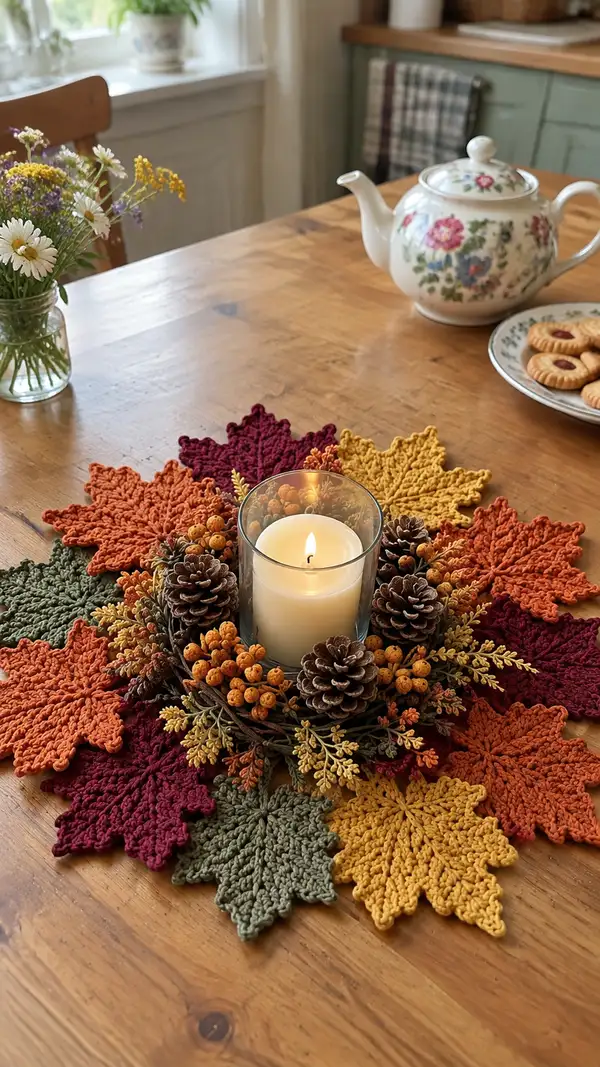
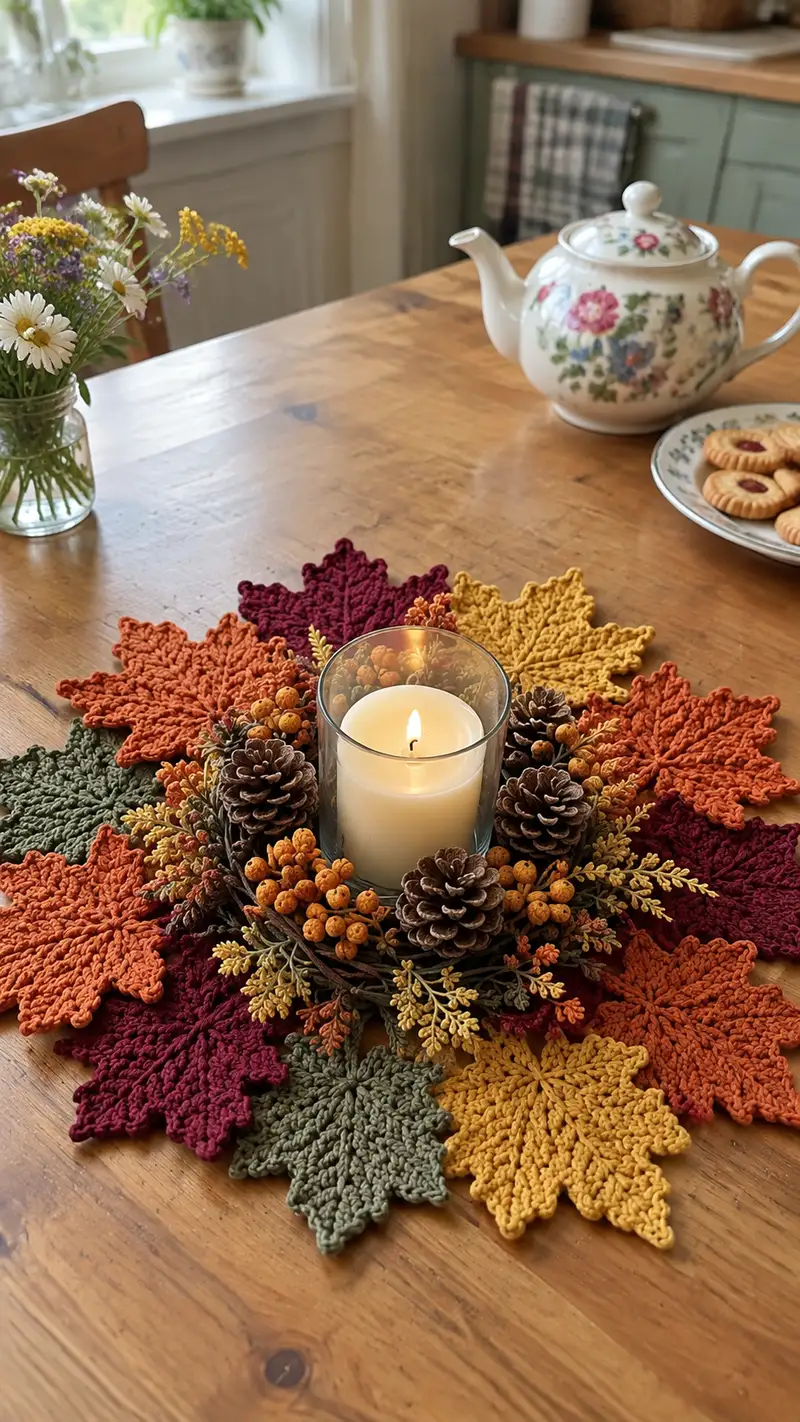
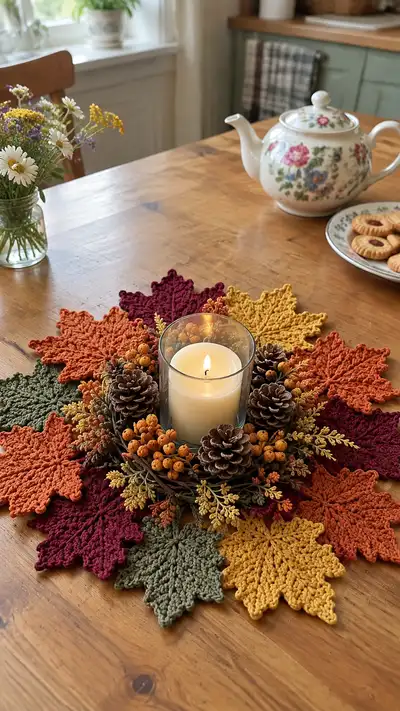
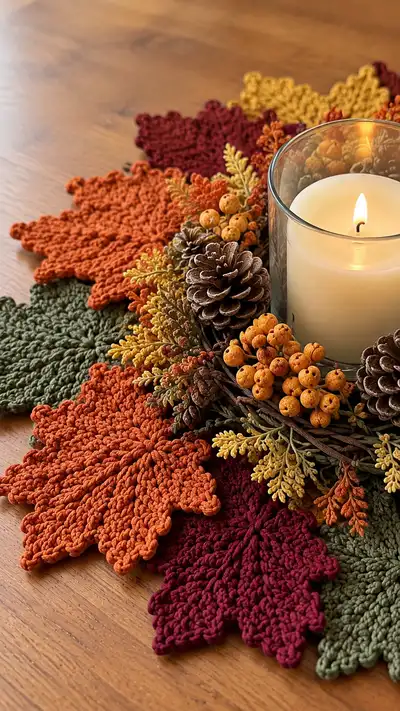
Create a cozy fall table centerpiece made from layered crochet maple leaves in rich autumn tones. This pattern teaches you how to make textured, lacy maple leaves, join them into a circular runner, and add a finished border to hold a candle wreath or centerpiece. The finished piece showcases deep burgundy, pumpkin orange, mustard yellow and olive green leaves arranged in a beautiful ring.
Progress Tracker
0% Complete
— Notes & Gauge :
Info :
Gauge: 16 sts x 12 rows in sc = 4 inches in flat stockinette style is only a rough guide; leaves are worked flat and made to match by stitch count, blocking and final joining. Use a 4.0mm hook for similar finished size to the sample where each finished leaf measures approximately 6.25-7 inches from tip to tip. Make a sample leaf to check appearance and adjust hook size if you prefer a tighter or looser fabric.
Info :
The leaf motif below is worked flat in rounds (worked continuously, not joined) to create a symmetrical maple leaf with nine points. Each round includes stitch counts that must be followed to maintain symmetry. After making the specified number of leaves, follow the join and edging sections to create the circular centerpiece.
— Leaf (Make 12 leaves in mixed colors) :
Round 3 :
(1 sc, inc) x 6 (18)
Round 4 :
(2 sc, inc) x 6 (24)
Round 5 :
(3 sc, inc) x 6 (30)
Round 6 :
(4 sc, inc) x 6 (36)
Round 7 :
(5 sc, inc) x 6 (42)
Round 8 :
(6 sc, inc) x 6 (48)
Info :
These initial 8 rounds build the leaf center. Keep tension even and place a stitch marker at the first stitch of Round 9 to mark the start. From Round 9 onward we will establish the primary veins and the first shaping for lobes while maintaining 48 sts across most rounds; counts will be maintained through stitch type changes and stitch placement.
Round 9 :
1 sc in each st around (48)
Round 10 :
1 sc in each st BLO (48)
Info :
Working in BLO on R10 creates a subtle ridge to suggest the central vein of the leaf. Leave marker in place and keep the piece flat; if it cups, block gently after finishing.
Round 11 :
(3 sc, 1 hdc, 1 dc, 1 hdc, 3 sc) x 6 inserting sequence to create 6 subtle raised vein clusters and keeping the total stitch count 48 by working stitches in consecutive sts (48)
Info :
Round 11 places texture in grouped sequences; work tightly into each stitch so the cluster stands proud—this helps define the lobes when shaping points later.
Round 12 :
1 sc in each st (48)
Round 13 :
(2 sc, (ch2, sk 1 st, sc in next st) as small lace V, 1 sc, 1 hdc) x 8 finishing with 4 sc to complete round (48)
Info :
Round 13 introduces small chain V-spaces to elongate the shape. These chain spaces are placed symmetrically; count carefully. The round description keeps the total stitches landing back at 48 by balancing ch2 spaces with single stitches in the following sequences.
Round 14 :
1 sc in each st and in each ch2 space around (48)
Round 15 :
(1 sc, 1 hdc, 1 dc, ch2, 1 dc, 1 hdc, 1 sc) x 6 (48)
Info :
Round 15 builds up the taller stitches that will form the points of the leaf. Work the chain-2 at the mid of each cluster to push fabric outward, forming a point at the next round's outer edge. Keep count: you should finish with 48 active stitch positions.
Round 16 :
1 sc in each st and in each ch2 sp (48)
Round 17 :
(1 sc, sl st in next st, 3 tr cluster over next 3 sts, sl st in next st, 1 sc) x 6 (48)
Info :
Round 17 places treble clusters to create pronounced veins and tiny points. Work clusters over consecutive sts as indicated; treat the sl st positions as anchors and maintain the stitch count by making sl sts where stitches are bypassed rather than adding or subtracting stitches.
Round 18 :
1 sc in each st (48)
Round 19 :
(2 sc, picot, 4 sc, picot, 2 sc) x 6 (48)
Info :
Round 19 adds picot points which become the serrated edge of each lobe. Picot: ch3, sl st in 3rd ch from hook. Place picots evenly — count them as decorative stitches that do not change the overall stitch count because they are built into the sequence of scs as shown.
Round 20 :
1 sc in each st BLO (48)
Info :
Working in BLO on R20 pulls the picot points forward and creates a ridge behind them, lending a crisp scalloped edge to the leaf. Check symmetry: the leaf should show a clear pointed edge every 8 stitches approximately.
Round 21 :
(1 sc, 1 hdc, 1 dc, 1 tr, 1 dc, 1 hdc, 1 sc) x 6 (48)
Round 22 :
1 sc in each st (48)
Info :
Round 21 builds the final tall stitches near the leaf edge to add volume and mimic the lobed silhouette of a maple leaf. Round 22 evens the stitches and prepares the edge round where we'll finalize the serrated tips. If your leaf looks slightly too small, you can add an extra round of (1 sc, inc) x 12 to add 12 stitches, but keep matching leaves consistent.
Round 23 :
(sk 1, (ch3, dc in next 2 sts, ch3, sl st in next st forming elongated picot cluster), sc in next 3 sts) x 8 finishing evenly across (48)
Round 24 :
1 sc around catching ch3 loops and dc posts to secure points (48)
Round 25 :
(1 sc, (picot, sc) in next 6 sts to emphasize serration) x 6 (48)
Info :
Round 25 is decorative: work each picot into the fabric so the serrated tips are stable. Use a tighter tension for picots so they don't flop. If desired, add a light steam-block focusing on the points to open and stiffen them slightly.
Round 26 :
1 sc in each st (48)
Round 27 :
(sc2tog, 4 sc) x 8 (40)
Info :
Round 27 gently sculpts the leaf rim to flatten the very outer edge, reducing the stitch count by 8 to give a slightly tapered edge while preserving the points. If you want a larger finished leaf, omit this round and proceed to final finishing rounds as below.
Round 28 :
1 sc in each st (40)
Info :
Fasten off leaving a long tail for blocking and optional joining. Weave in a couple of ends now or wait until after blocking. Repeat to make 12 leaves (or as many as your table needs), alternating colors for a pleasing color wheel effect.
— Center Ring Base (Make 1) :
Round 1 :
ch 8, join with sl st to form ring (8)
Round 2 :
ch1, 8 sc in ring (8)
Round 3 :
((1 sc, inc) x 4) around (12)
Round 4 :
(2 sc, inc) x 4 (16)
Round 5 :
1 sc in each st (16)
Round 6 :
(1 sc, 1 hdc) x 8 (24)
Round 7 :
1 sc around (24)
Info :
This center ring forms a low, stable base to hold a small glass candle holder or floral arrangement as in the sample. Make the ring tight and flat; if your candle holder has a larger base, increase the rounds by adding (3 sc, inc) repeats to expand circumference.
Round 8 :
FLO: 1 sc in each st around to create a defined inner ridge (24)
Round 9 :
1 sc around (24)
Round 10 :
(sc, picot, sc) in each 3-st segment around (24)
Info :
Round 10 adds a small textured ring of picots which visually separate the center from the leaves and provides a slight lip the glass can sit against. Fasten off and weave in ends. This base will be sewn or hot-glued into place after leaves are joined.
— Joining Wheel (Join leaves into circular centerpiece) :
Info :
Arrange leaves in color order around the tabletop or on a blocking board to visualize layout. The sample uses 12 leaves arranged with alternating colors creating a radial wheel. Leaves overlap slightly at their bases where they meet the center ring. We'll use a whipped seam and small slip stitches to join each leaf to its neighbors and to the center ring.
Round 1 :
Place two leaves right sides up with bases overlapped approximately 12-14 stitches worth. Using matching yarn and yarn needle, whipstitch the bases together with a running stitch across 10-12 stitches to create a secure overlap (no numeric stitch count shown because overlap varies by leaf positioning)
Round 2 :
Continue joining successive leaves in the same manner until you have a circular ring of leaves with all bases joined; the final join will be between the first and last leaf. Adjust overlap so the center opening matches the center ring diameter.
Info :
If you prefer a sewn seam that is invisible, use the ladder stitch matching the edge stitches; for a decorative visible seam, use a contrasting whip stitch. Pin leaves before sewing to ensure even spacing. You may also stitch through both the leaf base and the center ring simultaneously to anchor leaves to the ring.
Round 3 :
With leaves pinned, use a crochet hook and worsted-weight yarn to work slip stitches through both leaf bases and the center ring: find the central base stitch of leaf one, sl st into the ring, then sl st into the leaf base of leaf two and so on. Work around until all leaves are attached (this is a joining technique, not a count-based round).
Info :
Work deliberately: slip stitching through three layers (leaf base, center ring, next leaf base) secures leaves and keeps the ring flat. If you prefer stronger attachment for a frequently-handled centerpiece, sew first with yarn needle and then reinforce with sl sts.
Round 4 :
Once all leaves are attached, work one finishing round around the center of the wheel: ch1, 1 sc in each st around the ring and into the bases where possible to tidy the join and fill small gaps (24-36 depending on how many stitches per base you pick up)
Info :
If any gaps remain between leaves, add small decorative stitches (picots or tiny sc clusters) bridging the gap to create a seamless look. Pay attention to color transitions and hide tails neatly under adjacent leaves while weaving in ends.
— Decorative Border / Outer Edging :
Round 1 :
Attach yarn at the outermost point between two leaves. Ch1, work 1 sc evenly around the outer edge of all leaves, placing 2 sc in larger lobes and 1 sc in narrow joins to maintain an even edge (estimate final count 100-140 sts depending on number of leaves and lobes)
Round 2 :
(ch3, sl st in 3rd ch from hook to form picot, sc in next 4 sts) repeat evenly around to create decorative points and unify the outer rim
Info :
Because the outer edge spans multiple leaves, the stitch count is adaptive — aim for a consistent tension and rhythm so the border sits flat. If the border puckers, try a larger hook for the edging round; if it flares, go down a hook size or decrease the number of sc in lobes.
Round 3 :
1 sc around, finishing with a tidy sl st and fasten off. Weave in ends under the edging so they are hidden from view.
Info :
Optional: Add a lightweight lace chain between leaf points to create a more delicate look, or leave edges solid for a rustic, bold statement as pictured.
— Optional Crocheted Berries (Make 8 clusters) :
Berry Unit Round 1 :
MR, 6 sc in MR (6)
Berry Unit Round 2 :
6 inc (12)
Berry Unit Round 3 :
1 sc around (12)
Berry Unit Round 4 :
(sc2tog, sc4) x 2 (10)
Info :
Berry units are small and decorative. Make 3-6 berries per cluster and sew them together in triangular clusters. Use a tiny amount of stuffing or a small bead to firm the berry. Attach clusters between leaves near the center as in the photo.
Berry Finishing :
Fasten off leaving tail for sewing. Weave tails through cluster and secure. Make 8 clusters total.
— Optional Mini Acorn Tops (Make 6) :
Acorn Round 1 :
MR, 6 sc in MR (6)
Acorn Round 2 :
(1 sc, inc) x 3 (9)
Acorn Round 3 :
1 sc around (9)
Acorn Round 4 :
(sc, dec) x 3 (6)
Info :
Sew these little caps onto faux or crocheted beads or onto the pinecone wreath. Use a contrasting brown and sew them between leaves as additional texture. Make 6 pieces spaced evenly.
— Optional Additional Small Leaf (Make 12 small accent leaves) :
Small Leaf Round 1 :
MR, 6 sc (6)
Small Leaf Round 2 :
6 inc (12)
Small Leaf Round 3 :
1 sc around (12)
Small Leaf Round 4 :
(1 sc, 1 hdc, 1 dc, 1 hdc, 1 sc) x 2 (12)
Info :
These accent leaves fill gaps between larger leaves and add variety. Work lightly and block flat for a cohesive look. Attach with small whipstitches.
— Finishing & Blocking :
Info :
Wet-block or steam-block each leaf flat on a foam board: pin points to open gently and maintain symmetry. Leave to dry fully. Blocking is the most important finishing step for uniform shape and for making assembly easier and more accurate.
Info :
When weaving in ends, hide tails under the leaf base to avoid visible knots. Trim ends close once secure. Attach optional faux sprigs, berries and pinecones with hot glue or with yarn depending on permanence desired.
This autumn maple leaf centerpiece brings handmade warmth to any table. Each textured leaf and delicate picot edge creates natural movement and depth, forming a charming seasonal focal point. Layer it beneath a glass candle holder or floral wreath for instant cozy atmosphere. 🧡🍂 Handcrafted seasonal decor adds personality to your home and makes for a thoughtful gift — enjoy every stitch of the process! 🕯️