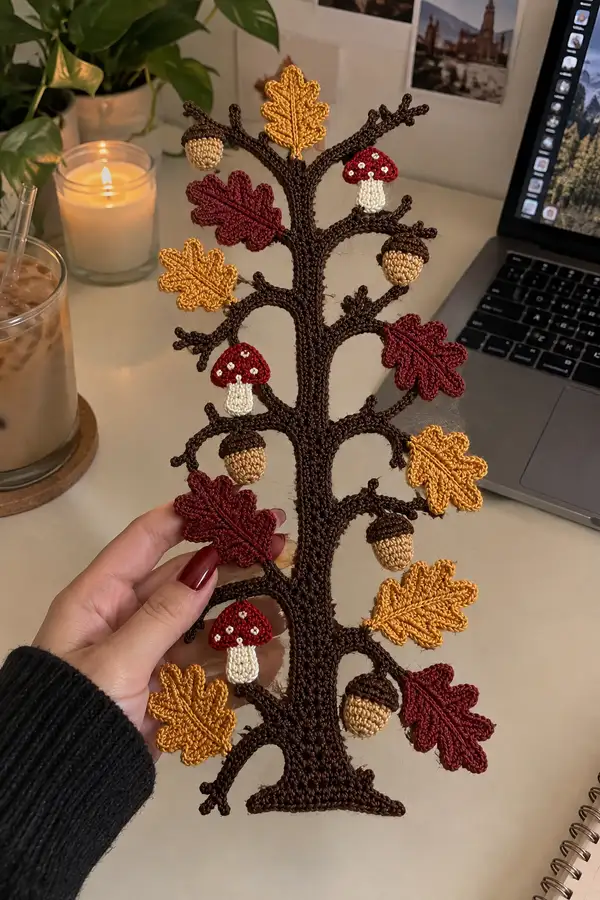
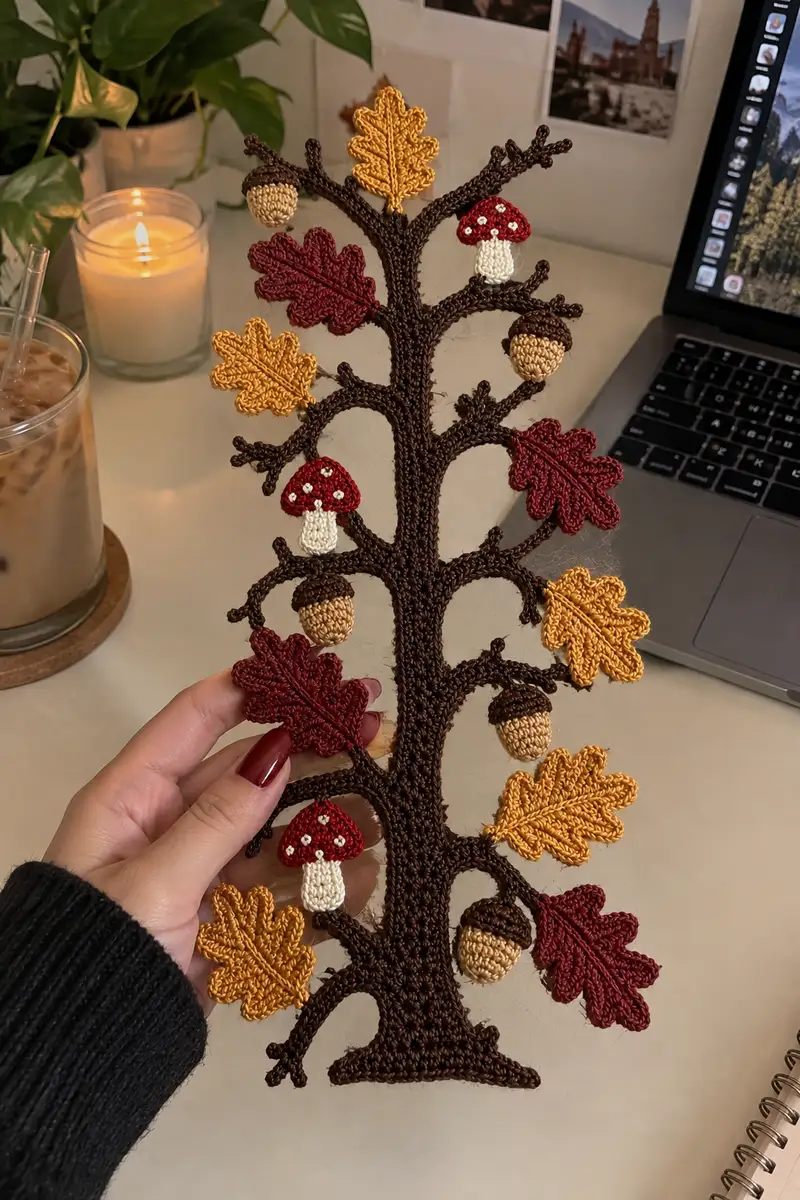
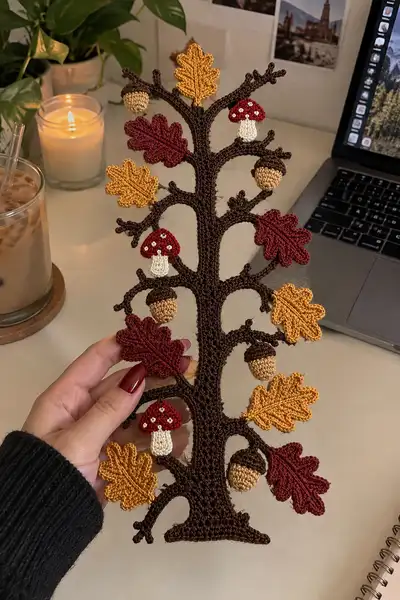
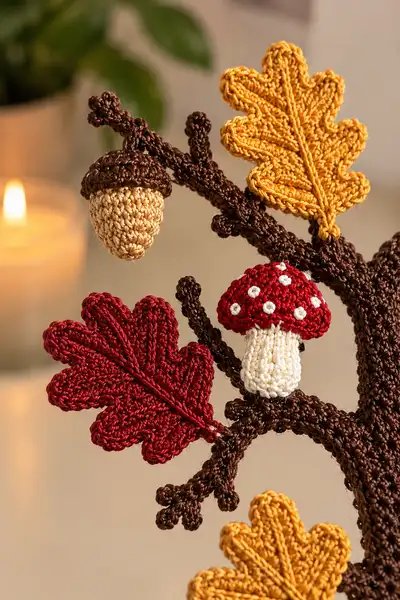
Create a delicate, lace-like autumn tree runner with crocheted trunk, oak leaves, acorns and tiny toadstools. Worked in fine cotton thread with modular pieces sewn into place, this decorative runner sits beautifully on a table, shelf, or mantel. The pattern includes detailed instructions for the central trunk/branch scaffold, oak leaves in two sizes, acorns, and tiny mushrooms with embroidered spots. Finished piece in photos measures approximately 11–14 inches tall and 4–5 inches wide.
Progress Tracker
0% Complete
— Central Trunk and Branch Scaffold :
Info :
This central scaffold is worked in continuous rounds in a tight spiral using size-10 cotton and a 1.75 mm hook. The trunk is intentionally narrow and flat with raised branches formed by worked chain arms and short spike clusters. If you prefer added structure, run a single length of 24–26 gauge floral wire through the center length of the trunk as you work or insert it afterward and tack in place. Work tightly so the thread stitches sit close together and the finished piece is sculptural.
Round 1 :
ch 18, sl st to first ch to form ring (18)
Round 2 :
ch 1, 1 sc in same st and in each ch around (18)
Round 3 :
Working in back bumps of chain for a neat edge: 1 sc in each st (18)
Round 4 :
1 sc in next 4 sts, inc, 1 sc in next 4 sts, inc, 1 sc in next 4 sts, inc (21)
Info :
We are broadening the base slightly for stability. Keep yarn tails at the wrong side and weave them later. Place stitch marker at the beginning of the spiral and move after each 10–12 stitches worked to help counting.
Round 5 :
1 sc in each st around (21)
Round 6 :
1 sc in next 5 sts, inc, 1 sc in next 5 sts, inc, 1 sc in next 5 sts, inc (24)
Round 7-9 :
1 sc in each st (24)
Round 10 :
(1 sc, inc) x 8 (32)
Round 11-14 :
1 sc in each st (32)
Info :
At Rounds 12-14 begin planning branch anchor points. Mark the stitch where each major branch will start (left and right). This trunk will gradually narrow as you work upward but will include built-in chain arch branch supports worked later.
Round 15 :
(2 sc, 1 dec) x 8 (24)
Round 16 :
1 sc in each st (24)
Round 17 :
(2 sc, inc) x 8 (32)
Round 18-21 :
1 sc in each st (32)
Info :
Now we will create the first pair of major branches. When you reach the marked anchor stitch for the left branch, you will chain out and create an arch then rejoin the trunk and continue. This creates the sculptural loop where motifs are sewn later.
Round 22 :
*Work 6 sc, ch 8 (branch chain arch), sl st 2nd ch from hook and sl st back along the chain to the base (creates a small corded arch), continue 18 sc; repeat sequence once for second branch anchor* (32)
Info :
When making the chain arch, do not fasten off - sl st back across the chain to create a corded arch that is sturdy. Each sl st back into chain is counted as joining stitches but we continue working the trunk in the same round.
Round 23-26 :
1 sc in each st (32)
Round 27 :
(3 sc, 1 dec) x 8 (28)
Round 28 :
1 sc in each st (28)
Round 29 :
1 sc in next 4 sts, create small branch spike: ch 5, sl st last 3 ch to make 2 little nubs, sc in next 4 sts, repeat 3 times across trunk (28)
Info :
These small 'spike' branches are created by short chains with sl sts back across them; they form the tiny limb tips seen in the photos. Work them symmetrically across the trunk for balance.
Round 30-32 :
1 sc in each st (28)
Round 33 :
(2 sc, dec) x 7, 1 sc (21)
Round 34 :
1 sc in each st (21)
Round 35 :
At marked anchor make left branch: ch 12, (sc 1, hdc 1, dc 1) across chain to create a textured arm, sl st back across chain to base; continue trunk sc around (21)
Round 36-38 :
1 sc in each st (21)
Info :
If using wire, this is a good place to run a single wire inside the trunk center - the trunk is wide enough between Rounds 10–36 to hide and stabilize it. Tuck the wire down into the base and up through to the top before finishing trunk rounds.
Round 39 :
(1 sc, dec) x 7 (14)
Round 40 :
1 sc in each st (14)
Round 41 :
(1 sc, inc) x 7 (21)
Round 42-44 :
1 sc in each st (21)
Round 45 :
Form series of small twiglets: ch 6, sl st back to base to create 4 twiglets around trunk spaced evenly; continue sc around (21)
Round 46-48 :
1 sc in each st (21)
Round 49 :
(2 sc, 1 inc) x 7 (28)
Round 50-52 :
1 sc in each st (28)
Round 53 :
Left and right branch pairs: at two evenly spaced anchors: ch 10, (sc, hdc, dc) along chain then sl st back to create stronger arches; repeat on opposite side; continue trunk sc around (28)
Info :
These larger arches become the supports for the oak leaves and mushrooms. Work them mirror-symmetric so the finished runner looks balanced when displayed vertically.
Round 54-56 :
1 sc in each st (28)
Round 57 :
(3 sc, 1 inc) x 7 (35)
Round 58-60 :
1 sc in each st (35)
Round 61 :
Decrease gently: (4 sc, 1 dec) x 5 (30)
Round 62-64 :
1 sc in each st (30)
Round 65 :
(2 sc, dec) x 7, 1 sc (22)
Round 66-68 :
1 sc in each st (22)
Round 69 :
Form top crown: ch 8, sc back along chain cord to create 3 little top twiglets evenly spaced; sc in remaining trunk sts (22)
Round 70-72 :
1 sc in each st (22)
Round 73 :
(1 sc, inc) x 11 (33)
Round 74-76 :
1 sc in each st (33)
Round 77 :
(2 sc, inc) x 11 (44)
Round 78-80 :
1 sc in each st (44)
Info :
Finish trunk with a neat base: fasten off leaving a long tail for sewing if you plan to attach to a base. Block trunk gently to open arches and flatten where leaves will sit. If you added wire, bend and arrange branches now for the best silhouette.
— Large Oak Leaf (Make 4 in yellow/ochre and 4 in burgundy) :
Info :
This oak leaf is worked flat from the center spine outward to create the lobed shape. Use 1.75 mm hook for crisp definition. Work each leaf flat; block and steam or wet-block to open lobes. Each leaf is worked in rows with turning chains counted as stitches when specified.
Round 1 :
mr, ch 2 (counts as first hdc), 6 hdc in ring, pull to close (7)
Round 2 :
ch 2, turn, hdc inc across: (1 hdc, inc) x 3, 1 hdc in last (10) — this forms one half of spine base
Round 3 :
Working on other side of starting ch: join yarn at opposite side, ch 2, hdc in same st, (inc, 1 hdc) x 3 (20 total across both sides)
Round 4 :
Turn and work to extend lobes: ch 2, (2 hdc, inc) x 5 (25)
Info :
Switch to FLO on next row to create a raised ridge along the central spine if desired: join yarn at center and work FLO hdc rows to form a visible spine.
Round 5 :
FLO: ch 2, 1 hdc in each st across (25)
Round 6 :
Working lobe shaping: ch 2, *2 hdc in next st, 1 hdc in next 2 sts, (sk 1, 3 dc in next) to create a rounded lobe peak*, rep across both sides symmetrically (25)
Round 7 :
Turn and decrease slightly toward tip: ch 2, (2 hdc, dec) x 6, 1 hdc (19)
Round 8 :
ch 2, 1 hdc in next 8 sts, slip stitch to form pointed tip, then work back along opposite side 1 hdc in next 9 sts (19)
Round 9 :
Edge scallops: attach yarn at base edge, *ch 3, sl st in next st* repeat along each lobed edge to define curves (approx 8 scallops per side)
Round 10 :
Finishing spine: embroider a running stem down the center with matching yarn: use tapestry needle to stitch a central raised ridge, anchoring at base and tip.
Info :
Blocking tip: Wet the leaf on both sides, pin on a blocking mat in its final lobed shape and allow to dry completely. Steam gently to set the central ridge if needed.
— Small Oak Leaf (Make 4 in yellow/ochre and 4 in burgundy) :
Round 1 :
mr, ch 2, 5 hdc in ring (5)
Round 2 :
ch 2, work 2 hdc in each st across to form wider base (10)
Round 3 :
Turn: ch 2, 1 hdc in next 3 sts, 2 hdc in next, 1 hdc in next 3 sts (11)
Round 4 :
ch 2, work small lobes by (hdc, dc, hdc) into designated sts on each side to form scalloped edge (11)
Round 5 :
Edge picots: along edge ch 3, sl st into same st to create tiny curlicues for texture, rep around (11)
Round 6 :
Fasten off leaving long tail for sewing; embroider center vein with a single strand using backstitch.
Info :
Use smaller leaves as fillers between large leaves when arranging on branches. Block flat to hold shape before assembly.
— Acorn Nut (Make 6) :
Round 1 :
mr, 6 sc in ring (6)
Round 2 :
inc in each st around (12)
Round 3 :
(1 sc, inc) x 6 (18)
Round 4-5 :
1 sc in each st (18)
Round 6 :
(2 sc, inc) x 6 (24)
Round 7-8 :
1 sc in each st (24)
Info :
Begin stuffing the acorn lightly at round 7. Use a small amount of polyester stuffing and press gently so the acorn keeps a smooth rounded shape.
Round 9 :
(2 sc, dec) x 6 (18)
Round 10 :
(1 sc, dec) x 6 (12)
Round 12 :
Fasten off leaving long tail. Close opening with tapestry needle and weave tail through several stitches to secure. Shape a subtle pointed bottom by pulling center of base slightly when closing.
Info :
For acorn scale texture, you will crochet a separate acorn cap and sew it over the top.
— Acorn Cap (Make 6) :
Round 1 :
mr, 6 sc in ring (6)
Round 2 :
inc in each st (12)
Round 3 :
(1 sc, inc) x 6 (18)
Round 4 :
1 sc in each st (18)
Round 5 :
BLO: ch 1, 1 sc in each st BLO to form a defined rim (18)
Round 6 :
Fold cap to fit acorn top and use slip stitch to gather slightly; fasten off leaving long tail for sewing. Tighten to cup shape and sew onto the top of the acorn nut, tucking edge under for a smooth seam.
Info :
Sew the cap on so it slightly overhangs the top of the nut like a little hat. You can add a few decorative surface stitches for scale texture using surface slip stitch or embroidery.
— Toadstool Mushroom (Make 3) :
Stem - Round 1 :
mr, ch 1, 6 sc in ring (6)
Round 2 :
inc in each st (12)
Round 3-6 :
1 sc in each st (12)
Info :
Work stem as a short cylinder; stuff lightly after round 4 so the stem is slightly firm but compressible to sew under the cap.
Stem - Round 7 :
(1 sc, dec) x 4, 1 sc (8)
Round 8 :
1 sc in each st (8) then fasten off leaving long tail for sewing to cap.
Cap - Round 1 :
Using red thread: mr, 6 sc in ring (6)
Round 2 :
inc in each st (12)
Round 3 :
(1 sc, inc) x 6 (18)
Round 4 :
(2 sc, inc) x 6 (24)
Round 5 :
ch 1, 1 sc BLO in each st (24) to create a slight rim (cap underside)
Round 6 :
Work cap top shaping: (3 sc, dec) x 6 (18)
Round 7 :
1 sc in each st (18) - fasten off leaving long tail for sewing
Round 8 :
Embroider tiny white spots using French knots or small circles of white thread across cap top. Space 6–8 dots evenly. Sew stem into the center underside of cap and secure.
Info :
Leave about 1 cm of stem protruding before fully tightening so the mushroom sits naturally on a branch when sewn in place.
— Small Decorative Twiglet Clusters (Make 8) :
Round 1 :
ch 6, sl st back along chain to create a 5-loop mini twig cluster; anchor with sc into trunk where desired
Round 2 :
Repeat to make clusters of 3–5 loops for realistic twig tips. Fasten off and leave tail for sewing.
Info :
These clusters are worked flat and sewn on to fill negative spaces and to echo the small twig details in the photo.
— Assembly and Finishing :
Info :
Arrange pieces on a flat surface in the orientation shown in the photos or as you prefer. Pin in place and step back to check balance — symmetry is pleasing for vertical display but asymmetry gives a natural look. Use long tails left on each piece to sew them into the trunk arches and branch loops.
Step 1 :
Position large leaves on the major branch arches created in trunk Rounds 22 and 53. Thread long tail through tapestry needle and sew leaf base to branch with invisible whip-stitches, taking 6–8 passes to secure each large leaf. Hide the knot inside branch structure and weave tail through trunk before trimming.
Step 2 :
Sew small leaves in the smaller arch supports and around twiglet clusters; stagger colors to create contrast (burgundy and ochre alternating). Use a single strand backstitch along the leaf base for a neat seam.
Step 3 :
Sew acorns to underside of medium branches: position where acorns hang in the photo. Use long tail to run several stitches through acorn top and branch cord, then cross-stitch back through cap and trunk to anchor strongly. Knot and weave tail several rounds into trunk to conceal.
Step 4 :
Attach mushrooms to flat branch tops or inside arches by stitching stem base into the trunk cord using long tail. Add tiny stitches to cap rim to make the mushroom sit flush against branch surface.
Step 5 :
Apply tiny white embroidered dots on mushroom caps with French knots using white thread. Each knot should be small; use 2–3 wraps for a neat dot. Space evenly for a whimsical look.
Step 6 :
When all motifs are attached, steam-block or very gently press the assembled runner to set shapes. If you want a more rigid runner, apply diluted fabric stiffener to the wrong side of trunk sparingly and allow to dry flat.
Info :
Final trimming: look for any tails that might show through fine thread and weave them deep inside the trunk or motifs. Use a tiny dab of clear craft glue on knots for extra security if the runner will be handled often.
Completing this oak leaf and acorn tree runner is such a satisfying seasonal project — every tiny leaf, mushroom and acorn adds character and warmth. The modular construction means you can arrange elements to your liking and create a one-of-a-kind centerpiece. I hope stitching each leaf and sewing them into the trunk brings you the same cozy joy I felt making mine. 🍂🧶