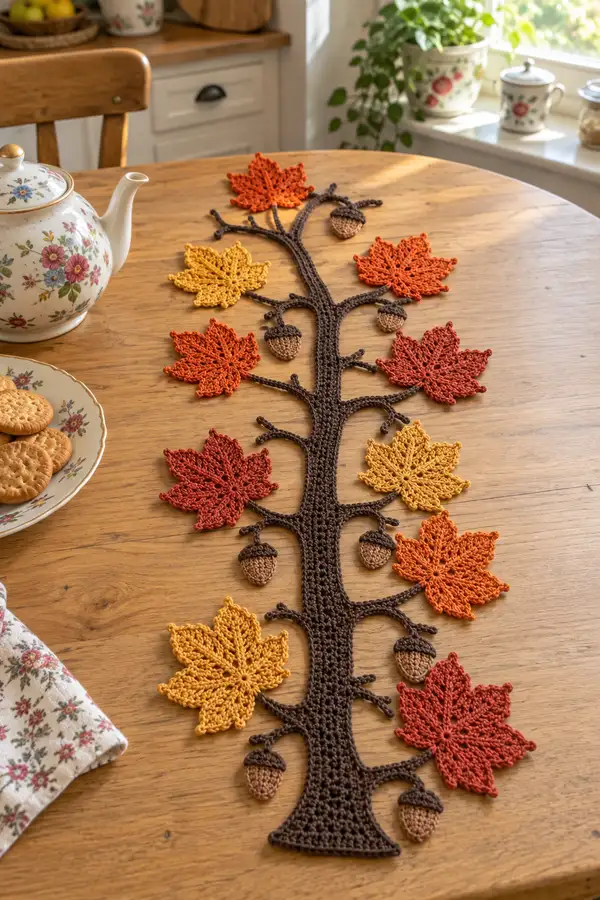
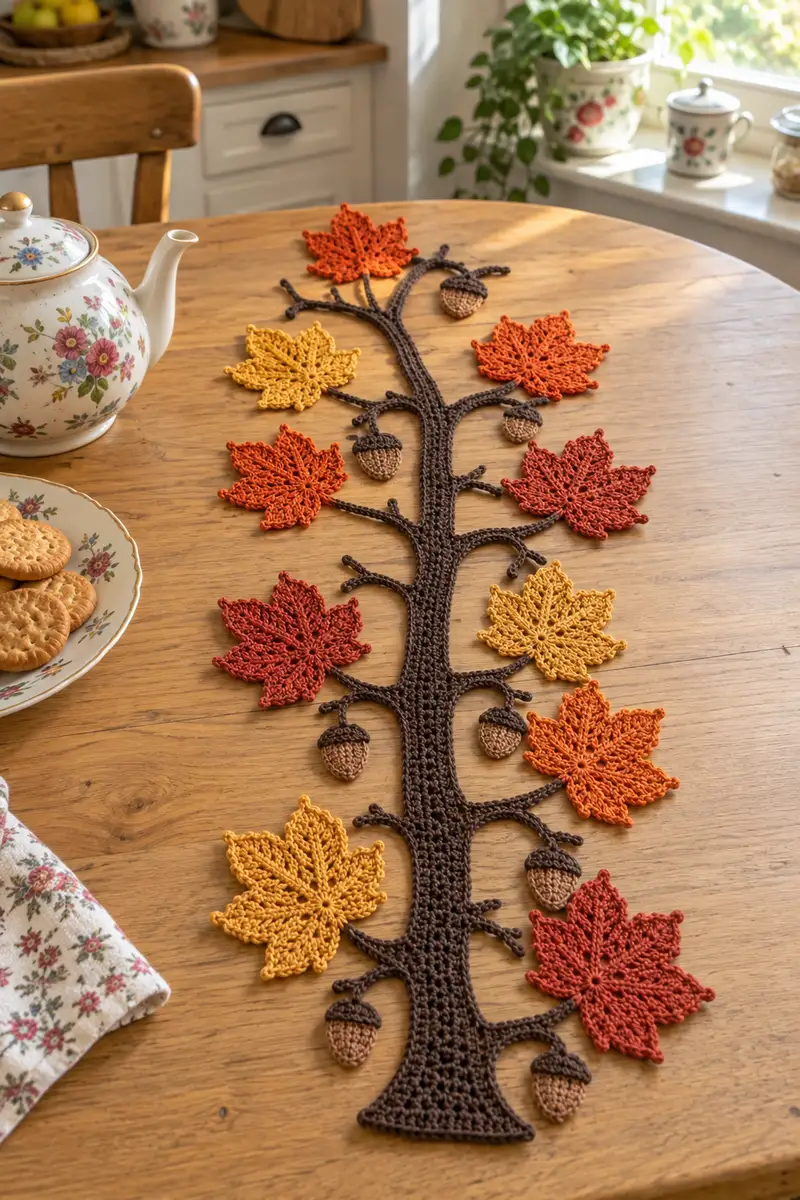
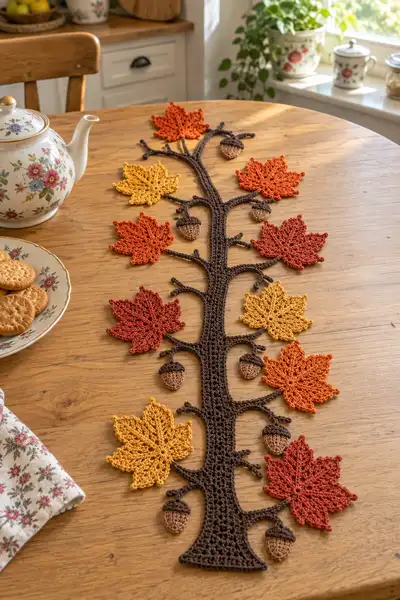
Create a charming autumn table runner inspired by a maple tree trunk with cascading crocheted leaves and acorns. This pattern features a long, textured trunk, delicate maple leaves in warm harvest shades, and small 3D acorns for a natural, seasonal look. Perfect for dressing a dining table or mantel, the runner lays flat and can be customized in length and color.
Progress Tracker
0% Complete
— Trunk (long central piece) :
Round 1 :
Foundation chain 14 (this will create a base width of 13 sc). Ch 1, sc in 2nd ch from hook and in each across (13)
Round 2 :
Ch 1, turn. 1 sc in each st across (13)
Round 3 :
Ch 1, turn. 1 sc in each st across (13)
Info :
This trunk is worked flat in rows; treat each 'Round' label below as a turned row. Use a stitch marker at the first stitch of the row (right side) to keep track of orientation for branch placement later
Round 4 :
Ch 1, turn. 1 sc in each st across (13)
Round 5 :
Ch 1, turn. 1 sc in each st across (13)
Round 6-10 :
Ch 1, turn. 1 sc in each st across (13) — Repeat for a total of 5 rows to build initial trunk height (rows 6-10)
Info :
If you prefer a slightly wider trunk, add 2 chains to the foundation chain and two sc to each row (resulting width +2). Maintain same stitch counts if you want the photographed proportions
Round 11 :
Ch 1, turn. (Sc in first 2 sts, inc) x 3, sc in remaining 4 sts (16) — increase row to broaden trunk slightly
Round 12 :
Ch 1, turn. 1 sc in each st across (16)
Round 13-19 :
Ch 1, turn. 1 sc in each st across (16) — Work seven even rows to create the central column
Info :
Mark the center line with a removable marker. You will use these row numbers and the marker positions to align branches and leaf attachment points later
Round 20 :
Ch 1, turn. 1 sc in each st across BLO (16) — working BLO here creates a subtle ridge to resemble bark texture
Round 21-28 :
Ch 1, turn. 1 sc in each st across (16) — eight rows building height; keep tension consistent (rows 21-28)
Info :
Plan to attach the first set of large leaves after round 28. Pin the leaves in place to preview spacing before sewing. Branch loops will be added in the following rows.
Round 29 :
Ch 1, turn. (Sc 4, inc) x 3 + sc 1 (19) — create a gentle increase for a flared branch area
Round 30 :
Ch 1, turn. 1 sc in each st across (19)
Round 31-34 :
Ch 1, turn. 1 sc in each st across (19) — four even rows (rows 31-34)
Info :
To make small branch loops: at the end of round 34, chain 12, sl st into trunk where you want the branch to attach, ch 1 and continue the row. These chain loops are worked separately; plan branch positions visually and mark with pins
Round 35 :
Ch 1, turn. 1 sc in each st across (19)
Round 36-40 :
Ch 1, turn. 1 sc in each st across (19) — allow this block to support mid-trunk leaf attachments
Info :
At rounds 36-40 add small slip-stitched branch bases by crocheting short chain loops (ch 8-14) that are later anchored to the trunk with a sl st. This creates the small twig look seen in the photo
Round 41 :
Ch 1, turn. (Sc 5, inc) x 3 + sc 1 (22) — slight expansion for lower trapezoid
Round 42-46 :
Ch 1, turn. 1 sc in each st across (22) — five even rows to keep trunk length visually balanced
Info :
You can create the effect of bark by alternating a single row in BLO every 6-8 rows; this creates vertical ridges that catch light nicely on cotton yarn
Round 47 :
Ch 1, turn. (Sc 6, inc) x 3 + sc 1 (25)
Round 48-52 :
Ch 1, turn. 1 sc in each st across (25) — five rows (rows 48-52)
Round 53 :
Ch 1, turn. (Sc 3, dec) x 6 + sc 1 (19) — begin gentle taper towards base end
Round 54 :
Ch 1, turn. 1 sc in each st across (19)
Round 55-58 :
Ch 1, turn. 1 sc in each st across (19) — maintain length and prepare base flare shaping
Info :
If you are making a longer runner, continue alternating sets of 6-10 even rows and small shaping increases/decreases to lengthen the trunk motif. Keep track of where leaves will attach so spacing remains even.
Round 59 :
Ch 1, turn. (Sc 2, dec) x 6 + sc 1 (13) — narrowing towards tail end of trunk
Round 60 :
Ch 1, turn. 1 sc in each st across (13)
Round 61-64 :
Ch 1, turn. 1 sc in each st across (13) — finish the top section where the trunk tapers in the photo
Round 65 :
Ch 1, turn. (Sc 1, dec) x 4 + sc 1 (10) — form narrow neck area at the top
Round 66-68 :
Ch 1, turn. 1 sc in each st across (10)
Round 69 :
Ch 1, turn. (Sc 1, inc) x 3 + sc 1 (13) — widen slightly for final base flare
Round 70-74 :
Ch 1, turn. 1 sc in each st across (13) — prepare the base for finish
Round 75 :
Ch 1, turn. (Sc 2, inc) x 3 + sc 1 (16)
Round 76-79 :
Ch 1, turn. 1 sc in each st across (16)
Round 80 :
Ch 1, turn. 1 sc in each st across (16). Fasten off leaving long tail for sewing to table runner backing if desired
Info :
Blocking: Once trunk is complete, press gently with steam or wet block to ensure it lays perfectly flat. Pin any chain loop branches into the desired curve before blocking so they retain shape
— Maple Leaf (make 10-12 leaves in various colors) :
Round 1 :
Start with golden/yellow (or chosen leaf color). Make a magic ring, ch 1, work 6 sc into ring, pull tight (6)
Round 2 :
Ch 2 (counts as first dc), (dc, ch 2, dc) in same st, sk next st, *(dc, ch 2, dc) in next st, sk next st* rep around to create 3 little lobes; sl st to first dc to join. You will have 3 ch-2 picot arches (6 dc total counting ch2s)
Info :
This leaf is constructed from a small central wheel, then each lobe is expanded with increases and chain spaces to create the pointed maple shape
Round 3 :
Ch 1, in first ch-2 arch: (sc, hdc, 3 dc, hdc, sc) into arch; sl st into next arch and repeat across all 3 arches to form three large petals (3 petals)
Round 4 :
Ch 1, turn to work along petal edge. Working along one petal edge only: *sc in next st, hdc in next, 3 dc in next, hdc in next, sc in next; sl st into center and move to next petal* — Repeat for all petals to maintain symmetry
Round 5 :
Ch 1, turn. On each petal: (sc, ch 2, sc) in the outermost tip to form a point, then sl st back toward center into next petal base; repeat for all petals (adds five pointed tips total as you re-interpret petals into lobes)
Info :
At this stage you have a simple three-lobed leaf; to form the 5-7 lobes typical of maple leaves, you will work split stitches to expand each primary petal into multiple lobes. Keep stitch counts even across each side.
Round 6 :
Ch 1. Work across center to split each large petal into two: in each petal base work (sc, inc, sc, hdc) then along the outer edge work (3 dc, ch 1, 3 dc) to form a deeper lobe point. Repeat for all petals (approximately 30 sts total depending on yarn tension)
Round 7 :
Ch 1. Work each petal edge with a pattern: sc, hdc, 3 dc, hdc, sc in each new petal tip. There should now be 5 distinct points visible (count will be approx 30-36 sts)
Round 8 :
Ch 1. On each of the 5 major points: (sc, ch 2, dc, ch 2, sc) to deepen the valley between lobes and create the serrated edge. Sl st to move to next point
Info :
If you are making leaves in different sizes, use either 3.0mm or 3.5mm hooks. For the photographed delicate lace effect, use the smaller hook and slightly tighter tension
Round 9 :
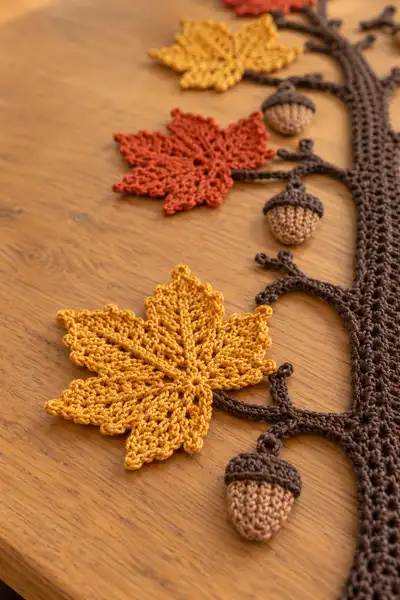
Ch 1. Work picot points at each major tip: (sc, ch 3, sl st into first ch) at the tip, then return along edge with sl sts to the valley. This creates the dotted scallop edge seen in the photos
Round 10 :
Ch 1. Finish edges with a row of sc around the whole leaf, placing (sc, ch 1, sc) in deeper valleys to keep leaf flat and (sc, picot) at tips. Approximate stitch count 40-48 depending on yarn and tension
Round 11 :
Ch 1. Work 2-3 surface slip-stitch veins: From center, ch 20 for a long vein, sl st back along chain into leaf body anchoring at each anchor point so veins rise gently. Repeat for 3-5 veins to mimic maple venation
Round 12 :
Ch 1. Finish by fastening off, weave ends through the base center and secure. Pin the leaf into shape and block carefully to define points
Info :
Make leaves in a mix of mustard, burnt orange, and rust red. The pattern above produces a medium-sized maple leaf similar to the photos; for slightly larger leaves add an extra dc row around edge and increase picot spacing
— Acorn (Make 6) :
Round 1 :
With tan yarn. Magic ring, 6 sc into ring (6)
Round 2 :
Inc in each st around (12)
Round 3 :
(1 sc, inc) x 6 (18)
Round 4 :
(2 sc, inc) x 6 (24)
Info :
Begin stuffing lightly after round 4. Acorns are small so avoid overfilling — you want them slightly squishable so they sit well against the flat trunk
Round 5 :
1 sc in each st around (24)
Round 6 :
(3 sc, dec) x 6 (18)
Round 7 :
(2 sc, dec) x 6 (12)
Round 8 :
1 sc in each st around (12). Stuff firmly but not tight
Round 9 :
Dec x 6 (6). Fasten off leaving long tail to sew to acorn cap
Info :
Acorn cap: With dark brown, ch 2, work 6 sc in 2nd ch from hook (6). Rnd 2: inc x6 (12). Rnd 3: (1 sc, inc) x6 (18). Rnd 4: 1 sc in each st around (18). Fold cap over the nut and edge with sl st to create rim. Sew cap to nut with contrasting neat stitches
Round 10 :
Optional: create a tiny loop for hanging: before fastening off, ch 6 from the top center of the cap, sl st back into cap top, fasten off and hide tail
— Small Twigs & Branch loops (make multiple) :
Round 1 :
With trunk brown yarn, ch 28. Sl st into 2nd ch from hook and each ch back to create a firm twisted cord. Fasten off leaving tail for sewing (approx 26 sl sts)
Round 2 :
For curled tiny branch: ch 14, sc in 2nd ch from hook and next 3 sts, then leave remaining chain unworked and use tail to anchor the chain into trunk with sl sts for a curled tendril
Info :
Make mix of straight corded twigs and short curled tendrils; vary lengths (8-30 ch) to get the natural irregular look from the photo. Secure each twig by sewing at both ends and mid-point for stability
Round 3 :
To add texture to cords, work surface slip stitches along one side to create slight ridge. This is optional but adds depth
— Leaf Edging & Finish :
Round 1 :
After blocking leaves, add a neat sc border around each leaf in matching color to sharpen points (sc around with ch-1 valleys to avoid pulling)
Round 2 :
Optional: work a thin picot edging along leaf tips: (sc, ch 3, sl st into first ch) at each tip to create small picot points
Info :
Blocking is essential: pin leaves and lightly mist with water or steam. Let dry fully before sewing to trunk to preserve shape and crisp edges
— Assembly & Placement :
Round 1 :
Lay the trunk flat on your table or blocking board. Arrange leaves along the trunk aligning centers with the branch loops you created earlier. Alternate colors for a balanced look
Round 2 :
Pin each leaf into place. Using a yarn needle and matching trunk yarn, whip stitch the leaf base to trunk along 6-8 stitches (or the entire base for larger leaves) to secure
Round 3 :
Sew acorns at the ends of some twig loops. Attach acorn caps to trunk first if you prefer, then arrange nut underneath and stitch through both cap rim and trunk for a secure mount
Round 4 :
Reinforce branch loops by sewing their ends securely into the trunk at the sl st join points. Tidy any stray ends and weave them into trunk width for invisibility
Info :
Step back frequently to check balance. In the pictured runner, leaves are mostly attached on alternating sides of the trunk; mirror spacing top-to-bottom so the runner looks arranged and symmetrical when placed lengthwise
Round 5 :
Optionally, attach a lightweight fabric backing or felt strips to the underside of the trunk for added stability on your table surface. Glue or stitch the backing in place
Round 6 :
Final tidy: weave all ends through at least 6-10 stitches to hide tails. Trim ends close to work. Lightly press or steam again to flatten any bumps
Info :
Personalize by adding small embroidered acorn caps, seed pods, or tiny felt mushrooms between leaves. This is the fun stage where the runner comes to life
This maple leaf tree runner is a beautiful way to bring autumn indoors — warm colors and delicate lace leaves create seasonal charm. Each stitch builds texture and personality, and the assembled runner becomes a centerpiece of cozy gatherings. Enjoy the meditative rhythm of making leaves and acorns, and feel proud displaying your handmade harvest-hued creation. 🍁🧶