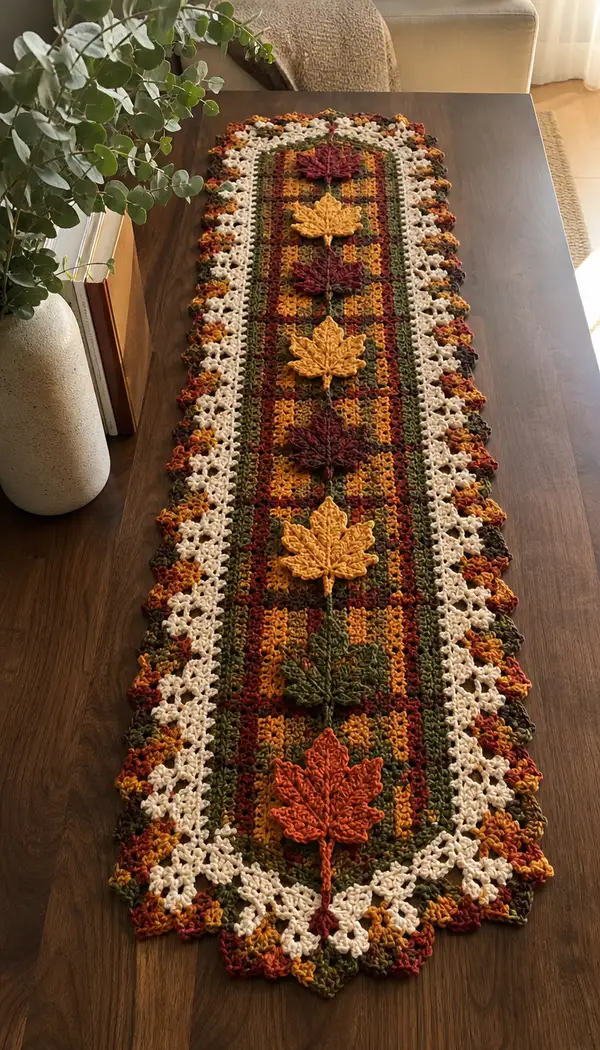
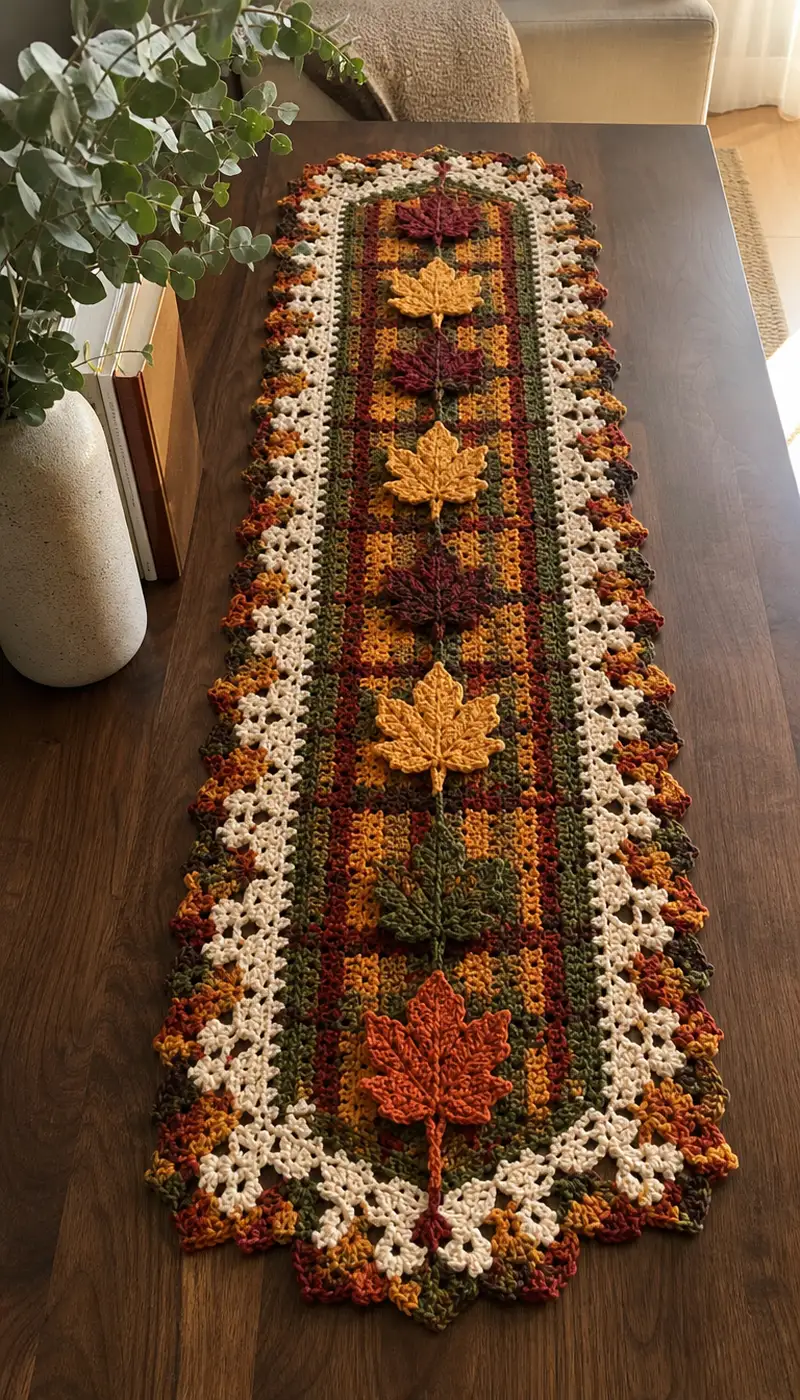
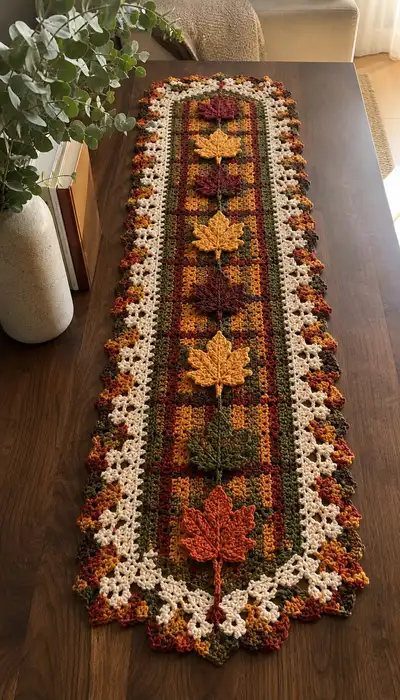
Bring warm fall color to your table with this hand-crocheted Autumn Maple Leaf Table Runner. The long rectangular runner features a central checked panel in autumn shades, five textured maple leaf appliques with stems, and a delicate lacy cream scalloped border edged in variegated autumn tones. The pattern uses simple stitch repeats and color changes to create a rich, layered look that lies flat and dresses any dining or console table for the season.
Progress Tracker
0% Complete
— Materials & Gauge :
Info :
Gauge is not critical for lengthwise runner projects but affects width and leaf size. Sample runner measures approximately 12.5" wide by 48" long unblocked. Using worsted weight yarn with a 4.5mm hook yields about 10 sts x 10 rows = 4" in sc; adjust hook if your fabric is noticeably larger or smaller.
— Center Panel (work flat in rows) :
Foundation :
Chain 121 (this forms the full width including turn chain, final width approx 11.5-13in depending on yarn & tension)
Row 1 :
Sc in 2nd ch from hook and in each ch across. Turn. (120 sc)
Info :
Use a stitch marker at the first stitch of each row to mark the turning side for long-row consistency. Row counts referenced below assume you are working on the right side when stated.
Row 2 :
Ch3 (counts as dc), dc in next 119 sts. Turn. (120 dc)
Row 3 :
Ch1, sc in each st across. Turn. (120 sc)
Info :
We will build a checked/striped panel by alternating blocks of 6 rows in one color then switching to the next. Carry unused yarn loosely along the WS where practical, or fasten off and weave tails.
Rows 4-9 :
Working in Color A (mustard): *Ch3, dc in each st across for Rows 4 (dc row); Rows 5-6 sc in each st; Row 7 ch3 dc across; Row 8 sc across; Row 9 sc across.* Maintain 120 sts each row. Turn at end of each row. (120)
Info :
Change to Color B (olive green) at first stitch of Row 10 by finishing last yarn over with new color. Carry colors on WS or cut and weave based on your preference for the finished runner. Placing color changes at the beginning of the row ensures a clean vertical color edge.
Rows 10-15 :
Working Color B (olive green): repeat Rows 4-9 structure but in Color B. Each row retains 120 stitches. (120)
Info :
Continue alternating 6-row blocks of color across the length to form the checker effect. The sample alternates mustard, burgundy, variegated/autumn multi, olive; feel free to repeat your color order to create a 4-color repeat every 24 rows.
Rows 16-39 :
Repeat the 24-row color-blocking sequence (mustard, burgundy, variegated, olive) to reach desired runner length for the center panel. Maintain 120 stitches each row. (120)
Info :
At this point check the length. The sample center panel used 40 rows of checker blocks total before inner border rows. Adjust the number of block repeats to your desired runner length; keep it an even number of color-block repeats for symmetrical placement of leaves.
Row 40 :
After completing the final color block, switch to the outer stripe color (dark burgundy or variegated) and work ch3, dc in each st across for a crisp stripe. (120)
Row 41 :
Ch1, sc in each st across. Turn. (120 sc)
Rows 42-44 :
Work 3 rows sc in olive green to create inner border ridge. Each row 120 sc. (120)
Info :
Use BLO on the final olive row if you want a defined ridge where the lacy border will join. Work 1 sc in each st BLO on the last inner border row to make a worked edge that the border stitches can anchor into.
Row 45 :
Ch1, sc in each st BLO across previous row to form a neat edge for attaching outer border. (120 sc)
Info :
Fasten off and weave tails at the end of the center panel if you plan to work the border separately in the round. If you prefer, leave the color attached to begin the border immediately; this pattern will present both options in the border section.
— Leaf Applique (Make 5 — identical, worked flat then sewn) :
Info :
Each maple leaf applique is made flat starting from the stem base and working up through the central shaft and lobes. The leaves in the sample are worked with worsted yarn, and stitch counts below result in a leaf roughly 4.5" wide and 6" long. Choose color for each leaf: mustard, burgundy, rust, deep green, ochre for varied fall look.
Round 1 :
With leaf color, ch 12. (12)
Round 2 :
Sc in 2nd ch from hook and in next 9 ch. In last ch work 3 sc; now working on opposite side of foundation chain sc in next 9 ch. Join with sl st to first sc. (24 sc)
Info :
This creates a narrow oval stem/leaf base. Keep tension even; place a removable stitch marker at the first stitch to mark round starts as you build the leaf shaft and lobes.
Round 3 :
Ch1, sc in each st around (24). Turn if preferred and work flat to build center column for lobes.
Round 4 :
Work two rows of sc even (24 each) to widen the base slightly. (24)
Info :
We will form the central rib (vein) next and then build left and right lobes with increases and decreases to shape the maple silhouette. Use tapestry needle to draw a centre line later for added vein detail if desired.
Round 5 :
Ch1, sc in first 3 sts, inc, sc in next 6, inc, sc in next 6, inc, sc in last 3. (27)
Round 6 :
Ch1, sc in each st across (27). (27)
Round 7 :
Form small lobes: sc in first 2, (inc, sc in next 2) repeat across until 27 sts achieved. (27)
Round 8 :
Start shaping pointed lobes: *sc in next 3, dec* across to create points. (24)
Info :
Switch to FLO or BLO selectively to create raised ribbing on the leaf surface. For a textured central vein, on Round 9 work sc in each st but in the central 3 sts work sc in BLO to make a slight ridge.
Round 9 :
Sc in each st across but work central 3 sts in BLO to create a vein ridge. (24)
Round 10 :
Shape top lobes: *sc2, inc, sc4, inc, sc2, dec* across as required to form five-point lobed silhouette. End with total 28 sts. (28)
Round 11 :
Sc across 28 sts maintaining central vein by working the middle 4 sts in BLO. (28)
Round 12 :
Create pointed lobe tips: *sc in next 3, dec, skip 1, sc in next 4, dec, sc in next 3* — this sculpts lobes and hollows. (24)
Round 13 :
Sc around evenly (24). Add surface detail by working 1 sl st into small groups across leaf face to suggest veining. (24)
Round 14 :
Work reverse side shaping: dec in 4 strategically spaced places to form the leaf tip point: (24->20) follow pattern: (sc3, dec) x4 = 20
Round 15 :
Sc across 20 sts and fasten off leaving tail for sewing. Weave ends short of center to avoid bulk. (20)
Info :
Use surface slip-stitch lines to enhance veins: with contrasting darker yarn, embroider 3-5 veins from center to lobes using a yarn needle and the tail left from Round 15. This gives the leaf the raised, textured look visible in the photo.
— Leaf Stem (Make 5) :
Round 1 :
With green yarn attach at leaf base center, ch 20. (20)
Round 2 :
Sc in 2nd ch from hook and each ch back to base. Sl st into base center. Fasten off leaving long tail for sewing. (19 sc)
Info :
When sewing stems to center panel, leave about 1" of stem free before sewing leaf base; this creates the natural droop seen in the sample where leaves sit slightly above the panel.
— Inner Border & Transition Rows :
Round 1 :
With cream yarn and working along long edges of center panel, join with sl st to corner edge (work along foundation chain and last row edges). Ch1.
Round 2 :
Work sc evenly around the entire rectangle edge, working 3 sc in each corner stitch to turn corners smoothly. Maintain counts but expect approx 2 sc per center panel stitch along long sides and 3 sc in corner to keep shape. (Approx 480 sc around, adjust to match real row length)
Info :
If you worked the center panel separately, block it first before adding border for a flat edge. Use stitch markers at each corner to keep the border symmetrical.
Round 3 :
Ch3 (counts as dc), *ch2, sk 2 sc, (5 dc in next sc) repeat across long sides; in corners work 5 dc cluster in corner sc. End join with sl st to top of ch3. This forms a rough foundation for the outer lacy border. (Cluster repeat count will vary by side length)
Info :
Work loosely in this round so the lace has movement. If your clusters pull in too tightly, go up a hook size for the lace rounds only.
— Outer Lace Scalloped Border (worked in rounds) :
Round 1 :
With cream, join in any ch-2 space and work: *(3 dc, ch2, 3 dc) in ch-2 space (shell), sk next cluster, sl st into next ch-2 sp* around. Join. Each shell forms a scallop. (Approx 40 shells around; adjust to match edge)
Round 2 :
Switch to autumn variegated for edge picots: sl st into center of shell, ch1, sc in same place, *ch3, sl st into top of next shell center, ch1 sc into same* repeat to create alternating small picots. Join and fasten off color. (Shell centers remain defined)
Info :
Optional: Add a tiny contrasting slip-stitch row along shell tips to make them pop. The sample alternates variegated picots on a cream shell to tie the colorwork back to the center panel.
Round 3 :
Return to cream and work one more round of 5-dc shells in every other shell to enlarge scallops at the very edge: *(5 dc in shell center, sl st in next shell center)* around. Join and fasten off. Block scallops open. (Approx 20 larger shells)
Info :
Because lace is worked in rounds after the center panel, keep the runner pinned to a blocking board to ensure scallops form evenly and the runner edges remain straight between scallops.
— Finishing Leaf Details & Assembly Prep :
Info :
Place the runner flat on a large surface, center the leaves visually along the center line to determine spacing. The sample places five leaves evenly spaced with approx 7-8" between leaf tops. Mark positions with pins: first leaf 4" from one short edge, last leaf 4" from the opposite short edge, remaining leaves spaced evenly between.
Step :
Pin the leaf stems down with pins through the stem and into the runner; ensure leaves sit staggered vertically to avoid crowding adjacent stripes.
Info :
Sew each leaf by bringing the applique base to the labeled spot and using mattress or whip stitch through the base rounds (Round 13-15 area) and the green stem tail through the center panel. Use matching thread/yarn color for least visible seam. Sew stems to the center squares of the checker pattern to anchor well.
— Detailed Stitching Guide for Applique Veins (Optional Embroidery) :
Info :
Using a tapestry needle and a strand of darker yarn, bring your thread through the center base of the leaf and stitch outward along the central ridge to create 3-5 veining lines. Use a backstitch or stem stitch across the leaf for a natural look. Anchor securely and weave tails inside the leaf before trimming.
— Blocking & Final Finishing :
Info :
Once all appliques are sewn, block the runner by pinning it to a flat surface and lightly steaming or wet-blocking the piece to open the lace and set leaf shapes. Allow to dry thoroughly before unpinning. Use rust-proof pins and a protective cloth if steaming.
Info :
Weave in all ends on the wrong side, trim close to the fabric, and give the runner a final light pressing with steam from a distance if needed. For extra stability you can optionally top-stitch very small invisible stitches at leaf bases to secure them further.
— Alternative: Work Border Joined to Panel Without Sewing :
Info :
If you prefer not to sew on outer border, pick up stitches evenly along the panel edge using a hook, then work the lace rounds directly onto the panel edge following the Outer Lace Scalloped Border instructions. Adjust shell placement to match stitch count exactly.
— Sizing & Adjustments :
Info :
To lengthen or shorten the runner, add or remove color-block repeats in the Center Panel section in multiples of 24 rows (one full 4-color repeat). To widen, increase the foundation chain by multiples of 4 stitches and check that the shell and cluster repeats in the border still divide evenly; you may need to adjust shell spacing slightly at corners.
Info :
If you want fewer or more leaves, re-space them evenly by measuring the total center panel length and dividing by desired leaf count+1 to center leaves evenly along the runner.
— Care Instructions :
Info :
Hand wash cold or gentle machine wash in a mesh bag on delicate cycle, lay flat to dry. Steam blocking will help maintain scallops. Avoid bleach and dry cleaning. If using natural fiber yarns, treat more gently and dry flat away from direct sunlight.
This Autumn Maple Leaf Table Runner marries classic crochet texture with seasonal color to create a cozy, welcoming table centerpiece. Every leaf and scallop adds a handcrafted detail that makes your table feel special for fall gatherings. I hope this pattern inspires you to crochet a beautiful runner for your own home or as a thoughtful handmade gift. 🧶🍁 Happy stitching and enjoy the warm colors of the season!