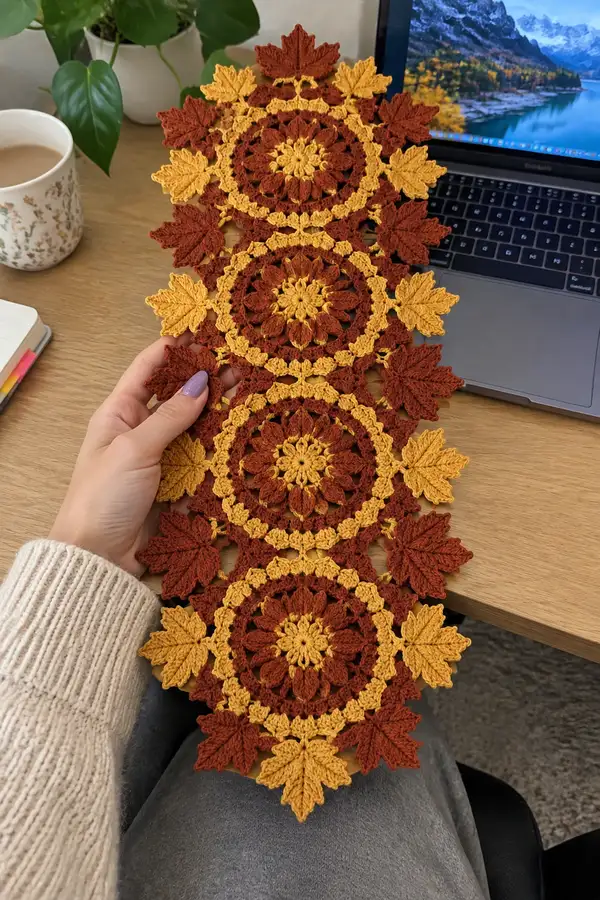
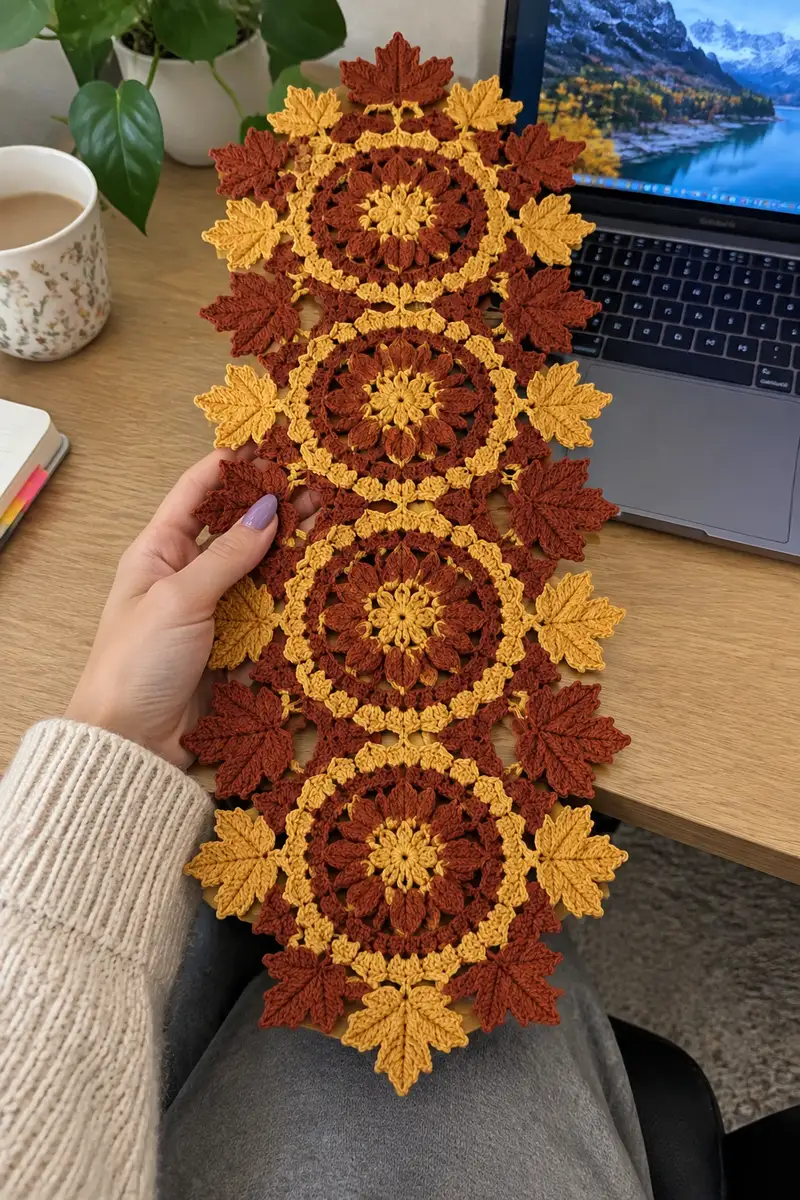
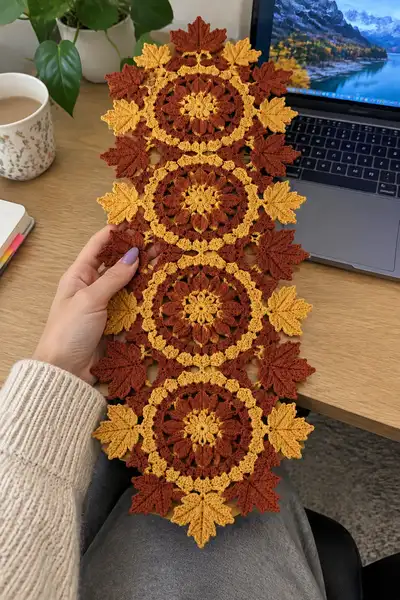
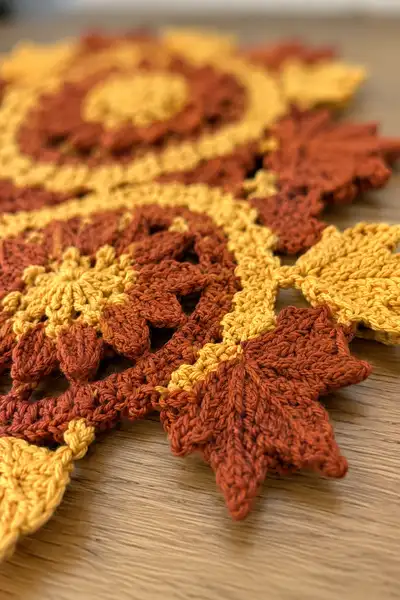
A warm autumn table runner made of linked circular medallions and textured maple leaves in rich rust and golden yellow. Each medallion features layered petals, a raised picot ring and decorative leaf points for a cascading, elegant fall display. Perfect for seasonal decor, sideboards, or a cozy centerpiece. The pattern includes detailed motif and joining instructions to recreate the exact layout shown.
Progress Tracker
0% Complete
— Materials & Gauge :
Info :
Gauge is not critical for pattern symmetry but for size: one finished medallion measures approximately 13-14cm (5"-5.5") across when worked with worsted cotton and a 3.5mm hook. If you prefer a flatter lacy look, use a 3.75-4.0mm hook; for more textured, crisp motifs use a 3.25mm.
— Notes Before You Start :
Info :
Pattern is worked in separate pieces: Medallion (make 4), Maple Leaf (make 8 per medallion arrangement), Small 4-point connectors (make as you go or after). Color abbreviations used: RUST = burnt orange, GOLD = golden yellow. Work tightly enough to avoid big gaps in the center petals but keep lace openings visible.
— Medallion (Make 4) :
Round 1 :
mr, ch2 (does not count as st), 12 hdc into ring, sl st to first hdc to join (12)
Round 2 :
(1 hdc, inc) x12 — work 1 hdc then 2 hdc in next st, rep around (24)
Round 3 :
(2 hdc, inc) x12 — (2 hdc, 2 hdc in next st) rep (36)
Round 4 :
(3 hdc, inc) x12 — (3 hdc, 2 hdc in next st) rep (48)
Info :
Switch to RUST yarn now for the first petal layer if you want the center step in GOLD; otherwise continue in GOLD for the center and change prior to Round 6.
Round 5 :
1 hdc in each st around (48)
Round 6 :
*(ch3, skip 1 st, sl st in next st) repeat around to make 16 chain loops for petal bases — because of stitch geometry you will make 16 loops; adjust slightly to align petals (48)
Info :
These chain loops form the base for raised petals worked in the next rounds. Keep loops loose but uniform. If you prefer a tighter petal base tighten the chains by using a slightly smaller hook for the petal rounds.
Round 7 :
Work petals into each ch-loop: *attach GOLD yarn into loop, (ch1, puff (yarn over, insert hook, pull up loop) x3, yarn over pull through all loops, ch1, sl st to base) repeat across each loop. You will have 16 puff petals arranged around center (16 petals equivalent)
Round 8 :
Sl st in next st, ch2, 1 dc in same base, (ch1, skip next small space, 1 dc in next) repeat around to create an airy ring between petal layers (48)
Info :
At this stage the medallion should show a center of puffs and a spaced ring. If your center looks loose, tighten magic ring before finishing Round 7. Blocking will open the petals beautifully.
Round 9 :
Switch to RUST yarn: join with sl st, ch3 (counts as dc), *3 dc cluster in next ch1 space (cluster = [yarn over, insert, pull up loop] x3 leaving extra loops, yarn over and pull through all loops), ch2, sl st in top of next petal base, rep around (16 clusters, spaces between)
Round 10 :
ch1, 1 sc in each dc and sl st around the ring to tidy the cluster bases and create 48 sc total (48)
Round 11 :
(4 sc, inc) x8 then (5 sc, inc) x8 — rearrange pattern to create small increases and bring stitch total to 64 (64)
Info :
Round 11 intentionally increases to create space for second petal layer. Keep counts precise: from 48 if you do (4 sc, inc) x8 you add 8 = 56; adding (5 sc, inc) x8 adds 8 = 64 total.
Round 12 :
1 sc in each st (64)
Round 13 :
*Work tall petals: ch2, puff stitch (yarn over insert twice or three times for a taller puff) into same st, ch2, sl st into next 4th stitch to center them; rep around to create 16 taller petals sitting between clusters (64)
Round 14 :
Sl st to base of petals to anchor, ch1 then 1 sc in each stitch to tidy (64)
Info :
Use FLO for the next round if you want a pronounced ridge under the next ring. Changing to FLO here will create raised band definition.
Round 15 :
1 sc in each st BLO (64)
Round 16 :
Change to GOLD yarn. Join with sl st, ch1, *(ch3, sl st into next ch-space) repeat 16 times to form a decorative chain ring between petals (64)
Round 17 :
Working in GOLD, into each chain loop make (1 sc, 2 hdc, 1 sc) to form small scallops — this adds texture and a neat ring (16 scallops, counts convert back to 64 total stitches distributed)
Round 18 :
Turn to RUST: ch1, 1 sc in each st around (64)
Round 19 :
(6 sc, inc) x8 — repeat around to add 8 stitches (72)
Info :
These increases create space for the outer leaf and connector points. If you prefer a more compact medallion, reduce increases by combining stitches (e.g., do (5 sc, inc) x8 to reach 68).
Round 20 :
1 sc in each st (72)
Round 21 :
*(ch4, skip 3, sl st) repeat around to create 18 chain loops — this will be used to attach maple-leaf points (72)
Round 22 :
Make small 4-point connector bases: Into every 3rd loop work (sc, ch3, sc) to mark four connection points evenly (24 connector anchors total)
Info :
Count loops and anchors carefully — these determine where leaves will attach and how motifs will link along the runner. Use pins to mark the loops that will become leaf attachment points.
Round 23 :
Switch to GOLD: join with sl st in a connector base, ch1 then 1 sc around the final ring to create a tidy edge (72)
Round 24 :
In GOLD, work picot ring: *sc, ch3, sl st in last sc to create tiny points around the edge at regular intervals — repeat for 24 picot accents (72)
Info :
Blocking will make the picots stand out. If your picots look too large, reduce chain length to ch2. Secure color joins on the backside to avoid visible color jogs at the front.
Round 25 :
Switch to RUST: 1 sc in each st (72)
Round 26 :
(7 sc, inc) x8 — add 8 = 80 total (80)
Round 27 :
1 sc in each st (80)
Round 28 :
*(ch5, sl st into base 3 stitches ahead) repeat to create elongated loops for decorative leaf anchors (80)
Info :
These elongated loops provide the 'arms' where maple leaves are attached and where the medallions will visually touch. Make sure loops are uniform in size by counting chains each time.
Round 29 :
Work gauntlet chain-shells between loops: into each long loop make (sc, hdc, dc, hdc, sc) to shape outer shells (80)
Round 30 :
Switch to GOLD: 1 sc in each st to reinforce the shells and create contrast (80)
Round 31 :
(9 sc, inc) x8 — add 8 = 88 total (88)
Round 32 :
1 sc in each st (88)
Round 33 :
Decorative raised ridge: FLO 1 sc in each st (88)
Info :
If you want more pronounced leaf attachment, you can use a second round of FLO for an even stronger ridge to sew leaves onto later.
Round 34 :
Switch to RUST: ch1, 1 sc in each st to secure ridge (88)
Round 35 :
(10 sc, inc) x8 — add 8 = 96 total (96)
Round 36 :
1 sc in each st (96)
Round 37 :
Even out final outer ring: *(sc, ch2, skip 1) repeat around to create 48 chain spaces for leaf placement and a crisp visual border (96)
Round 38 :
Switch to GOLD: work into each ch2 space 1 sc, ch1, 1 sc to make a delicate scallop at each spacing (96)
Round 39 :
Sl st to join, 1 sc around to tidy edge (96)
Info :
At this point the medallion is complete. The stitch totals grow by increments of 8 in several rounds to maintain a multiple-of-eight geometry that aligns petals and leaf points. Block the medallion flat before attaching leaves for the cleanest look.
Round 40 :
Optional: For an even firmer outer edge, repeat Round 39 in RUST: 1 sc in each st (96)
Round 41 :
Optional embellishment: Working GOLD, insert small sl st picots at every 6th stitch for subtle texture (16 picots placed evenly) (96)
Round 42 :
Final tidy round: 1 sc in each st, fasten off leaving long tail for joining if you prefer to sew medallions together rather than joining-as-you-go (96)
Round 43 :
Info: Weave in ends from center and each color change but do not cut the tail intended for joining until you are ready to assemble. Blocking now creates crisp petal and picot definition.
Round 44 :
Final check: Count your leaf-attachment loops and mark every 3rd loop that will be the primary leaf attachment site. You should have 24 primary anchors distributed evenly (96)
— Maple Leaf (Make 8 per runner spacing) :
Round 1 :
Use GOLD yarn (or second color if you want alternating leaves): ch6, sl st in 2nd ch from hook to form small loop, ch1, 1 sc in loop, ch2, 1 sc to create base (counts as tiny center, not counted)
Round 2 :
Attach to main leaf stem point: ch1, 3 sc into foundation loop to make solid base, turn to shape leaf tip (3)
Round 3 :
Work left side of leaf: ch3, (sc in next st, hdc in next, dc in next, tr in next) progress along to shape point, then mirror on right side to create symmetry; finish with sl st to base. The left and right sides combine to form a single leaf shaped by tall stitches (approx 8-10 stitches per side)
Round 4 :
Ch1, sl st into base then *work 3 sc into base, ch2, 3 sc into same base to create a small raised vein node — repeat across to emphasize central vein (approx 7 nodes)
Info :
This leaf uses tall stitches (dc, tr) to create the pointed lobes of a maple leaf. The method is visual: you create a left lobe and right lobe mirrored from a central base, then add small sc clusters to indicate serration.
Round 5 :
Switch to RUST for small accent veins: using surface slip-stitch technique, outline the central shaft and a couple of secondary veins on the leaf face to bring out detail (not changing the base stitch count)
Round 6 :
Refine lobes: *into each side lobe work (hdc, dc, tr, dc, hdc) to create a pronounced point; sl st back into base between lobes (leaf length increases)
Round 7 :
Edge finish: 1 sc evenly around the entire leaf shape to tidy edges and add a slight thickness for three-dimensional effect (approx 30-36 sc)
Round 8 :
Turn leaf over and work 1 sc in each st to reinforce underside if desired (same count)
Info :
For a plump leaf, gently block and use a small amount of soluble fabric stiffener or light starch. This helps the leaf keep shape when attached to medallions. Alternating leaf colors between GOLD and RUST creates the cascading look shown.
Round 9 :
If you want more texture, work 2 rounds of surface sl st veins in a contrasting color using the yarn tail and tapestry needle, anchoring at base and tip (no change to stitch counts)
Round 10 :
Fasten off and leave a 20-30cm tail for sewing to medallion anchors. Repeat to make the number of leaves you need (16 leaves for the shown runner with 4 medallions, 24 if you like denser edges)
Round 11 :
Info: Each leaf should measure approximately 6-7cm (2.5"-2.75") long with the chosen yarn and hook. Leaves are slightly cupped by blocking to create a sculptural look.
Round 12 :
Optional small leaf variant: for filler leaves, make a simplified 6-round mini leaf using only sc and hdc for 3-4cm pieces to tuck between larger leaves.
Round 13 :
Info: When making multiples, try alternating the sequence RUST-GOLD-RUST on each medallion to create the alternating color rhythm visible in the runner photo.
Round 14 :
Fasten off all leaf pieces after weaving in tails partially; leave a sewn tail for final attachment to the medallion anchors (do not cut too short).
Round 15 :
Optional: If you prefer an attached leaf worked directly from the medallion, you can pick up stitches from the anchor ch-loop and work the leaf in one piece — use the same shaping sequence but pick up 6-8 stitches directly from the medallion point.
Info :
The leaf instructions are intentionally descriptive because real maple leaf shaping uses mirrored increases and tall stitches to make recognizable lobes. If you want precise charts, map out stitch counts by blocking a prototype leaf first and counting stitches per edge.
— Joiner Connector & Link Motifs (Make As Needed) :
Round 1 :
Small 4-point connector: ch6, join ends with sl st to form a ring, (ch3, 3 dc, ch3, sl st) into ring to make a small decorative four-arm hub that will be used to link medallions (1 hub)
Round 2 :
Use GOLD yarn for connectors: sl st to turn, ch1, 8 sc around the hub to create a sturdy anchor (8)
Round 3 :
Chain-linked joining path: make short chains of ch6 between medallion anchors and attach with sl st into the anchor loop on adjacent motif until motifs are aligned. Secure each connector by sewing through the connector base and the medallion anchor with several whip stitches.
Info :
Joining as you go (JAYG) is recommended: when you finish the last round of a medallion, start the connector chain in GOLD and sl st into the adjacent medallion's anchor to form a permanent seam. This method keeps shape cleaner than sewing later.
Round 4 :
To assemble the shown runner (4 medallions in a vertical cascade): make medallions first, block them, then arrange so medallion centers are aligned and anchor points for leaves alternate RUST/GOLD. Use the connector chain to join each pair of medallions at 6-8 evenly spaced points.
Round 5 :
For a strong join, sew connectors with matching thread using a mattress or ladder stitch for a flat seam. Hide the working tails beneath the medallion edge by weaving them under several rounds.
Round 6 :
If you prefer a crocheted join: slip-stitch from medallion A anchor into connector chain then into medallion B anchor, working a continuous slip-stitch chain back and forth twice to secure (this is done on the wrong side for a clean right-side look)
Info :
When joining, alternate which medallion is on top so the seam doesn't create a ladder visible from the right side. Use small whip stitches hidden under petals to flatten any raised seam area.
Round 7 :
After joining medallions, attach leaves: using the long tail left on each leaf, sew the leaf base to its assigned anchor on the medallion. Stitch through the medallion base and a couple of rounds beneath for a stable attachment. Add 3-4 small stitches under the leaf tip to anchor it down flat.
Round 8 :
Place larger leaves at the outer perimeters and alternating smaller filler leaves in between to match the cascading look. Ensure leaf tips alternate directions so adjacent medallions appear to flow into each other (this creates the cascade effect).
Round 9 :
Info: If motifs shift after initial attachment, insert a few mattress stitches through the medallion layers and leaf bases to pull them slightly taut. Blocking again after joining can ease minor misalignments.
Round 10 :
Edge Join Reinforcement: With GOLD yarn, work 1 sc around the join seam on the wrong side of the runner to secure all connectors and leaves, making sure the wrong-side stitches do not show on the right side (approx 1 round around the entire runner).
Round 11 :
Optional decorative chain overlay: Using GOLD, chain-run small arches along the seam by working a 3-ch arch anchored every 4 stitches to disguise any join irregularity (maintain even spacing).
Round 12 :
Info: Because the medallions are fairly open, adding these subtle overlay chains gives the runner a more finished, continuous appearance. Keep overlay stitches light to preserve lace effect.
Round 13 :
Secure all ends: weave tails through multiple rounds of stitches and trim. If a tail is visible on the right side after weaving, bury it further by stitching into adjacent petals and pulling the tail through to the wrong side with a tapestry needle.
Round 14 :
Final shaping: check that the runner lays flat. Block again if necessary after all pieces are sewn. Use rust and gold pins to pin edges into final shape during blocking to create crisp leaf points.
Round 15 :
Info: If you plan to launder the runner, use a steam block after hand washing and dry flat. Cotton yarn handles wet blocking well; synthetic blends may require steam-only blocking to avoid distortion.
— Final Edge & Border (worked after assembly) :
Round 1 :
With GOLD, join in any outer edge st with sl st, ch1 and evenly place 1 sc in each outer stitch to create a neat continuous border around the assembled runner (count will vary depending on joins; work evenly so border is flat).
Round 2 :
*(ch3, sl st into next stitch) repeat to create pointed scallops around outer leaves — place scallops in spaces to highlight leaf tips (approx 40 scallops depending on runner length)
Round 3 :
Switch to RUST: 1 sc in each st around to lock the scallops into place and give a warm outline (same stitch count)
Info :
This two-color border frames the runner and echoes the colors of the medallions and leaves. If you prefer a single-color finish, do both rounds in your chosen color for a simpler appearance.
Round 4 :
Work small picot accents at leaf tips: *sc, ch3, sl st into sc two stitches back to form a small picot; repeat around leaf tips to create slight beads that catch the eye (count varies)
Round 5 :
Final secure round: 1 sc in each stitch, fasten off leaving a tail for final weaving (this stabilizes the border and hides the picot joins)
Round 6 :
Info: The border rounds intentionally maintain the runner flatness. If your runner seems to ripple, remove the last border round and re-try one size tighter (use a smaller hook) to remove looseness.
Round 7 :
Optional fringe or tassel detail: If desired, add small tassels at each extreme end and between medallions using short strands of both colors tied through the border scallops. Trim tassels uniformly.
Round 8 :
Final blocking and pressing: pin runner to shape and steam lightly. Use starch if you want very stiff leaves. Allow to dry completely before use.
Round 9 :
Info: Care instructions: hand wash mild soap, reshape and lay flat to dry. Cotton can be ironed lightly through a pressing cloth if you want very flat presentation.
Round 10 :
Pattern complete: Enjoy your Cascading Maple Leaf Medallion Table Runner — it looks great as a centerpiece, over an entry console, or folded at a table end.
This cascading maple leaf medallion runner brings autumn warmth to any table with rich rust and golden highlights. Each motif is satisfying to make and together they create a graceful, textured centerpiece. The layered petals and dimensional leaves are small delights that catch the light and create cozy seasonal charm. Enjoy the meditative process of crocheting each motif and the joy of assembling them into one beautiful runner. 🍂🧶