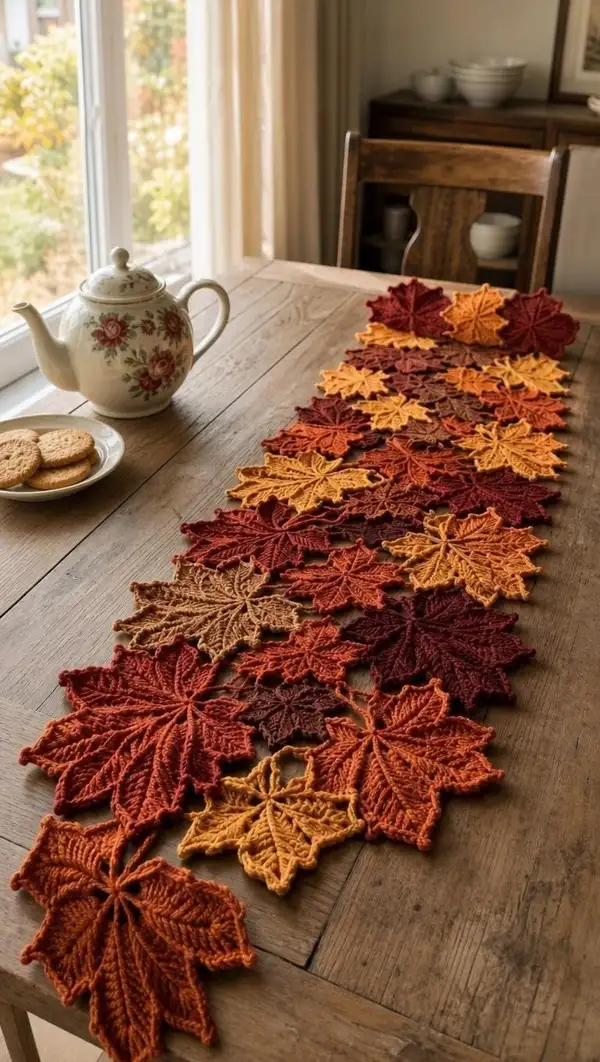
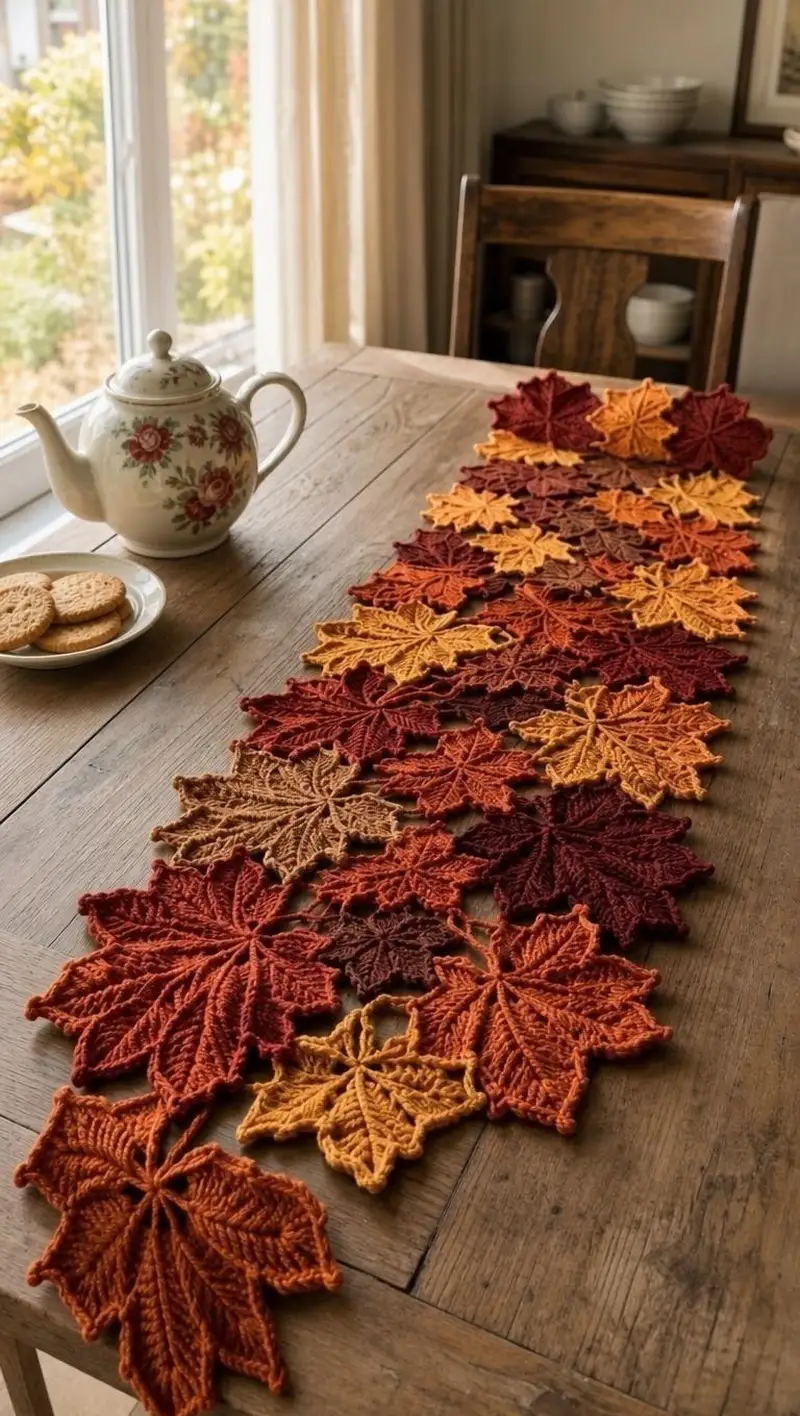
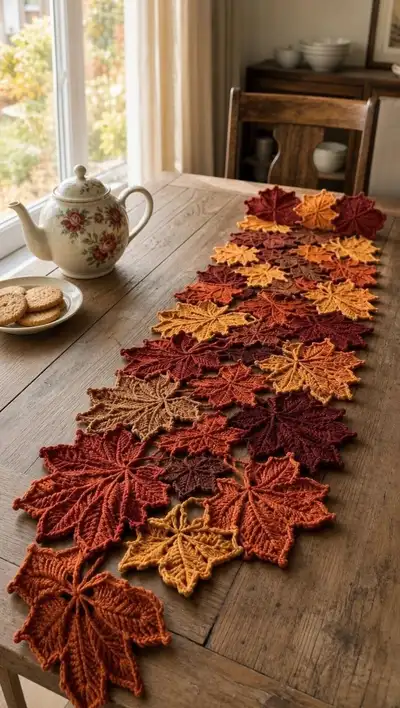
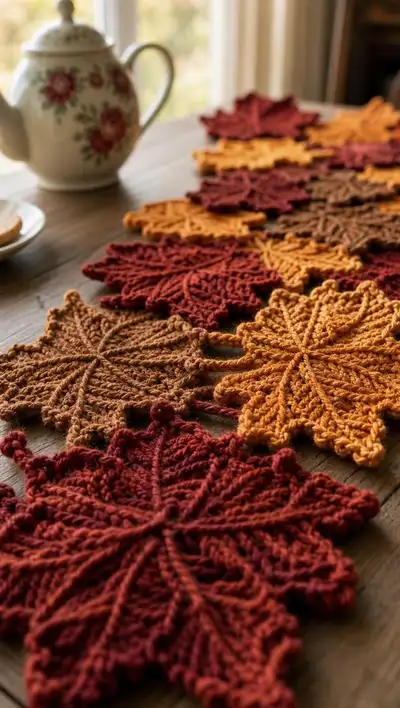
Create a warm, richly textured autumn table runner made of crocheted maple leaves in golden yellow, burnt orange, rust and deep burgundy. This pattern shows how to crochet three leaf sizes with raised vein detail, join them into a flowing runner and add a neat picot edge. The finished piece layers beautifully on a wooden table as seasonal decor or gift.
Progress Tracker
0% Complete
— Notes & Gauge :
Info :
Gauge is not critical for this decorative runner but consistent gauge will make leaves match in size. Using worsted weight yarn with a 4.0mm hook a large leaf measures approximately 14-16 cm across tip-to-tip, a medium leaf 10-12 cm and a small leaf 7-9 cm. Block motifs flat before joining for best results.
Info :
All leaves are worked in continuous rounds unless otherwise noted. Place a marker at the beginning of each new round. Where I say 'first stitch' I mean the stitch you joined to at the end of the previous round.
— Large Maple Leaf (Make 6–8 for runner) :
Round 1 :
mr, ch3 (counts as dc), dc into ring, ch3, *dc, ch3* repeat from * to * 6 more times (end with dc), sl st to top of starting ch3 to close ring (8 dc with 8 ch3 spaces)
Round 2 :
Working in each ch3 sp: *sc, hdc, 3 dc, hdc, sc in same ch3 space* around (7 sts worked into each sp) (8 lobes x 7 = 56 sts). Sl st to first sc to join.
Info :
Mark the first stitch of each lobe (the sc at the base) with a stitch marker — you'll have 8 markers. These mark the valley points between lobes and help maintain symmetry.
Round 3 :
Ch1, work in back loops only (BLO) across the 3-dc group center of each lobe to create a slightly raised edge: *(sc in sc, hdc in hdc, 5 dc in center dc group, hdc in hdc, sc in sc)* repeat for all 8 lobes (9 sts per lobe) (8 x 9 = 72 sts). Sl st to join.
Round 4 :
Ch2 (counts as hdc), *work (fpdc around the central dc that sits at the tip of lobe, ch1, dc in next stitch, ch1, fpdc around same central dc through the next round) to build the central vein; then hdc in hdc, sc in sc* repeat for each lobe. Maintain 72 working stitches total but with visible fpdc vein on each lobe.
Info :
Front post double crochet (fpdc) stitches create the central raised vein. Keep tension slightly firmer when working post stitches so the vein stands proud.
Round 5 :
Ch1, *(sc, hdc, 7 dc, hdc, sc) in each lobe, placing the 7-dc shell so the middle 3 dcs align with the vein established in Round 4* (11 sts per lobe) (8 x 11 = 88 sts). Sl st to join.
Round 6 :
Ch1, 1 sc in each st around working in BLO for the base-most sc to create a neat valley ridge: 88 sc (88). Sl st to join.
Round 7 :
Info :
Change to slightly longer stitch shaping at lobe skirts — this round increases the tip definition.
Round 7 :
Ch3 (counts as dc), *(dc, ch2, 3 dc) worked into the 7-dc center so the ch2 opens the tip, then dc, ch2 between lobes to form a notch* repeat for 8 lobes. After shaping, count will be approximately 8 x 10 = 80–88 stitches depending on chains; place counts visually and keep symmetry.
Info :
Because this round places extra chains for lobe tips the stitch count will appear to change due to ch2 spaces; when I list counts later I'll use the working stitch numbers (do not worry about the temporary ch spaces, maintain even lobe shaping).
Round 8 :
Ch1, sc in each st and sp around working evenly to close ch2 spaces: aim to have 88 sc total. Sl st to join. This evens out the ch2 loops placed last round.
Round 9 :
Ch2, *bpdc around 2nd dc of center group, ch1, fpdc around central dc to continue vein, ch1, bpdc around 2nd dc of center group* across each lobe (this places two back-posts flanking a front-post to emphasize vein ridge). Count remains 88 sts (worked as combination of posts and regular sts).
Round 10 :
Ch1, sc in each st around working in FLO for the sc row to create a crisp edge ridge (88 sc). Sl st to join.
Info :
At this stage your leaf has a circular base and 8 lobes with a visible raised center vein. Block now to flatten: spray lightly, pin each tip outwards so the leaf measures even tip-to-tip, allow to dry fully.
Round 11 :
Ch1, *into each lobe work shaping rows to form the pointed tip: (sc, hdc, 3 dc, tr, 3 dc, hdc, sc) in the tip area* — this elongates each lobe and adds a central treble for height. This increases stitches in the lobe to 13 each (8 x 13 = 104 sts). Sl st to join.
Round 12 :
Ch1, sc in each st around (104 sc). Sl st to join.
Round 13 :
Info :
If you want a slightly cupped leaf, skip blocking until after joining; for completely flat leaves, block now before continuing the fine edging rounds.
Round 13 :
Ch3 (counts as dc), *1 dc in next 6 sts, (dec over next 2 sts), 1 dc in next 4 sts* repeat for each lobe to refine shape; working decreases evenly trims bulk at the base of lobes. New total approximately 96 sts after modest decreases (math varies slightly depending on placement; maintain symmetry).
Round 14 :
Ch1, sc in each st around in BLO to create an inner ridge: 96 sc. Sl st to join.
Round 15 :
Ch3, *(dc, ch1, dc) in tip chain space to create little points on the leaf tip, then 1 dc in each of next 10 sts* repeat around. This places small point picot-style shapes on each tip — working total ~96–104 sts.
Round 16 :
Ch1, sc in each st around (use FLO to make a smoother outside ridge if desired). Count remains similar to round 15. Sl st to join.
Info :
Finish with a neat picot border if you like: ch3, sl st in 3rd ch from hook to form a picot on each lobe tip. Alternate method shown in edging section below.
Round 17 :
Ch1, *work an alternating spike stitch row to create veins between the central post and edge: (sc, ch2, spike hdc into the round 5 stitch below, ch2, sc)* repeat around. This adds rich texture and deep shadows on the leaf surface. Tie off and weave ends.
Info :
Weave ends into the back of the leaf and trim. Block again briefly to set final shape. Large leaf is complete.
— Medium Maple Leaf (Make 8–10) :
Round 1 :
mr, ch3 (counts as dc), dc into ring, ch3, *dc, ch3* repeat from * to * 5 more times (6 dc, 6 ch3 spaces), sl st to top of ch3 (6 dc)
Round 2 :
In each ch3 sp: *sc, hdc, 3 dc, hdc, sc* (7 sts per lobe) — 6 lobes x 7 = 42 sts. Sl st to join.
Info :
Medium leaf uses 6 lobes rather than 8 for a compact maple look. Mark the base sc of each lobe with 6 stitch markers.
Round 3 :
Ch1, work (sc in sc, hdc in hdc, 5 dc in center group, hdc, sc) each lobe to create fuller lobes (9 sts per lobe) (54 sts). Sl st to join.
Round 4 :
Ch2, *fpdc over the central dc to create vein, ch1, dc either side to bulk the tip, ch1* repeat across lobes. Maintain 54 working stitches with added post stitch veins.
Round 5 :
Ch1, sc in each st around in BLO (54 sc). Sl st to join.
Round 6 :
Ch3, *(dc, ch2, dc) in tip area to make a split tip then 1 dc in subsequent stitches to shape lobe* repeat for each lobe resulting in approx 60–66 sts. Sl st to join.
Round 7 :
Ch1, sc around evenly to neaten the edge (approx 60 sc). Sl st to join. Add a final round of tiny picots (ch3 sl st in top of ch3) at each tip if desired. Tie off and weave ends.
Info :
Medium leaves benefit from a slightly smaller hook (3.75–4.0mm) if you want a denser look. Block each leaf after finishing to flatten and match size.
— Small Maple Leaf (Make 10–14) :
Round 1 :
mr, ch2 (counts as hdc), (hdc, ch2) x 4 then sl st to join (5 small lobes with 5 ch2 spaces). This creates a small decorative leaf base (5 hdc).
Round 2 :
In each ch2 sp: sc, 3 dc, sc (5 per lobe) — total 25 sts. Sl st to join.
Info :
Small leaf is designed as a filler motif and will visually sit between larger leaves. Keep these tighter and flatter.
Round 3 :
Ch1, sc in each st around (25 sc). Sl st to join.
Round 4 :
Ch3, work (dc, ch1, dc) into center of each lobe to create mini tips, then sc around to neaten (approx 25–30 sts). Tie off and weave ends. Block flat.
— Raised Vein Technique (applies to all leaf sizes) :
Info :
Front post (fpdc) and back post (bpdc) double crochets form the raised leaf veins. When working fpdc/bpdc, insert hook from front/back and wrap yarn as you would for a normal dc; keep post stitch tension slightly firmer than body stitches to make it stand out.
Round 1 :
For a typical central vein: after building the lobe base, count to the center group of 3 dcs in the lobe. Work fpdc around the central dc of that group in the next round and then work bpdc on both sides in the surrounding stitches. This visually reads as a spine with flanking ridges.
Info :
Work veins in early rounds and repeat in later rounds for a layered effect. Always work post stitches into earlier-round stitches (eg. work fpdc into the previous round's dc) to pull the thread through the fabric and form a raised line.
— Joining Leaves into Runner :
Info :
Decide your runner layout before joining: alternate large, medium, small leaves, and stagger them so lobes overlap slightly for a natural look. Leaves may be joined as you go or sewn together after blocking. I recommend joining as you go for a flowing visual effect.
Round 1 :
Method A - Crochet Join-As-You-Go: Start by placing the first leaf face up. With RS of second leaf facing you and working into the last round of the second leaf, attach yarn in an edge stitch where you want the join. Ch3 (acts as dc), sl st into the corresponding stitch on the first leaf; continue across a short distance: *1 dc in next stitch of second leaf, sl st into corresponding stitch on first leaf* repeat for 3–6 stitches depending on desired join. Break yarn and weave tail. This produces short chain bridge joins that float the second leaf slightly above the first, creating layered depth.
Round 2 :
Method B - Sewing Join: Pin leaves in position, using a tapestry needle and matching yarn, use ladder stitch along corresponding edge stitches moving from the underside to the right side, catching the two loops to form an invisible seam. Tie off and weave ends. Sewing gives a flatter result than chain joins.
Info :
When crocheting joins, choose 3–5 stitches to connect, not entire edges, to keep the runner airy. Stagger joins so that the runner can lie flat and also show negative space between leaves.
Round 3 :
For every join, plan at least two anchor points near valley areas (base of lobes). For large-to-large joins choose 4 anchor stitches; for large-to-medium choose 3; for medium-to-small choose 2. Use the counts on the last round of each leaf to find evenly spaced anchoring stitches.
Info :
To make long runners, create additional leaves and repeat joining every ~2–3 leaves along a central axis. Use different colors to create gradient changes along the length of the runner.
— Joining Sample Sequence (example for 5-leaf repeat) :
Round 1 :
Place Large Leaf A flat. Attach Medium Leaf B overlapping one lobe of Leaf A by crocheting 4 join stitches (dc+sl st) across the point where edges meet — this forms a small bridge. Attach Small Leaf C overlapping Medium Leaf B with 2 join stitches. Attach Medium Leaf D to the opposite side of Large Leaf A with 3 join stitches. Attach Large Leaf E at the end with 4 join stitches to create a repeating chain. Repeat sequence to desired length.
Info :
Alternate join direction to create curves in the runner: anchoring more stitches on alternating sides will bias the runner left/right, producing a gentle S-curve instead of a straight line.
— Edging & Finishing :
Round 1 :
Once all leaves are joined, work a unifying edging along the outermost edges: Join yarn at any outer edge stitch, ch1, sc in same st; *ch3, skip 2 sts, sc in next st* around edges, placing extra sc at sharp points to maintain shape. This provides small loops that visually unify the runner.
Round 2 :
Ch1, *sc in each sc and in each ch3 loop work (sc, ch2, sc) to create picot scallops* continue around. This softens the silhouette and helps camouflage joins.
Info :
If you prefer a simpler finish work a single round of sc in BLO around the entire runner and tie off, then block gently for final shaping.
Round 3 :
If using picot border: ch3, sl st in 3rd ch to create picots spaced at each tip and valley for a delicate finish. Secure and weave in all ends at the back of the runner.
Info :
To avoid curling, use steam blocking: pin runner to dimension desired, cover with a damp cloth and press with a steam iron for a few seconds. Allow to cool and dry fully before unpinning.
— Optional: Weighted Backing for Flat Display :
Round 1 :
If you want the runner to sit perfectly flat on a table, sew a thin fabric backing (linen or cotton) to the underside and add a few small flat weights near the center of leaves using narrow pockets and flat washers or slightly heavy buttons. Sew the backing in place with small slip stitches along the inner ridge so it is invisible from above.
Info :
Use slip stitch or ladder stitch with matching yarn to avoid visible seams. Add weights only if runner will be used on windy surfaces (eg. outdoor porch) or needs extra flatness.
— Color Placement & Design Tips :
Info :
Arrange colors so darkest tones anchor the ends and slightly lighter tones form the middle stripe; this makes the runner look intentionally gradiented. Alternatively mix all colors randomly for a scattered natural look. Keep at least one leaf of each size in each color group for balanced composition.
Info :
When planning, lay out your finished leaves on a table and photograph the layout before joining to preserve your intended sequence and orientation.
— Troubleshooting & Tips :
Info :
If a leaf is slightly larger than the rest, wet it lightly, pin to desired size and allow to dry while pinned. Alternatively unpick the last one or two rounds and rework with slightly smaller stitch counts. Keep consistent yarn tension throughout.
Info :
To create a smaller scale runner for narrow tables, scale back the number of leaves and alternate leaf sizes more frequently. For table centerpieces, make a cluster of 5–7 leaves rather than a long runner.
Info :
Use a contrasting thread color for decorative visible joins if you want chain bridges to be a design feature rather than hidden joins.
— Sizing & Yield Estimates :
Info :
Approximate yield using worsted yarn: one 100g skein will make 6–8 medium leaves or 10–12 small leaves. For a 120cm runner you will likely need about 6 large, 8 medium and 10 small leaves depending on join density and spacing.
Info :
Adjust quantity to table length: measure table and place leaves end to end with your chosen overlap to calculate required number of motifs before crocheting large batches.
— Care Instructions :
Info :
Spot clean with damp cloth. If washing is necessary, lay flat to dry and re-block while damp. Avoid tumble drying to preserve shape and texture.
This autumn maple leaf runner brings handcrafted seasonal charm to your table — each leaf stitched and textured to mimic real fall foliage. The mix of colors and raised-vein details makes it both cozy and elegant, perfect as a centerpiece or gift. Enjoy the meditative process of crocheting and watching the runner grow leaf by leaf. 🧶🍁✨