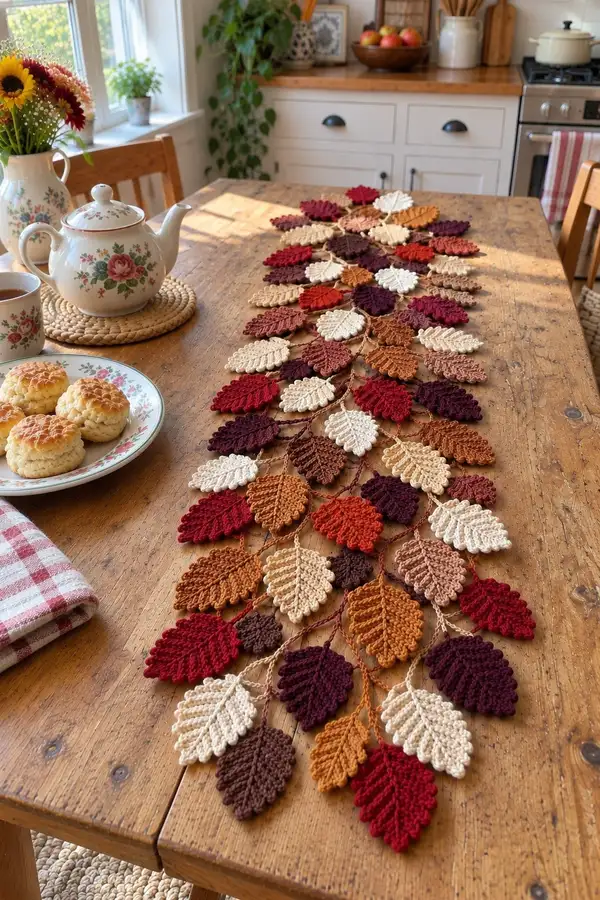
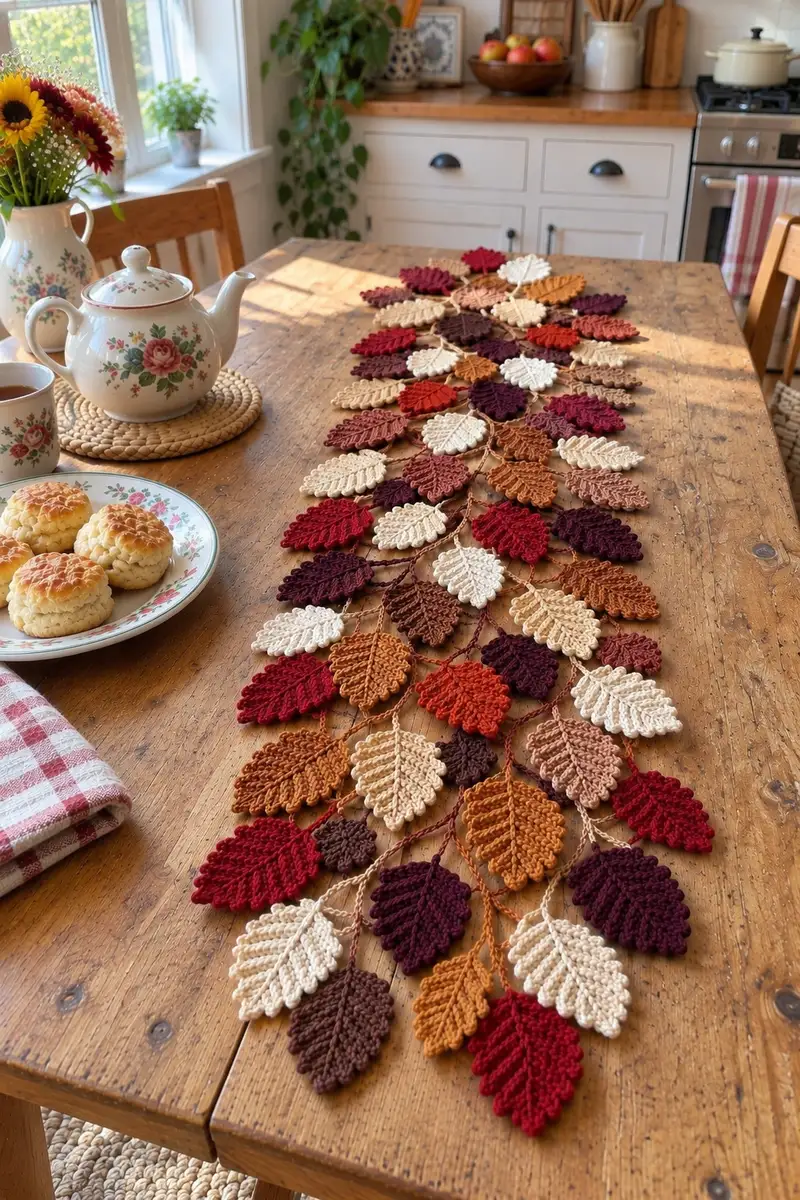
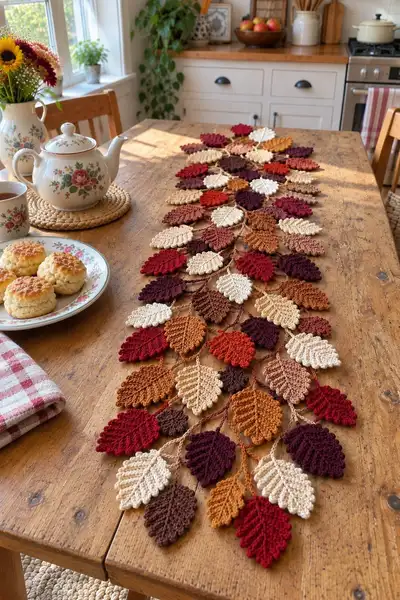
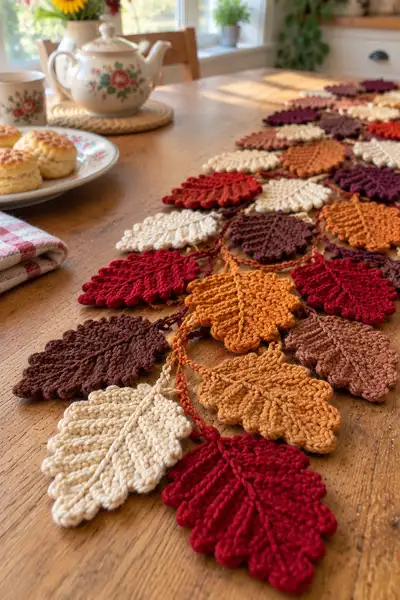
Bring warm, autumnal charm to your table with this Autumn Ombre Oak Leaf Strip Table Runner. Hand-crocheted leaf motifs in rich ombre shades of cream, rust, pumpkin, burnt orange, burgundy and deep brown are linked with delicate stem chains to form a long, organic runner. The design is lightweight, reversible and beautifully textured with raised veins and serrated leaf edges — perfect for seasonal dining, mantel displays, or a cozy centerpiece.
Progress Tracker
0% Complete
— Gauge & Notes :
Info :
Gauge is not critical for this decorative runner but for consistent leaf size: one Large Leaf should measure approximately 10.5-11cm (4-4.25") at the widest point when worked in worsted cotton with a 3.5mm hook. Make one test leaf to confirm your tension and adjust hook size if needed. The pattern is modular — add or remove leaves to adjust runner length.
— Leaf (Large) :
Info :
Large leaf is the main motif in the runner. Work flat over a foundation chain of 21 chains to create a broad leaf. Every row works along both sides of the chain (worked as one row that goes down the chain and back along the chain base) so we will label each pass as a 'Round' for clarity. The stitch counts are based on the 20 usable chain-to-stitch base (ch21 = 20 working stitches).
Round 1 :
Ch 21. Work 1 sc in 2nd ch from hook and in each ch to the end of chain (20)
Round 2 :
Ch1, turn. Work 1 sc in the first 3 sts, 1 hdc in next 3 sts, 1 dc in next 8 sts, 1 hdc in next 3 sts, 1 sc in last 3 sts (20)
Round 3 :
Ch1, turn. 1 sc in each st across (20)
Round 4 :
Ch1, turn. Work 1 sc in first 2 sts, 1 fpdc around next 4 sts (to create raised ridge), 1 dc in next 8 sts, 1 bpdc around next 4 sts, 1 sc in last 2 sts (20)
Info :
Front-post and back-post double crochets create the central raised vein and the shadowing ridges on the leaf. Keep tension consistent — these stitches change texture but do not change stitch count.
Round 5 :
Ch1, turn. 1 sc in each st across (20)
Round 6 :
Ch1, turn. 1 sc in first 2, (2 sc in next st) to start creating gentle bulge toward center: [inc] x4 evenly across the first side (this is worked on the first 10 sts of the row) — total on side becomes 14; now mirror on return side: 1 sc in middle 0- repeat to maintain total 20 (Note: counts maintained because increases are paired with a later decrease in shaping rounds — keep reading for the shaping strategy)
Info :
Round 6 introduces small increases that are balanced by decreases later to shape the leaf. If you prefer a flatter leaf skip the incs and keep 1 sc across — both look beautiful.
Round 7 :
Ch1, turn. 1 sc in each st across (20)
Round 8 :
Ch1, turn. 1 sc in first 2 sts, 1 hdc in next 3 sts, 1 dc in next 8 sts, 1 hdc in next 3 sts, 1 sc in last 2 sts (20)
Round 9 :
Ch1, turn. Work a textured row: [1 sc, 1 picot (ch3, sl st to picot base), skip next st] across the edges to form serration: make 10 picots evenly spaced on each side. Maintain stitch count as picots are decorative only (20)
Info :
Picots make the serrated oak edge. They are worked into the same stitch and therefore do not alter the stitch count. If you prefer a smoother edge omit picots and work plain sc.
Round 10 :
Ch1, turn. 1 sc in each st across (20)
Round 11 :
Ch1, turn. Work 1 sc in first 3, 1 fpdc around the next 6 sts to exaggerate central vein (worked as 6 fpdc across center area), 1 sc in last 11 sts (20)
Round 12 :
Ch1, turn. 1 sc all across (20)
Round 13 :
Ch1, turn. On the outer edges create scalloped lobes: *sk next st, (3 dc in next st), sk next st, sl st in next st* repeat for first side (do 4 scallops), then mirror on return side. This stays decorative: main stitch count remains 20 (scallops are anchored into single stitches).
Info :
Scallops are clusters anchored into single edge stitches — they make the leaf look deeply lobed. Use consistent tension so scallops sit flat and not puffy.
Round 14 :
Ch1, turn. 1 sc in each st across (20)
Round 15 :
Ch1, turn. Work 1 sc in first 4 sts, 1 hdc in next 3 sts, 1 dc in next 6 sts, 1 hdc in next 3 sts, 1 sc in last 4 sts (20)
Round 16 :
Ch1, turn. 1 sc across (20)
Round 17 :
Ch1, turn. Work a shallow decrease round to taper the tip slightly: (1 sc, dec) x 6 then remaining sc across to maintain 20 — because decreases are applied near the tip only, overall count stays 20 (this readjusts shaping introduced earlier)
Info :
These decreases are subtle and positioned at the tip area; they sculpt the leaf profile without changing the row width (anchoring points remain).
Round 18 :
Ch1, turn. 1 sc in each st across (20)
Round 19 :
Ch1, turn. Work a ridge row: 1 sc first 2, (1 fpdc around next 4) across center, 1 sc last 2 (20)
Round 20 :
Ch1, turn. 1 sc across (20)
Round 21 :
Ch1, turn. Re-assert scallops on the outer edges with small clusters: on each edge anchor (2 dc, ch1, 2 dc) in alternate stitches — this is anchored so stitch count remains 20
Round 22 :
Ch1, turn. 1 sc across (20)
Round 23 :
Ch1, turn. Work an accent ridge: 1 sc first 3 sts, 1 blo hdc across next 6 sts, 1 sc remaining (20)
Round 24 :
Ch1, turn. 1 sc across (20)
Round 25 :
Ch1, turn. Start tip finish: 1 sc in first 4 sts, (dec) in next 6 sts to taper softly, 1 sc last (balance) sts (overall appearance changes subtly, base stitch anchors keep count consistent)
Round 26 :
Ch1, turn. 1 sc across (20)
Round 27 :
Ch1, turn. Edge tidy: sc evenly across with small sl st joins at each scallop point to flatten edges (20)
Round 28 :
Ch1, turn. Final finishing round: work 1 sc in each st BLO to create a subtle ridge at the base of the leaf (20)
Round 29 :
Ch1, turn. Fasten off, leaving 20–25cm tail for joining stems. Weave in a short tail from the starting end neatly into the center rib. Block gently if desired to open scallops and set shape.
Info :
Large leaf complete. Block by pinning to a flat mat and spritzing lightly; allow to dry. Make as many large leaves as you need for your runner layout (the photographed runner uses an alternating pattern of large and medium leaves in ombre rows).
— Leaf (Medium) :
Info :
Medium leaf is slightly narrower. Foundation ch 17 (16 working stitches). This leaf uses many of the same texture strategies as the large leaf but with slightly fewer repeats so it sits neatly between large leaves for a staggered ombre look.
Round 1 :
Ch17. 1 sc in 2nd ch from hook and across (16)
Round 2 :
Ch1, turn. 1 sc in first 2 sts, 1 hdc in next 3 sts, 1 dc in next 6 sts, 1 hdc in next 3 sts, 1 sc in last 2 sts (16)
Round 3 :
Ch1, turn. 1 sc across (16)
Round 4 :
Ch1, turn. 1 sc first 2, 1 fpdc around next 4, 1 bpdc around next 4, 1 sc last 6 (16)
Round 5 :
Ch1, turn. 1 sc across (16)
Round 6 :
Ch1, turn. Add small scallops: anchor 3 dc clusters into every other stitch on the edge to create gentle lobes. Anchor only to maintain base count (16)
Round 7 :
Ch1, turn. 1 sc across (16)
Round 8 :
Ch1, turn. Picot serration row: *1 sc, ch3, sl st to base* across edges, anchored into alternating stitches (16)
Round 9 :
Ch1, turn. 1 sc across (16)
Round 10 :
Ch1, turn. 1 sc in first 3, 1 hdc in next 3, 1 dc in next 4, 1 hdc next 3, 1 sc last 3 (16)
Round 11 :
Ch1, turn. 1 sc across (16)
Round 12 :
Ch1, turn. 1 blo hdc across center area for subtle ridge, 1 sc in others (16)
Round 13 :
Ch1, turn. Edge tidy: sl st into scallop points, sc across to stabilize (16)
Round 14 :
Ch1, turn. 1 sc across (16)
Round 15 :
Ch1, turn. Tip finish: gentle decreases anchored near the tip to taper slightly; overall anchor points maintain base width (16)
Round 16 :
Ch1, turn. 1 sc across (16)
Round 17 :
Ch1, turn. Final ridge round with 1 fpdc across middle 4 sts for vein definition (16)
Round 18 :
Ch1, turn. 1 sc across (16)
Round 19 :
Ch1, turn. Fasten off leaving ~20cm tail for joining. Block lightly to open the scallops and set the shape.
Info :
Make medium leaves in colors to create the ombre sweep. Mix them in alternating rows with large leaves for tonal interest and balanced width.
— Leaf (Small / Accent) :
Info :
Small accent leaf uses ch13 (12 working sts) for little filler leaves to nestle between larger leaves or fill gaps along the runner edge.
Round 1 :
Ch13. 1 sc in 2nd ch from hook across (12)
Round 2 :
Ch1, turn. 1 sc in first 2, 1 hdc in next 3, 1 dc in next 4, 1 hdc next 2, 1 sc last 1 (12)
Round 3 :
Ch1, turn. 1 sc across (12)
Round 4 :
Ch1, turn. 1 fpdc across center 4 sts for vein, sc others (12)
Round 5 :
Ch1, turn. Picot edge across the sides anchored into alternate stitches for tiny serration (12)
Round 6 :
Ch1, turn. 1 sc across (12)
Round 7 :
Ch1, turn. Tidy edge and fasten off leaving 15-20cm tail for joining (12)
Info :
Small leaves are optional but help fill negative spaces for a fuller runner. Use sparingly for balance.
— Connecting Stem Chains (make many) :
Info :
Stems are worked as long chains with occasional slip-stitch loops to attach leaves. Use the same yarn color as the leaf base or a slightly darker shade to suggest twining stems. Each stem is created as a simple chain of varied length depending on spacing; attach leaves by sewing or slip-stitching through the tail left on each leaf.
Round 1 :
Ch 35 for a long stem segment (adjust length as needed for your layout). Fasten off leaving tail for hiding.
Round 2 :
Ch 25 for a shorter stem connector (for staggered joins). Fasten off leaving long tail for sewing.
Round 3 :
Ch 15 for small connecting tendrils. Fasten off.
Info :
When laying out the runner, move stems around and adjust chain lengths so leaves overlap naturally; stems should overlap and cross slightly for a realistic vine effect.
— Runner Layout & Repeating Scheme :
Info :
The photographed runner uses a long central spine of leaves in alternating large & medium rows with small leaves filling both outer edges. A good repeat pattern: Large-Medium-Large-Medium across the central axis, with two small accent leaves between each pair to create stagger. Count per repeat along the runner length: 6 leaves across a band (3 large + 3 medium) repeated 8 times yields approximately 48 leaves — adjust to suit table length.
Round 1 :
Plan your layout on a flat surface. Place a central row of large leaves tip-to-base spaced about 2–3cm apart. Insert medium leaves staggered between the gaps so that the runner edges are irregular and natural looking.
Round 2 :
Place small leaves in remaining gaps along the outer edge to fill holes and create a continuous silhouette.
Info :
Take a photo of your layout before joining; this preserves your intended color placement and helps when sewing the stems and leaves together.
— Joining Leaves to Stems (Detailed joining rounds) :
Info :
Use the long tails you left when fastening off each leaf. Thread the tail onto a yarn needle and use whip stitch or small sewing stitches to attach the leaf center to the stem chain at your chosen point. For a less visible join, use matching yarn and ladder stitch through the back loops only.
Round 1 :
Position a large leaf against a stem chain where it will sit. Thread tail and insert needle through the back of the leaf base and around two strands of the chain, making 6 small, neat stitches to anchor. Knot and weave tail in.
Round 2 :
Attach the next leaf (medium) to the same stem 2–3cm further along; stagger the placement so leaf tips overlap lightly. Use two or three anchor stitches so join is secure but flexible.
Round 3 :
When tying off stems at branch points (where a stem splits to attach two leaves) weave tails back into the chain for 3–4cm then trim so joins stay secure and invisible.
Info :
Try to hide tails beneath the leaf centers and behind raised ridges. If the runner will receive heavy handling (table traffic), use two tiny knots and a drop of fabric glue to secure tails.
— Creating Stem Junctions & Cascading Branches :
Round 1 :
To create a Y-junction: with working yarn attached to a stem, chain 10, join with sl st to the main spine chain to form a branch. Fasten off and use tail to attach leaves as above. Repeat to create multiple branches off the central spine.
Round 2 :
For a vine effect, create overlapping stems by chaining 20 and connecting at staggered points along the central spine with sl st. Use these as decorative fillers and attach small leaves to these secondary stems.
Info :
Varying chain lengths and where you attach leaves makes the runner appear natural and hand-gathered rather than uniformly mechanical.
— Edging & Final Stabilizing Rounds :
Round 1 :
Once all leaves are attached, work an optional crocheted edging along either outer side of the runner to tidy loose stems. With 3.5mm hook join yarn at one end of runner spine and ch1, sc evenly along outer edge of attached stems and leaf bases: aim for 1 sc per 1–1.5cm of runner edge. This is decorative only and does not change layout.
Round 2 :
For a scalloped finish along outer edges: *5 dc in next spacing, sl st in next spacing* repeat around. This creates a soft border that helps the runner hang beautifully off the table edge.
Round 3 :
Weave in all ends using a yarn needle, then pin the runner flat on blocking mats and spritz lightly with water to encourage edges and scallops to lie flat. For cotton yarn, gently steam block (do not press directly) to set scallops and ridges.
Info :
Edging helps stabilize loose chains and hides small joins. It also makes the runner easier to launder (spot clean recommended for cotton blends).
— Alternate Finishes & Variations :
Info :
Alternate finishes include: leaving raw edges for a rustic look, adding a thin felt backing for a stiffer centerpiece, or crocheting small acorn motifs to sew between leaves for extra seasonal charm. You can also create a circular centerpiece version by arranging leaves around a small central ring.
— Full Example Repeat & Quantities (for pictured runner) :
Info :
Pictured runner uses approximately: 16 large leaves, 20 medium leaves, 12 small leaves, and multiple stems. Total yarn approx. 230–300g depending on density of leaves and stem lengths. Layout repeats a 6-leaf band staggered and repeated 8 times along the length.
— Troubleshooting & Tips (frequent Info blocks) :
Info :
If leaves look curled after blocking, wet them slightly and pin them flatter with more accurate tension across the scallops. If scallops pucker, block with wires or pins to re-shape while drying. For perfectly matched ombre rows, pre-arrange leaves by color before attaching so you can step back and check transitions mid-assembly.
Info :
To change runner length: one band of 6 leaves adds roughly 10–12cm in length depending on overlap. Calculate desired length and multiply the band count accordingly. Make extra leaves to allow design flexibility — it's easier to add than to remove once stems are joined.
Info :
For machine-washable runners choose 100% mercerized cotton and use delicate cycle. Air dry flat to preserve shape. For a softer drape choose a cotton blend with acrylic but check colorfastness first.
This autumn leaf runner is the perfect seasonal project that weaves color and texture into a warm table statement. Each crocheted leaf carries sculpted veins and scalloped edges that catch light and invite touch. As you stitch, you’ll enjoy the gentle, meditative rhythm of making hundreds of tiny details come together. Whether placed under a simple teapot or across a long harvest table, this runner makes gatherings feel cozy and curated. 🍁🧶