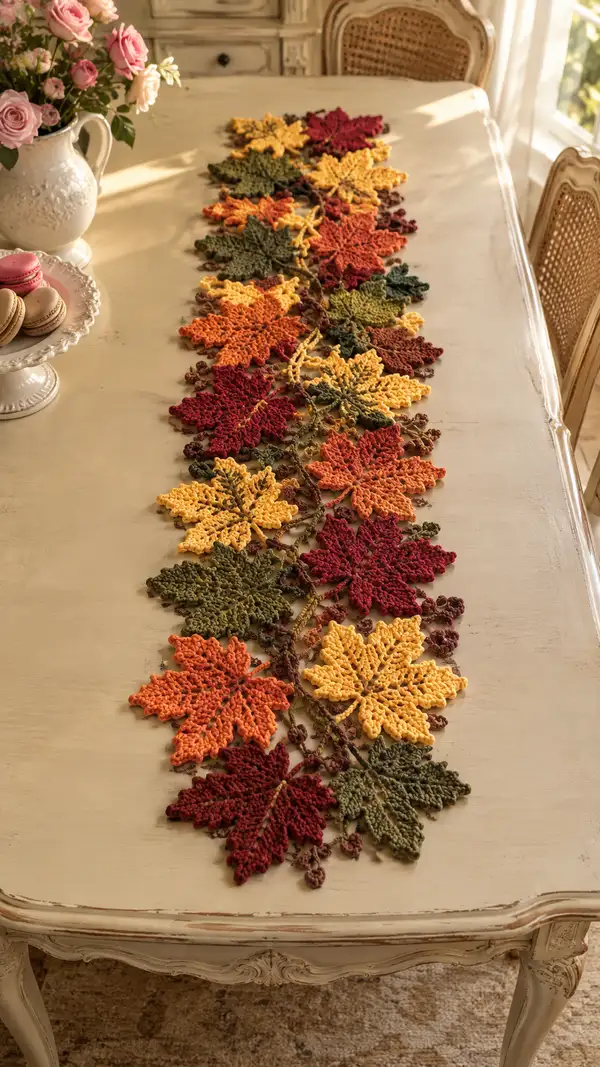
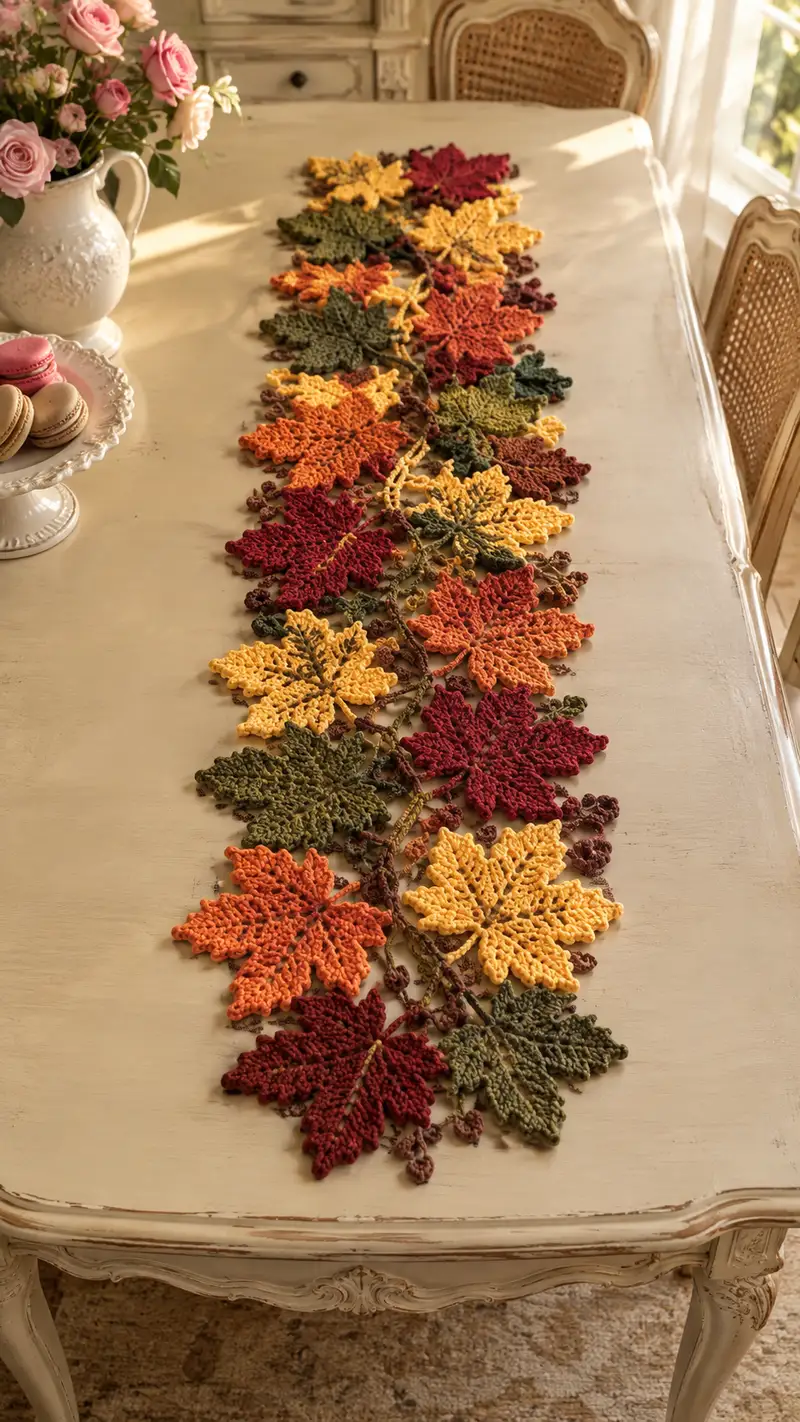
Create a stunning fall table runner featuring layered maple-leaf motifs in rich burgundy, mustard, orange and olive tones joined by a sinuous brown vine. This pattern builds individual lace-style leaves and links them with a decorative chain of tiny buds and acorns to create an elegant seasonal centerpiece. Lace-like texture, raised vein detail, and picot-edged lobes deliver a realistic autumn look perfect for holiday tables or fall décor.
Progress Tracker
0% Complete
— Leaf Motif (Make 20–24 leaves in assorted colors) :
Round 1 :
Make a magic ring, ch1, 6 sc in ring. Pull ring tight. (6)
Round 2 :
Inc in each st around. (12)
Round 3 :
(1 sc, 1 inc) x6. (18)
Round 4 :
(2 sc, 1 inc) x6. (24)
Round 5 :
(3 sc, 1 inc) x6. (30)
Info :
These first rounds create a compact center that will anchor the leaf vein. Maintain even tension — this center should be slightly firm so the leaf holds its shape.
Round 6 :
(4 sc, 1 inc) x6. (36)
Round 7 :
(5 sc, 1 inc) x6. (42)
Round 8 :
(6 sc, 1 inc) x6. (48)
Info :
We will divide the round into 8 equal lobe anchors; place 8 stitch markers evenly (every 6 stitches) at the start of each lobe to help when we form the lobes. Count carefully before proceeding.
Round 9 :
Ch1, 1 sc in each st around working in both loops. (48)
Round 10 :
Ch2 (counts as hdc), *hdc in next 5 sts, ch3, skip 2 sts, hdc in next 6 sts; rep from * across to form small ch-spaces at lobe bases. Finish with hdc in last st, join to top of ch2 with sl st. (48 hdc plus eight ch3 loops)
Info :
The ch3 spaces created in this round will be the tripod anchor for each lobe shell. If your spacing seems off, adjust by 1 stitch at the start of the next round — consistent placement is key for symmetrical lobes.
Round 11 :
Work lobe shells: Join with sl st into first ch3 loop, ch3 (counts as dc), work (2 dc, ch2, 3 dc) into same ch3 loop to make a full shell, sl st into next ch3 loop and repeat across completing 8 shells total. Join to first dc with sl st. (8 shells)
Round 12 :
Ch1, 1 sc in the top of the first shell, *ch2, 1 sc between shells (into the hdc stitch that separates shells), ch2, 1 sc in center of next shell; rep from * around. Join. This creates chain bridges between lobes for shaping.
Round 13 :
Work each lobe separately in the round (rep x8): Start in first shell center: ch2, (3 hdc, 3 dc, ch3, 3 dc, 3 hdc) all worked into the shell center to deepen the lobe. Sl st into the chain bridge to secure and move to next lobe. Repeat for all 8 lobes.
Info :
When working a lobe, keep the middle stitches taller (dc/tr) and the outer stitches shorter (hdc/sc) to create the classic maple leaf pointed lobes. Use stitch markers to mark the beginning and end of each lobe for consistent size.
Round 14 :
Ch1, sc evenly around entire leaf working into the outermost stitches of each lobe to make a connecting round. Work 2 sc in the tip of each lobe (tip = center top of the ch3 or ch5 space made previously) to ensure crisp points. Expected total ~64–72 sc depending on placement; aim for even coverage around tips and valleys.
Round 15 :
Working in FLO around: (3 sc, picot, 3 sc) in each lobe tip area to create serrated edges; between lobes, work (1 sc, ch2, 1 sc) to form small valley indentations. Count should remain approximately consistent; aim for symmetric edges across 8 lobes.
Round 16 :
Turn the leaf to the wrong side briefly and add a row of reverse loops for a raised vein effect: Join yarn on wrong side at center base, ch1, bpdc around the central vein area (work 6–8 bpdc along the center area from base toward top), fasten off and weave in tail. This will give a subtle raised ridge visible from the right side.
Info :
The raised vein can be made more prominent by using a size smaller hook or working fpdc over the same stitches on the right side. The technique is optional but adds realistic texture to the leaf.
Round 17 :
Right side: Rejoin yarn at base center, ch1, 1 sc evenly around shaping the join between lobes and vein. Make sure the sc at the peaks and valleys is consistent; expected count ~70–78 sc.
Round 18 :
Edging row: *sc in next 3 sts, picot, sc in next 3 sts, sl st in valley; rep across. This produces the tiny scalloped serration seen on the leaf edges. Adjust picot spacing if your yarn makes large or small puffs.
Round 19 :
Optional color accent: Change to a slightly darker shade for the very edge (work change before beginning round). Ch1, sc in each st around in chosen edge color for one round to frame the leaf. (same stitch count)
Info :
If working color change for the edge, carry unused yarn along the back of the last round, catching it every few stitches with a single crochet to keep floats neat, or fasten off and rejoin for a cleaner edge.
Round 20 :
Fasten off leaving a 30–40cm tail for joining. Weave tail partially into back and block the leaf flat, pinning each lobe to an even shape. Repeat to make total leaves in color layout: e.g., 5 burgundy, 5 mustard, 4 orange, 4 olive for a long runner.
Info :
Block each leaf to exact dimensions. Spray lightly with water or steam, shape the lobes and let dry fully. Blocking sets the lace and sharpens the picot edges.
— Berry/Acorn Cluster Motif (Make ~30–40 small clusters) :
Round 1 :
Using brown, make a magic ring, ch1, 6 sc in ring. (6)
Round 2 :
Inc in each st around. (12)
Round 3 :
(1 sc, inc) x6. (18)
Round 4 :
Ch1, work 18 sc around; do not join. Fold piece in half and sl st through both thicknesses to create a tiny acorn cap shape. Fasten off leaving a tail for sewing. (18)
Round 5 :
With darker brown, join at top edge, ch2 (counts as hdc), work small cluster stitches: (hdc, dc, hdc) around 6 sts to fashion decorative cap; sl st and fasten off. Leave tails for sewing.
Info :
Vary yarn tension and slightly vary size to create a natural assortment of tiny berries and acorns. You can also make a flat flower cluster by working ch4 loops between acorns to serve as leaf connectors.
Round 6 :
Optional variation as tiny berry: ch3, sl st into next stitch to make a loop; cluster several loops connected by sl st to form a 3–4 berry group. Fasten off and leave tail for attachment.
Info :
Make more clusters than you think you'll need — some will be used as fillers under and between leaves for a natural, layered look.
— Connecting Vine (Make 1 long vine to link leaves) :
Round 1 :
Using brown, ch 220 (or adjust length to desired runner length). This forms the central vine chain. If your table is shorter, reduce chain accordingly. The sample photo shows a runner approximately 48–54 inches long so adjust for your table.
Round 2 :
Working back along the chain on right side: Join with sl st in 2nd ch from hook, *sc in next 3 ch, ch3, sk 2 ch, sc in next 4 ch; rep across. This builds small loops and anchors for leaf joining points. Expect ~210 sc total depending on chain length.
Info :
The vine is intentionally slightly irregular — allow small variations in loop spacing to mimic natural vines. If you want perfectly even spacing, mark every 10th chain as a joining anchor before working back.
Round 3 :
Decorative post-stitch ridge: Ch1, turn, *sc in next 3 sc, fpdc around the next sc to create a raised ridge, sc in next 3 sc; rep across. This produces a subtle twisted vine feel. Fasten off and weave ends.
Round 4 :
Attach small leaf buds: Join darker brown at various ch3 loops and work a small 6-stitch picot bud (sl st, ch3, sl st in base) into selected loops along the vine every 5–10 cm. Fasten off tails for weaving.
Info :
Make placement irregular like natural vines. Leave extra tail lengths to secure leaves and clusters onto vine during assembly rather than sewing each tiny motif separately.
Round 5 :
Optional braided vine: If you prefer a thicker vine like the photo's slight braid, make 3 chains each half the length and braid them lightly together, then single crochet across the braid to fuse. Alternatively, work a chain and then sc through both loops of a second thinner chain to create thickness.
Info :
If braiding, keep tension even and block the braid lightly before joining leaves so the braid lies flat and stitches for joining are accessible.
— Join-As-You-Go Leaf Attachment (Layout & Join Technique) :
Info :
Layout your runner on a large flat surface. Arrange leaves in a staggered double column down the vine: one side leaves angled slightly right, opposing side leaves angled left, alternating colors. Place acorn clusters in gaps between leaf bases to mimic natural debris.
Step 1 :
Start at one end of the vine and pin the first leaf in position so its base aligns with a chain-loop anchor on the vine (we used the ch3 loops made during Round 2 of the Vine). Use a safety pin or blocking pin to hold.
Round 1 :
With the leaf's long tail, sew through the leaf base (where you left the long tail after Round 20 of the Leaf Motif) and through the vine anchor using a yarn needle. Use a mattress/ladder stitch and work 8–12 secure passes to create an invisible seam. Pull yarn gently to set; do not distort the leaf shape.
Info :
Sew through back loops only of the leaf's last round and into the vine chain to keep the join subtle from the runner's right side. Keep a uniform angle for each leaf so the runner looks cohesive.
Round 2 :
Work small decorative sl sts along the vine into the leaf base to lock position. Insert needle through vine, pick up one outer stitch of leaf base, sl st on top. Repeat every 4–6 stitches to anchor firmly.
Round 3 :
Attach clusters: Using tails from berry/acorn clusters, place clusters under and between leaf bases and sew through vine and underside of leaf using a few small secure stitches. Cluster placement should appear natural and not perfectly symmetrical.
Info :
Pin all leaves and clusters first, then sew. This ensures spacing and overlap are consistent and allows you to step back and judge the overall composition before committing to stitches.
— Secondary Leaves and Overlays (Optional Decorative Leaves) :
Round 1 :
Make small two-lobe leaves for filling gaps: mr, ch1, 6 sc, ch2, turn, sc in each st around to form a flat two-lobed shape. Fasten off leaving tail for sewing. Make 8–12 small filler leaves.
Info :
These small leaves can be tucked under large maple lobes for depth. Use olive and darker brown shades for contrast and to make the runner read as layered foliage.
— Edge Finishing and Final Lace Border :
Round 1 :
Once all leaves and clusters are attached, work a decorative border along the vine edges: Join yarn at one end of the runner along the vine chain and ch1, sc evenly along the edge on both sides of vine to frame it. Keep stitches even. (Expect 160–240 sc depending on runner length)
Round 2 :
Picot scallop: *sc in next 4 sts, picot, sc in next 4 sts, (ch3, sl st in base) to make small loops that echo leaf picots; rep across both edges. This unifies the tiny picot theme across the runner.
Info :
Work the border with a slightly smaller hook to tighten the edge and keep it crisp. Block again after finishing the border to ensure everything lies perfectly flat.
Round 3 :
Weave in all tail ends on the wrong side using the yarn needle, going through at least 6–8 stitches for each tail to secure. Trim ends close to fabric.
Round 4 :
Final blocking: Lay runner flat and pin each leaf lobe to create a gentle, natural curve. Mist lightly and let dry fully to set lace shapes. If needed, press lightly with a steam iron on low without touching yarn directly (use pressing cloth).
Info :
Block the runner to the desired final width and length, using measurements and photos as references. Proper blocking is the last step that makes the runner look professional and refined.
— Alternate Joining Method: Crochet Join-As-You-Go Variation :
Round 1 :
Instead of sewing, you can join using slip-stitch and sc joins: Place leaf on vine, right-sides together, and sl st through leaf's last round and vine chain every 4–6 stitches. After full attachment, flip to right-side and work a single crochet round over the seam to hide the joins and reinforce.
Info :
The crochet join gives a more visible textured seam but is faster for those who prefer not to sew. Test one join to ensure you like the look before proceeding for whole runner.
— Finishing Touches and Storage :
Round 1 :
Inspect runner for any loose joins or stray tails. Re-sew any leaves that feel floppy using a few extra passes. Tuck in and weave tails neatly on the underside.
Round 2 :
To store, fold loosely with acid-free tissue between folds or roll around a tube to protect picot points. Avoid heavy furniture on top to prevent crushing defined lobes.
Info :
If you intend to launder the runner, spot-clean where possible or hand-wash gently in cool water and block to shape. Avoid tumble drying to preserve the lace and picots.
This autumn runner brings cozy, handmade charm to your table with layered maple leaves and rustic vine detailing. Each leaf is a small triumph of textured stitches and picot edges, joined into a long seasonal centerpiece you’ll return to year after year. Working it is deeply satisfying — a leisurely project that blossoms into striking fall decor. 🍁🧶