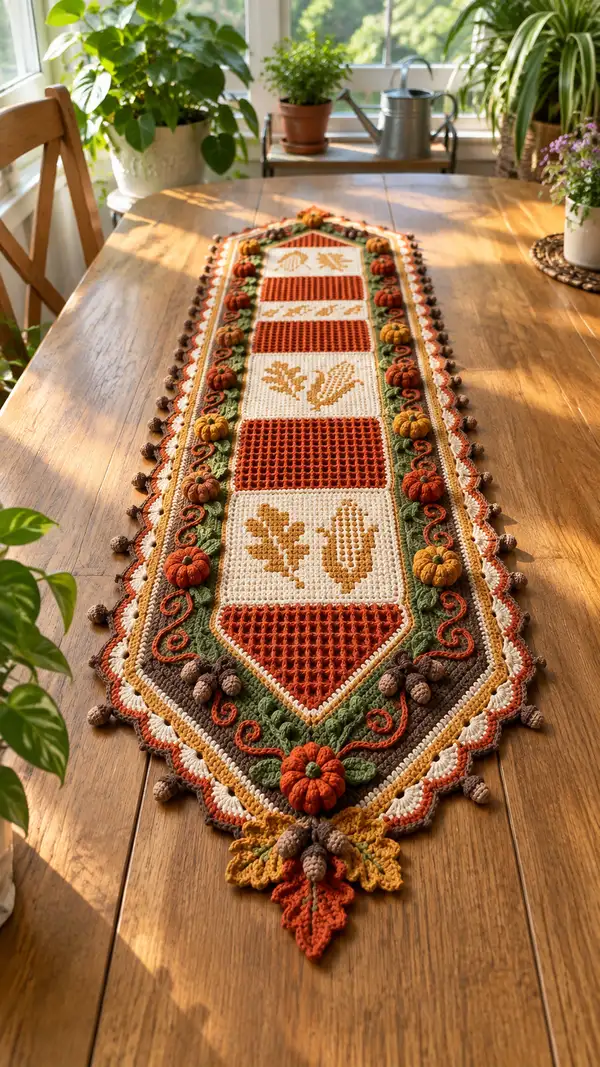
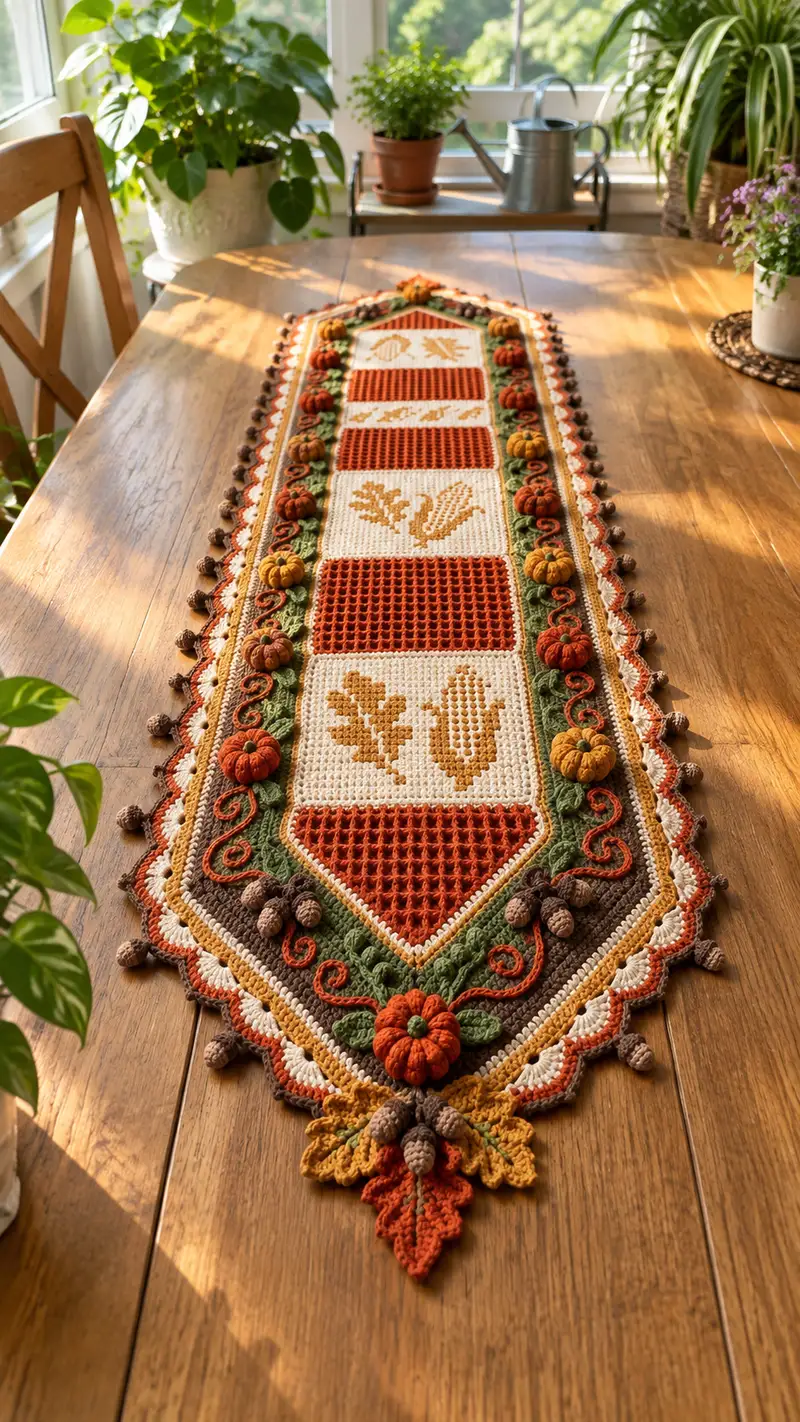
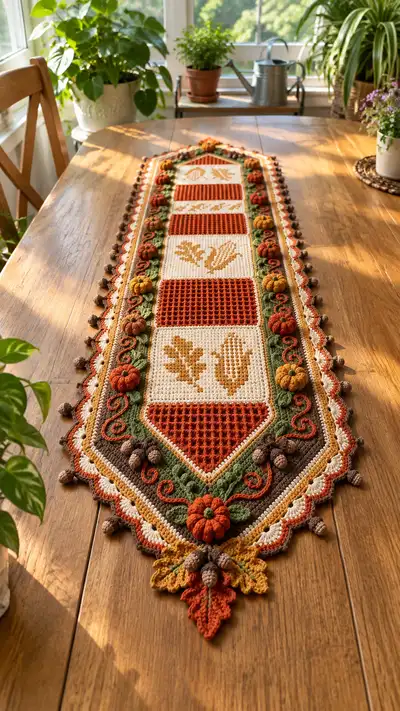
A warm, textured table runner inspired by harvest season—featuring alternating waffle and motif squares, raised pumpkins, acorn bobbles, leafy appliques and a scalloped autumn-hued border. Worked in rich cream, rust, mustard, olive and chestnut browns, this runner is long, elegant, and full of tactile detail that pops on a wooden table. The pattern includes step-by-step panels, 3D appliques and a layered edging that creates a finished heirloom piece.
Progress Tracker
0% Complete
— Notes & Techniques :
Info :
This runner is worked flat in modular panels that are joined together and edged. Work tension consistently. The pattern is written for worsted weight yarn and a 4.0mm hook; adjust hook size if you prefer a denser or drapier fabric. Color changes are worked by carrying the yarn minimally on the WS or by fastening off and weaving ends; Info sections explain where to change.
Info :
Throughout this pattern 'Round' refers to a working row for flat panels and to true rounds for appliques and motifs. Count stitches frequently. Use stitch markers to mark corners and important anchor chains when joining panels and when starting border repeats.
— Center Panel: Alternating Blocks (Make center strip of 7 blocks: 4 motif squares + 3 waffle squares; adjust repeats to desired length) :
General Block Size :
Each square/block is worked 28 sts wide by 28 rows tall when using a 4.0mm hook with recommended yarn (this yields roughly 6.5" square). Adjust hook to achieve matching gauge across blocks. We present the motif square first (cream background with mustard motif) then the waffle square (rust). Repeat across the runner.
Motif Square - Setup Row 1 :
Ch 29, sc in 2nd ch from hook and across to end (28) - turn
Round 2 :
Ch 1, sc in each st across (28) - turn (28)
Round 3 :
Ch 1, sc in each st across (28) - turn (28)
Info :
Work motif using tapestry/intarsia technique. Carry background (cream) and motif color (mustard) not more than 6 sts before twisting to avoid long floats. Work RS rows left to right; WS rows right to left maintaining float tension.
Round 4 - 6 :
Continue sc in each st across in cream (28) (28)
Round 7 :
Begin motif chart: Ch 1, sc across first 6 sts in cream, sc 1 in mustard, sc 1 in cream, sc across to end following motif chart positions (28)
Round 8 :
Ch 1, follow chart row 2 for color placement, sc in each st across (28)
Info :
The motif is worked over rows 7-22 (16 rows) to form stylized ear-of-corn and oak leaf shapes in mustard against cream. Chart provided separately; if you prefer, embroider motif after panel is finished. Keep edges tidy by crocheting final stitch of each row in the outer loop only if you plan to seam panels together with a surface seam.
Round 9-22 :
Continue following the motif chart row-by-row, sc in each stitch, carrying colors cleanly (28)
Round 23 :
Ch 1, sc in each st across in cream (28)
Round 24-28 :
Ch 1, sc in each st across in cream (28)
Info :
Fasten off and weave ends on WS. Block square lightly to square up edges before joining.
— Waffle Textured Square (Rust) :
Setup Row 1 :
Ch 29, sc in 2nd ch from hook and across (28) - turn (28)
Round 2 :
Ch 1, sc across (28) - turn (28)
Round 3 :
Ch 1, *dc in next st, ch 1, sk 1*, rep across ending with dc in last st (maintain 28 sts footprint) - turn (28)
Round 4 :
Ch 1, sc in each ch-1 sp and dc across (28) - turn (28)
Round 5 :
Ch 1, *dc in next sc, ch 1, sk 1*, rep across, maintaining 28 sts (28)
Round 6-16 :
Repeat Rounds 4-5 alternating to build waffle texture until panel measures 28 rows total (28)
Info :
Waffle texture is achieved by alternating dc rows and rows of sc into ch-1 spaces. Keep edges straight by working the first and last st of each row as sc where necessary to maintain 28 stitches across.
Round 17-28 :
Ch 1, sc in each st across in rust to finish square, 12 total rows of sc if needed to match motif height (28)
Info :
Make 4 motif squares and 3 waffle squares for a long runner similar to the sample. Adjust number of repeats to fit your table. Block each square to exact dimensions before joining to ease seaming.
— Joining Center Blocks (Join-As-You-Go or Whip Stitch) :
Info :
We recommend joining squares horizontally first to form a long strip, then reinforcing seams with whip stitch on WS. For JAYG join: work last row of new square and slip stitch into corresponding st of previous square every 5th stitch, then continue. Alternatively, align squares and seam using matched stitch alignment and mattress stitch for invisible join.
Round 1 :
Align first two squares RS facing up with edges matching. Using cream yarn and yarn needle, mattress stitch along 28 stitches, weaving under corresponding sc loops to create flat seam. (Seam length approx 28 sts)
Round 2 :
Repeat for each join until center strip of 7 blocks is complete. Reinforce seam with a second pass of whip stitch if necessary.
Info :
Block again after joining to square up seams and reduce ripple before attaching border. Pin to blocking board if desired.
— Leaf Appliques & Vines (Make 12 large leaves and a vine border) :
Leaf - Round 1 :
With olive, ch 11, sc in 2nd ch from hook, sc in next 8 sts (9) - turn
Round 2 :
Ch 1, sc in first st, hdc in next, dc in next 3 sts, hdc in next, sc in last 2 sts (9)
Round 3 :
Ch 1, work around opposite side of foundation chain: sc 2, hdc, dc 3, hdc, sc 1. Join with sl st to first sc. (18 total edge stitches)
Round 4 :
Ch 1, *sc in next 2 sts, 2 sc in next st* rep across to create slightly fuller tip (22)
Round 5 :
Ch 1, picot detail along one edge: sc in next st, (ch 3, sl st in 3rd ch from hook) in next st, continue across. Fasten off leaving tail for sewing.
Info :
Sew leaves in staggered pairs along the green vine row that will be added to the side border. Use a small central stitch to anchor each leaf to the runner edge.
Vine Chain :
With olive, ch to length of runner edge plus 6" extra, sl st to WS along seam points every 6-8 sts, then swirl vine into S-shapes and tack with small whipstitches in the valley points.
— 3D Pumpkin Appliques (Make 10 - small/medium pumpkins for placement along sides) :
Pumpkin - Round 1 :
Using rust and 3.5mm hook, ch 2, work 6 sc in 2nd ch (6)
Round 3 :
(1 sc, inc) x6 (18)
Round 4 :
(2 sc, inc) x6 (24)
Round 5 :
(3 sc, inc) x6 (30)
Round 6 :
Sc in each st around (30)
Round 7 :
Sc in each st around (30) - start shaping by working front-loop-only in next round to create side ridges (30)
Round 8 :
Work 2 rounds BLO sc in each st (30)
Info :
Do not stuff yet. You will create pumpkin ribs with a running thread and gather method after forming the sphere. Keep top opening large enough to insert stuffing later.
Round 9 :
Start decreasing: (3 sc, dec) x6 (24)
Round 10 :
(2 sc, dec) x6 (18)
Round 11 :
(1 sc, dec) x6 (12)
Info :
Fasten off leaving long tail. Lightly stuff with fiberfill until round shape is gently filled. Thread tail onto yarn needle and weave through front loops only around center (approx 6-8 loops) and pull to create the pumpkin ribbing. Wrap a contrasting strand of dark brown or green around the gathered ribs to create pronounced sections, securing with a knot on WS.
Pumpkin Stem :
With green or brown and 3.5mm hook, ch 4, sc in 2nd ch from hook and across (3), ch 1, turn, sc in each st for 3 rows or until desired stem height, sl st to base of pumpkin and sew securely. Add a tiny embroidered tendril with stem color.
Info :
Make small pumpkins (as above), medium pumpkins by adding 2 extra increase rounds before working BLO rounds (increase to 36 sts then two BLO rounds), and larger pumpkins with an additional increase round and proportionally more stuffing.
— Acorn Bobbles (Make 20) :
Acorn Cap Round 1 :
With dark brown and 3.5mm hook, ch 2, 6 sc in 2nd ch (6)
Round 3 :
(1 sc, inc) x6 (18)
Round 4 :
BLO bobble round: *bp in next st, sc in next st* rep around to create textured cap (18 including bps)
Acorn Body :
With chestnut brown, work ch 2, 6 sc in 2nd ch (6); Round 2: inc around (12); Round 3-4: sc around (12); Round 5: dec around to 8, fasten off leaving tail, stuff lightly and sew to cap. Add a tiny stem of green or brown with 4 ch and sl st down.
Info :
Sew acorns along the outermost border edge at the bobble points for a clustered, harvest look. Vary orientation for a natural scattered effect.
— Small Decorative Flower (Make 6) :
Flower Round 1 :
With rust, ch 5, join to form ring, ch 1, 10 sc into ring, sl st to first sc (10)
Round 2 :
*Ch 3, sl st in next st* rep around to make 5 petals, fasten off, sew small green leaves underneath and attach to pointed runner ends.
Info :
Flowers are used at both points of the runner for a finished ornamental cluster with pumpkins and leaves. Place one cluster at each end and one centered on each long side as shown in the photo.
— Pointed Diamond End Panel (Make 2 ends) :
Center Diamond Setup Row 1 :
With rust, ch 29, sc in 2nd ch and across (28) - turn (28)
Round 2 :
Ch 1, sc across (28) - turn (28)
Round 3 :
Ch 1, sc across (28) - turn (28)
Round 4 :
Change to cream - ch 1, sc across (28)
Round 5-10 :
Work cross-hatch or waffle mesh in center triangular formation by decreasing 1 st each side every 2 rows to form an elongated point: Row pattern: on RS rows sc2tog once at left edge and sc2tog at right edge on WS rows to shape each side. Maintain center 12-16 rows of mesh before decreasing. Count carefully—each decrease row reduces width by 2 sts. Start with 28 sts; after 8 decrease rows width becomes 12 sts. Adjust to create preferred point length.
Info :
Create a neat triangular point by placing markers at the central stitch and decreasing symmetrically. The triangle will be framed by rows of olive and brown leaf stitches in the border rounds that follow.
Round 11-20 :
Work remaining shaping rows to complete the pointed end to a narrow tip (6-8 sts at point). Fasten off and weave in ends. Block to pointed shape using pins.
— Inner Framing Border (Attach to long sides) :
Round 1 :
With cream, join to edge along one long side, ch 1, sc evenly around seam edge (count should equal length of seam in sts; typical runner side will be approx 7 blocks x 28 sts = 196 sts). Work sc around entire perimeter including two diamond points. (Approx 196 per side)
Round 2 :
With mustard, ch 2 (counts as hdc), hdc in each st across to create a raised frame (196)
Info :
Keep stitch counts identical on both long sides. Use stitch markers at each block seam to maintain even spacing for appliques and future bobbles.
Round 3 :
With brown, ch 1, sc in each st BLO (196) - this creates a neat ridge for leaf appliques to sit on.
Round 4-6 :
With olive, work a leaf ridge row: *ch 3, sk 1, sl st in next*, rep to create vine anchor points. Secure with small sl sts at regular intervals to make loops for sewing leaves and pumpkins (approx every 6 sts).
Info :
These rounds create the channel where appliques are sewn. Tacking olive vine in a spiraled S pattern with a yarn needle will give a natural vine effect.
— Raised Scroll Row (decorative rope) :
Round 1 :
With rust, attach at start of seam, ch 60 to length of one block edge, sl st back to create a twisted rope, sew into S-shapes every 8 sts along the olive ridge with thread. Repeat along both sides.
Info :
The scroll is a decorative surface cord worked separately and sewn on. This helps achieve the raised swirls visible in the sample runner.
— Outer Decorative Border (Shells, Bobbles and Scallops) :
Round 1 :
With cream, join at outer edge, ch 1, sc evenly around border (approx total perimeter 480 sts for full runner, count and adjust as needed) - mark corners and diamond tips (480)
Round 2 :
With mustard, ch 2, hdc in each st around (480)
Round 3 :
With brown, ch 1, sc in each st BLO to form ridge (480)
Round 4 :
With rust, *sk 2, 5 dc in next st (shell made), sk 2, sl st in next st* rep around to create shell scallops. Adjust repeats to fit total stitch count; shells should be evenly spaced. (Approx 80 shells)
Info :
To space shells evenly, divide total perimeter stitches by desired shell count to get interval. Mark positions with stitch markers before working shells across long sections.
Round 5 :
With cream, work single crochet around shells to tidy edges and create base for bobbles: sc in base of each shell and in intervening sts (480)
Round 6 - Bobble Round :
With dark brown, make bobbles: *sk 3, make bobble (see below), sk 3, sl st* rep around in valley between shells. Bobble stitch: (yo, insert, pull up loop) 5 times in same st, yo and draw through all 10 loops, ch 1 to close bobble. Place bobbles at intervals matching sample photo—approximately every 6 shells for grouped clusters. (approx 60 bobbles)
Info :
Bobbles are made with a smaller hook (3.5mm) for tightness if desired. Sew each bobble securely through base and second row to prevent detachment from handling.
Round 7 - Final Scallop Trim :
With cream and 4.0mm hook, *sk next st, (sc, hdc, dc, hdc, sc) in next st* rep around to create symmetric scallops that mirror the shell row underneath (count will match shells ~80). Fasten off and weave in ends neatly on WS.
Info :
For diamond points, increase scallop density slightly to follow tapered shape. Place a larger flower, pumpkin cluster and leaves on each point as in photo; instructions for cluster below.
— Cluster Assembly at Points :
Cluster Components :
Each diamond point cluster contains: 1 medium pumpkin, 2 small pumpkins, 3 leaves, 3 acorns, 1 flower. Arrange with large pumpkin centered, smaller pumpkins flanking, leaves radiating, acorns grouped at base.
Round 1 :
Pin components to the point area on the runner WS up to check placement. Using rust and brown threads, sew each pumpkin by stitching through the runner and through the base of pumpkin with secure whipstitches. Anchor stems to center with hidden stitches. Sew leaves with a few running stitches to create slight lift. Secure acorns grouped with 3-4 tight stitches per acorn.
Info :
Use small, even stitches and hide knots on WS. If a more three-dimensional effect is desired, tack only the pumpkin base and leave top surfaces slightly free for gentle squish and texture.
— Surface Embroidery for Motifs (Optional) :
Info :
If you prefer the motif to be embroidered rather than tapestry-worked, use duplicate stitch or surface slip stitch to lay mustard motifs over a cream square. Work veins using backstitch with a yarn needle and mustard yarn. This option is ideal for crocheters who prefer simpler block-work then embroidery.
— Final Finishing Touches :
Round 1 :
Weave in all ends on WS. Trim tails close. Tack any loose yarn by passing needle through several loops to secure and then bury ends inside fabric.
Round 2 :
Lightly steam-block runner on blocking board to even out scallops and straighten edges. Pin diamond points sharply and allow to dry completely.
Info :
Attach tiny felt pads underneath each pumpkin/applique cluster if runner will be in direct contact with polished wood table to prevent scuffing.
Care Instructions :
Hand wash gently in cool water with mild detergent and reshape while damp. Lay flat to dry. Avoid tumble drying. Spot clean where possible to preserve 3D elements.
Info :
You can scale the runner up or down by adding or removing center block repeats and adjusting border counts proportionally. Keep seam and shell spacing consistent for seamless results.
Completing this autumn table runner is a beautiful way to bring warmth and texture to your home—each panel and applique adds a handcrafted story to your table. The layered border and 3D pumpkins make this piece delightfully tactile and perfect for fall gatherings. I hope you enjoy every stitch as the runner comes together, and that it becomes a treasured seasonal accent for years to come. 🧶🍂