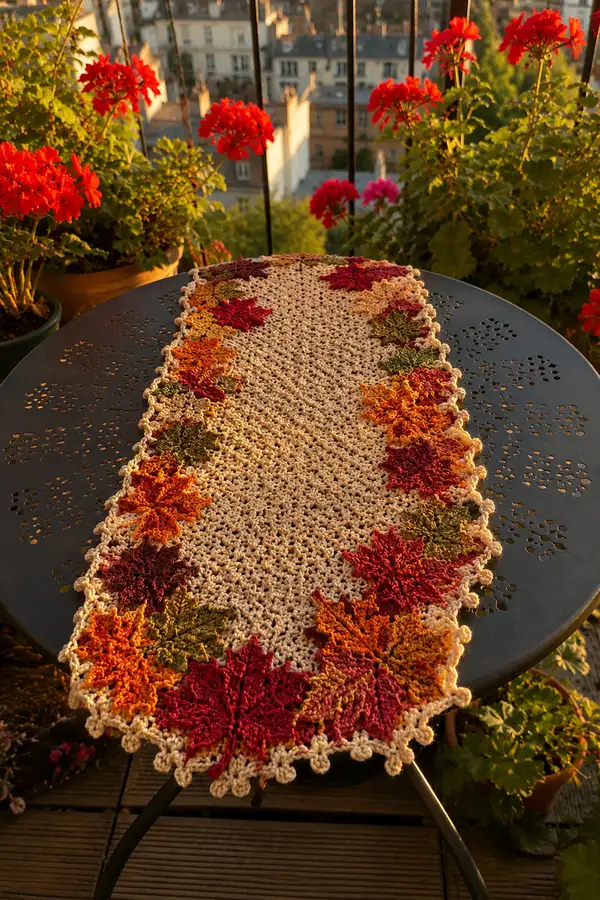
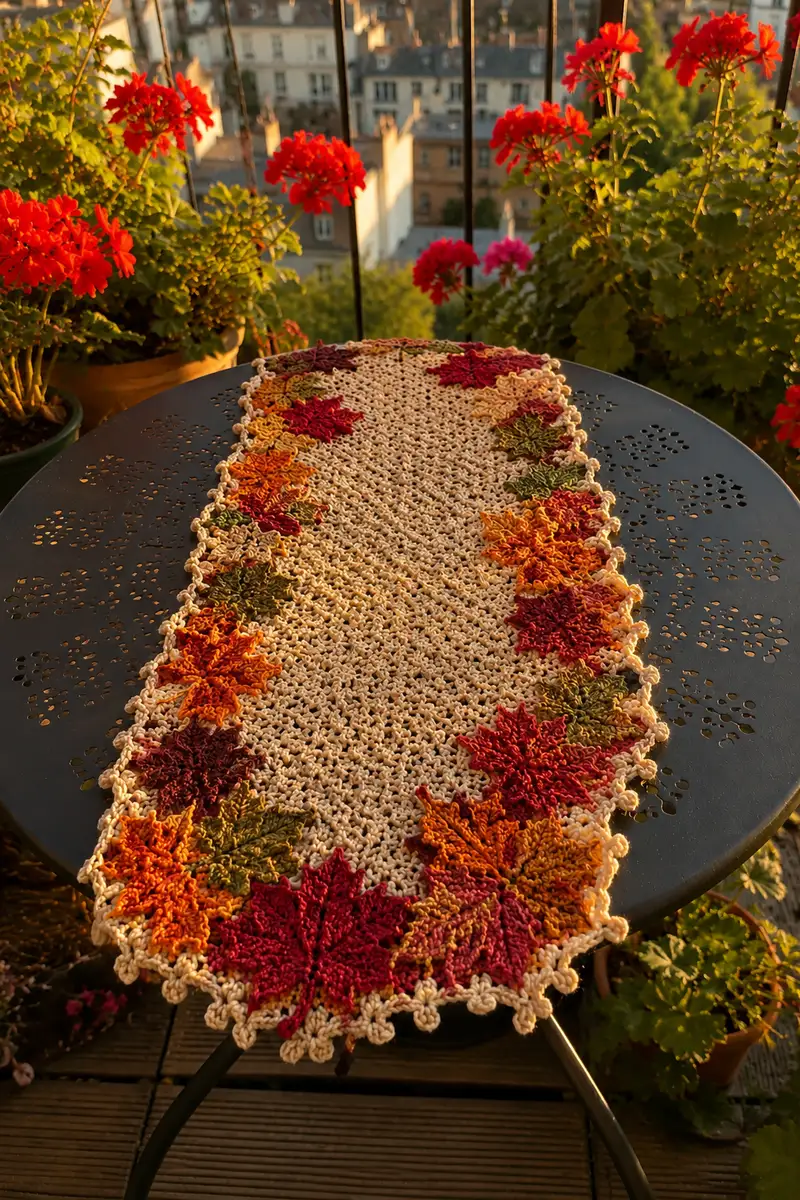
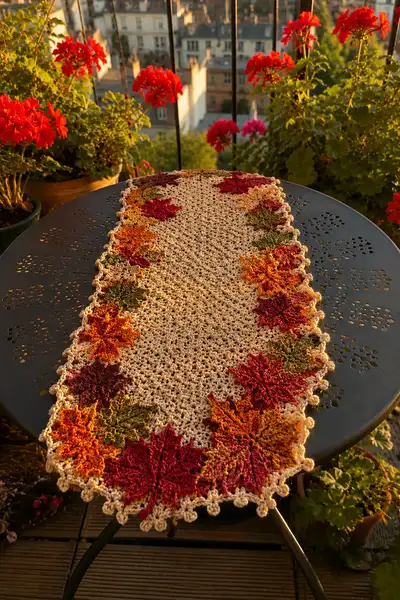
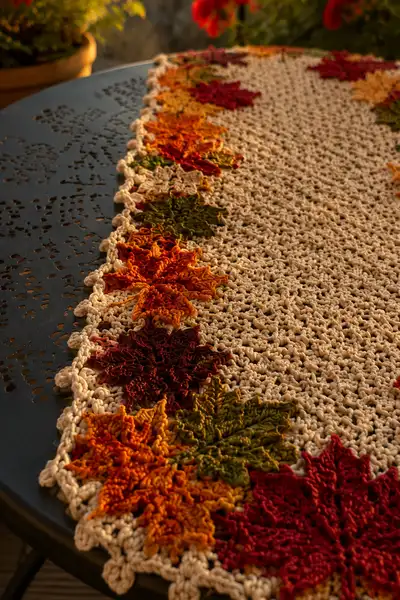
A warm, autumnal table runner decorated with a garland of textured maple leaves and curled picot edges. The neutral mesh center is worked in a lacy, open stitch that lets the leaves shine, while multicolored leaf motifs in red, orange, gold and olive are joined along both long edges. Finished with a soft cream picot scallop, this runner brings cozy Fall charm to any table or mantel.
Progress Tracker
0% Complete
— Notes & Gauge :
Info :
This table runner is worked flat with a lacy mesh center and separate leaf motifs joined to the long edges. Gauge is not critical, but for reference: 14 sc = 4in (10cm) using worsted cotton and 4.0 mm hook. Finished runner shown measures approximately 12" (30cm) wide by 36" (92cm) long after blocking. Adjust chain length for longer or shorter runner.
Info :
Work center panel first. Leaves are made separately and attached as you go or sewn on after blocking. Use stitch markers to mark every 10 repeats across the width to maintain straight edges.
— Center Mesh Panel :
Round 1 :
Foundation chain 101 (multiple of 4 + 1 for turning). Ch1, sc in 2nd ch from hook, sc in each ch across. Turn (100 sc)
Info :
Adjust foundation chain to desired width: add or subtract multiples of 4 to increase or decrease width by repeat units of the lacy mesh.
Round 2 :
Ch3 (counts as dc), *sk next 2 sc, dc in next sc, ch1, sk next sc, dc in next sc* repeat across to last sc, dc in last sc. Turn. (Approx 50 dc + ch-1 sps)
Round 3 :
Ch1, sc in first st, *ch3, sk next dc and its ch-1 sp, sc in next dc* repeat across. End with sc in turning dc. Turn. (50 sc / 25 ch-3 sps)
Round 4 :
Ch3, dc in first sc, *ch1, dc in next sc, ch1, dc in next sc* repeat across. Turn. (Maintains open mesh, approx 50 dc)
Round 5-8 :
Repeat Rounds 3-4 twice (work evenly in established mesh pattern). Keep edge tension even; place stitch markers at ends every 8 rows to check straightness.
Info :
If you prefer a denser center, substitute dc rows with hdc rows every 6th row. For the sample runner, the airy open mesh provides a delicate backdrop for leaves.
Round 9 :
Ch1, sc in first st, *ch4, skip next ch-1 sp and dc, sc in next dc* repeat across, ending with sc in last st. Turn. (Creates more open holes for visual texture)
Round 10-16 :
Repeat mesh established in Rounds 3-9, alternating a ch3 open row and a dc row. Work evenly for 7 repeats (adds texture and length). Place a stitch marker at the center stitch on each end every 6 rows to maintain straight edges.
Info :
This runner's center is worked to 70 rows total for the shown length. You can stop earlier or extend by 4-row repeats to adjust final length. When adjusting, keep in mind leaf placement: leave 6-8 rows of margin at each end for corner leaves and border.
Round 17-32 :
Continue established mesh pattern: alternate ch3/dc row with ch1 open sc row every other row. Work evenly and check width every 8 rows. (This segment adds 16 rows; total rows now 32)
Info :
Mark rows at quarter, half and three-quarter lengths to plan where leaf clusters will sit along the edge — this runner places clusters at every 6th mesh repeat (approx every 6-8 rows) along the long edges.
Round 33-56 :
Continue pattern repeats until center panel reaches 70 rows total. Keep edges neat by working the first and last stitch of each row as sc. (Maintains even width)
Round 57 :
Ch1, sc evenly across the top row (work 1 sc in each stitch and in each ch-1 sp). This creates a stable edge for joining leaf motifs later. Turn. (Approx 100 sc)
Info :
Fasten off and block the center panel lightly to open the mesh. Pin to desired rectangle and mist lightly with water if using cotton yarn. Allow to dry completely before attaching leaves.
— Maple Leaf Motif (Make 24 - 12 per long edge or adjust for your runner length) :
Info :
Each maple leaf is worked in one piece from base to tip and back, creating a symmetrical leaf. Use worsted cotton in chosen color. For variegated shading, use hand-dyed or change colors mid-leaf (see Info sections below).
Round 1 :
Using Leaf Color A, ch9. (This forms the central spine foundation: 8 ch + turning ch)
Round 2 :
1 sc in 2nd ch from hook, 1 hdc in next ch, 1 dc in next ch, 1 tr in next ch, ch2, 1 tr in next ch, 1 dc in next ch, 1 hdc in next ch, 1 sc in next ch — work across foundation chain to create first half of spine. Do not turn; working across creates the right half. (9 sts along spine)
Info :
This creates a rising profile from base to tip. Keep tension slightly loose on treble stitches to allow leaf lobes to open.
Round 3 :
At tip (last st), work: ch3, sl st to the top of last st to form tip loop, then continue working down left side of foundation chain mirroring the right: 1 tr in next st, 1 dc, 1 hdc, 1 sc, sl st into base to close the leaf shape. (Symmetrical leaf outline)
Round 4 :
Work leaf lobes: From base, join yarn in base point with sl st, ch1, sc in base, *(ch3, sl st in top of next st) - repeat 3 times* across the central spine to create small lobes on one side, then work *(ch3, sl st) x3* down the other side. Fasten off and weave tail. This gives a small scalloped edge to the basic leaf silhouette.
Info :
If you prefer a more pronounced lobe, replace ch3 loops with (ch4, sl st) or add a picot at each lobe tip. For textured veins, add raised stitches in the next rounds.
Round 5 :
Join Leaf Color B (optional darker shade) with sl st at the center base. Ch1, sc into base, *work 3 sc evenly across the first small lobe, sl st in the base at the lobe valley; repeat for each lobe around the leaf. Continue to mirror on the other side. Fasten off. (Creates a doubled lobe effect and slightly thickens the leaf)
Info :
For variegated leaves, change colors at the tip (Round 3) or use a self-striping yarn. Use small bobbins to keep colors tidy.
Round 6 :
To build texture and veins, rejoin main leaf color at base with a sl st, ch2 (counts as hdc), *hdc in next 2 lobe stitches, front post dc around the corresponding spine st to create a raised ridge* repeat across the leaf center creating three raised veins. Fasten off and weave ends. (Veins are subtle but add depth)
Round 7 :
Optional frilled edge: Join yarn at any lobe tip, *(sc, hdc, 3 dc, hdc, sc) in same lobe tip, sl st into next valley* repeat around leaf to form a ruffled edge that naturally curls. Fasten off. (This round adds 5-7 sts per lobe depending on ch loop size)
Info :
Work lightly for ruffle rounds to encourage curling without distorting the leaf. If you want very flat leaves, skip Round 7.
Round 8 :
Block each leaf lightly by pinning to a slight concave curve to create natural curl. Use steam or mist to set cotton, then let dry thoroughly. Repeat to make 24 leaves.
Info :
Make sets of color combinations to alternate along the runner: Burgundy, Burnt Orange, Gold, Olive, Burgundy, etc. Mixing 2-color leaves (center spine dark, lobes lighter) gives realistic fall shading.
— Leaf Alternate Technique (Detailed 12-round version for deeper texture) :
Round 1 :
Ch10, 1 sc in 2nd ch from hook, 1 hdc, 1 dc, 1 tr, ch1, 1 tr, 1 dc, 1 hdc, 1 sc (completes base to tip). (9 sts)
Round 2 :
At tip ch4, sl st into top of tip to make a small loop. Working down the opposite side of foundation chain, place 1 tr, 1 dc, 1 hdc, 1 sc, sl st at base. (Creates more elongated leaf)
Round 3 :
Join contrasting yarn at base, ch2, 2 hdc in base, *skip to lobe tip, (hdc, dc, hdc) in each lobe center* continue around to form raised lobes. Fasten off.
Round 4 :
Rejoin main color at base, ch1, sc evenly across one side of leaf into the back loops of previous round to create a ridge, sc across to tip and down the other side. Fasten off. (Creates a crisp outline)
Round 5 :
Optional decorative veins: Using contrasting thread and a yarn needle, embroider 3-5 straight stitches from base to the tip along the leaf center and radiating veins toward lobes. Secure and weave ends.
Info :
This alternate technique yields a leaf with flatter, more pronounced features and is ideal for bulky or variegated yarns where surface texture is important.
— Joining Leaves to Center (Placement & Join) :
Info :
Leaves are joined along both long edges. Pin leaves onto the blocked center panel: place one leaf approximately every 3-3.5 inches (8-9 cm), alternating slightly above and below the edge to create an overlapping garland effect. For a 36" runner place 12 leaves per side (24 total) with slightly larger clusters at each end.
Round 1 :
With center panel pinned and leaves blocked, thread a tapestry needle with matching cream or leaf-color yarn and sew the base of each leaf to the edge of the center panel using small whip stitches through the sc edge of the center and the base stitches of the leaf. Sew only through the first 3-4 stitches at the leaf base to leave the tip free (3-4 secure stitches per leaf).
Info :
For a stronger join, catch two loops per stitch on the center panel so leaves stay secure over time. Hide tails under leaf layers for a neater back.
Round 2 :
When sewing a leaf cluster (three leaves slightly overlapping), layer leaves with the largest at the bottom and stitch through bottom leaf base first, then through middle and top leaf bases, all into the same center panel anchor points. This creates a cohesive cluster that behaves like a single decorative unit.
Info :
Alternate leaf directions every other leaf (left-slanted, right-slanted) for natural variation. Keep stitches small and secure to avoid visible thread on the front of the leaf shapes.
— Picot Curl Scallop Edge (Worked around both long edges and short ends) :
Info :
Use 3.5 mm hook for crisp picots. The picot curl scallop is worked directly on the center panel edge after leaves are attached to provide a continuous border that frames leaves and hides seam edges.
Round 1 :
Join cream yarn at any corner with sl st. Ch3 (counts as dc), *skip 1 st, dc in next st, ch3, sl st in 3rd ch to form picot, sl st in same edge st to anchor, skip 1 st, dc in next st* repeat along edge. Work evenly around long edges and across short ends using approximately one picot for every 4 center-panel stitches. Fasten off at join and weave ends. (Creates curled picot loops along entire perimeter)
Info :
If leaves overlap picots slightly, that is desirable — the picot edge will curl slightly under the leaves giving a finished frame. Use smaller hook if picots are too loose, larger if too tight.
Round 2 :
Optional second round for deeper scallop: Join cream yarn in each picot loop and work (sc, hdc, 3 dc, hdc, sc) into the loop to create a ruffled scallop. This will increase the border depth by about 1/2". Work evenly and fasten off after each section if needed to avoid stretching.
Round 3 :
For a more curled picot, after Round 1, work an additional row of single crochet in BLO along the edge to pull the fabric inward, then block the runner with a slight upward pinning on the border to set the curl.
Info :
When working across short ends, space picots to match the gauge used along long edges so the border looks continuous. Use pins to hold picots in place while working the second round of scallop if you choose to add it.
— Final Finishing & Blocking :
Round 1 :
Weave in all ends from leaves and border using a tapestry needle. For cotton yarn, weave tails along the back into several stitches to prevent slipping. Trim excess.
Round 2 :
Lightly wet-block or steam-block the entire runner: pin to blocking mat in a gentle rectangle, position leaves slightly curled upward for 3D effect, and allow to dry fully. For leaves that need extra curling, pin lobes in a slightly cupped position before drying.
Round 3 :
Optional: Hand-stitch a few discreet tacking stitches at the leaf tips into the picot edging to secure them against heavy use. Use matching thread to keep stitches invisible.
Info :
For long-term care, machine wash gentle in cold water inside a mesh bag and dry flat, or spot clean. Re-block after cleaning to restore shape.
Finishing this runner is a joy — the neutral lacy center lets those richly colored leaves shine, and the curled picot edge gives a charming frame that feels handmade and refined. Each leaf adds personality and the freedom to customize color and placement. This project is a warm, satisfying way to bring autumn indoors. 🧶🍁✨