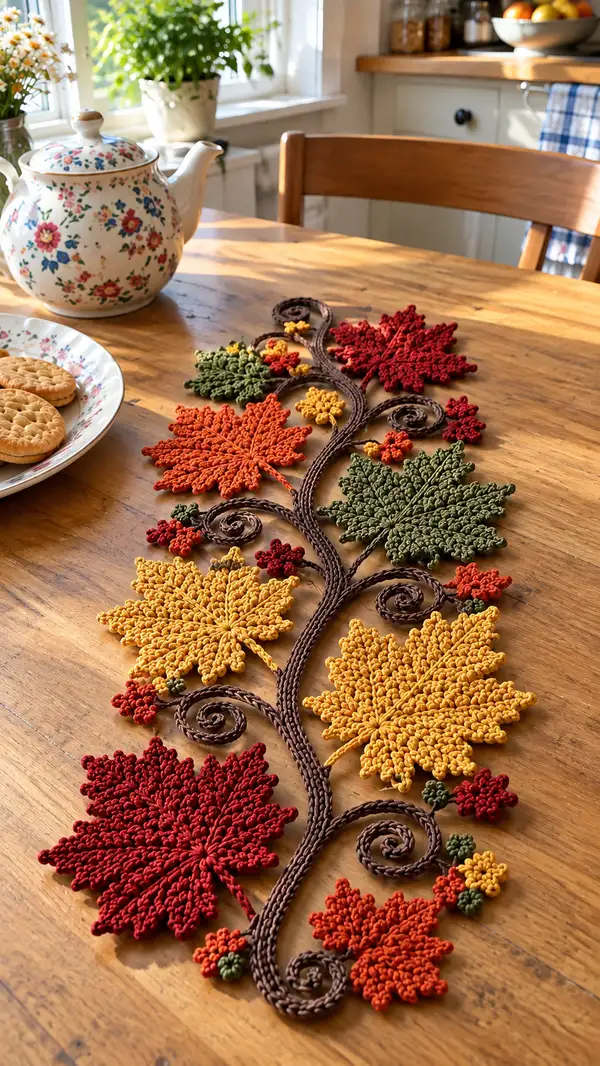
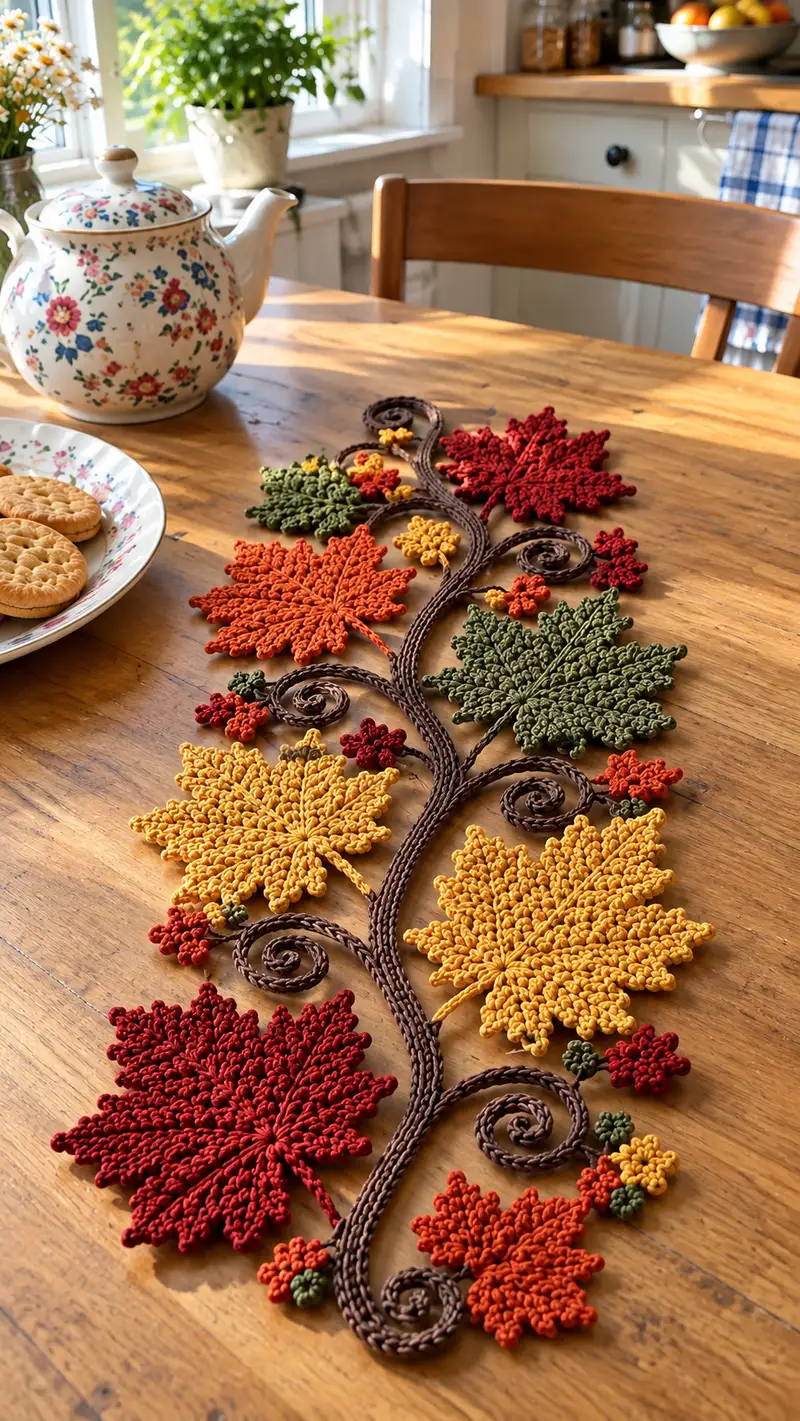
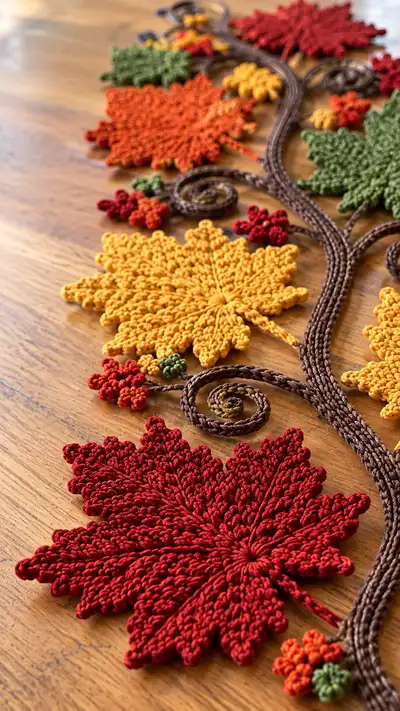
Create a stunning autumn table runner featuring richly textured crochet maple leaves, curled vine stems and tiny berry clusters. This pattern recreates the layered look of fall foliage with warm red, orange, yellow and green leaves attached to a braided brown trunk. Perfect for a centerpiece or seasonal gift — it lays flat while keeping a sculpted, hand-crafted charm.
Progress Tracker
0% Complete
— Overview :
Info :
This pattern is modular. You will make: 6 large maple leaves (approx 18-22cm each), 3 medium maple leaves (12-15cm each), 6 small maple leaves, 12-16 small berry clusters, a long crocheted braided trunk (worked as 3 cord pieces then sewn together), and several decorative vine spirals. Assemble by pinning pieces on a backing table or blocking board and sew together with yarn needle.
Info :
Gauge: leaves are textured and worked tightly. Use a 3.5mm hook for the worsted cotton shown to produce crisp ridges. Adjust hook size if you use a different yarn weight.
— Big Maple Leaf (Make 6) :
Round 1 :
6 sc in magic ring (6)
Round 3 :
(1 sc, inc) x 6 (18)
Round 4 :
(2 sc, inc) x 6 (24)
Round 5 :
(3 sc, inc) x 6 (30)
Round 6 :
(4 sc, inc) x 6 (36)
Round 7 :
(5 sc, inc) x 6 (42)
Round 8 :
(6 sc, inc) x 6 (48)
Info :
These first 8 rounds build the circular center of the leaf. Keep tension even and place a stitch marker at the start of each round. This center will be the leaf's throat where veins radiate.
Round 9 :
1 sc in each st BLO (48) - creates a subtle ridge for texture (48)
Round 10 :
1 sc in each st (48)
Round 11 :
1 sc in each st (48)
Info :
Now we'll begin shaping leaf lobes. You will create 8 lobes (points) by establishing 8 segments of 6 stitches each. Mark boundaries every 6 stitches with small removable markers to help with shaping rounds below.
Round 12 :
(1 sc x 4, ch 5, skip next 2 sts, sl st to next segment) x 8 - this creates chain spokes for defining lobes. After working 8 chain spokes, join and rotate to work around chains (32 sc worked + chain loops)
Info :
We will work into each chain loop to build the point shape. Keep chains loose enough to pick up stitches easily but not so loose they distort the center.
Round 13 :
*In first ch-5 loop: (sl st, ch1, 1 sc, hdc, 2 dc, hdc, 1 sc, ch1, sl st to base). Sl st to next segment. Repeat around to form rounded petal bases* x 8 (petal bases formed)
Round 14 :
Work petal shaping in rounds around each spoke: In each petal work (1 sc in next 2 sts, 1 hdc, 3 dc, 1 hdc, 2 sc) - finish each petal and sl st to next base (8 petals total). This increases the outer edge without changing center count.
Info :
At this stage the leaf looks like a flower—next rounds will adjust the petals into pointed maple-like lobes by doing strategic decreases and textured ridges along each lobe center to mimic a vein.
Round 15 :
Work around the whole motif in sc but add 3 sc in the valley gap between petals to smooth joins so total stitch counts will vary slightly; maintain symmetry visually.
Round 16 :
Start central veins: attach yarn at center, ch1, *fpdc around post of the center sc of petal 1 to create raised vein, sl st to center, ch1, move to next petal* x 8 - creates 8 raised veins radiating to lobes.
Info :
FPDC (front post double crochet) used here creates a strong raised line. Keep the FPDC stitches stacked, one into each round, to form a continuous raised vein as you build outward in the next rounds.
Round 17 :
Working each petal area: in each lobe work (sc around outer edge in BLO to create texture, then 1 sc in each valley between lobes). This round keeps edge tidy for the next point-work.
Round 18 :
Point formation: For each of the 8 lobes do: (ch2, 1 sc in base, inc, 2 sc, inc, 1 sc, ch2) - at the tip of the lobe work a cluster: (3 dc cluster) then sl st back to base to anchor the point. Repeat for all lobes.
Info :
Adjust counts slightly per lobe so all lobes measure visually equal. Use pins to flatten and compare. Blocking will finalize the shape later.
Round 19 :
Edge scallops: 1 sc in each st around entire leaf, placing 3 sc at each valley between lobes to accent separation (approx stitch count 100-120 depending on increases from petal shaping)
Round 20 :
Work 1 sc in each st BLO for one round to create a sharp edge (same stitch count as previous round)
Info :
Fasten off leaving a long tail (~50cm) for sewing to trunk and weaving. Wet-block or steam-block leaf, pinning each lobe to form crisp points. Repeat to make 6 leaves in your chosen color palette.
Round 21 :
Optional vein embroidery: With a contrasting or tone-on-tone yarn, using the long tail and tapestry needle, embroider a central ridge by bringing the yarn up at base and making surface slip stitches along raised FPDC veins toward tip. Secure and weave in ends.
Info :
Make each big leaf in these colors: 2 golden yellow, 2 dark red, 1 rust orange, 1 olive green (or alter to taste). Blocking and firm edges are critical to match photo crispness.
— Medium Maple Leaf (Make 3) :
Round 1 :
6 sc in magic ring (6)
Round 3 :
(1 sc, inc) x 6 (18)
Round 4 :
(2 sc, inc) x 6 (24)
Round 5 :
1 sc in each st BLO (24)
Info :
Medium leaves follow the same shaping logic as large leaves but condensed to 6 lobes rather than 8. Mark segments every 4 stitches for lobes below.
Round 6 :
*(ch4, skip 2 sts, 1 sc next 4 sts) x 6* - chains form spoke loops for lobes.
Round 7 :
In each ch-4 loop: (sl st, ch1, 1 sc, 2 dc, 1 sc, ch1) to form petal base. Repeat x6.
Round 8 :
Work point shaping: in each petal: (2 sc, hdc, 2 dc, hdc, 2 sc) anchor and sl st to next. Then 1 sc around entire motif smoothing edges (approx 60-72 sts)
Info :
Finish with one round in BLO to create a tidy edge. Fasten off leaving long tail for sewing and weave in ends after blocking.
— Small Maple Leaf (Make 6-8) :
Round 1 :
6 sc in magic ring (6)
Round 3 :
(1 sc, inc) x 6 (18)
Round 4 :
Work 1 sc in each st BLO for two rounds to create tiny textured disc (18)
Round 5 :
Form simplified lobes: *(ch3, 3 dc cluster into next st, sl st to base)* x 6 forming small points. Fasten off leaving tail for sewing.
Info :
Small leaves are used as scattered accents and berry leaves. Make 6-8 in accent colors (deep cranberry and pumpkin orange)
— Tiny Berry Cluster (Make 12-16) :
Round 1 :
6 sc in magic ring (6)
Round 2 :
Work mini popcorn rounds: *ch1, (5 dc in next st, remove hook and pull through) to make popcorn, sl st to secure* x 3 within the ring to create 3 small berries; turn slightly and add 2 more popcorns into gaps for 5 small bumps. Fasten off (visual cluster of 5 tiny berries)
Info :
Vary cluster sizes for realism: some clusters of 3, some of 5. Use different tiny colors to add contrast. Leave long tails for sewing.
— Braided Trunk & Vines (Make 3 cord pieces, join) :
Info :
The trunk in the photo looks like a 3-strand crocheted cord, worked as long I-cords or slip-stitch cords, then sewn together and twisted into a braid with spiral vine ends. We'll make three identical cords then join and braid.
Cord Piece - Foundation :
Ch 200 (or desired length of runner trunk sections; each ch yields approx 0.5cm - adjust to fit table length). This is foundation for each cord. For a runner approx 80-90cm long make ch200; adjust for your surface.
Round 1 :
Starting in 2nd ch from hook work 1 sc in each ch to end (199 sc). Turn. Work back along unused loops to create a tubular cord if desired.
Round 2-6 :
Work 1 sc in each st around the cord (199) for 5 rounds creating a firm cord. Alternatively work BLO to create a ridge (199).
Info :
For a firm I-cord effect, use a smaller hook (3.0mm) for these cord rounds. Make three identical cords then sew ends together and braid or twist as preferred. Use wire inside if you want poseable spiral ends.
Round 7 :
Fasten off leaving long tails for joining cords. Make two more identical cords.
Info :
To join cords into the trunk: align three cords, overlap end by 4-5cm and whip stitch together using the long tails, then braid the cords loosely along the length. Secure the far end with whip stitch. For decorative spirals, after braiding leave 10-12cm unbraided and curl into spiral shapes, securing with hidden stitches. Optionally insert thin wire before finishing spirals for stable curls.
— Vine Spirals (Make 6) :
Round 1 :
Ch 35, sl st into 2nd ch from hook, sl st across to create a slim cord (34 sl st). Fasten off leaving long tail.
Round 2 :
Roll cord into spiral on table, pin and sew spiral coil to trunk at desired position. For slightly raised vine, couch the cord by sewing at three points to trunk cord using yarn needle.
Info :
Vine spirals are decorative. For thicker spirals, work 3 sc across each chain into a tube and then coil. Insert wire if you want permanent curl.
— Leaf Stem (Leaf Tail) :
Round 1 :
For each leaf make a short stem: ch 12, 1 sc in 2nd ch from hook across (11 sc), sl st to attach stem base to leaf underside where center meets trunk. Fasten off leaving long tail for sewing.
Info :
Make stems matching leaf colors or use brown for consistency. Make stems slightly longer for larger leaves to mimic photo proportion.
— Assembly Prep :
Info :
Block all leaves flat and pin into desired arrangement on a foam board or blocking mat prior to sewing. Lay the braided trunk down the center lengthwise and arrange leaves alternately along both sides. Place small leaves and berry clusters in gaps and at spiral terminations for a natural rhythm.
Info :
Refer to the photo layout: top to bottom arrangement alternates leaf colors and sizes for balance: red (top), rust, green, yellow, red (bottom) with spirals and clusters spaced evenly.
— Decorative Surface Veins and Edge Crisping :
Round 1 :
Using matching yarn and tapestry needle, surface-sl st a vein from base to tip along the top of each leaf. Make 3-4 subsidiary surface slip stitches branching to each lobe tip to mimic secondary veins.
Info :
For stronger veins, use a chainless foundation row of FPDC from center to tip before blocking. Alternatively, embroider a thicker vein using a backstitch with doubled yarn.
Round 2 :
Stiffen edges (optional): spray with diluted fabric stiffener and pin edges into shape. Allow to dry fully before removing pins.
— Finishing Touches :
Round 1 :
Sew leaves to trunk: position each leaf so its stem overlaps the trunk braid. From inside underside of leaf whip stitch leaf tail to trunk through two or three passes. Use strong yarn and secure knots thoroughly.
Info :
Sew berry clusters into gaps between leaves and secure spirals to trunk where they intersect. Tuck small leaves under larger leaves where natural overlap helps hide stitches.
Round 2 :
Weave in all tails: hide ends by threading into trunk interior or leaf underside and trimming flush. Add a few securing stitches where the runner will receive wear at edges.
Info :
Edge reinforcement: If runner will be used frequently, consider stitching a narrow slip-stitched edging around exposed trunk ends for durability. Secure spirals with additional invisible stitches to trunk base.
Round 3 :
Final blocking: Pin entire assembled runner into desired flat shape on blocking board. Use steam or spray method to ensure leaves lay flat and lobes hold shape. Allow to dry completely.
Info :
Optional hanging loop: add a small loop at runner end by sewing a ch10 loop to underside for easy storage or hanging between seasons.
This autumn maple leaf runner brings the season to your table with sculptural leaves, curled vines and tiny berry clusters. Each crocheted element is handmade and assembled for a striking, textured centerpiece you can treasure. The rich reds, golds, oranges and greens create a cozy fall mood—perfect for gatherings or a seasonal refresh. 🍁🧶 Display it proudly as a festive focal point and enjoy the compliments! 🍂