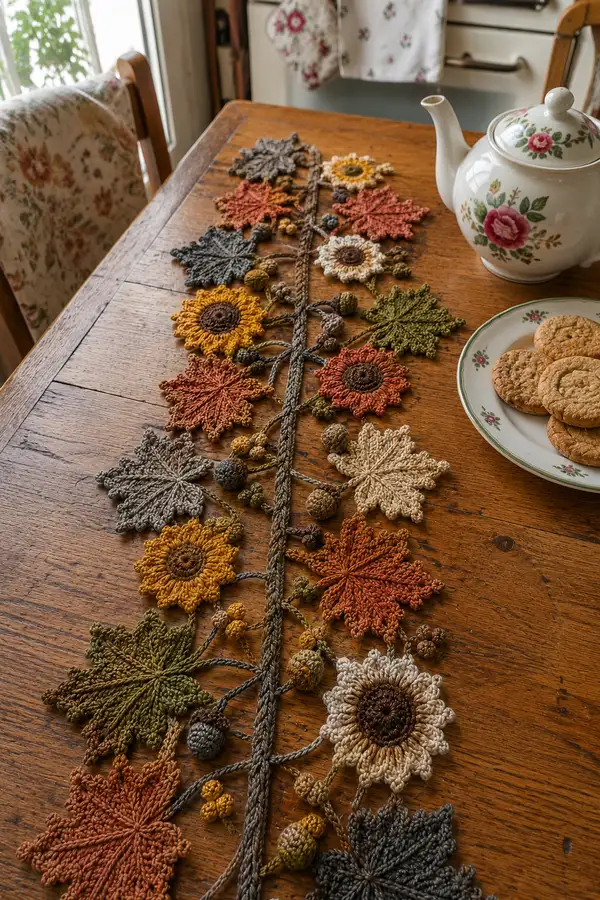
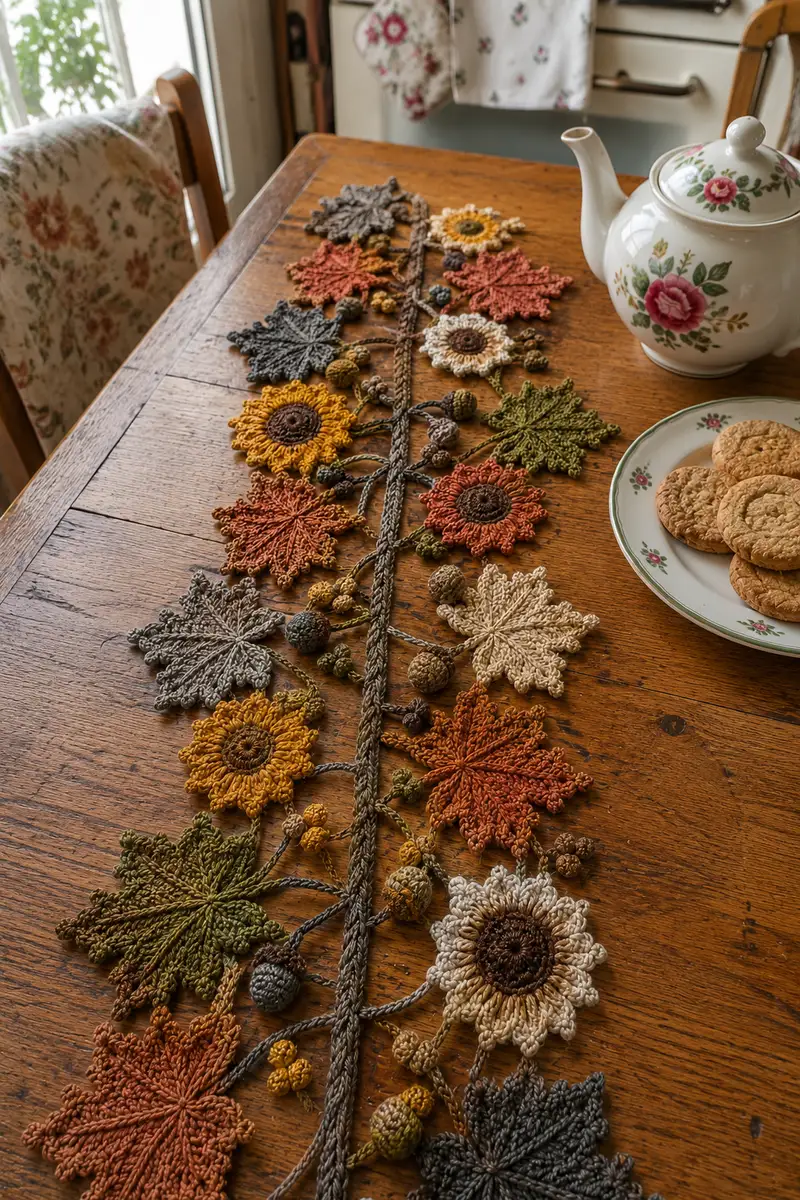
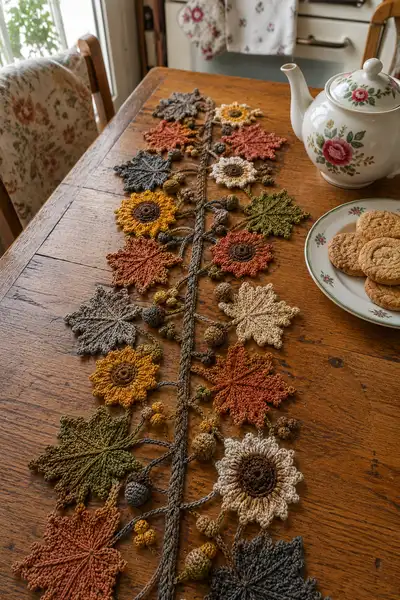
Bring cozy autumn charm to your table with this crocheted runner featuring textured maple leaves, bold sunflowers and tiny acorn berries. Made in warm fall shades — mustard, rust, olive, cream and taupe — the motifs are joined by a braided stem for a natural look. Perfect for seasonal decor, a centerpiece, or as a thoughtful handmade gift with lots of stitch detail and texture.
Progress Tracker
0% Complete
— Overview :
Info :
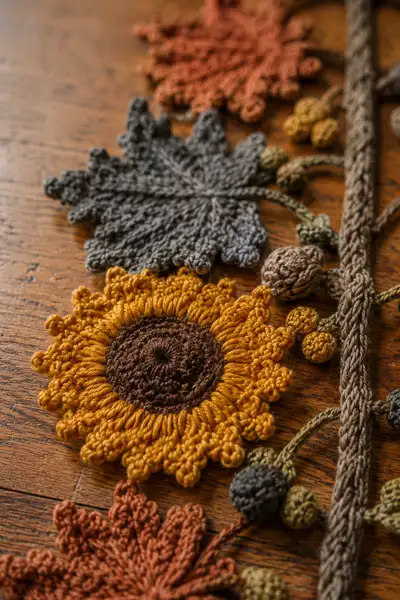
This pattern is composed of three main motif types: Sunflower (worked in rounds), Maple Leaf (worked in rounds/short rows), and small spherical acorns/berries. All motifs are blocked and then sewn to a braided central stem. The instructions give a complete round-by-round breakdown for one sunflower, one leaf and one acorn type. Repeat and color-switch as desired to assemble the full runner.
— Materials & Gauge :
Info :
Gauge is not critical for motifs because pieces are joined, but the recommended gauge with the yarn and 3.5mm hook yields flowers ~11-12cm across and maple leaves ~10-11cm across. Adjust hook size to make motifs larger or smaller as desired.
— Sunflower Motif (make 4–6 depending on runner length) :
Round 1 :
Make a magic ring. 6 sc in magic ring (6)
Round 3 :
(1 sc, 1 inc) x 6 (18)
Round 4 :
(2 sc, 1 inc) x 6 (24)
Round 5 :
(3 sc, 1 inc) x 6 (30)
Info :
Change to center-color (chocolate brown) at final yarn over of previous round if you're working a two-color center. Keep centers worked tightly for contrast.
Round 6 :
1 sc in each st (30)
Round 7 :
(4 sc, 1 inc) x 5 then 1 sc (35)
Round 8 :
1 sc in each st (35)
Round 9 :
(5 sc, 1 inc) x 5 then (4 sc, 1 inc) x 1 (41)
Info :
This center is intentionally slightly domed — it creates a nice base for tall petals. If you prefer a flatter center, tighten the last few rounds by working one round in BLO to pull the fabric inwards.
Round 10 :
1 sc in each st (41)
Round 11 :
(3 sc, 1 inc) x 10 then 1 sc (51)
Round 12 :
1 sc in each st (51)
Info :
Fasten off center color (if using a separate center) with a 20 cm tail to sew into the petal base later. We will begin petal rounds in petal-color (mustard/gold).
Round 13 :
Join petal color with sl st into any st. *Ch 6, skip 1 st, sl st into next st*; rep from * to * around to create 17 chain-loops (17 loops; final sl st joins) (17 loops)
Info :
Each chain-6 loop will become a full petal. Count loops to ensure even petal placement. If your count is off, adjust loop size (ch 5 or ch 7) so the loop count fits around the center evenly.
Round 14 :
Work petals into each ch-6 loop: *(sl st, 1 sc, 1 hdc, 3 dc, 1 hdc, 1 sc, sl st) into loop*; rep around (17 petals)
Round 15 :
Into the space between each petal, work a picot cluster: *ch 3, (sl st into petal tip), ch 3, sl st into base between petals*; rep around for a scalloped outer edge (17 picots)
Round 16 :
Optional decorative round: Work 1 sc in each st and 2 sc in picot base to firm up outer edge (count will vary depending on how you executed picots; expected 68–74 sts)
Info :
Block sunflower flat by pinning to shape, pulling petals gently outward. Use a lightly damp cloth or steam blocking appropriate to your yarn fiber. Blocking defines petals and evens out edges.
Round 17 :
Weave in ends from center and petal rounds. Leave a sewing tail on petal color (approx 20cm) for assembly. Fasten off (no count).
— Maple Leaf Motif (make 6–8) :
Round 1 :
Make a magic ring. 6 sc in magic ring (6)
Round 3 :
(1 sc, 1 inc) x 6 (18)
Round 4 :
(2 sc, 1 inc) x 6 (24)
Round 5 :
(3 sc, 1 inc) x 6 (30)
Info :
Change to leaf color (olive or rust). The leaf will be shaped by working a central spine and then creating lobes symmetrically along short rows. To make clear lobes, we will work in rounds to a point and then create 7 leaf points by working chains and slip stitches to shape lobes.
Round 6 :
1 sc in each st (30)
Round 7 :
1 sc in next 4 sts, ch 8, skip 8 sts, sc in next 10 sts, ch 8, skip last 8 sts, join (creates two chain-lobe spaces at opposite sides) (30)
Round 8 :
Work lobe edges: Into first ch-8 space work *(sc, hdc, 3 dc, hdc, sc)* to form a pronounced lobe; sl st across next sc base, into next ch-8 space repeat; continue around to create 2 large lobes plus a continuous base (st count will vary; expected ~46)
Info :
For a classic maple look, create additional smaller lobes between large lobes: create chain-5 loops between the larger petals then work small clusters to mimic serrated edges. This is stylistic — adjust counts to taste.
Round 9 :
Work 5 smaller points between the two large lobes by slipping into the base and working *(ch 5; sl st into base; ch 5; sc into next base st)* across; then in each ch-5 work *(sc, 1 hdc, 2 dc, 1 hdc, sc)* to create pointed serrations (expected ~70 sts total)
Round 10 :
1 sc around entire leaf edge to tidy and equalize the edge (expected ~70)
Round 11 :
Create a raised central vein: join yarn at leaf base, ch 1, work 10 sc along the central base to create a short raised tube (10)
Info :
To make the vein, you can work sc in FLO or around a chain to form a raised ridge. Use an embroidery yarn end to stitch a visible vein from tip to base later for extra detail.
Round 12 :
Optional: Work surface slip stitch veins — using contrasting color, from center base stitch slip-stitches along the leaf midline and diagonally into lobes to mimic maple venation. Fasten off and leave 20cm tail for sewing.
— Small Acorn Sphere (make 8–12) :
Round 1 :
Make a magic ring. 6 sc in magic ring (6)
Round 3 :
(1 sc, 1 inc) x 6 (18)
Round 4 :
1 sc in each st (18)
Round 5 :
(1 sc, 1 dec) x 6 (12)
Info :
Begin stuffing lightly with very small amounts of fiberfill. The acorn should be firm but not overstuffed—use a stuffing tool or blunt pencil to push fill into the center.
Round 7 :
Fasten off leaving long tail for sewing (leave about 20cm). Close remaining opening by weaving tail through front loops and pulling closed. Shape into a neat sphere.
Round 8 :
Make a small acorn-cap: With contrasting darker yarn, ch 2, 6 sc in second ch from hook (6); Round 9: (1 sc, 1 inc) x 3 (9); Round 10: 1 sc in each st (9). Fasten off leaving a tail for sewing the cap to the sphere.
Info :
Sew cap to sphere with overlapping stitches, then sew a short stem (ch 4) to the cap top or insert a tiny loop of yarn for attaching to branches. For larger acorns, make extra rounds of increases before stuffing and adjust stuffing amounts.
— Tiny Berry Cluster (make many) :
Round 1 :
Make a magic ring. 6 sc in ring (6)
Round 2 :
1 sc in each st (6)
Round 3 :
Start stuffing very slightly; fasten off leaving a long tail for sewing (no count)
Info :
Group berries into clusters of 3–5 by sewing them together at their tails; then attach the cluster to a short chain stem before sewing to the main runner.
— Braided Central Stem (make 1 long braid equal to runner length) :
Info :
The central stem is a 3-strand crochet braid. Prepare three long chains in taupe/brown shades; each chain should be double the desired runner length plus allowance for braiding. Alternatively, crochet long i-cords and braid them together for a thicker effect.
Round 1 :
Chain 220 (or desired length for long runner; adjust counts proportionally). Fasten off and make two more chains of equal length in different taupe shades (3 chains total).
Round 2 :
Join the three chains side-by-side at one end by knotting or weaving ends together. Braid the three chains tightly for the full length and secure the end with a knot (braid will not have a st count).
Info :
If you prefer a plumper stem, make 4 or 5 chains and work a braid or twist; alternatively, create 3 crocheted i-cords (work in BLO around a chain) and braid for the most professional look.
— Short Stems & Branches (make many) :
Round 1 :
For each short stem chain ch 12 in chosen stem color (this becomes approx 4-5cm); sl st back along the chain to thicken (work 12 sl st) and leave ends to sew (no count).
Round 2 :
For curving stems, after chaining 12, work *sc in 2nd ch from hook to last ch* (11 sc) and then work sc along opposite side of chain to create a tube (total about 22 sc). Fasten off leaving tail to sew to braid.
Info :
Vary stem lengths between 6 and 20 chains so that motifs sit staggered along both sides of the main braid. Curl stems gently with blocking or by steam shaping after attaching to the braid for a natural look.
— Decorative Petal Variation (for small daisy-like flowers) :
Round 1 :
Make a magic ring. 6 sc in ring (6)
Round 3 :
*Ch 5, sl st in next st* around to create 6 loops (6 loops)
Round 4 :
Into each loop work *(sc, hdc, 3 dc, hdc, sc)* to create 6 small petals. Fasten off and leave tail for sewing (petal flowers roughly 4cm wide).
Info :
These small daisies are great to tuck into leaf gaps and add scale contrast. Make clusters of 2–3 per space for visual interest.
— Assembly Prep (blocking and layout) :
Info :
Block every sunflower and maple leaf flat. Use pins to hold edges and steam lightly (or wet-block according to yarn type). Pin motifs on flat surface along the braided stem, alternating leaf and flower and staggering on both sides as seen in the photo. Leave roughly 6–10cm between large motifs depending on runner length.
Info :
Position small stems, acorns, and berry clusters around the motifs: acorns typically sit near the leaf bases or in small clusters of 2–3 near the braid. Use pins to preview placement before sewing.
— Sewing Motifs to Stem :
Round 1 :
Use the long tail left at the petal base to sew sunflower to the braid. Place sunflower so its center sits approx 2–3cm from the braid and sew through the braid loops and the flower tail, taking small whip stitches to secure (no count).
Round 2 :
Sew maple leaf bases to the braid using the 20cm tail left. Stitch through the braid and the centre back of leaf multiple times to secure, then run hidden stitches along the back of leaf to hide tail (no count).
Info :
Sew each short stem to the braid first, then sew the smaller object (acorn, berry) to the other end of the short stem so the acorn sits naturally at the motif edge instead of directly sewn into the braid.
Round 3 :
For acorn clusters, sew acorn caps to spheres first, then stitch each sphere to short stems (ch4). Knot securely and hide tails inside acorn or along stem with yarn needle (no count).
Info :
Use tiny stitches and a matching yarn color for invisible joins. Add little extra stitches at the base of heavier motifs (sunflowers) so the piece hangs flat and motifs do not flop away from the braid.
— Final Finishing Touches :
Round 1 :
Once all motifs are sewn in place, run a surface slip-stitch along the braid on both edges to tidy raw braid sides and keep motifs snug (work 1 sl st in every 4-6 braid loops).
Round 2 :
Add surface embroidery veins on leaves using yarn tail and simple running stitch: originate at base and stitch out to main lobes in symmetrical fashion. Tie off and hide tails (no count).
Info :
Trim all remaining yarn tails, and give the entire runner a final light steam/block so motifs sit correctly and all joins relax into a natural arrangement. Secure any loose motif with a small drop of fabric glue if necessary but avoid overuse to keep the runner flexible.
This table runner brings the heart of autumn to your home with textured maple leaves, cheerful sunflowers, and tiny acorns that peek between motifs. Each piece is lovingly blocked and sewn in place along a hand-braided stem, creating a cozy, handcrafted centerpiece you will reach for every season. I hope you enjoy making it as much as you enjoy displaying it—it's perfect for slow afternoons and thoughtful gifting. 🧶🍁🌻