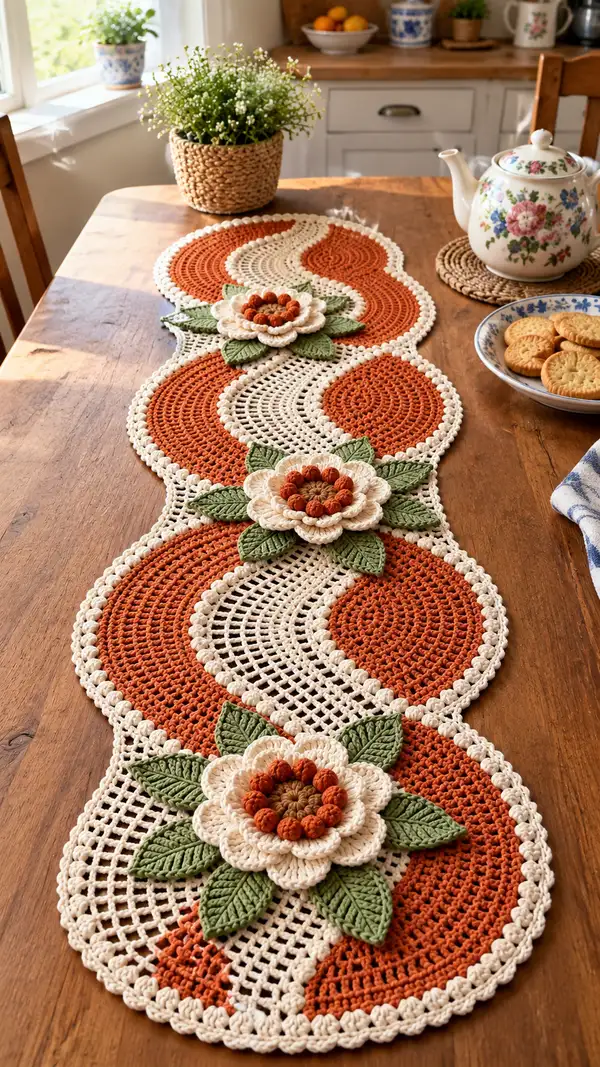
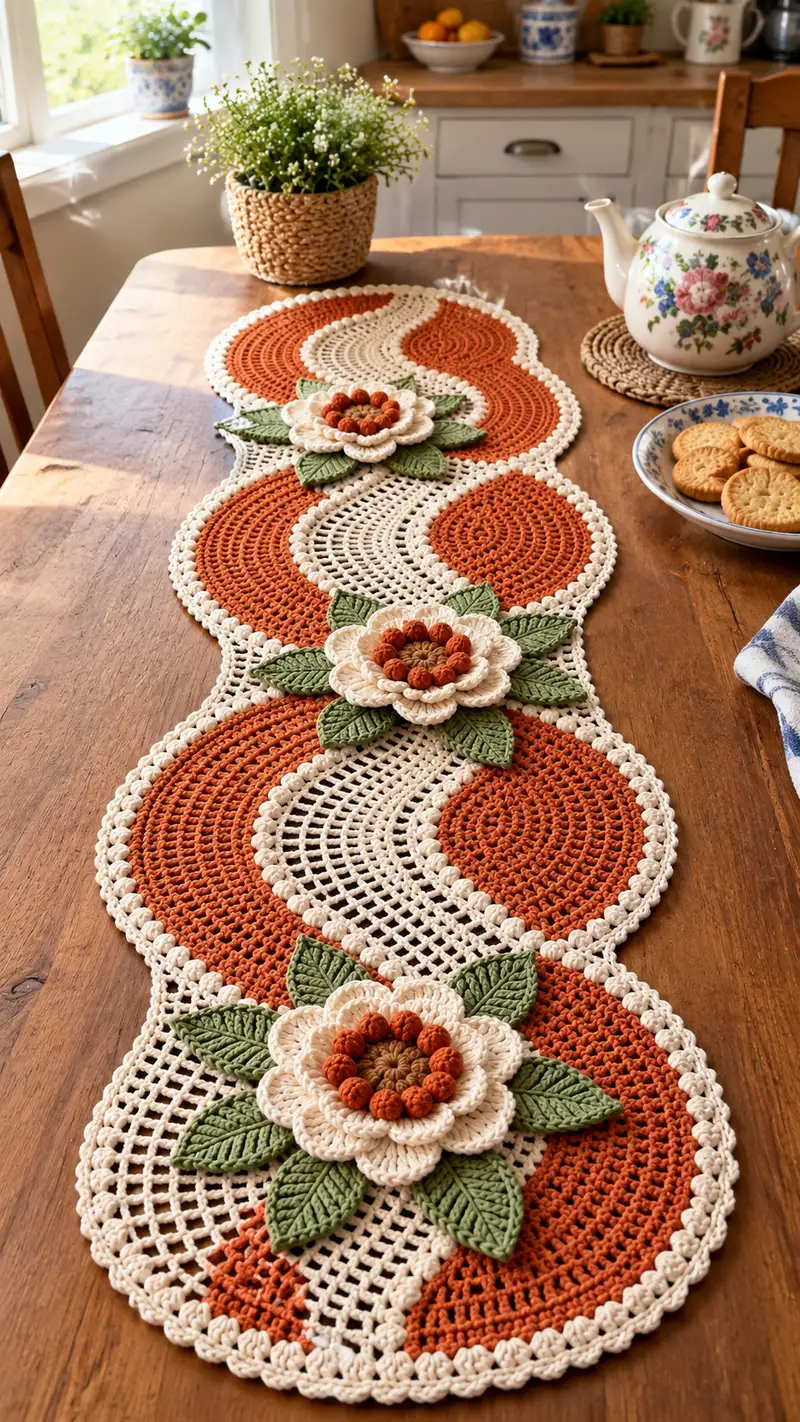
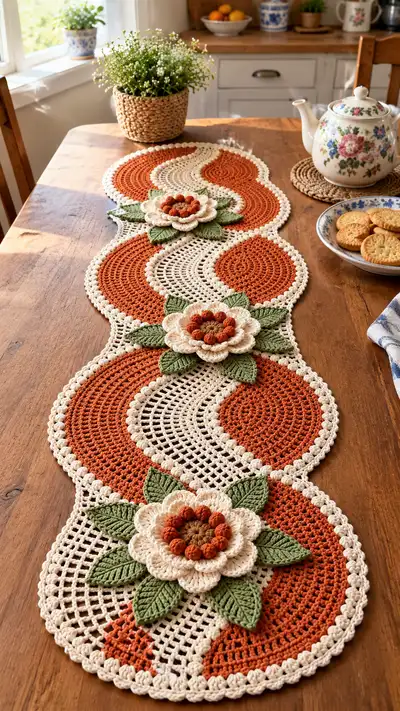
A warm, elegant table runner featuring three connected circular motifs with yin-yang swirls, cream scallop edging and layered floral appliques. Rich terracotta panels contrast with soft cream mesh and leafy green accents for a modern vintage look. Ideal for seasonal decor or a statement centerpiece on a dining table. Clear step-by-step instructions include detailed motif construction, flower and leaf appliques, and finishing border techniques.
Progress Tracker
0% Complete
— Materials & Gauge :
Info :
Gauge is not critical for design repeat but affects final runner length. Sample: 14 dc x 8 rows = 10 cm in half double crochet worked loosely. Use cotton yarn for a flat, non-stretchy finish. Work tightly enough that the stitches are dense but not stiff.
— Main Circular Motif (Make 3 identical) :
Round 1 :
Using terracotta: 6 sc in magic ring (6)
Round 3 :
(1 sc, inc) x 6 (18)
Round 4 :
(2 sc, inc) x 6 (24)
Round 5 :
(3 sc, inc) x 6 (30)
Round 6 :
(4 sc, inc) x 6 (36)
Round 7 :
(5 sc, inc) x 6 (42)
Round 8 :
(6 sc, inc) x 6 (48)
Info :
These increases create a flat round. Keep counts accurate and check often. If edge cupping begins, omit one increase in that round at the cupping area.
Round 9 :
1 sc in each st (48)
Round 10 :
1 sc in each st (48)
Round 11 :
1 sc in each st (48)
Round 12 :
1 sc in each st (48)
Info :
Work even rounds to build the solid terracotta field. Keep these rounds dense to make a stable base for the overlay mesh. If needed, switch to a 4.5mm hook to maintain density.
Round 13 :
(6 sc, inc) x 6 (54)
Round 14 :
1 sc in each st (54)
Round 15 :
1 sc in each st (54)
Round 16 :
1 sc in each st (54)
Info :
At this stage the circle should be approximately 13-14 cm across depending on yarn. Fasten off terracotta leaving a long tail for joining if required. We will add the cream swirl panel next as a separate overlay.
— Swirl Mesh Inlay (Make 3, creates the cream S-curve overlay) :
Info :
Work this panel in cream as a separate piece and join to the terracotta circle by sewing using the long tail. The mesh is a shaped fillet, crocheted in rows rather than rounds. Use 4.0-4.5mm hook and keep edges straight. The mesh will be 28 rows high and vary in stitch count to create the S curve.
Row 1 :
With cream, ch 44, 1 hdc in 2nd ch from hook, hdc across (43 hdc)
Row 2 :
Ch 1, turn, sc in first st, *ch 3, sk next 3 hdc, sc in next st* rep across ending sc (11 sc, 11 ch3 sps)
Row 3 :
Ch 1, turn, sc in first sc, *ch 3, sc in next sc* rep across (11 sc, 11 ch3 sps)
Row 4 :
Ch 1, turn, sc in each sc and in each ch-3 sp (total 33 sc)
Info :
To create the S-shape, we will increase and decrease the number of ch-3 mesh repeats across the center rows so one side bulges while the other narrows. Mark the center column with a stitch marker.
Row 5 :
Ch 1, turn, sc in first 2 sts, *ch 3, sk next 3sts, sc in next st* rep 9 times, sc in last 2 sts (9 ch3 sps)
Row 6 :
Ch 1, turn, sc in each sc and ch-3 sp (total 29 sc)
Row 7 :
Ch 1, turn, sc in first st, inc (sc inc) in next st to gently curve, *ch 3, sc in next sc* rep adjusting to create extra ch3 on left side (10 ch3 sps)
Row 8 :
Ch 1, turn, sc across filling ch-3 sps as sc, total approx 31 sc
Info :
Alternate rows of mesh with solid sc rows to stabilize the shape. Use increases near the outer arc to allow the cream panel to bulge over the terracotta field creating the yin-yang aesthetic.
Row 9 :
Repeat Row 5 pattern but shift the increased ch-3 repeats toward the opposite side to create the S curve (9-11 ch3 sps depending on shaping)
Row 10 :
Ch 1, turn, sc across stabilizing row (approx 30 sc)
Row 11-16 :
Repeat Rows 5-10 gradually tapering the mesh width so that the panel finishes narrower at the ends; final mesh will be about 12 ch-3 sps wide at the widest point
Row 17 :
Ch 1, turn, sc in each st across, fasten off leaving long tail for sewing (approx 28-34 sc)
Info :
Block the mesh panel flat to the same curvature as the terracotta circle. Pin the panel aligning the bulging center over the circle's outer arc, leaving ends to follow circle edge. When satisfied with fit, sew carefully with mattress stitch or whip stitch through color tails.
— Joining the Mesh to Motif :
Info :
With the terracotta circle RS up, position the cream mesh overlay so the outer mesh arc follows the circle's outer edge and the inner curve nestles into the inner radius. Use plenty of pins to ensure the S shape sits flat without puckering.
Round 1 :
Using cream, work a row of sl st around the seam joining the cream mesh to terracotta; pick up both layers where possible to secure (work approx 54 sl st around the join)
Info :
Take care to pull the seam snug but not tight; this will keep the inlay flat and prevent gaps. Fasten off and weave in ends on the WS.
— Motif Outer Scallop Border (do after mesh securely attached) :
Round 1 :
With cream, join with sl st to outer edge, ch 1, sc evenly around whole motif, placing 2 sc in each increase point and spacing others: total 64 sc (adjust to fit circumference)
Round 2 :
Ch 2 (counts as hdc), hdc in same st, *sk 1 st, 5 dc cluster in next st (shell), sk 1 st, hdc in next st* rep around to form spaced shells (approx 16 shells)
Round 3 :
Ch 1, sc in each st and in each shell top to anchor shells (64 sc)
Round 4 :
To create popcorn scallop edge: *ch 1, sc in next st, (5 dc in next st, remove hook, insert hook into first dc of the 5, pull loop through to make popcorn) sl st to secure popcorn* rep around placing popcorn every 3rd stitch (approx 20 popcorns)
Info :
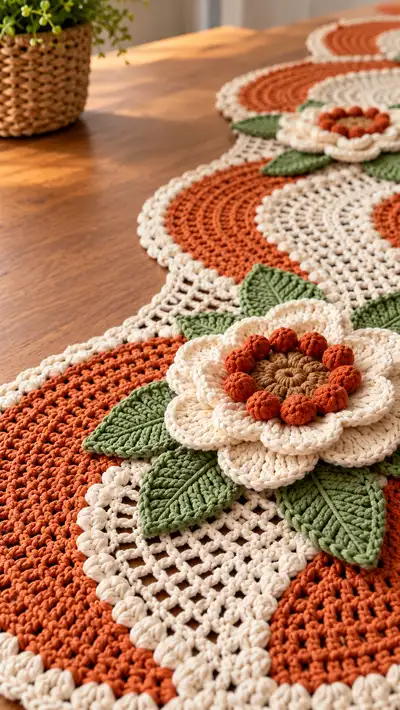
Popcorns create the raised bead edge visible in photos. Keep popcorns uniform by maintaining yarn tension and using the same number of dc per popcorn. Block after finishing to open and flatten shells.
— Center Flower Base (Make 3 per motif) :
Round 1 :
Using brown: 6 sc in magic ring (6)
Round 3 :
(1 sc, inc) x 6 (18)
Round 4 :
1 sc in each st (18)
Info :
This small brown disk will sit beneath the bobble ring. Keep it slightly domed by stuffing lightly with a scrap of yarn if you prefer a raised center.
— Bobble Ring (Rust bobbles around center) :
Round 1 :
Join rust to any st on brown disk, ch 1, sc around in same round, total 18 sc
Round 2 :
*Puff stitch in next st (yarn over, insert hook, pull up loop 3 times, yarn over and draw through all loops), sl st in next st* repeat around to create 9 puff/bobbles (work 9 puffs, 9 sl st anchoring spaces)
Round 3 :
Fasten off bobbles leaving long tail for sewing onto flower petals. Weave bobble anchors to keep ring stable.
Info :
Puff stitch method: pull loops to equal height and finish with a secure yarn over to ensure bobbles are tightly closed. Keep bobbles consistent in size by using same number of pulls.
— Flower Petal Layer 1 (Inner Petals, Make 3 sets) :
Round 1 :
With cream, ch 2, work 18 hdc around brown disk through brown round 4 (or join to a round 4 usable loop) to create a base ring (18 hdc)
Round 2 :
*In next st: ch 3, sc in same st to form a small petal base* rep around for 18 small petals
Round 3 :
Working behind Row 2 petals, sc across petal bases to anchor, then fasten off leaving long tail for joining layered petal 2
Info :
These inner petals are small and sit beneath the larger outer petals. Pin them in place when assembling to ensure even spacing between petals and the bobble ring.
— Flower Petal Layer 2 (Outer Petals, Make 3 sets) :
Round 1 :
Join cream to base behind inner petals. Ch 2, work 18 hdc across anchoring points to form outer petal base (18 hdc)
Round 2 :
*In next st: ch 5, sl st in same st to form elongated petal loop* repeat 18 times (18 loops)
Round 3 :
Working into each loop: (sc, hdc, 3 dc, hdc, sc) in each loop to form rounded petals; fasten off and weave ends
Info :
Use a yarn needle to shape petals while moist or after a gentle steam to make them lie flat and even. Pin petals while gluing or sewing layers together.
— Flower Assembly :
Info :
Layer sequence: brown disk (center) -> rust bobble ring sewn around brown -> inner cream petals -> outer cream petals. Pin all pieces centered and sew through the center of each layer with a length of matching yarn to secure layers neatly. Knot and weave ends on the underside.
— Leaves (Make 6 leaves per flower; 18 leaves total) :
Round 1 :
With green, ch 11, sc in 2nd ch from hook, hdc in next, dc in next 3, hdc in next, sc in next 3, sl st in last ch to form one side of leaf (9 sts worked)
Round 2 :
Rotate and work down opposite side: sc in next 3 ch, hdc in next, dc in next 3, hdc in next, sc in last; sl st to join at base. Fasten off (approx 18 sts total)
Round 3 :
Refine leaf shape: join green at base, ch 1, *fpdc around center spine to create raised vein: work fpdc across middle 5 sts, sc around remaining edges* repeat one pass to create texture; fasten off and weave ends
Info :
Leaves are worked flat and slightly cupped. Work front post/half double crochet down the center of each leaf to mimic the vein. Make all leaves consistent in size and mirror pairs for a balanced look when arranging under flowers.
— Full Flower Unit Complete (per motif) :
Info :
Each flower unit comprises the brown center, rust bobble ring, two layers of cream petals, and 6 leaves. Once assembled, the finished flower should measure approximately 12-13 cm across. Make 3 identical units for 3 motifs.
— Motif Join and Intermediate Mesh Connectors (link motifs into runner) :
Info :
Motifs are connected by wide cream mesh S-curves between outer edges. We will create trimmed mesh panels that span from scallop edge of motif A to motif B and stitch them together to form a continuous runner. Work two connectors per gap to keep the balance symmetrical (one on each side of the S centre).
Connector Row 1 :
With cream, join at a scallop valley of motif A with sl st, ch 1, sc evenly across 12 sts to form the first anchor (12 sc)
Connector Row 2 :
Ch 4, turn, sl st into base to create open loop, *ch 4, sl st into next anchor* repeat to create ladder fillet linking to the next motif's anchor (approx 12 loops)
Info :
Adjust the number of ch loops to control mesh openness. Keep both connectors identical so motifs sit evenly spaced. Pin across the table to check spacing before final joining.
— Runner Continuous Outer Border (work after all motifs are joined) :
Round 1 :
With cream, join at any junction seam, ch 1, sc around entire runner edge, placing 2 sc where seams join and spreading evenly across straight edges (total stitch count will vary by join; aim for even spacing)
Round 2 :
Ch 2, hdc in same st, *sk 1 st, 5 dc shell in next st, sk 1 st, hdc in next st* rep around forming shells across curved edges and simple hdc on straight mesh edges
Round 3 :
Ch 1, sc in each st to tidy shell tops and mesh join lines
Round 4 :
Popcorn scallop row: *sc in next st, ch 1, make popcorn (5 dc cluster closed as popcorn) in next st, sl st to secure* rep around placing popcorns at even intervals (aim 50-60 popcorns around full runner)
Info :
This prominent popcorn edge gives the runner the beaded look along the border. If your yarn is thicker, reduce the number of dc per popcorn to 3 to control bulk. Block the runner after completing the border for an even scalloped finish.
— Final Finishing Touches :
Info :
Sew each assembled flower unit onto the center of each motif. Position the flowers so their outer petals overlap slightly onto the terracotta field and sit centered along the motif's long axis. Use invisible whip stitch around the petal base; avoid stitching through puff/bobble fronts to maintain texture.
Info :
Weave in all tails on WS. Steam-block or pin-block the runner to final dimensions using pins and light steam. For a crisper finish, use spray starch sparingly and reshape scallops while damp.
Info :
Optional: add a small piece of craft felt under flower centers (cut to size) and tack with running stitch to protect table surfaces from any pointy stitchwork beneath the flower. This also helps the flowers sit flatter on the runner.
Completing this Autumn Bloom table runner brings a lovely sense of accomplishment—the rich terracotta and cream play beautifully together while the layered flowers add delightful texture. Each scallop and bobble is a small triumph, and the finished runner makes a warm centerpiece for any table. I hope you enjoy the process as much as the finished piece! 🧶🍂✨