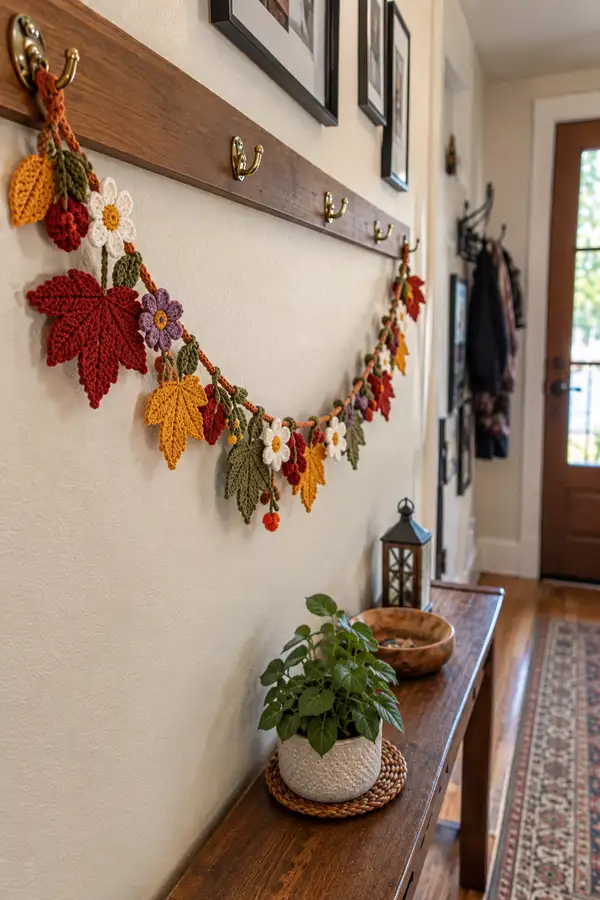
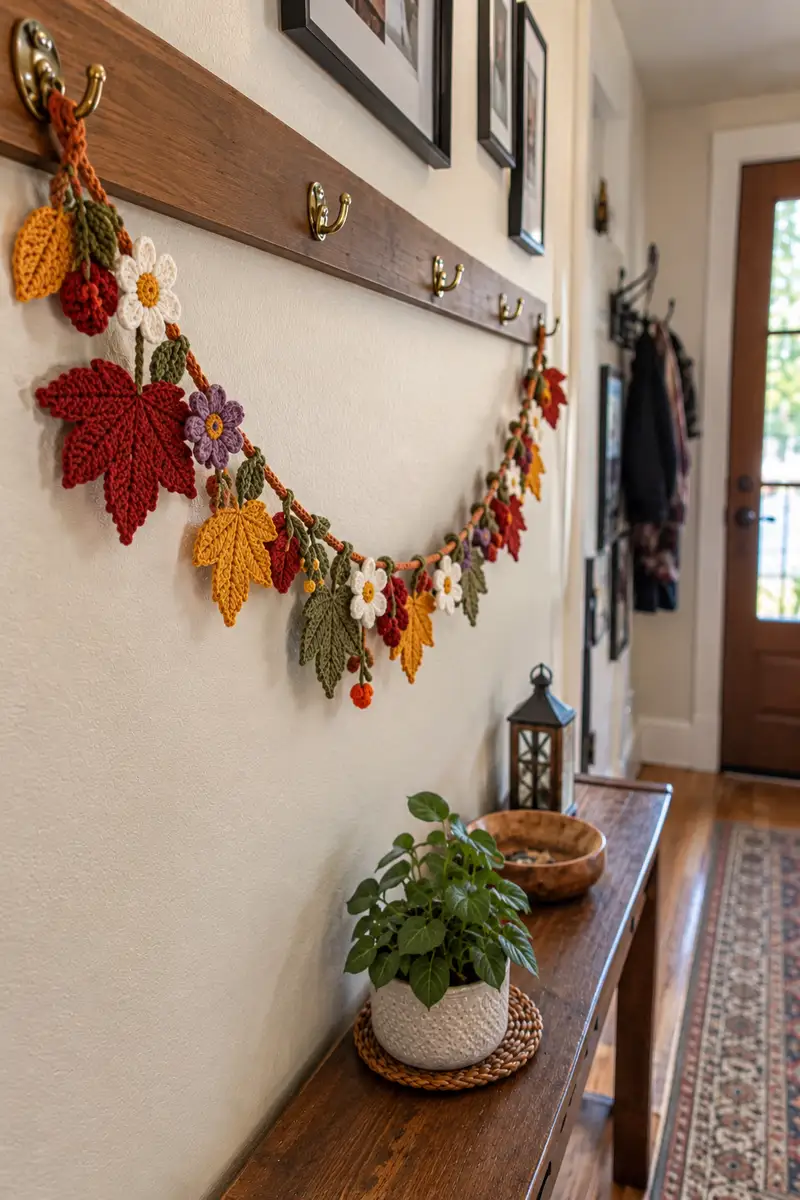
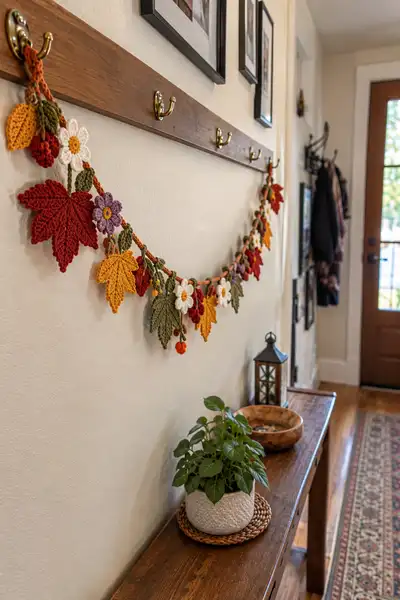
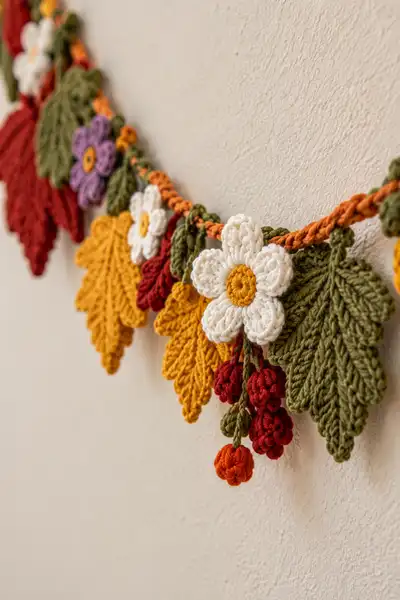
Celebrate the colors of fall with this freeform Autumn Table Runner featuring layered maple and serrated leaves, daisy-style wildflowers, and tiny berry clusters. Worked in worsted-weight cotton for crisp stitch definition, the garland is lightweight and easy to drape across a mantel, table, or entryway. The pattern includes step-by-step motifs and an assembled twisted cord with hanging loops — perfect for seasonal decor or gifting.
Progress Tracker
0% Complete
— Notes :
Info :
This pattern is modular: make the exact number of motifs you need for your space. Sample shown uses 9 large/medium leaves, 6 smaller leaves, 5 daisies, 3 purple flowers and 7 berry clusters strung along a twisted cord approx 6.5 ft (2 m) long. Work motifs tightly for crisp edges; use finer hook for small details if desired. All stitch counts shown are for one motif unless noted.
— Large Maple Leaf (Make 3) :
Round 1 :
Start with ch 6, join with sl st to form a small loop. Ch 1, 6 sc into loop (6)
Round 2 :
Ch 1, inc in each st around (12)
Round 3 :
Ch 1, (1 sc, inc) x 6 (18)
Round 4 :
Ch 1, (2 sc, inc) x 6 (24)
Round 5 :
Ch 1, (3 sc, inc) x 6 (30)
Info :
Switch to a slightly larger hook for Round 6 if you want softer edges, otherwise continue with working hook. The first 5 rounds form a small oval center that helps anchor leaf ribs.
Round 6 :
Ch 1, (4 sc, inc) x 6 (36)
Round 7 :
Ch 1, 1 sc in each st around (36)
Round 8 :
Ch 1, (4 sc, dec) x 6 (30) — begin shaping upward into leaf tip
Round 9 :
Ch 1, (3 sc, dec) x 6 (24)
Info :
Prepare to form leaf lobes. We'll work directional ribs by making short rows on alternating sides — place a stitch marker at the center top stitch to orient the tip later.
Round 10 :
Ch 1, (2 sc, dec) x 6 (18)
Round 11 :
Ch 1, (1 sc, dec) x 6 (12)
Round 12 :
Ch 1, dec x 6 (6) — form a point for top tip
Info :
We will now build the leaf by working out from the center and creating lobes. Do not fasten off; continue along one side only for lobe shaping.
Round 13 :
Do not join. Ch 1, 1 sc in first 3 sts, hdc, dc, tr, dc, hdc, 1 sc in next 3 sts — work down one side creating a lobe extension; leave remaining sts unworked (count of stitches now along worked edge = 9 functional edge stitches)
Round 14 :
Turn and work back along the same side into the opposite loops only: sl st into next st, (sc, hdc, dc) in the apex stitch, hdc in next, sc in next 3 — create a neat ridge (9)
Round 15 :
Return to the center and slip to the unworked side base, repeat Round 13 mirrored on the opposite side (9)
Round 16 :
Work mirrored return as in Round 14 to close the base of the lobes and rejoin to center round with sl st. You should now have two lobes extending from the tip and a central top point.
Info :
We will carve the classic maple serrations by working a series of small picot/cluster points along each lobe edge. Keep tension even. Count your picot points: sample uses 5 serrations per lobe.
Round 17 :
Along the outer edge of one lobe: *(sc, ch 3, sl st in same st) picot; skip 2 sts; rep from * across lobe edge — create serrated points (approx 5 picots)
Round 18 :
Repeat picot serrations on the opposite lobe. Fasten off leaving a 20 cm (8 in) tail for sewing and shaping. Weave tail through base stitches to close and shape leaf tip.
Info :
Block the leaf lightly by pinning to shape and using a steam iron held above the cotton fabric (do not press directly). This opens the ribs and flattens the serrations for a crisp maple leaf effect.
— Medium Serrated Leaf (Make 4) :
Round 1 :
mr, 6 sc in mr (6)
Round 2 :
Inc in each st around (12)
Round 3 :
(1 sc, inc) x 6 (18)
Round 4 :
(2 sc, inc) x 6 (24)
Round 5 :
1 sc in each st around (24)
Info :
This leaf will be elongated with a center vein. We'll work spikes along one side, then mirror on the other. Change to BLO for the next round if you want a visible ridge in the center.
Round 6 :
Work FLO across one half (12 sts) to create a raised center: 1 sc in each of the first 12 sts FLO, leave remaining sts unchanged (12)
Round 7 :
Turn and work along one edge: ch 1, sc in next 6 sts, (ch 3, sl st in same st) picot; repeat to create 4 picots along edge then sl st to join back to center; do not fasten off
Round 8 :
Mirror round 7 on the opposite edge to create symmetrical serrations. Fasten off leaving long tail for sewing (approx 25 cm)
Info :
Use surface slip stitch veins: with same color, run a yarn needle with slip stitches from base to tip along center to enhance vein definition if desired.
— Elongated Olive Leaf (Make 6) :
Round 1 :
Ch 10, sl st to join into ring (10)
Round 2 :
Ch 1, 1 sc in each ch around (10) — counts are working continuous spiral
Round 3 :
(1 sc, inc) x 5 (15)
Round 4 :
1 sc in each st around (15)
Round 5 :
(2 sc, inc) x 5 (20)
Round 6 :
1 sc in each st around (20)
Info :
Now we will shape the leaf tip and then work back down the opposite side to create a symmetrical shape from a single foundation chain. Keep rounds unjoined and treat as a long oval.
Round 7 :
Sc in next 10 sts, dec across next 2 sts, dec across next 2 sts, sc in final 6 (16)
Round 8 :
Sc in each st (16)
Round 9 :
(2 sc, dec) x 4 (12)
Round 10 :
(1 sc, dec) x 4 (8)
Round 11 :
Sc in each st (8)
Round 12 :
Picot edging: *(sc, ch2, sl st) across the outermost 6 sts to form slight serration on one side; fasten off and mirror picot on opposite side by making identical piece and working a slip-stitch seam to join if needed.
Info :
These elongated leaves look best if blocked flat and pressed down the center with a steam iron to emphasize the length; press from the back and use a damp cloth if desired on cotton yarn.
— Daisy Flower (Make 5) :
Round 1 :
mr, 6 sc in mr, pull tight (6)
Round 2 :
Ch 1, inc in each st around (12)
Round 3 :
Ch 1, (1 sc, inc) x 6 (18)
Round 4 :
Change to petal color (white). Info : Change to white yarn now. Fasten off center color leaving a 12 cm tail to sew through leaves if layering.
Round 5 :
Make petals: *ch 3, (3 dc, ch 2, 3 dc) into next st, sl st into next st; rep from * around to make 6 petals; after last petal sl st to base (6 petals)
Round 6 :
Return with lower loop reinforcement: Working into base behind petals, 1 sc into each base stitch around to secure petals (18)
Info :
For a rounded petal shape, slightly block petals by pinning them into a petal shape and lightly steam. Finish center with a small embroidered or crocheted disc in golden yellow.
Round 7 :
Using golden yellow, mr, 6 sc into mr, pull tight and sew to center of petals. Fasten off leaving long tail for sewing (6)
Round 8 :
Sew the yellow disc to the center of the petal assembly, tidy ends, and weave through the back of the flower for a flat finish.
— 6-Petal Purple Flower (Make 2) :
Round 2 :
Inc in each st (12)
Round 3 :
(1 sc, inc) x 6 (18)
Round 4 :
Change color to purple for petals. Info : This flower uses a denser petal construction for a slightly pouffed look.
Round 5 :
*Ch 4, in same st work (2 tr, 1 dc, 2 tr), sl st in next st; rep from * around to make 6 tall, slightly textured petals. Fasten off and sew in ends.
Round 6 :
Weave a small contrast center: with yellow or orange yarn, embroider a small round swirl into the center and secure firmly on the back.
Info :
Stacking flowers layered over a leaf gives a natural wildflower look — sew flower onto leaf with running stitches and a few securing backstitches to keep it centered.
— Berry Cluster (Make 7 clusters; each cluster contains 3-6 berries) :
Round 1 :
mr, 6 sc in mr, pull tight (6) — this forms one berry
Round 2 :
1 sc in each st around (6) — fasten off leaving 8-12 cm tail for assembly
Round 3 :
Make 3-6 of these small berries per cluster. Info : Stuff minimally with a small scrap of fiberfill or leave unstuffed for a flatter berry. Cotton yarn will hold a rounded shape with very light stuffing.
Round 4 :
To make a hanging increase cord for cluster: ch 20, sl st to first berry base; attach 3 berries at staggered points along this chain by sewing through berry tail and chain stitch. Make additional small buds (ch 8 with single berry at end) for varied length. Fasten off.
Info :
Color choices in sample: deep red berries and one orange accent berry per cluster. Arrange berries in groups of three for a natural look and sew them to a short twisted stem (see cord section).
— Tiny Pumpkin Bud (Make 3) :
Round 1 :
mr, 8 sc in mr, pull tight (8)
Round 2 :
(1 sc, inc) x 4 (12)
Round 3 :
1 sc in each st around (12)
Round 4 :
Using needle and yarn tail, draw up center to create a slightly segmented pumpkin shape and wrap with leftover yarn to form a stem loop; fasten off leaving a tail to sew.
Info :
These tiny pumpkin buds are optional accent details that add a playful pop of orange on the runner. Make them small and sparingly, they work best near clusters of leaves.
— Twisted Cord Runner (Make 1, approx length to suit) :
Round 1 :
Decide desired finished length (sample uses ~2 m / 6.5 ft). Cut three long strands of your main cord color(s) each about triple the desired finished length to allow twisting.
Round 2 :
Join the three strands together with an overhand knot approx 15 cm from one end to create a tassel starter point, then braid tightly for 10 cm and switch to twisting method described below.
Round 3 :
Twist method: anchor one end and twist all three combined strands tightly in the same direction until they kink; then fold in half allowing them to twist around each other naturally into a rope. Knot both ends to secure.
Info :
Alternatively, you can crochet a chain or rope: ch to desired length and then sc back along chain in BLO to create a dense rope. Both methods give a sturdy base for sewing motifs.
Round 4 :
To add hanging loops: at each end, ch 10, join with sl st to cord base to create small loop for hanging. Make two loops near each end and secure with extra wrapping for reinforcement.
Round 5 :
Spacing marks: use safety pins or contrasting yarn to mark where each motif will attach along the cord. Sample spacing: large leaves every 20-24 cm, medium leaves alternating at 12 cm spacing, flowers clustered midpoints between leaves.
Info :
Be mindful of balance: heavier motifs (multiple layered leaves + flower + berries) should be alternated with lighter pieces to avoid sagging in one section of the garland.
— Leaf Vein Surface Stitching (Optional Decorative Step) :
Round 1 :
Thread yarn needle with contrasting or same-color yarn; insert at leaf base (back side) and come through to center front.
Round 2 :
Make a series of surface slip stitches or chain-stitched veins: sl st forward along centerline in evenly spaced gaps to tip; secure and weave tail at back. Repeat on each leaf lobe to create natural veins.
Info :
BLO or FLO can be used during motif construction to create a raised ridge already — surface stitching is a finishing option for extra definition and does not alter stitch counts shown earlier.
— Assembly & Layering (Attach motifs to cord) :
Round 1 :
Lay out cord and pinned spacing. Arrange motifs in planned order on a flat surface: large maple leaf, olive leaf, small serrated leaf, daisy, berry cluster, repeat. Info : Rearrange until you like the balance visually.
Round 2 :
Sew motifs to cord: for each leaf or flower, fold the top base edge over the cord and use matching yarn and whip stitch to secure through base stitches to cord. Use 6-10 securing stitches across base for large motifs for stability.
Round 3 :
Layer smaller motifs: sew daisies onto leaf fronts first, then attach layered leaf behind with two or three small back stitches to secure both in position. Info : Use long tails and a yarn needle to pass through multiple layers; don't knot on front surface.
Round 4 :
Attach berry cluster stems by folding the short chain stem around the cord and sewing the tail through cord base. For hanging berry clusters, leave them free to dangle 3-7 cm below the cord according to photo sample.
Round 5 :
Secure heavier motifs with a second pass of stitches and an anchoring knot hidden under the motif. Info : If your cord is braided and bulky, take smaller stab stitches to avoid visibility of thread between cord plies.
Round 6 :
Trim tails and weave in all loose ends thoroughly on the backside of the garland. Optionally add a dab of fabric glue on inside knots for extra security.
Round 7 :
Optional edging: For a decorative finished look along the cord, work small spaced picot loops (ch 3, sl st to cord every 3-5 cm) to create tiny hanging points for additional ornaments.
Info :
Hang the garland and step back — redistribute motifs if the balance looks off, and adjust by sliding some attachment points (if sewn on with long tails you can reposition slightly by unpicking a couple of stitches).
— Finishing Touches & Care :
Round 1 :
Press or lightly steam motifs into final position if cotton yarn is used — place a cloth between iron and motifs and do not press hard. This helps settle shapes and flatten petals and leaves without crushing texture.
Round 2 :
To store, remove from wall and wrap loosely in tissue to prevent flattening. Spot clean with a damp cloth or handwash gently; reshape flat to dry.
Info :
For seasonal long-term use, store flat in a box with acid-free tissue and avoid hanging heavy objects from the garland to preserve the cord and stitches.
Completing this Wildflower and Maple garland is such a satisfying, cozy project — every leaf and flower builds up seasonal character. The layered textures and autumn palette create a welcoming vignette perfect for mantels, hallways, or doorways. Take pride in the little details: sewn petals, dangling berries, and crisp leaf veins. Enjoy the warmth this handmade runner brings to your home! 🍁🧶