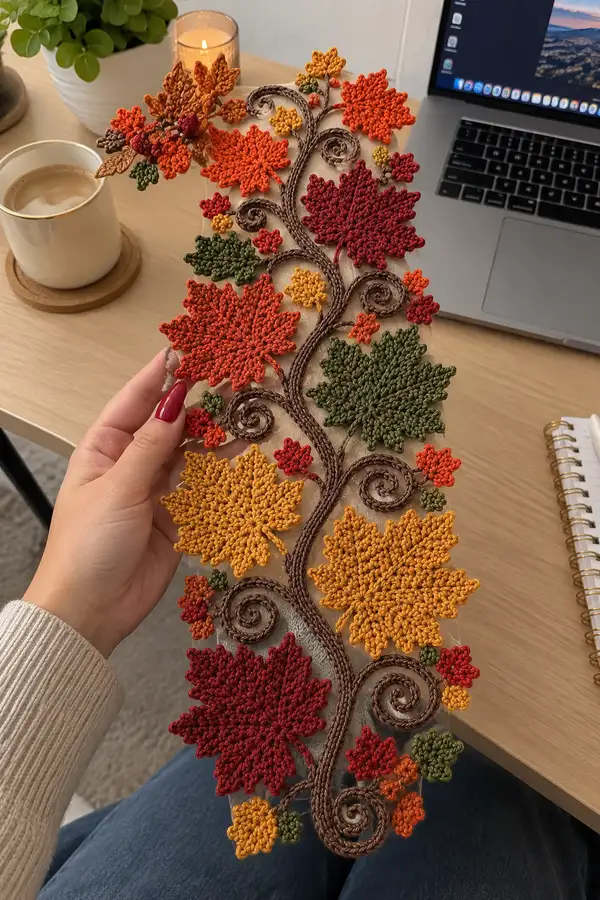
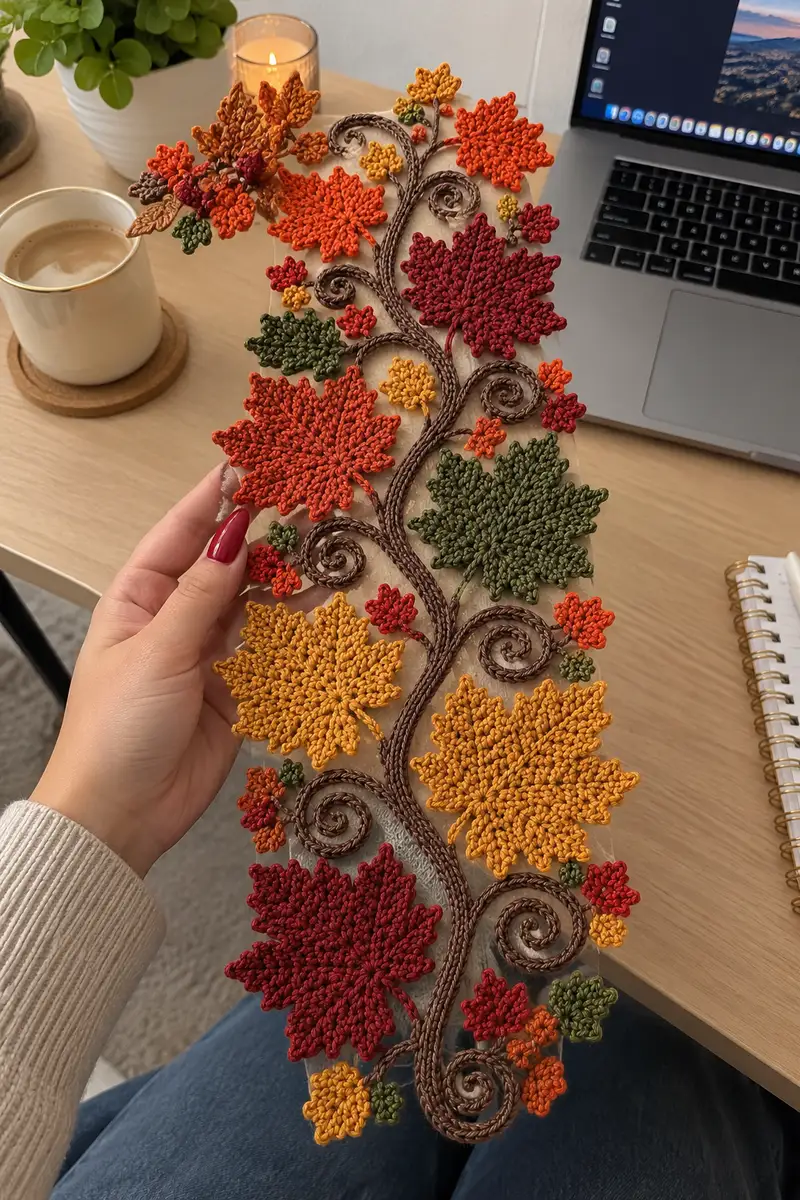
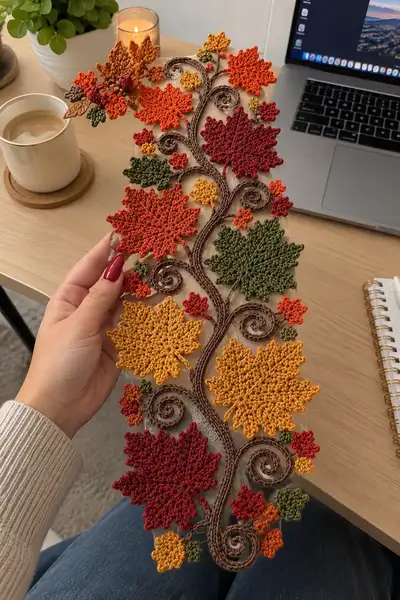
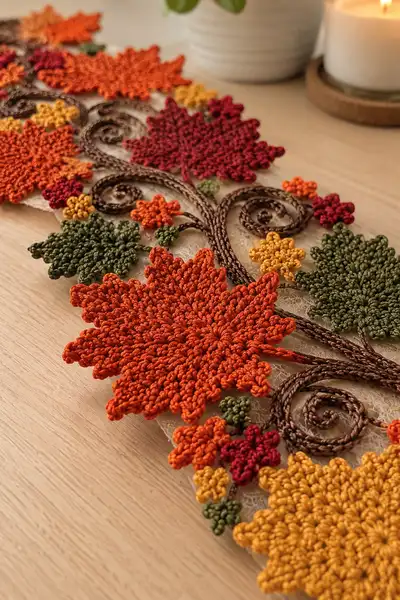
Create a stunning autumnal applique panel inspired by hand-crafted maple leaves and swirling vines. This pattern includes large textured maple leaves, medium leaves, tiny clustered leaves, delicate floral buds and a braided vine with spiral coils that attach together to form a decorative table runner or wall panel. Rich fall colors and crisp lace-like stitch definition make this piece a beautiful seasonal accent for home decor or gifts.
Progress Tracker
0% Complete
— Large Maple Leaf (Make 4–6 in assorted colors) :
Round 1 :
Make a magic ring (mr). Ch1, work 12 sc into mr. Pull ring closed. Join with sl st to first sc. (12)
Round 2 :
Ch1. (1 sc, inc) x6 around. Join. (18)
Round 3 :
Ch1. (2 sc, inc) x6 around. Join. (24)
Round 4 :
Ch1. (3 sc, inc) x6 around. Join. (30)
Info :
These first increasing rounds create the compact center that will anchor twelve leaf points. Keep tension even and use stitch marker at round start. If your leaves become domed, use a slightly larger hook for next rounds or block flat later.
Round 5 :
Ch1. 1 sc in each st around. Join. (30)
Round 6 :
Ch3 (counts as 1 dc), *ch2, skip 2 sts, dc in next st; rep from * around to create 12 ch-2 loops. You will create 12 spaces/loops overall. Join with sl st to top of starting ch3. (12 loops)
Info :
Round 6 establishes 12 point bases. Each loop becomes a pointed lobe - work each lobe in sequence from this round outward. Mark the first loop so you don’t lose track.
Round 7 :
Working into each ch-2 loop as you go: (in each loop) *(1 sc, 1 hdc, 3 dc, 1 hdc, 1 sc) in loop; sl st into next base st to secure*; rep around through all 12 loops. (Each lobe formed; total stitch count across round varies by stitch height but treat as 12 lobes.)
Round 8 :
Rotate to work behind point bases: Ch1, sc evenly around connecting the lobes (approximately 72 sc; aim for 6 sc per lobe), placing 1 sc in each dc and hdc for a neat edge. Join. (approx.72)
Round 9 :
Ch1. Work 12 leaf tip rounds: *Work a picot tip: (ch3, sl st in 3rd ch) at the top central dc of each lobe; then 4 sc down the side of the lobe to the base; sl st to the next joining st*. Repeat across all 12 lobes. This defines serrated tips. (approx. 96 total small stitches)
Info :
Work picots tightly so they create a pointed maple-tooth. If you prefer softer tips, substitute a ch2 and sl st small loop instead. Keep counts per lobe consistent for uniform points.
Round 10 :
Ch1. On the reverse (back) side, sc evenly around the entire leaf to build stability. Work approx. 1 sc in each previous sc and 1 sc in each picot base. Join. (approx. 120)
Round 11 :
Ch1. Work a decorative vein ridge: *1 sc in next 3 sts, sl st in FLO across 2 sts to create a raised line, rep across each major segment (12 segments)*. Join. (count is same as previous round)
Round 12 :
Ch1. Edge: *sc 2, picot, sc 2* across each lobe edge to accent serration. Fasten off leaving 20–25cm tail for sewing or anchoring to vine. Weave in short end on back. (approx.120)
Info :
Block each large leaf flat immediately after finishing: pin to blocking mat and mist with water, shaping points carefully. Allow to dry completely to ensure crisp definition before assembly.
— Large Maple Leaf (Variant B, slightly fuller) :
Round 1 :
mr. Ch1, 12 sc in mr. (12)
Round 2 :
Ch1. (1 sc, inc) x6. Join. (18)
Round 3 :
Ch1. (2 sc, inc) x6. Join. (24)
Round 4 :
Ch1. (3 sc, inc) x6. Join. (30)
Round 5 :
Ch1. (4 sc, inc) x6. Join. (36)
Info :
Variant B uses an extra increasing round for a broader center so the points sit slightly further out. Use this for the biggest leaves on your runner.
Round 6 :
Ch3, *sk next st, dc in next 2 sts, ch2, sl st to base to create 12 larger loops*. Join. (12 loops)
Round 7 :
In each loop: (1 sc, 2 hdc, 5 dc, 2 hdc, 1 sc). Join. (approx. 144 total shape sts)
Round 8 :
Ch1. Sc around entire shape evenly (approx. 144 sc). Join. (144)
Round 9 :
Work serrated edging: *sc 3, picot, sc 3* along each lobe tip and side. Join. Fasten off leaving a 30cm tail for attachment. (approx. 160)
Info :
Variant B creates fuller lobes for a bold centerpiece leaf. Attach with longer tails for decorative overlap on vine arms.
— Medium Maple Leaf (Make 6–8) :
Round 1 :
mr. Ch1, work 8 sc in mr. (8)
Round 2 :
Ch1. (1 sc, inc) x4. Join. (12)
Round 3 :
Ch1. (2 sc, inc) x4. Join. (16)
Round 4 :
Ch1. (3 sc, inc) x4. Join. (20)
Round 5 :
Ch3, *ch2, dc in next st* repeat to make 8 small loops for lobes. Join. (8 loops)
Round 6 :
In each loop: (1 sc, 1 hdc, 3 dc, 1 hdc, 1 sc). Join. (approx. 64 undefined stitches across lobes)
Round 7 :
Sc evenly around edge (~80 sc). Join. Fasten off leaving 15–20cm tail. Block flat. (approx.80)
Info :
Medium leaves are faster but should align with the larger leaves when placed on the vine to create balanced clusters.
— Small Cluster Leaves (Make many, assorted) :
Round 1 :
mr. Ch1, 6 sc in mr. (6)
Round 2 :
Ch1. (1 sc, inc) x3. Join. (9)
Round 3 :
Ch1. In each stitch make a tiny cluster: (sc, hdc, dc) then sl st to next st to create small lobed cluster; repeat 9 times. Join. Fasten off leaving short tail 8–12cm for sewing. (approx. 27 cluster stitches)
Info :
These tiny clusters are used as accent buds between leaves. Work in contrasting colors (gold, burgundy, moss) for pops of color.
— Tiny Five-Petal Flowers / Buds (Make 10–20) :
Round 1 :
mr. Ch1, 5 sc in mr, pull closed. (5)
Round 2 :
*Ch3, sl st in next st* repeat 5 times to form five tiny petals. Fasten off leaving tail. (5 petals)
Info :
Use these as filler elements; stitch to vine between leaf attachments or cluster them at branch tips.
— Braided Vine Cord (Make 2 long cords for the main vine) :
Round 1 :
Using brown yarn, chain a length to desired vine length + 10cm (example: ch 200 for a 60cm runner; adjust to your layout). Do not join; leave chain straight. (chain length variable)
Round 2 :
Turn. Working into 2nd ch from hook, sc in each chain across. Fasten off leaving long tails. This creates a flat cord. (same number as chain)
Round 3 :
Make three identical cords. Braid or twist them together for a thicker vine: place cords parallel and braid loosely for organic look. Secure ends with a knot and tidy with wrapping yarn. (cord assembly)
Info :
If you prefer a tubular cord, work a crocheted i-cord or a chain covered with sc in round. For a more decorative rope, work chain, then one round of sc along chain loop pulling firm for a braided appearance.
Round 4 :
To make spiral coils: wind braided vine into desired coils and stitch through the coil with matching yarn at several points with wide, invisible stitches to keep shape. For decorative raised coil, make an extra thin cord and stitch on top in a spiral.
Info :
Optional: slide thin craft wire into one or two of the cords before braiding for poseable rigid coils; fold wire ends back and cover with yarn to avoid poking.
— Decorative Spiral (worked as overlay) :
Round 1 :
Make a spiral by chaining 30 (or desired coil length), then working sl st back along chain and coiling while stitching to itself. For a sturdier coil, chain 40 and sc in each ch back, coiling as you go to make 1-2 tight spirals. Fasten off leaving long tail to tack to vine. (chain dependent)
Round 2 :
Attach spiral to braided vine at desired positions by sewing through the coil at 6–8 anchor points. Hide ends under the coil or weave into braid. (attachment)
Info :
Vary coil diameters by changing chain lengths — smaller coils look delicate, larger coils look graphic. Place coils asymmetrically for a natural look.
— Leaf Vein Embroidery (Optional, on each leaf) :
Round 1 :
Thread yarn needle with contrasting slightly darker color. Starting at leaf base, bring needle up through back to front, then insert at leaf tip and return, creating a surface running stitch; repeat to create 3–5 veins per leaf by splitting lobes symmetrically. Secure ends on back. (no formal stitches)
Info :
Use a matching color for subtle veins or a darker shade for visible texture. Work thin single strand for delicate lines; use two plies for heavier definition.
— Edge Finishing & Lace Backing (Optional) :
Round 1 :
Cut a rectangle of lightweight felt or soluble fabric to desired runner size. Pin motifs in place with spacing seen in photos, roughly 2–3 cm overlap between leaves for flowing composition.
Round 2 :
Sew each motif to backing with small whipstitches using tails left from motifs. Use matching yarn color for invisible joins. Leave some motifs unattached at tips if you want a free-floating shadow effect. (assembly prep)
Info :
If you use soluble fabric backing, sew motifs through the fabric, then dissolve backing in warm water per manufacturer instructions, leaving motifs connected where you stitched. This creates a floating lace effect.
— Attaching Leaves to Vine (Step-by-step) :
Round 1 :
Plan layout: place braided vine on table and arrange large leaves alternating sides, medium leaves and small clusters filling gaps. Pin each motif in place with rust-proof pins or sewing pins. Aim for 3–4 large leaves per 60cm section depending on desired density.
Round 2 :
Using long tail left on each leaf, sew leaf base to vine with ladder stitch through braid core for invisible join. Make 6–8 secure stitches and then pass needle through vine and leaf again to lock. Knot on underside and weave tail along braid. Repeat for all motifs.
Info :
Position small clusters between main leaves and tack them down with 2–3 stitches each. For a layered look, slightly overlap leaves and tack only at bases so tips lift. This adds dimension and shadow play.
— Finishing Touches and Securement :
Round 1 :
Go over entire runner and secure any loose motifs with a few extra stitches. Ensure coils are sewn at 4–6 anchor points so they won’t unwind. Tuck tails and weave them under the braid or into adjacent motifs.
Round 2 :
Lightly steam-block the assembled runner on low steam from the back to set shapes (do not press coils directly). Allow to cool and dry flat. Trim any visible ends.
Info :
Consider adding a few hand-sewn seed beads or small wooden beads at cluster centers for extra texture and weight that helps the runner drape nicely.
— Optional Variations & Extra Motifs :
Round 1 :
Create small acorns: ch6, sc back along chain, add brown cap with 6 sc in mr, sew together. Use as tiny accents. Make 6–10.
Round 2 :
Create elongated leaf: ch10, sc down chain, work shell tip of (1 sc, 1 hdc, 3 dc, 1 hdc, 1 sc) across last ch, sc back along base, join. Fasten off. Make clusters to add variety.
Info :
Mixing leaf shapes makes the arrangement more organic. Use deeper reds and browns for focal leaves and mustard/green for filler shapes.
— Color & Blocking Notes :
Round 1 :
Work each color in full motif runs for tonal consistency; switch to contrasting colors for accent clusters. Carry yarn behind motifs if working two-color motifs to avoid many ends; secure floats at back with small stitches.
Round 2 :
Block each motif flat: pin points and edges taut, mist lightly and leave to dry for at least 12 hours. Proper blocking changes a homemade look to a professional look and reduces curling of lobes.
Info :
For mercerized cotton, a light steam will set stitches and add a subtle sheen. For acrylic or cotton blends, use wet-blocking and stretch into shape gently.
— Troubleshooting Common Issues :
Round 1 :
If a leaf curls, rewet and pin the edges flatter and allow to dry longer. If a motif is too rigid, use a slightly larger hook or relax by wetting and reshaping.
Round 2 :
If coil won’t hold, add a thin wire inside cord or stitch more anchor points along coil radius. If seams show, use a matching thinner yarn and mattress or ladder stitch for invisible joining.
Info :
Keep a sample motif to test blocking and tension before producing many repeats.
Completing this autumn applique is such a cozy, satisfying experience — the rich fall colors come together like a miniature forest of leaves and the swirling vine adds graceful movement. The motifs are quick to make but impactful when assembled into a runner or wall hanging. I hope stitching this project brings a little seasonal warmth to your home and lots of proud display moments. 🍁🧶