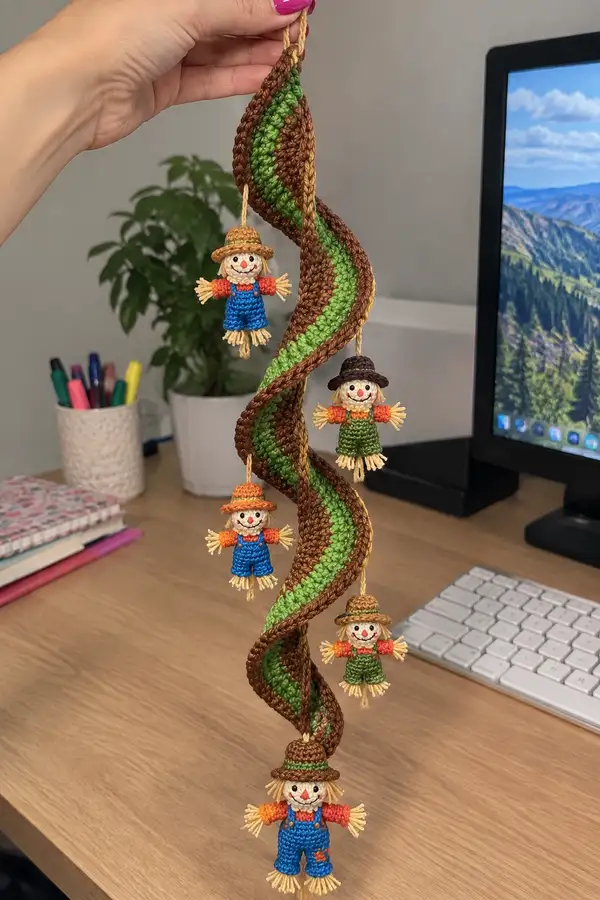
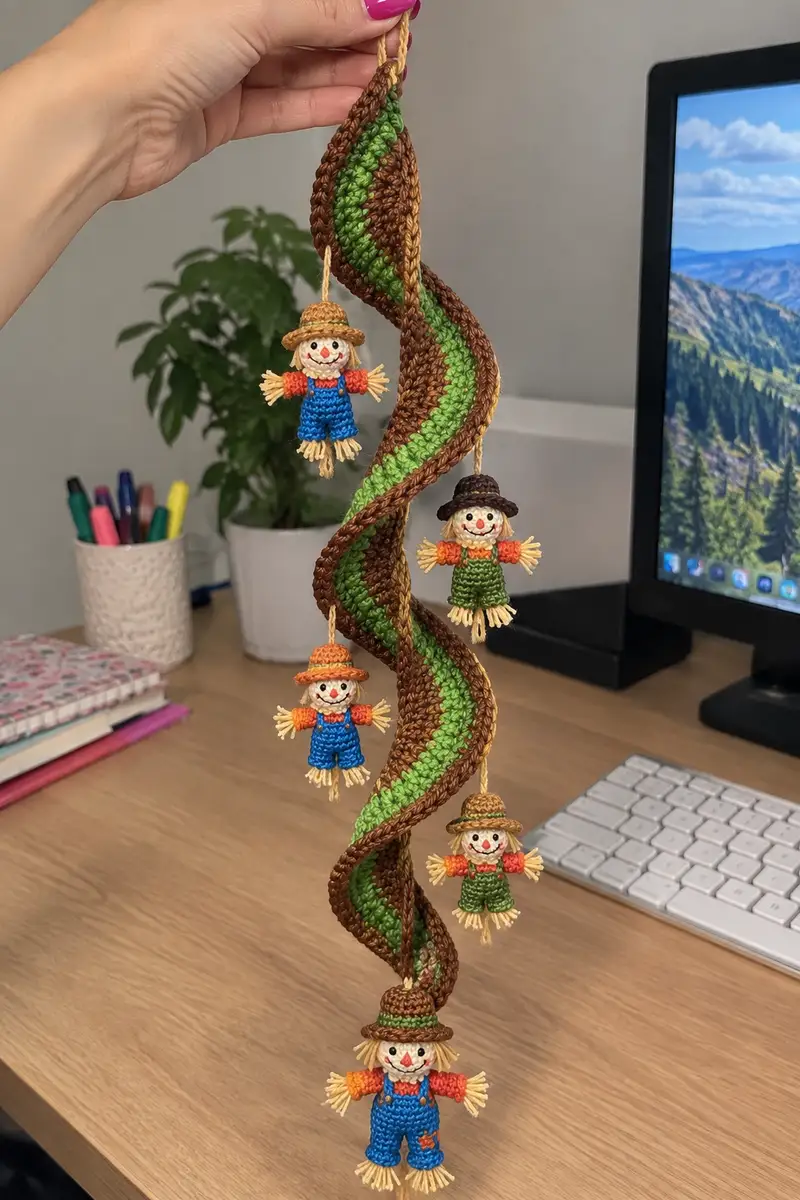
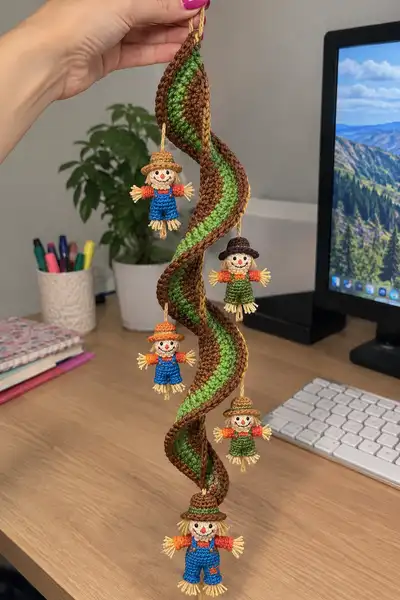
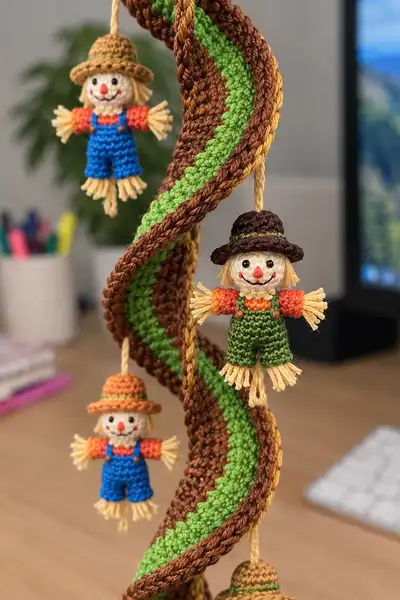
This charming hanging garland features a long spiraled vine in autumnal brown and green with four tiny, smiling scarecrow amigurumi dolls dangling along its length. Each scarecrow has a straw-like fringe, a little hat, embroidered face and a colorful overall—perfect for seasonal decor. The spiral creates a whimsical cascading effect that looks lovely in doorways, windows or as a table centerpiece.
Progress Tracker
0% Complete
— Materials & Gauge :
Info :
Gauge is not critical for amigurumi but for size reference: 22 sc x 24 rows = 10 cm in single crochet using specified yarn and 2.5mm hook. Work tightly to prevent stuffing showing through.
— Notes :
Info :
Make four identical scarecrows. For clarity rounds for each small piece are written for one unit only, followed by a note 'Make 4' where appropriate. Keep a stitch marker at the first stitch of each round. Use 4mm safety eyes or embroider eyes as preferred.
— Spiral Vine (Long Decorative Column) :
Info :
This spiral is worked as a long panel in the round to create a two-sided strip with a green center stripe and brown edges. Final length is approximately 80-90 cm before twisting; after twisting into a spiral the vertical length will be 60-70 cm. Change hook size if your yarn tension differs.
Round 1 :
Work 36 sc in a magic ring (36) - this makes the central base ring to build the strip. Tighten ring.
Round 2 :
Inc evenly 6 times around: (5 sc, inc) x 6 (42)
Round 3 :
(6 sc, inc) x 6 (48)
Round 4 :
1 sc in each st (48)
Info :
Begin center stripe color change: switch to green yarn at the beginning of Round 5. Carry brown yarn along the outside edge if you will be crocheting the edge in the same piece later, or break and rejoin color where noted.
Round 5 :
Change to green. 1 sc in each st (48)
Round 6-10 :
1 sc in each st (48) - work 5 rounds even to build the green center stripe
Info :
Technique :
To keep edges tidy work the green center in FLO on the first stitch of each round for a faint ridge where you will later attach the brown edge; this helps shape the spiral.
Round 11 :
Change to brown. 1 sc in each st (48)
Round 12-16 :
1 sc in each st (48) - build the brown outer panel so the strip gains depth (5 rounds)
Info :
If your strip feels too narrow for a dramatic spiral, do additional even rounds in brown here until width measures approximately 3-4 cm flat; each even round increases height of the column and will lengthen final spiral.
Round 17 :
Work in BLO for the next round: 1 sc in each st BLO (48) to create a sculpted ridge for twisting (48)
Round 18-30 :
1 sc in each st (48) - continue even rounds alternating brown and green stripes after every 6 rounds if you want a segmented stripe look. For the project pictured keep center green constant (Rounds 5-16) then brown outer rounds 11-30 for consistent brown edging.
Info :
At round 24 measure your strip's length. The finished spiral in the photo is long and tapers slightly at the top. You may add up to 30 additional rounds here in brown to lengthen the strip. Keep consistency across projects when making multiple garlands.
Round 31-60 :
1 sc in each st (48) - continue even rounds until your strip reaches desired pre-twist length (suggested 80-95 cm). If you prefer a slower spiral, add more rounds but maintain stitch count.
Info :
Finish the long strip by creating a stable top loop: after final round, work 6 rounds of denser edge by alternating (BLO round, regular sc round) to create a thicker rim that will hold the hanging loop securely.
Round 61 :
Work a reinforcement round: (1 sc, inc) x 24 (72) - this slightly flares the top edge to allow for attaching the hanging loop and to avoid curling too tightly at the top
Info :
Fasten off leaving a long tail for joining into a top loop or braid. Create the hanging cord by braiding three strands of yarn 30-40 cm and sew into the top rim securely with mattress stitch. Optionally add a small ring for ceiling hook.
— Scarecrow Head (Make 4) :
Info :
Use tan/cream yarn for head. Safety eyes 4mm recommended. Work tightly to avoid holes showing the stuffing. The tiny head is worked in continuous rounds; use a stitch marker.
Round 1 :
6 sc in magic ring (6)
Round 3 :
(1 sc, inc) x 6 (18)
Round 4 :
(2 sc, inc) x 6 (24)
Round 5 :
(3 sc, inc) x 6 (30)
Round 6 :
(4 sc, inc) x 6 (36)
Round 7 :
(5 sc, inc) x 6 (42)
Round 8 :
(6 sc, inc) x 6 (48)
Round 9-16 :
1 sc in each st (48) - work 8 rounds even to build head height
Info :
Place safety eyes between rounds 12 and 13 approximately 6-8 stitches apart depending on expression desired. For embroidered eyes mark placement now. Add small stitch for nose position approximately 5-6 stitches below eye line.
Round 17 :
(6 sc, dec) x 6 (42)
Round 18 :
(5 sc, dec) x 6 (36)
Round 19 :
(4 sc, dec) x 6 (30)
Info :
Begin stuffing head firmly but not overstuffed. Use small amounts of fiberfill at a time to shape cheeks and forehead. Adjust eye placement slightly if necessary before the head becomes firm.
Round 20 :
(3 sc, dec) x 6 (24)
Round 21 :
(2 sc, dec) x 6 (18)
Round 22 :
(1 sc, dec) x 6 (12)
Round 24 :
1 sc in each st (6) - pull closed slightly to shape bottom of head and leave tail for sewing (6)
Info :
Embroider mouth and cheeks now while the head is slightly open and you have access to inside for securing knots. Use red yarn for mouth stitching and pink embroidery for blush if desired. Fasten off leaving long tail to sew to body.
— Hair & Straw Fringe :
Info :
Use cream/tan raffia-style yarn or thin cream yarn to create straw-like hair and fringes on hands and feet. Cut 10-12 strands per fringe ~3.5-4 cm long for a small fringe. Fold in half and use a latch hook method through stitches to secure.
Round 1 :
Create hair by inserting hair strands around the back-top of the head; fold strands and pull loop through one stitch then pull ends through loop and tighten. Place 12-16 groups of 3-4 strands to create a full head.
Info :
Trim hair to uniform length and spread around head. For straw feet and hands attach 6-8 groups of 4 strands at each wrist and ankle finishing after you assemble arms/legs.
— Body / Torso (Make 4) :
Info :
Body is small and short; overalls are crocheted as part of the body using color change. Default body color is orange for shirt, overall color green or blue as preferred. Work torso top-down or bottom-up; below is worked from bottom-up to attach legs easily.
Round 1 :
6 sc in magic ring (6)
Round 3 :
(1 sc, inc) x 6 (18)
Round 4 :
(2 sc, inc) x 6 (24)
Round 5 :
(3 sc, inc) x 6 (30)
Round 6-8 :
1 sc in each st (30) - this forms the lower body and allows leg placement
Info :
Mark positions for legs: place markers opposite each other separated by 10 stitches if making one-piece legs, or make two leg openings by crocheting short torsos and then attaching legs later. For these tiny scarecrows we'll create two legs worked down from the torso. Mark stitches 1-6 and 16-21 for legs.
Round 9 :
Work next 6 sts (leg opening 1) in a separate chain: FO leaving tail for sewing the leg later, then continue working body in rounds across remaining stitches to create a small gap for leg 1. (See option below to create legs directly)
Info :
To keep things simple on tiny dolls we will crochet legs separately and sew them to the bottom rim. Continue the body to form torso height for straps and neck attachment.
Round 10-14 :
Change to overall color (green or blue). 1 sc in each st (30) - work 5 rounds to form overalls body (30)
Round 15 :
Switch to shirt color (orange) for armholes: 1 sc in each st (30)
Round 16-18 :
1 sc in each st (30) - continue shirt color to create a small shoulder area
Info :
Stuff body lightly before closing. The body should be firm enough to hold head but soft enough to allow sewing. Leave top opening to attach head with whip stitch. Fasten off leaving long tail for sewing the head.
Round 19 :
(3 sc, dec) x 6 (24)
Round 20 :
(2 sc, dec) x 6 (18)
Round 21 :
(1 sc, dec) x 6 (12)
Round 22 :
6 dec (6) - leave opening and fasten off with tail for attaching head (6)
— Legs (Make 8 for 4 dolls) :
Info :
Each leg is tiny; work in rounds and stuff lightly. Feet are fringed like straw or left plain depending on look. Make two legs per doll.
Round 1 :
6 sc in magic ring (6)
Round 3 :
(1 sc, inc) x 6 (18)
Round 4-6 :
1 sc in each st (18) - work 3 rounds even to form foot
Round 7 :
Change to pant color if desired (same as overalls). 1 sc in each st (18)
Round 8-12 :
1 sc in each st (18) - work 5 rounds to form lower leg/overall leg
Info :
Attach straw fringe to bottom of foot now: create 6-8 groups of cream strands tied into the bottom edge and trim evenly to resemble straw feet. Stuff lightly before closing the ankle.
Round 13 :
(1 sc, dec) x 6 (12)
Round 15 :
1 sc in each st (6) - use tail to sew leg to body bottom; fasten off (6)
Info :
Repeat for second leg and sew both legs to bottom of torso positioned as marked earlier. Make sure spacing matches other dolls for consistent look.
— Arms (Make 8 for 4 dolls) :
Info :
Arms are worked top-down or bottom-up; this pattern uses a top-down approach starting at the shoulder. Each arm ends with straw fringe hands attached with groups of yarn strands.
Round 1 :
6 sc in magic ring (6)
Round 3 :
(1 sc, inc) x 6 (18)
Round 4-6 :
1 sc in each st (18) - work 3 rounds in shirt color to form upper arm
Round 7 :
Change to skin color (tan) for hand area: 1 sc in each st (18)
Round 8 :
1 sc in each st (18)
Info :
Attach straw fringe for hands: add 6-8 groups of short cream strands around the last round of hand portion. Fold and knot or use latch hook method to secure. Trim evenly to create straw hand effect.
Round 9 :
(1 sc, dec) x 6 (12)
Round 11 :
1 sc in each st (6) - leave tail to sew arm to body at shoulder (6)
Info :
Sew arms to body on the shirt-color round near shoulder lines. For consistent placement sew arms so that they sit slightly forward for a welcoming pose — attach to body between Rounds 15-16 of torso for natural shoulder height.
— Hat (Make 4) :
Info :
Each scarecrow has a small round hat. Hats are crocheted as a small dome then brim worked in rounds. Use brown tones as shown. Make 4 hats total.
Round 1 :
6 sc in magic ring (6)
Round 3 :
(1 sc, inc) x 6 (18)
Round 4 :
(2 sc, inc) x 6 (24)
Round 5 :
1 sc in each st (24)
Round 6 :
1 sc in each st BLO (24) - start to form shallow dome and connect brim
Round 7 :
Change to brim color or keep same: (3 sc, inc) x 6 (30) - begin expanding brim
Round 8 :
(4 sc, inc) x 6 (36)
Round 9 :
1 sc in each st (36)
Round 10 :
Work a decorative edge: *sl st, ch1, sc* alternating around to make a picot-like rim (36)
Info :
Fasten off leaving a long tail to sew hat to head top. Sew brim slightly forward on the head to resemble a hat sitting over the hair. Optionally add a small green accent band with a round of slip stitches.
— Overalls & Details (Make 4) :
Info :
Overalls are integrated into torso rounds but add small straps and buttons for charm. The straps are sewn strips of 6 ch long and sewn across the torso front. Use small knots of brown yarn or beads as buttons.
Step :
Cut two lengths of yarn (approx 10 cm) for each strap. Slip stitch across the top of overall front from round 10 to 12 creating two even straps. Sew small seed bead or french knot as a button at strap base.
Info :
Repeat decoration for each doll—make two blue overalls, two green for a varied look as pictured. If you prefer painted wooden buttons, glue them now with fabric glue and allow to dry.
— Face Embroidery & Nose :
Info :
Use small red triangle nose embroidered with short satin stitch and a curved smile stitched with black yarn. Two small black French knots or sewn black beads make eyes if you opt not to use safety eyes. Add two small blush spots with watercolor pencil or pink embroidery for extra charm.
Step :
Embroider mouth as simple curved line: insert needle below nose, bring up and down with a series of small straight stitches to create a smile; secure inside and weave tail through the head and knot off.
— Fringe/Straw Hands & Feet Assembly :
Info :
Fringe groups should be attached after sewing limbs in place. For a secure finish stitch across the base of grouped strands to secure them and hide knots inside limb fabric. Trim evenly and use starch or light fabric glue to stiffen strands if desired.
— Final Assembly for Each Scarecrow :
Info :
Pin head to torso aligning center. Use whip stitch around the neck with the long tail left from the head. Make tight, even stitches to ensure head is secure. Sew hats on after head is attached. Attach arms to torso so straw hands protrude slightly forward. Sew legs to bottom, spacing evenly.
Step :
Sew two small straps of overall onto front (see Overalls section), sew on tiny button knots or beads to finish the look. Trim and neaten tails and weave ends inside body. If using safety eyes, ensure they are locked before stuffing.
— Hanging Loops and Final Placement :
Info :
Each scarecrow gets a hanging loop of braided yarn approx. 6-8 cm long. Insert loop through the top of the hat (or sew into hat seam) and knot securely. Attach each scarecrow to the spiral by stitching the loop to the spiral rim at even intervals—refer to placement guide below in Assembly Instructions.
Step :
Arrange scarecrows aesthetically along the spiral: top to bottom spacing approximately 14-18 cm apart depending on final spiral length. Sew loops firmly to the inside edge of the spiral so dolls hang outward and remain visible from multiple sides.
Info :
Optionally stiffen the spiral slightly by inserting a thin wire along the inside seam before closing the top edge; this helps maintain a perfect helix when hung. Ensure wire ends are covered fully and secured away from exposed edges to avoid injury.
This spiral scarecrow garland is a delightful way to celebrate autumn—so playful and full of character! Each tiny scarecrow brings its own personality, and the spiraling vine makes a beautiful eye-catching display. I hope you enjoy making these as much as I enjoyed designing them—each little stitch adds charm and warmth to your home. 🧶🍂 Hang it proudly and let it sway with the season. Happy crocheting! 🎃