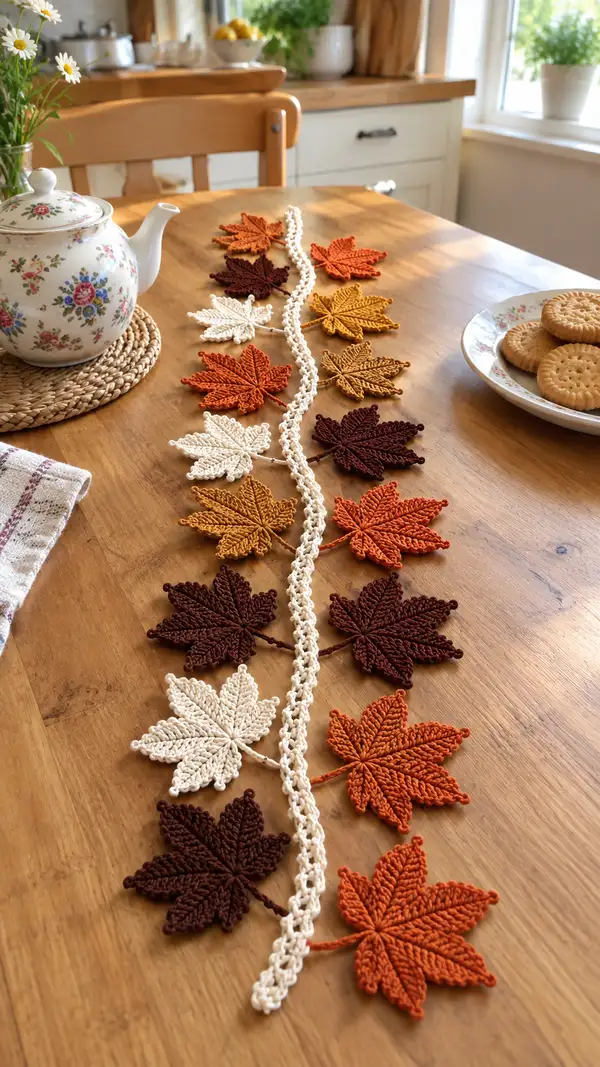
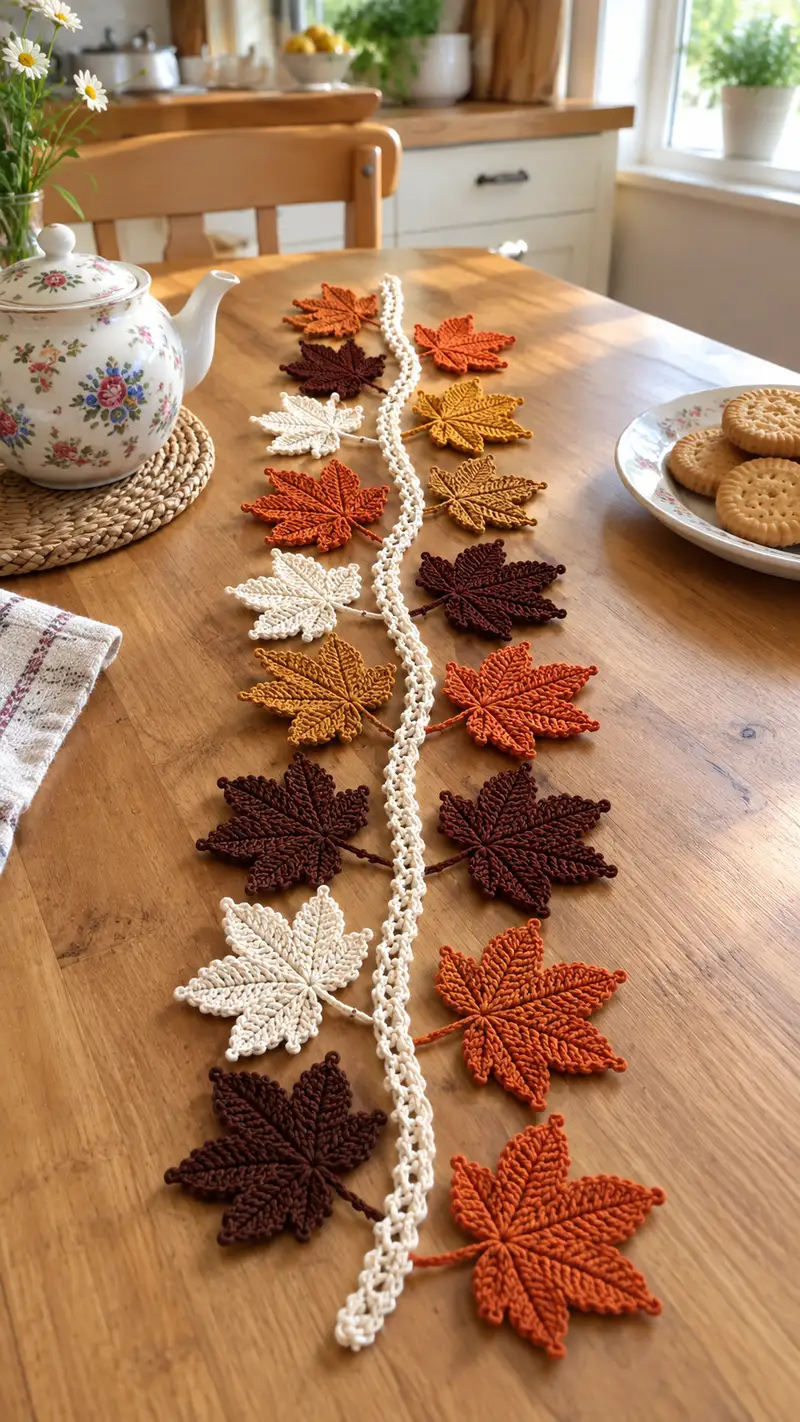
Create a cozy autumn table runner or hanging garland with delicate crochet maple leaves in warm fall hues. This pattern shows how to make crisp, textured leaves with a central stem and a decorative connecting chain. The finished garland is perfect for seasonal decor, table styling, or a mantel display—each leaf is worked flat with raised veins and a picot edge for a professional finish.
Progress Tracker
0% Complete
— Leaf (make as many as you like) :
Round 1 :
Make a magic ring. Work 7 sc into the ring. Pull tight. (7)
Round 2 :
Inc in each st around — 2 sc in each st. (14)
Round 3 :
(1 sc, inc) x 7. (21)
Info :
We are creating a 7-lobed maple leaf, so we increase to produce a round base that we will build lobes from. Place a removable stitch marker in the last stitch of this round to note start.
Round 4 :
(2 sc, inc) x 7. (28)
Round 5 :
(3 sc, inc) x 7. (35)
Round 6 :
(4 sc, inc) x 7. (42)
Info :
After R6 you have 42 stitches evenly distributed. These form the base around which each lobe (petal) will be made. We'll now create the first lobe by working out from the center in a chain-and-return method, then repeat for each lobe.
Round 7 :
Ch 6 (counts as turning and first chain of lobe), turn and work along chain: 2 sc in 2nd ch from hook, hdc in next ch, dc in next ch, tr in next ch, sl st back to the base stitch at the first of the 6 chain's attached stitch to complete lobe. Sl st into next base stitch to begin next lobe. (base stitch count remains 42)
Round 8 :
Work second lobe: ch 6, 2 sc in 2nd ch, hdc, dc, tr, sl st to base, sl st next base st. Repeat the exact sequence for lobes; you will work a chain lobe into each of seven designated base stitches across the row. (perform for lobe 2)
Round 9 :
Complete lobes 3–7 repeating Round 7 instructions so each lobe is identical. Maintain tension so lobes are uniform. After finishing lobe 7 sl st to join into base. (all seven lobes made)
Info :
Make sure each lobe chain length and stitch heights are consistent — practice one lobe first and use it as a gauge. Keep your sl st joins neat; these become the valley points between lobes.
Round 10 :
Turn leaf to work around lobe edges: From the sl st join at a lobe tip, ch 1 and work 1 sc into the tip space, then 3 sc down the outer side of the lobe (working around the chains), 2 sc into the base join, 3 sc up the inner side of the lobe, sl st into the center base stitch between lobes. (repeat for lobe 1, counts will vary per lobe)
Round 11 :
Repeat Round 10 for each remaining lobe, working neat, closely-spaced sc along each curve to create a dense leaf surface. The center remains flat; the outer ridges are forming. After finishing all lobes you will have added a round of single crochet outlining each lobe.
Info :
If you prefer a more textured leaf, use BLO or FLO on this outlining round to create a raised ridge. Example: 1 sc in each st BLO along the outline to create visible ridges.
Round 12 :
Working from the center, we will establish 7 raised veins. Sl st to center top of lobe 1, ch 1, *work 7 hdc along the center line from base of lobe to tip using a combination of hdc and front post hdc to make a raised column; sl st to center* — repeat for each lobe (work a vertical vein for each lobe). Tip: use front post hdc for the central stitches of each vein to lift them.
Round 13 :
Return to each vein and work 1 dc on the outer-most stitch and 1 dc on the inner-most stitch on both sides of the vein to create subtle ridge shadows. This is done by inserting hook around post stitches (FLO or back post) and working dc in those posts to lift contrast lines.
Info :
The veins are the feature that make these leaves look realistic; hold the leaf flat and work each vein individually for even placement. Use a stitch marker to find the exact center base for consistent start points.
Round 14 :
Edge shaping: slip to the tip of lobe 1, ch 1, sc in tip, *ch 3, sl st in first ch of ch3 to make picot, sc down outer side of lobe spacing the sc so that each lobe has 5–7 sc points depending on size, ch3 picot at valley, continue around to next lobe.* Repeat for all lobes to create decorative picot edging. Fasten off and weave ends. (picot edge around leaf)
Info :
If you want a rounded leaf edge rather than picots, work 1 sc evenly spaced all around the outer edge instead of ch3 picots. Picots are decorative and give a slightly 'pointed' autumn look.
Round 15 :
Stem (petiole) base: Rejoin yarn at the center base valley between two lobes (bottom center). Ch 14 to form the stem length (or adjust for desired stem length). Sl st back along the chain towards the leaf to create a cabled stem: sl st into second ch from hook and each ch back to the leaf base, join with sl st. Fasten off and leave long tail for sewing to chain. (stem created)
Info :
For longer stems make more chains. For a twisted cord look, you can braid several chained stems or work a small i-cord crochet cord with a smaller hook for a cleaner finish.
Round 16 :
Optional reinforcement: Rejoin yarn at the base of the stem and sc along the underside of the stem for 1 round to thicken and secure the stem. Fasten off and weave in ends. (neat stem underside)
Round 17 :
Blocking: Wet-block the leaf. Pin the leaf to a blocking board to open the lobes and flatten the leaf. Shape the veins slightly upwards and pin them in place. Allow to dry completely. Optionally spray with diluted fabric stiffener for a firmer finish.
Info :
Blocking is essential to reveal the leaf details. Cotton responds well to steam or water blocking; hold the steam iron above the surface and use pins to open the lobes to exact shape.
— Leaf Variation: Raised Vein Method (alternate look) :
Round 1 :
Make a magic ring. Work 8 sc into the ring. (8)
Round 2 :
(1 sc, inc) x 8. (16)
Round 3 :
(2 sc, inc) x 8. (24)
Round 4 :
Ch 5, sl st into next st to form small lobes; repeat creating 8 lobes this time (makes a slightly different maple style). Work two rounds of sc around to bring counts to (24) even. This version is slightly narrower and good for small garlands.
Info :
Use this variant to create smaller leaves to mix scale on your garland—it will provide visual interest when alternating sizes on the chain.
Round 5 :
Work raised veins by making front post dc rows from the center out to each lobe tip. Use 5–6 sts per vein depending on leaf size. Finish with picot edge as earlier.
Round 6 :
Make 3–5 small picots around the lobes' tips to give a classic maple look. Fasten off neatly.
Info :
Alternate between the full-size leaf and this small variant to create a balanced garland. A typical garland alternates large and small leaves every 1–3 leaves.
— Decorative Picot & Edge Detail :
Round 1 :
With main leaf color rejoined at an outer edge point, ch 1, sc in same st, *ch 3, picot (sl st in 3rd ch) at every 3rd or 4th sc around to accent valleys and tips.* Continue evenly spacing picots so each lobe tip is accented with one picot. Count ensures consistent spacing: 5 picots per large leaf is typical.
Round 2 :
For a more pronounced scallop, work (hdc, dc, hdc) into each valley point and then a picot at the tip. This creates a layered border that lifts from the table surface.
Info :
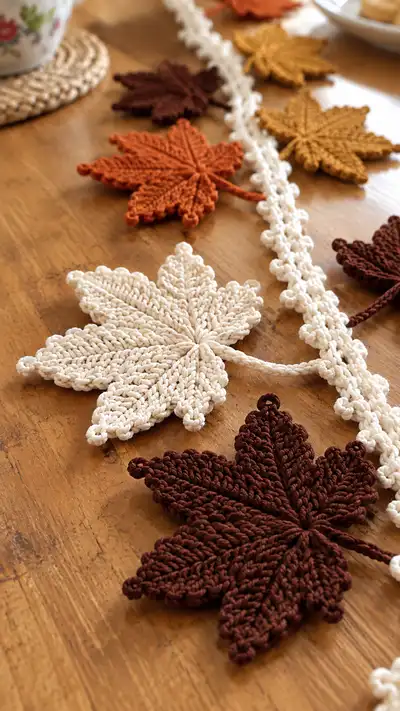
A tighter picot (ch2) gives a daintier look. Use ch3 for more pronounced bobbles at the tips as pictured in the reference image.
— Connecting Chain (central neutral chain) :
Round 1 :
With neutral cream yarn, ch 150 (or desired garland length in chains), leaving a 20–30 cm tail at both ends to hang. (chain length variable)
Round 2 :
Working into the 2nd ch from hook, sc across the entire chain to create a compact base chain. This produces a single crochet rope. (approx 149 sc)
Round 3 :
Turn and work 1 sc in each st BLO for 3 rounds total to produce a ridged cord. After 3 rounds the cord has a woven rope look. Fasten off leaving long tail for joining. (maintain same stitch count)
Info :
Alternately you can create a decorative chain using (1 sc, ch 3, skip 1) to create small loops along which to attach leaf stems. The pictured chain shows a bobble rope effect—achieved by working multiple rounds in BLO and finishing with a picot-on-every-few-stitches loop.
Round 4 :
To make the popcorn/beaded look: Working along the top edge, *sc 3, ch 3, sl st into 1st ch of ch3 to create a small bobble loop* repeat across or every 4th stitch for a decorative beaded strand. Fasten off and weave ends. (pattern repeats)
Round 5 :
Optional twist: make two identical cords and sew them together side-by-side for a thicker central chain for heavier displays or long garlands.
Info :
Keep chain tension even; if you want more flexible hanging, make fewer sc rounds and rely on a simple ch chain. For a sturdy runner, make 3–4 sc rounds over the chain.
— Attaching Leaves to Chain :
Round 1 :
Lay the chain flat and plan leaf placement. Typical spacing in the photos is one leaf every 10–12 cm alternately on each side. Pin in place using blocking pins to confirm spacing.
Round 2 :
Use yarn tail from leaf stem to whip stitch the stem around the chain for 10–12 stitches, sew back and forth to make a secure join. Tie a small knot if necessary and weave tail toward the back of the chain before trimming.
Round 3 :
For leaves that are worked without long tails, make a small loop at the base of the leaf stem, insert chain through loop, and whip stitch the loop closed around the chain. This keeps the leaf freely movable on the chain if you desire.
Info :
Alternate side placement: attach one leaf on the left, the next on the right so the garland looks balanced when laid out, as shown in the reference photo. Keep leaves flat and pin as you sew for uniform orientation.
Round 4 :
To make the leaves lay flat and not rotate, stitch through the underside of the leaf (the underside of the stem is best) and secure with a few stitches through the chain core. Test by laying the garland flat and adjusting sewn points if necessary.
Round 5 :
Finish by securing all yarn tails by weaving them back into the chain and leaf underside for a neat finish. Block the whole garland gently once assembled to unify shape.
Info :
If you want removable leaves for washing, make a small crochet loop at the leaf stem and add a wooden or metal ring to slip the leaf on and off the chain.
— Finishing Touches & Variations :
Round 1 :
Make small tassels or acorn shapes between some leaves using leftover yarn for added texture. Small tassels: fold yarn, tie, and trim to length; sew to the chain at regular intervals.
Round 2 :
For a wreath style, make a shorter chain and join ends with slip stitch to form a loop. Sew leaves around the loop alternating directions for a full autumn wreath.
Round 3 :
Use a small amount of embroidery (brown yarn) to add tiny veins or speckles on the finished leaf surface after blocking for extra realism.
Round 4 :
Create a matching placemat set by working multiple shorter chains and placing leaves across as a placemat centerpiece.
Info :
Experiment with yarn types: mercerized cotton yields a crisp professional look, while a soft cotton blend will appear more organic and flexible—choose according to desired finish.
— Troubleshooting & Tips (frequent Info sections) :
Info :
If your leaf tips curl, wet block more aggressively and pin them outward while drying. Curling often indicates too-tight stitches at tip rounds—loosen tension slightly next time.
Info :
Consistency: Make one complete leaf as a sample and measure its dimensions. Use the first leaf as a template for all subsequent leaves so scale remains consistent across the garland.
Info :
Count your stitches after each increase round: missing an increase can skew where lobes attach and cause an off-centered shape. Use stitch markers every 7th stitch if needed.
Info :
When working raised veins, keep post stitches parallel and spaced equally from center—this avoids a lopsided ridge. If in doubt, mark vein placement with pins before stitching.
Info :
Edge detail: Always work edging with the leaf laid flat. If you work it while the leaf is cupped, the picots will be irregular and the leaf will not lie flat after blocking.
Info :
Profile: the pictured garland alternates warm rust, deep brown, mustard and cream leaves—plan your color order before beginning and cut yarn tails to length for neat sewing during assembly.
This autumn maple leaf garland brings the season to your home with handmade charm and classic colorways. The textured veins and picot tips give each leaf a delicate, realistic feel while the neutral rope ties everything together for a warm table statement. Whether used as a runner, mantel garland, or wreath accent, it’s a satisfying project with beautiful results. 🍁🧶 Display, gift, and enjoy the cozy atmosphere your handiwork creates!