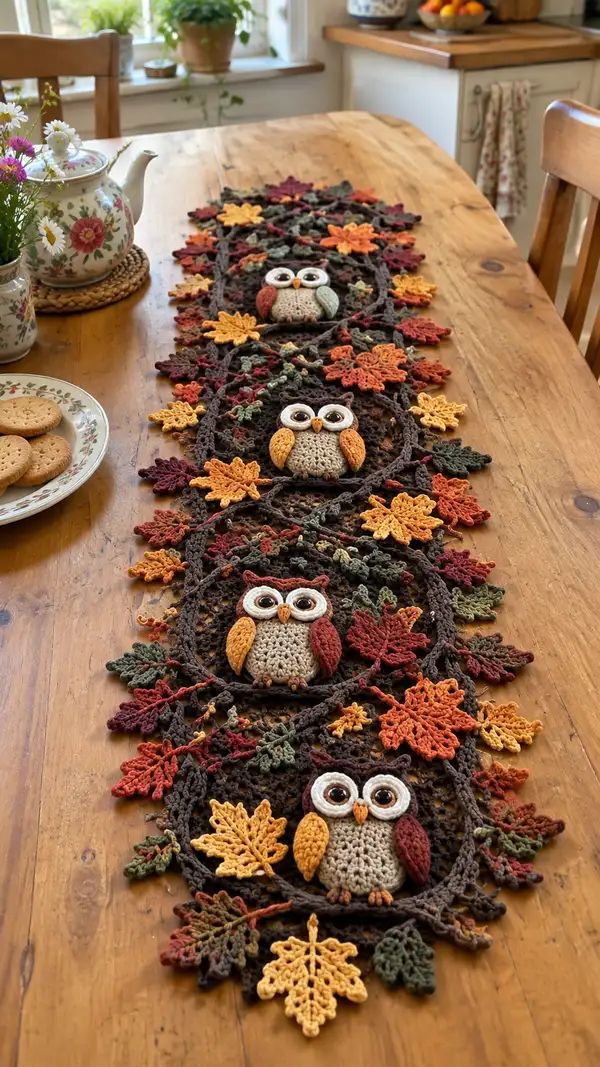
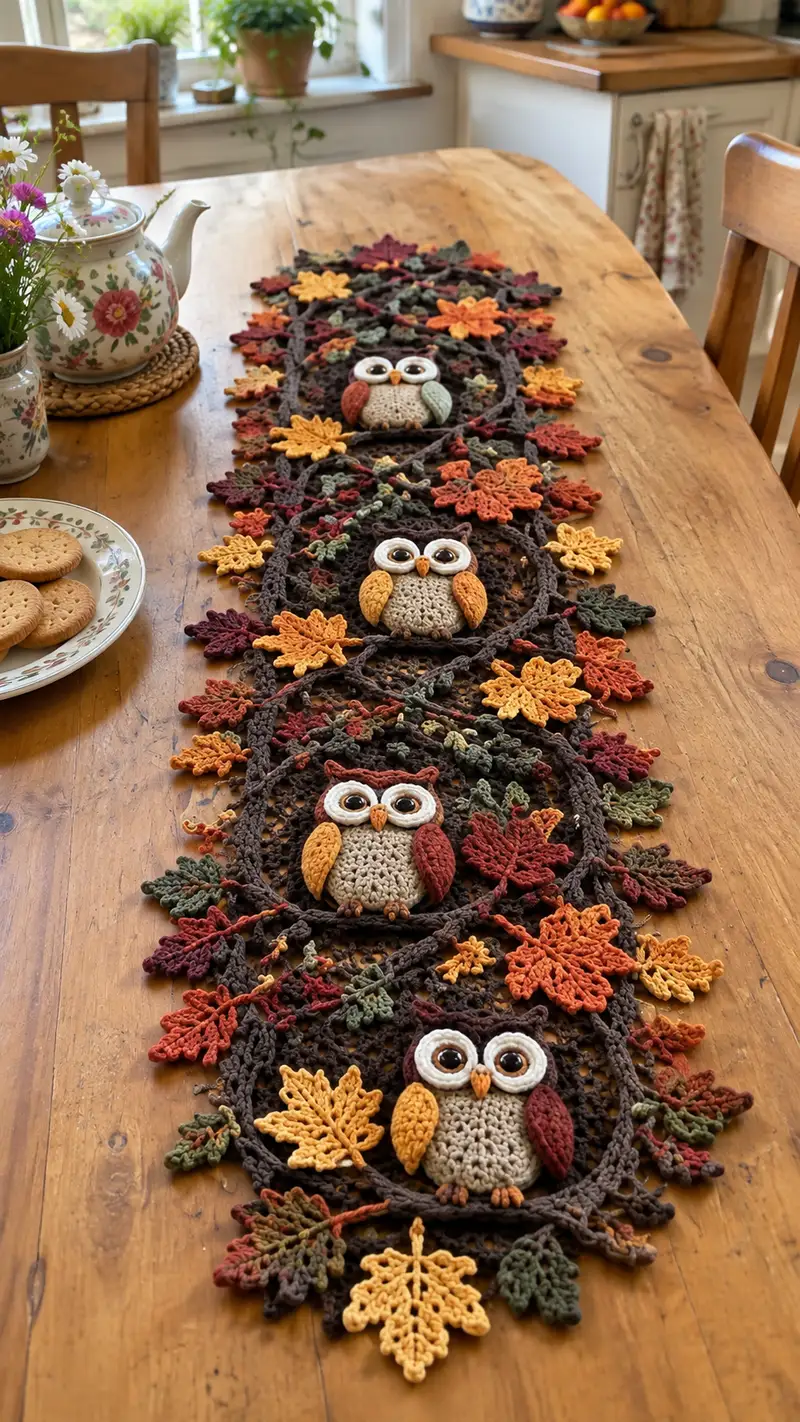
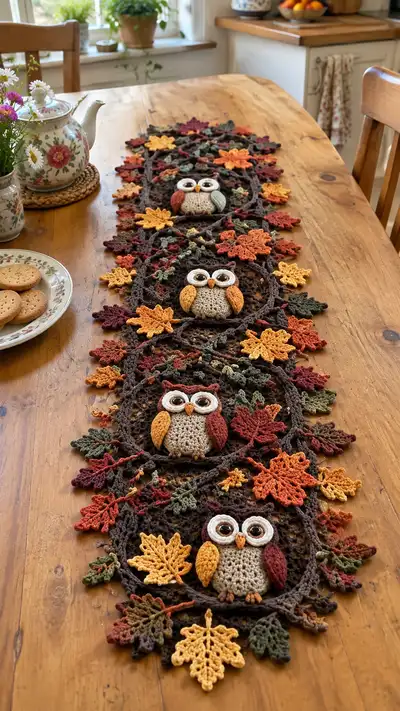
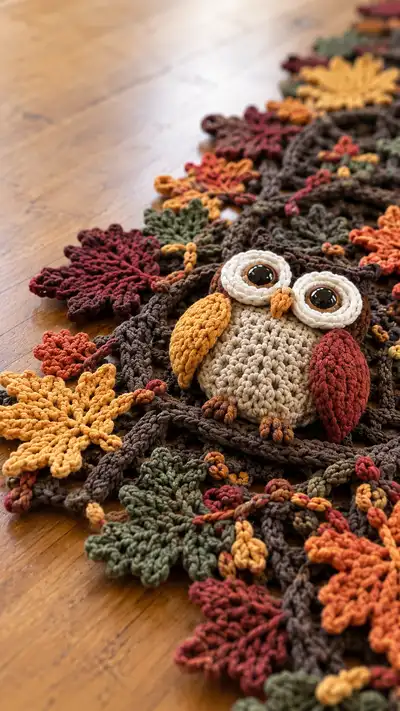
Create a beautiful autumn-themed table runner featuring four plump owls nestled inside braided wreaths and surrounded by delicate crocheted leaves. This pattern uses warm fall colors—mustard, rust, burgundy, olive and chocolate—and layered textures to make a cozy centerpiece. The design combines small 3D amigurumi owls with lace-like vinework and many individual leaf motifs for a richly detailed runner that lays flat on your table.
Progress Tracker
0% Complete
— Notes & Gauge :
Info :
Gauge is not critical for the look of this runner, but using worsted weight cotton with a 3.5mm hook will produce an owl approximately 9-10cm tall for each circular wreath opening around 10-12cm diameter. Work tightly for amigurumi sections so stuffing does not show. Make motifs flat by blocking leaves and wreath rings before assembly.
— Owl Body (Make 4) :
Round 3 :
(1 sc, inc) x 6 (18)
Round 4 :
(2 sc, inc) x 6 (24)
Round 5 :
(3 sc, inc) x 6 (30)
Round 6 :
(4 sc, inc) x 6 (36)
Round 7 :
(5 sc, inc) x 6 (42)
Round 8 :
(6 sc, inc) x 6 (48)
Round 9-12 :
1 sc in each st (48)
Info :
At the end of round 12 your piece is becoming a small sphere. Place safety eyes (if using) temporarily aside until round 14-15 positioning. For a 12mm eye, place between rounds 13 and 15 about 6-8 stitches apart; if you prefer embroidered eyes, mark position with stitch markers now.
Round 13 :
(6 sc, inc) x 6 (54)
Round 14-18 :
1 sc in each st (54)
Info :
Decide which round will be the bottom of the head/top of the torso transition. The larger section (rounds 9-18) determines owl height. At the end of round 18 begin subtle shaping for belly bulge. Keep tension consistent and use a marker for round start.
Round 19 :
(6 sc, dec) x 6 (48)
Round 20 :
(5 sc, dec) x 6 (42)
Round 21 :
(4 sc, dec) x 6 (36)
Info :
Begin stuffing the owl moderately at round 21. Use small bits of fiberfill pushed in with a stuffing tool or blunt end of a crochet hook. Aim for a firm but squeezable body—too much stuffing will distort the roundness.
Round 22 :
(3 sc, dec) x 6 (30)
Round 23 :
(2 sc, dec) x 6 (24)
Round 24 :
(1 sc, dec) x 6 (18)
Info :
Fasten off leaving a long tail for sewing. Flatten the small opening slightly and use an invisible stitch to close the bottom. You will not fully close the bottom if you are going to attach the owl into a wreath ring later—instead leave a 2-3cm neck tail to sew to the wreath backing.
Round 26 :
Rejoin to the top center with a sl st and work 6 sc in a circle to create a decorative belly scallop base (6)
Round 27 :
(1 sc, inc) x 6 (9)
Round 28 :
(2 sc, inc) x 3 around (12)
Info :
Switch to a lighter oatmeal/tan for the body belly detail if you want the belly to contrast. Work these last rounds more loosely so the scalloped belly looks textured. Fasten off and weave in ends if you will stitch the belly piece over the main body.
— Owl Eyes (Make 8 rings total: 2 per owl = 8 eye-rings; 2 sizes per eye)
Round 1 :
Using cream/white, 6 sc in mr (6)
Round 3 :
(1 sc, inc) x 6 (18)
Round 4 :
1 sc in each st (18)
Info :
This forms the outer eye ring. For a layered look create a shallow inner ring by making a smaller ring in brown/black for the eyelid/pupil base: 6 sc in mr, 6 inc to 12, fasten off and insert safety eye or sew a brown disc inside. If using safety eyes, secure them now through both rings before stitching to body.
Round 5 :
Using smaller hook (3.0mm) and darker brown, make a small pupil cup: 6 sc in mr (6); Round 6: 6 inc (12); Round 7: 1 sc in each st (12). Fasten off leaving long tail for sewing.
Round 6 :
Assemble eye: Sew pupil disc to inner side of outer cream ring, then place a 12mm brown safety eye through center. If embroidering pupils, use a circle of darker yarn and a tiny French knot for shine.
Info :
When positioning the eyes on the owl body, place them roughly between rounds 13-15 of the body piece, approximately 6-8 stitches apart depending on desired expression. Use pins to experiment with spacing then sew both rings to the body with a fine yarn needle.
— Beak (Make 4) :
Round 1 :
Using mustard/orange, ch 5, sc in 2nd ch from hook, sc, hdc, dec to form little triangle (3)
Round 2 :
Turn and sc along across to thicken: 3 sc (3)
Round 3 :
Sl st into center of beak and fasten off leaving tail for sewing. Fold the base slightly and stitch to the center between the eyes at round 14 body placement.
Info :
Use two small stitches from beak tail to anchor firmly. If using safety eyes, ensure the beak sits beneath them with a small gap so the eyes have a layered appearance.
— Owl Wings (Make 8 total: 2 per owl) :
Round 1 :
With accent color (rust or mustard), ch 6, sc in 2nd ch from hook and across (5)
Round 2 :
Turn, ch1, sc across 5 (5)
Round 3 :
Turn, ch1, (sc, inc across) : (1 sc, 1 inc) x 2, sc (7)
Round 4 :
Turn, ch1, sc across (7)
Round 5 :
Turn, ch1, (2 sc, inc) x 2, sc (9)
Round 6 :
Turn, sc across (9)
Round 7 :
Work a scalloped edge: *skip 1 st, 5 dc in next st, skip 1 st, sl st* across the top row to create feather texture. (5 shells)
Round 8 :
Fasten off leaving long tail for sewing. Block slightly to give wings a gentle curve.
Info :
Sew wings to the side of the owl body between rounds 16-20, angling slightly forward so they appear folded across the belly. Use small tight stitches to anchor the curve.
— Owl Feet (Make 8) :
Round 1 :
With dark brown, ch 4, sc in 2nd ch from hook, sc, dec (2)
Round 2 :
Ch1, 2 sc in each st (4)
Round 3 :
Ch1, work 1 sc in each st (4). Fasten off leaving long tail to sew under the body. Make two small toe clusters per owl by sewing 3 small bobble-stitches in front using accent thread to imitate talons.
Info :
Sew the feet to the base of the belly where you left the neck tail or to the underside of the body so the owl sits forward inside the wreath. Use the same thread to tack feet and body together for stability.
— Wreath Ring (Make 4) :
Round 1 :
With dark brown, 6 sc in mr (6)
Round 3 :
(1 sc, inc) x 6 (18)
Round 4 :
(2 sc, inc) x 6 (24)
Round 5 :
(3 sc, inc) x 6 (30)
Round 6 :
(4 sc, inc) x 6 (36)
Round 7 :
(5 sc, inc) x 6 (42)
Round 8 :
(6 sc, inc) x 6 (48)
Round 9-12 :
1 sc in each st (48)
Info :
These rounds build a fairly tight circular disc. To create a hollow wreath with a braided look, fold this disc and work surface slip stitches along the outer edge or create a chain rope to stitch around the disc. Another option is to work an extra round of 48 sc then form a back ring and join the two rings with slip stitches to create a tube—this gives the wreath a raised 3D edge.
Round 13 :
Work 48 sc BLO to create a defined ridge (48)
Round 14 :
Make 48 sc FLO to form contrast ridge (48)
Round 15 :
Sl st around outer loops to create a tidy outer edge and fasten off. Block flat into a circular frame roughly 10-12cm diameter. If you prefer a larger wreath, repeat increasing rounds until you reach approx. 54-60 sts circumference.
Info :
Stitch a short chain loop or small sl st loops at four anchor points on the wreath (top, bottom and sides) to make it easier to sew leaf clusters and vines onto the ring later. This also helps create a secure base for the owl to be sewn into the center.
— Large Maple Leaf (Make 8-12) :
Round 1 :
With chosen color, ch 10, sc in 2nd ch from hook and across back to create foundation (9)
Round 2 :
Ch1 turn, 1 sc each across (9)
Round 3 :
Turn, ch3 (counts as dc), *skip next st, dc in next, ch1; repeat across creating spaced dcs to form points* to the end, sl st to base (approx 4 points each side)
Round 4 :
Work on one side only: ch5, (sl st, picot, sl st) into previous dc, sc down toward base to make a pointed lobe; repeat for each lobe (work symmetrical on both sides) (creates 5 lobes)
Round 5 :
Turn and work reverse side repeating lobes so leaf is symmetrical. Fasten off and block flat. (This method gives a decorative maple silhouette.)
Info :
For more realistic leaves, use a textured stitch on the center spine by working a row of hdc down the middle before creating edge lobes. Use color changes to add depth and crochet several in different sizes for variety.
— Small Pointed Leaf (Make 16-24) :
Round 1 :
With olive or burgundy, ch 8, sc in 2nd ch from hook and across (7)
Round 2 :
Ch1 turn, sc across, ch3, sl st into side to create a little point (7)
Round 3 :
Work small picots along the edge to create texture: *ch3, sl st into same st* across each side. Fasten off and weave ends. Block if possible.
Info :
Small leaves are perfect to fill gaps around the wreath; make more of these than larger leaves. Use variegated yarn for mixed tones or spice up plain leaves with a second-color edge worked in sc.
— Tiny Berry Clusters (Make about 24 clusters) :
Round 1 :
With dark brown or deep red, ch 3, 6 sc in 2nd ch from hook (6)
Round 2 :
Sl st into next 3 sts to create a tiny cluster and fasten off leaving a tail for sewing. Attach clusters sporadically across wreaths and vines for interest.
Info :
Emphasize clusters in groups of 2-3 to mimic berries or small acorns. Sew them with the tail and knot securely behind the vine so they do not come loose when the runner is handled.
— Connecting Vines & Lace Base :
Round 1 :
Work a long chain rope: ch 120 (or suit length of runner segment between wreaths), join with sl st into the first ch to form loop or leave as open rope based on placement (120)
Round 2 :
Work back along the chain: 1 sc in each ch (120)
Round 3 :
On next round, work a twisted rope by crocheting in the back loop only for 120 sts (120)
Info :
Make the vine ropes in varying lengths between wreaths. Use cotton rope to keep them flexible. Twist them by pinning on blocking mat to give a natural vine curve. Sew leaf clusters and berries along the rope every 6-12 stitches to create organic distribution.
Round 4 :
To create open lace filler, attach short chains between ropes with picots: *ch 8, sl st to rope 10 sts ahead, ch 8, sl st* repeat to form netting. Fasten off and block open.
Info :
Use slip-stitch joining and light blocking to shape the lace into ovals that contain each owl. The lace should be flat so the runner lays nicely on a surface; steam blocking helps shape cotton fibers without large distortion.
— Assembly & Placement Info :
Info :
Each runner segment is made from a wreath ring with an owl sewn into its center, then connected with vine ropes and lace connectors. Make all wreaths and owls first, then arrange them on a large blocking board to determine final placement for leaves and berries. Pin everything in place before permanent stitching—this is the easiest way to make a pleasing asymmetric but balanced composition.
Info :
To attach an owl to its wreath, use the long tail left at the bottom of the body and sew through the inner ring of the wreath in a spiral fashion. Sew beneath the owl belly and around the edge of the wreath so the owl sits slightly forward and the feet rest on the ring edge.
— Optional: Additional Decorative Embellishments :
Info :
Add a few chains with button leaves or wooden beads to create more depth. If you prefer less three-dimensional bulk, flatten some leaves by reducing stuffing and sewing them closely to the base instead of leaving them free-standing.
— Final Finishing Rounds :
Round 1 :
Once all pieces are sewn and arranged, trap all tails by weaving them into the back of the lace base using a yarn needle. Trim close to the woven area.
Round 2 :
Steam-block the entire runner on a flat surface, pinning each leaf and wreath ring into final position until cool and dry to maintain shape. Avoid pressing too hard on stuffed owls; a light steam is sufficient.
Info :
For long-term stability consider backing the runner with a lightweight felt or cotton fabric using fabric glue or careful hand-stitching. This provides extra protection when setting tableware on top of the runner.
— Pattern Notes Summary :
Info :
Make motifs in batches to maintain consistent tension and color distribution. Block all flat motifs (rings, leaves) before final assembly. Use contrast and balance when distributing warm and cool autumn colors along the runner—alternate mustard and burnt orange leaves so the runner reads as a cohesive whole.
This autumn owl table runner is a labor of love that brings seasonal warmth to your home. Each wreath frames a plump owl and is surrounded by a scatter of leaves in warm fall hues. The layered textures and 3D owls make it a delightful centerpiece you'll enjoy creating and displaying. 🧶🍂✨