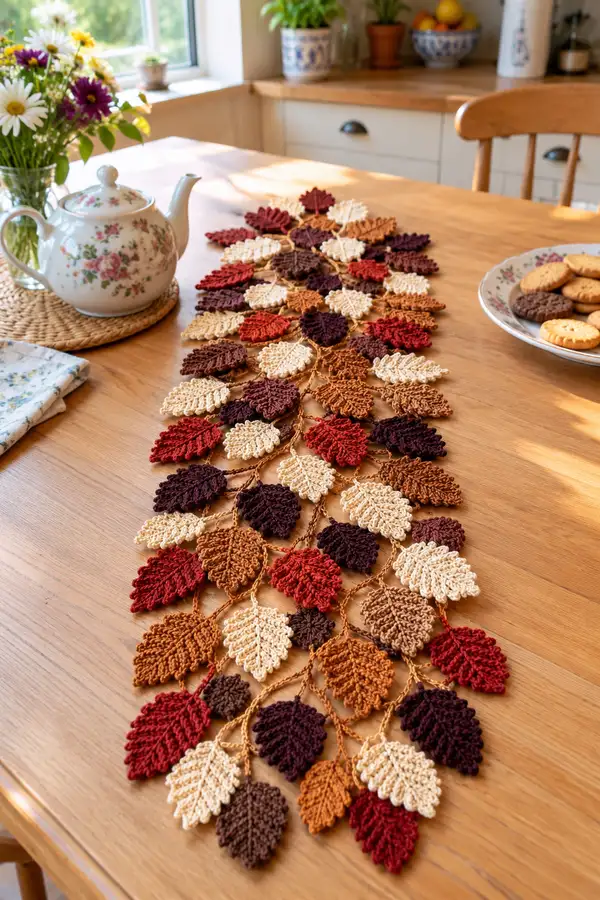
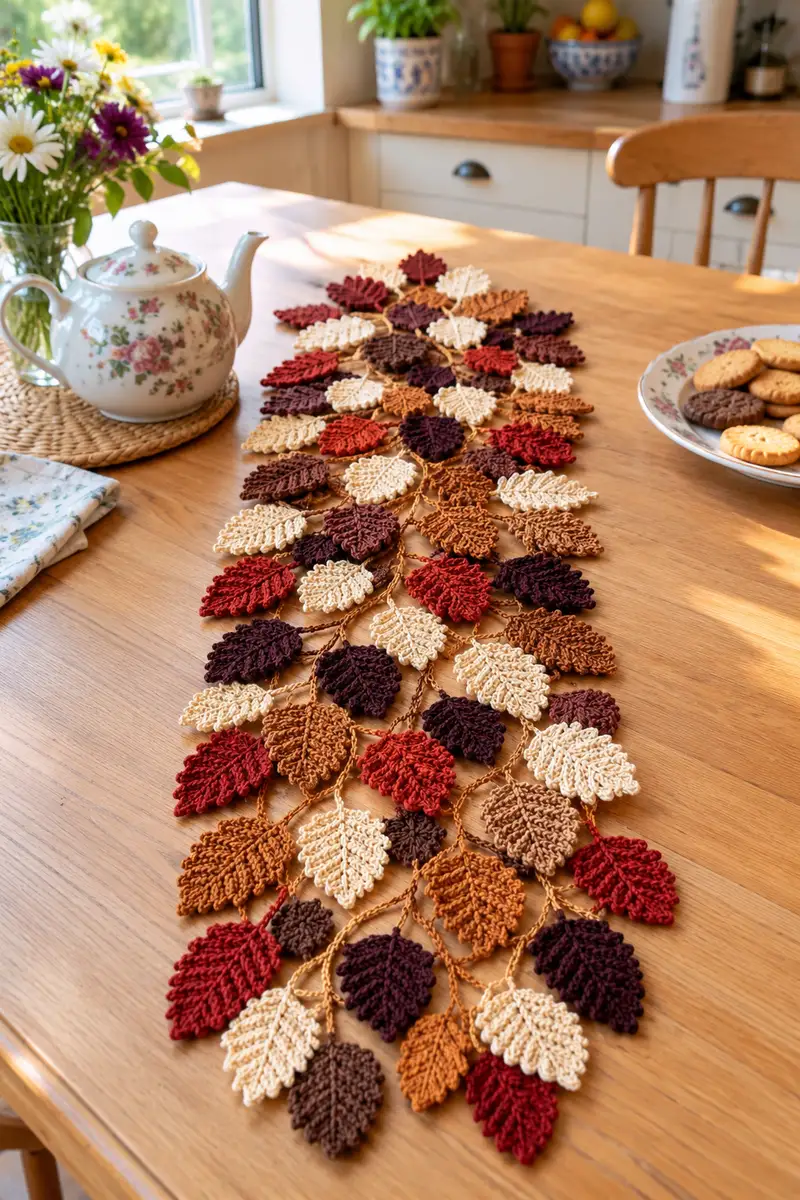
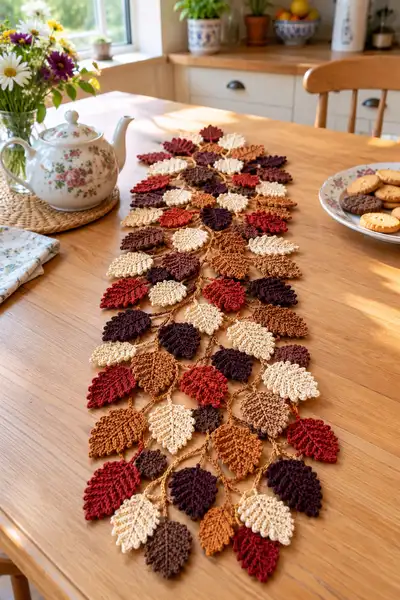
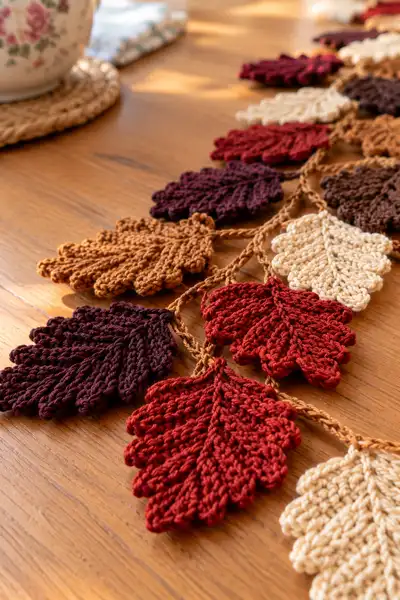
Bring warm autumn charm to your table with this crochet leaf table runner. The design is made from dozens of individual textured leaves in rich fall tones—deep burgundy, rusty red, chestnut brown, golden tan and cream—joined together with braided chain vines to create an elegant runner or garland. Each leaf is worked flat with raised ribs for realistic texture and sewn onto a soft braided vine. Perfect for seasonal decor, mantel displays, or as a cozy centerpiece.
Progress Tracker
0% Complete
— Overview :
Info :
This pattern is made up of many individual leaves worked flat in three sizes (Large, Medium, Small), then joined with braided/chain vines. Leaves use a central spine concept where increases create the wide base and decreases shape the tip. The leaves include raised ribs made with front-post double crochet rows to mimic veins. Work each leaf tightly for good stitch definition. Block leaves lightly before joining.
Info :
Gauge: Gauge is flexible for this decorative project. Using a 3.5mm hook with worsted-weight cotton gives leaves approximately: Large leaf 11-12 cm (4.5") tall, Medium 8-9 cm (3.5"), Small 6-7 cm (2.5-3") depending on tension. Adjust hook to alter size.
— Large Leaf (Make 12-14) :
Round 1 :
Ch 9. Starting in 2nd ch from hook, 1 sc in each of next 7 ch, 3 sc in last ch to turn corner, now working along opposite side of foundation ch, 1 sc in each of next 7 ch (16 sts total across both sides) (16)
Round 2 :
(1 sc, inc) x 8 along the symmetric repeats to widen leaf both sides evenly (24)
Round 3 :
(2 sc, inc) x 8 (32)
Info :
Begin to create ribs: Work the next two rows using FLO on the outward-facing side so ribs will be created with front post stitches on later rows. Mark the center stitch at the tip to help with symmetry.
Round 4 :
(3 sc, inc) x 8 (40)
Round 5 :
(4 sc, inc) x 8 (48)
Round 6 :
1 sc in each st BLO to set a visible ridge along the leaf edge (48)
Round 7-10 :
1 sc in each st (48) - work 4 rounds even to build leaf body length while keeping stitch count constant (48)
Info :
For ribbed veins: On the next four rows work a central sequence using fpdc across the center 8 sts of the row (or approximate centre section) to create raised veins. Use stitch markers to identify the central 8 stitches at the start of Round 11.
Round 11 :
Work to marked center section: 1 sc in each of first 20 sts, fpdc in next 8 sts (working each as front-post double crochet), then 1 sc in remaining 20 sts (48)
Round 12 :
Repeat Round 11 (48)
Round 13 :
Repeat Round 11 (48)
Round 14 :
Repeat Round 11 (48)
Info :
Start shaping toward the tip: decrease evenly on both sides. Work decreases evenly spaced around the tip portion; aim to remove 8 sts over the next 4 rounds to form a pointed end.
Round 15 :
(4 sc, 1 dec) x 8 (40)
Round 16 :
(3 sc, 1 dec) x 8 (32)
Round 17 :
(2 sc, 1 dec) x 8 (24)
Round 18 :
(1 sc, 1 dec) x 8 (16)
Round 19 :
8 dec around the tip to close into a tight point (8)
Round 20 :
Fasten off leaving 20-30 cm tail for sewing or attaching to vine. Weave in the base tail to create a tidy stem end. Block leaf flat, pinning tip and base into shape and spray or steam lightly to set.
Info :
When blocking, gently stretch the leaf lengthwise and arrange the ribbed veins so they sit centered. Pin each lobe if needed. Allow to fully dry before joining to the vine.
— Medium Leaf (Make 14-18) :
Round 21 :
Ch 7. Starting in 2nd ch from hook, 1 sc in each of next 5 ch, 3 sc in last ch, then 1 sc in each of next 5 ch on the opposite side = (12 sts total) (12)
Round 22 :
(1 sc, inc) x 6 (18)
Round 23 :
(2 sc, inc) x 6 (24)
Info :
Work a couple of rows even to create leaf length. Mark the center and plan to place a narrower fpdc rib along the center 6 sts on medium leaves.
Round 24 :
1 sc in each st (24)
Round 25 :
1 sc in each st (24)
Round 26 :
1 sc in each st BLO to define the edge ridge (24)
Round 27 :
Work to marked center: 1 sc in first 9 sts, fpdc in next 6 sts, 1 sc in remaining 9 sts (24)
Round 28 :
Repeat Round 27 (24)
Info :
Begin decreases to form the leaf tip by working (2 sc, dec) pattern across the next round to keep balance of shape.
Round 29 :
(2 sc, 1 dec) x 6 (18)
Round 30 :
(1 sc, 1 dec) x 6 (12)
Round 32 :
Fasten off leaving a 20 cm tail for joining. Block lightly to open ribs and define shape.
Info :
Med leaves have the same rib technique as large but with fewer central fpdc stitches. Use the blocked shape as a template for placement on the vine.
— Small Leaf (Make 12-16) :
Round 33 :
Ch 6. Starting in 2nd ch from hook, 1 sc in next 4 ch, 3 sc in last ch, then 1 sc in each of next 4 ch on the opposite side (10)
Round 34 :
(1 sc, inc) x 5 (15)
Round 35 :
(2 sc, inc) x 5 (20)
Round 36 :
1 sc in each st (20)
Round 37 :
1 sc in each st BLO to accent outer edge (20)
Round 38 :
Work center rib: 1 sc in first 7 sts, fpdc in next 6 sts, 1 sc in remaining 7 sts (20)
Round 39 :
(1 sc, 1 dec) x 5 (15)
Round 41 :
Fasten off leaving 15-20 cm tail for attaching. Block small leaves firmly to flatten and set ribs.
Info :
Small leaves are excellent fillers at ends and between medium/large leaves. Varying the number of ribs (fpdc stitches) slightly adds realism.
— Leaf Edge/Vein Variation (Optional Textured Detail) :
Round 42 :
After leaf is complete, optionally work an edging round: attach yarn at base, ch1, sc evenly around leaf working 2 sc at the tip for a smooth point and 1 sc in each lower-edge st (st count will match last round of leaf)
Round 43 :
For a scalloped border: *(sk next st, 5 dc in next st, sk next st, sl st in next)* repeat as space allows along each lobe edge. This will add a decorative scallop (variable count depending on leaf size)
Info :
Edging is optional; it adds weight and visual finish. If you plan to drape the runner, keep edging light to avoid excessive stiffness.
— Braided/Chain Vine (Make 3-4 long strands depending on runner width) :
Round 44 :
Using a warm golden tan or caramel yarn, ch 120 (or length needed for your table runner width). This will create the central vine cord for joining leaves. Note: length may be adjusted—measure your table and add or remove chains accordingly.
Round 45 :
For a more substantial cord: make 3 identical ch120 cords and braid them together, or use a chain-3 rope technique (see Info). Alternatively, for a twisted look, ply two ch60 cords together and twist clockwise tightly, then fold and steam lightly to set.
Info :
Chain length: Each ch120 strand yields about 80-90 cm of length depending on tension. For a runner that goes end-to-end along a standard dining table center (approx 140-160 cm) you will need longer chains or more braids. Make multiple strands and join end-to-end by slip stitching or sewing.
Round 46 :
Optional: To make a crocheted rope with body, work a foundation single crochet: ch 4, 3 sc in 2nd ch from hook and first 2 ch, continue sc in each chain back along foundation to create a firmer rope. Repeat for length desired, then braid.
Round 47 :
To create spaced leaf attachment points, measure and mark every 8-10 cm along the vine with a removable stitch marker or a small safety pin. These marks will be where leaves are attached (distance depends on leaf size — larger leaves need more space).
— Attaching Leaves to Vine (Detailed Joining Steps) :
Round 48 :
Lay out your leaves on a flat surface arranged and staggered as in the photo: alternating colors and sizes to create visual interest. Start with a central spine of large leaves and tuck medium and small leaves between them.
Round 49 :
To attach: thread the tail left on each leaf onto a yarn needle. Position the leaf against the vine at your pre-marked point. From the underside of the vine, bring the tail through to the top and take a secure stitch through the chain cord and back into the base of the leaf. Use a whip stitch or mattress stitch to sew leaf base to vine.
Round 50 :
Secure each leaf with 3-5 sewn passes: one central secure stitch, then two side stitches capturing a few chain loops each to hold leaf flat. Knot inside and weave in end at least 6 cm into the vine to prevent slipping.
Info :
Alternate joining technique: Create a small loop with ch 6 at the base of leaf tails, then slip stitch that loop to the vine chain. This adds a tiny decorative hanging loop visible between leaves.
Round 51 :
When attaching leaves in clusters, overlap leaf bases slightly so the vine is concealed. For decorative knotting, tie a small simple knot with the vine under the base of some leaves to mimic natural stem junctions.
Round 52 :
After all leaves are attached, examine both sides of the vine for balance. Adjust position if needed by removing a few stitches and re-sewing. Leaves can be flipped or angled slightly when sewing to produce a more organic look.
— Joining Multiple Strands (Optional Wide Runner) :
Round 53 :
To create a wider runner like in the image, make three braided vines and offsetly attach rows of leaves to each vine so they interlock visually. Attach central vine first with most large leaves, then join side vines with medium/small leaves overlapping.
Round 54 :
Connect vines by sewing at junction points every 10-12 cm to keep them aligned. Use small whip stitches with matching vine yarn and hide tails inside braid.
Info :
Create a strong join by sewing through several plies of the braid and catching the back loops of adjacent vine chains. This prevents sagging when runner is draped.
— Decorative Twine Details & Knots :
Round 55 :
Add small knots or mini braids at leaf junctions: cut 15 cm of yarn, fold in half, pull fold under vine then pull ends through to create a larks head knot. Trim tails to 2-3 cm for little stem accents.
Round 56 :
For a more rustic look, use natural jute or twine to wrap small sections of the vine at intervals. Secure with a dab of fabric glue on the underside so it doesn’t show.
Info :
When mixing materials (cotton yarn + twine), test a small section to see how the materials behave together and whether blocking is affected.
— Finishing & Blocking :
Round 57 :
Once all leaves are attached and joins are secure, lay the runner flat on a blocking mat or towel. Pin leaves into a pleasing arrangement—rotate some leaves to create a layered, natural look.
Round 58 :
Spritz lightly with water or use a steam iron held above (do not press) for cotton yarn. Allow to dry completely. This sets shape and opens the ribbed veins.
Round 59 :
Weave in any remaining tails. Use a small stitch of fabric glue on hidden joins for extra security if runner will be handled often. Trim loose ends close to fabric but not into the knot.
Round 60 :
Final trim: check for loose fibers, symmetrical spacing, and lay runner on table to ensure drape. Make micro-adjustments by shifting a few sewn stitches and re-securing if necessary.
Info :
If you plan to wash the runner, consider lining the underside with a narrow cotton tape sewn across the vine to prevent stretching in a gentle hand-wash.
— Variation: Leaf with Central Cut Vein (Alternative Technique) :
Round 61 :
Start as Medium Leaf but instead of fpdc ribs, after the main body is complete, take a contrasting color and embroider a central chain of sl st down the center from base to tip to simulate an inset vein. Secure ends and weave in.
Round 62 :
Another option: Leave the central tail long after round 31 (medium leaf) and use it to embroider a center stem using tapestry needle and running stitch to draw a raised vein over the center column.
Info :
Embroidery allows color contrast and further realism—use a slightly thicker yarn for embroidery to make the vein standout.
— Small Decorative Accents & Tassels :
Round 63 :
Create tiny tassels to attach between leaf clusters: cut 12 strands of yarn 6 cm long, fold through a ch loop and knot. Trim tassels evenly and attach with a single secure stitch.
Round 64 :
Mini pom-poms in cream or mustard can be glued or sewn under leaf overlaps to add depth and whimsy to the runner.
Info :
Keep accents sparse; the leaves are the star. Small splashes of cream or gold balance the deep burgundy and brown tones.
— Optional Hanging Loop or Runner Anchors :
Round 65 :
If using as wall garland, create a hanging loop at each end: fold vine end and secure with 10 tight whip stitches using matching yarn, then weave tail back through braid. Add a small knot and trim.
Round 66 :
For table-use anchors: sew two small non-slip fabric pads to underside at center to prevent sliding on polished wood.
Info :
When adding hardware for hanging, do so at the very end after blocking to ensure correct placement and balanced weight distribution.
— Care Instructions :
Round 67 :
Spot clean with damp cloth. If washing is necessary, hand wash gently in cool water, lay flat to dry and reshape while damp. Avoid tumble drying to prevent distortion and color fading.
Round 68 :
Store runner flat or gently rolled with tissue to preserve leaf shapes. Avoid heavy stacking which flattens ribs and scalloped edges.
Info :
Use colorfast cotton yarn to prevent bleeding; test a scrap if you plan to use mixed colors and wash the runner occasionally to prevent soil build-up.
— Troubleshooting & Adjustments :
Round 69 :
Too many leaves making runner heavy? Remove a few medium leaves and replace with smaller ones; rearrange placement to redistribute weight.
Round 70 :
Leaves not laying flat? Re-block, pinning along edges and pressing lightly with steam; check for mis-sewn bases causing rotation and re-sew if needed.
Info :
For uneven color distribution, plan your layout ahead. Photograph the arrangement before sewing to keep symmetry when joining many leaves.
— Quick Reference Stitch Counts :
Round 71 :
Large leaf key counts: R1 16, R2 24, R3 32, R4 40, R5 48, R6-R10 48, R15 40, R16 32, R17 24, R18 16, R19 8
Round 72 :
Medium leaf key counts: R21 12, R22 18, R23 24, R24-26 24, R29 18, R30 12, R31 6
Round 73 :
Small leaf key counts: R33 10, R34 15, R35 20, R36-37 20, R39 15, R40 5
Info :
These counts help you verify you're on track at each stage — always count stitches at the end of a row if your leaf looks off.
— Final Styling Tips :
Round 74 :
Mix colors with intention: place a cream or light tan leaf adjacent to several dark leaves to create highlights. Cluster a few small leaves around a big one for natural variation.
Round 75 :
Let some leaves be slightly rotated or flipped when sewn to mimic how real leaves fall. Do not make the runner perfectly symmetrical unless you prefer a formal look.
Info :
Take photos of your arrangement before final sewing so you can reproduce it later or make matching runners.
This autumn leaves table runner is a joyful celebration of seasonal color and texture—crafted leaf by leaf and braided vine by vine, each piece comes together into a cozy centerpiece full of personality. The warm palette and raised ribs catch the light beautifully, giving your table a handmade, elegant finishing touch. Enjoy arranging and re-arranging the leaves each season—this runner is as flexible as it is charming. 🍁🧶✨