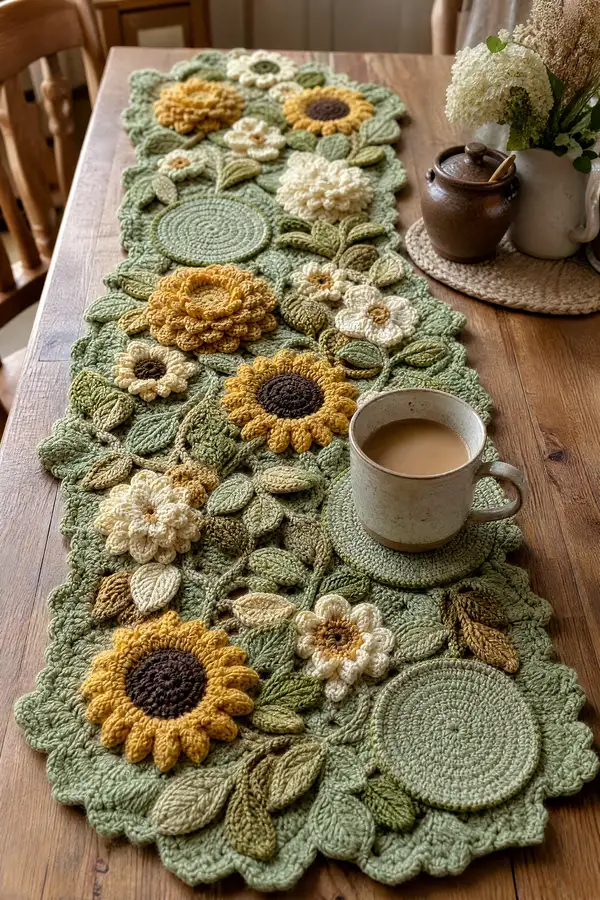
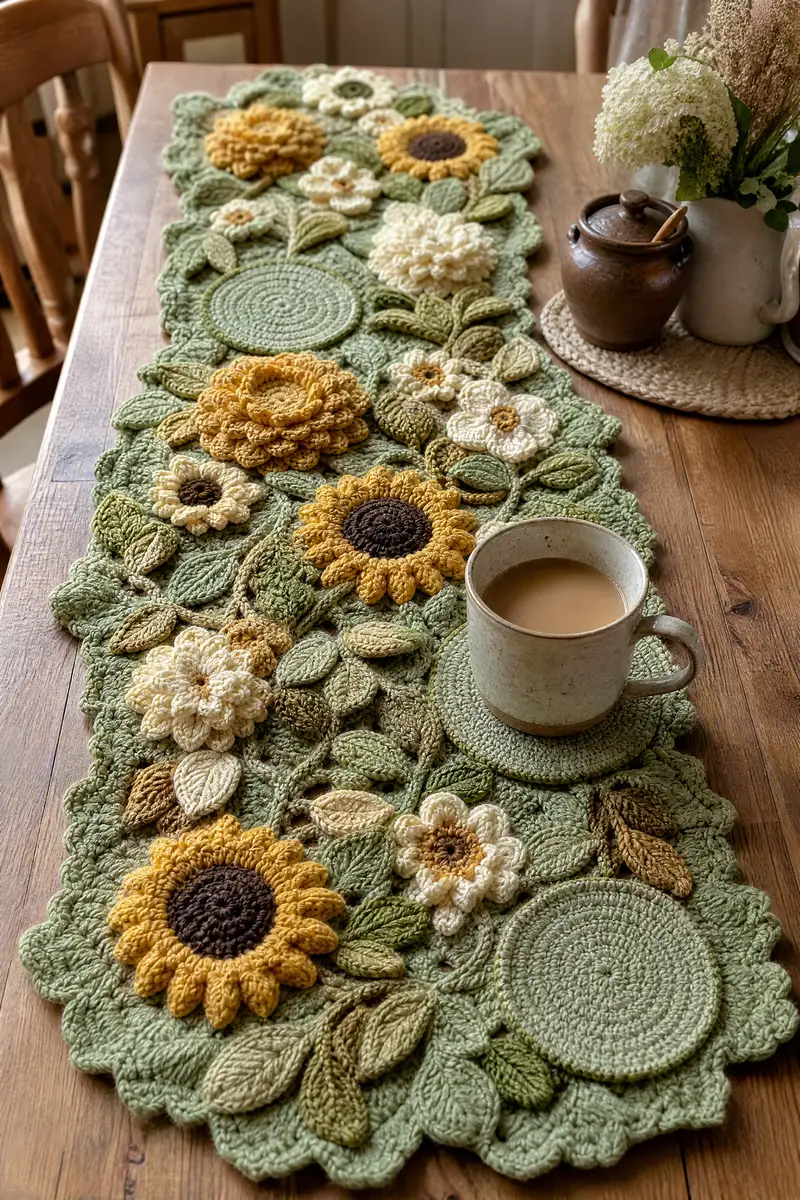
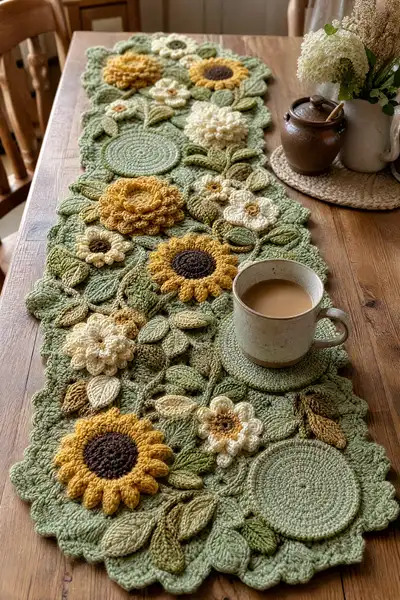
This Sunflower Harvest table runner features layered floral motifs, textured leaves and circular medallions in warm autumn tones. The design combines raised petals, scalloped edges and interlocking vines for a rich, dimensional centerpiece. Perfect for a harvest table or seasonal decor, it balances structure and flow with repeatable motifs you can rearrange. Includes step-by-step stitch sequences, assembly notes and finishing tips to recreate the layered look.
Progress Tracker
0% Complete
— Overview :
Info :
This pattern is modular: make multiple motifs (large medallions, sunflowers, layered blooms, small flowers, and leaves) then join into a runner. All motifs are worked in rounds unless specified as 'row' for elongated leaves. Use 4.0mm hook for most work; use 3.5mm for dense petals if you prefer crisp edges. Block large flat pieces before joining. Tension: work tightly for petals and centers to prevent gaps; slightly looser for background and vines.
Info :
Throughout the pattern I include stitch counts in parentheses. If you prefer larger motifs increase rounds on medallions by following the increase formula (add 6 sts per round). Color changes are noted before the round. Carry unused yarn loosely on the wrong side or fasten off and weave in ends for clean joins.
— Large Foundation Medallion (Make 2) :
Round 1 :
6 sc in magic ring (6)
Round 3 :
(1 sc, 1 inc) x 6 (18)
Round 4 :
(2 sc, 1 inc) x 6 (24)
Round 5 :
(3 sc, 1 inc) x 6 (30)
Round 6 :
(4 sc, 1 inc) x 6 (36)
Round 7 :
(5 sc, 1 inc) x 6 (42)
Round 8 :
(6 sc, 1 inc) x 6 (48)
Info :
Switch to Sage Green if not already using it. Keep tension even; work in continuous rounds or join and turn depending on preferred seam visibility. If you want a slightly domed medallion, stop increases one round earlier.
Round 9 :
(7 sc, 1 inc) x 6 (54)
Round 10 :
(8 sc, 1 inc) x 6 (60)
Round 11 :
(9 sc, 1 inc) x 6 (66)
Round 12 :
(10 sc, 1 inc) x 6 (72)
Round 13 :
(11 sc, 1 inc) x 6 (78)
Round 14 :
(12 sc, 1 inc) x 6 (84)
Round 15-16 :
1 sc in each st (84)
Info :
These two rounds give the medallion height; add more even rounds if you want larger coaster-like medallions. Fasten off leaving a long tail for sewing when assembling into runner.
Round 17 :
Work 1 rnd of sc in BLO to create a subtle ridge for attaching petals or other motifs (84)
Round 18 :
Optional scalloped edge: *sk1, 5 dc in next st, sk1, sl st in next st* around to form decorative edge. Adjust repeats to end neatly. Fasten off and weave ends.
— Sunflower (Make 3) — Center + Two Petal Layers :
Round 1 (Center) :
Using dark brown, 6 sc in magic ring (6)
Round 3 :
(1 sc, 1 inc) x 6 (18)
Round 4 :
(2 sc, 1 inc) x 6 (24)
Info :
Complete center disc to desired size. For the pictured sunflowers the center is worked to 24-30 sts (rounds 4-5). Fasten off and weave tail to the back for later sewing. Set centers aside.
Round 5 (Inner ring for petals) :
Join mustard yarn to any stitch on the outside of center. Ch1, sc around the outside of center disc placing 1 sc per stitch across edge (24) — this creates the joining round for petal loops.
Round 6 :
*ch3, sl st in same st to make a small loop* repeat in each st around (24 loops)
Info :
These chain loops are anchors for the first petal layer. Keep loops uniform; use your finger to size each loop if necessary.
Round 7 (Petal Layer 1) :
Working into each chain-3 loop: (sc, hdc, 3 dc, hdc, sc) in each loop. Fasten off after completing round. This creates fuller, rounded petals (24 petals)
Round 8 :
Flip piece to back and work a short rnd of sc behind petal bases to secure (24). Fasten off and weave tail to back.
Round 9 (Petal Layer 2) :
Join mustard again behind first layer in the space between two petals. Ch2, *(3 tr, ch2, 3 tr) in next space, sl st in next petal base; rep around to create a larger scalloped petal overlay (12 larger petals total)*
Round 10 :
For added texture, work puff stitches in each large petal: *yo, insert, pull up loop 6 times, yo and pull through all loops, ch1 to close* repeat in each large petal, sl st to secure (12 puff petals)
Info :
Position the inner and outer petal layers to fan naturally; steam block lightly while pinned to shape. Sew sunflower center to the middle by whipstitching through center back and petals to secure.
Round 11 :
Sew center to flower: place dark brown center over the petal bases and sew through both layers with long tail. Weave in ends on the wrong side.
— Layered Chrysanthemum Bloom (Make 2) :
Round 1 :
6 sc in magic ring (6)
Round 3 :
(1 sc, 1 inc) x 6 (18)
Round 4 :
(2 sc, 1 inc) x 6 (24)
Info :
Use mustard or cream depending on desired tone for the layered bloom. These blooms get many small petal layers built directly on top of each other to create the dense look.
Round 5 :
1 sc in each st (24)
Round 6 :
*ch4, sl st in next st* around to create 24 small loops for petal anchors
Round 7 (First petal round) :
In each ch4 loop: work (sc, hdc, 5 dc, hdc, sc). Fasten off the round ends but do not cut yarn; you will layer more petals above.
Round 8 :
Work sc in back loops behind the petal bases to anchor. (24)
Round 9 (Second petal round) :
Join yarn in between petal bases, ch3 and make 2 dc clusters into the space above each petal to form staggered upper petals (24 clusters). Fasten off.
Round 10 :
For additional density, repeat a smaller petal round with chain-3 loops and 3 dc in each loop to create an inner filler layer. Stagger petals so they tuck behind outer ones.
Info :
Trim yarn leaving long tails to sew blooms onto background. If you want a puffier bloom, place a small circle of thin batting under the petals and secure with a few stitches through the bloom base before sewing to the runner surface.
— Small Daisy Flower (Make 6) :
Round 1 :
6 sc in magic ring (6)
Round 3 :
1 sc in each st around (12)
Round 4 (Petals) :
*ch3, sl st in same st to make 12 small loops* around (12 loops)
Round 5 :
Into each loop: (sc, hdc, 3 dc, hdc, sc) to form small 12 petals. Fasten off and weave ends.
Info :
Use cream for petals and a small tan or brown center. These small daisies sit around larger motifs to fill gaps and bring light contrast. Leave tails for sewing.
— Leaves — Small, Medium, Large (Make varied numbers) :
Small Leaf - Round 1 :
Ch 8, sc in 2nd ch from hook, hdc in next, 3 dc in next, hdc in next, sc in next, sl st in last to form tip, then work on opposite chain working sc, hdc, 3 dc, hdc, sc to base. Join to first st with sl st. (12 sts across leaf outline)
Small Leaf - Round 2 :
Work 1 rnd of sc around leaf to tidy edge, placing 2 sc at base to angle leaf appropriately. Fasten off leaving long tail for sewing.
Medium Leaf - Round 1 :
Ch 12, sc in 2nd ch from hook, hdc in next 2, 3 dc in next, 3 dc in next two stitches for fuller middle, hdc in next 2, sc in next 2; reverse across opposite chain and join. Work a round of sc around and finish (approx 18 sts)
Medium Leaf - Round 2 :
Using BLO: 1 sc in each st BLO to create a raised center ribline when turned. Fasten off leaving long tail for sewing.
Large Leaf - Round 1 :
Ch 16. Work up one side: sc, hdc, 3 dc, 5 dc, 3 dc, hdc, sc across to tip. Work same along opposite side back to base, sl st to close. (approx 24 sts)
Large Leaf - Round 2 :
Working in FLO: sc in each st FLO to create a textured vein on the surface. Optionally embroider a central vein using surface slip stitch in contrasting olive.
Info :
Make 20-30 leaves in a mix of sage, olive and tan to achieve the layered look in the photo. Stagger sizes when sewing into place to create depth. Use surface slip stitch or embroidery to add midrib lines and veins after the leaves are sewn down.
— Curled Bud Leaves (Make 12) :
Round 1 :
Ch 6, sc in 2nd ch from hook, hdc in next, 3 dc in next, hdc in next, sc in last; fold and sl st across base to form a curled bud leaf (approx 8 sts). Fasten off leaving tail for attaching.
Info :
These small curled pieces are excellent fillers around flowers and medallions. Curl by folding before closing base, or block over a dowel for a permanent curve.
— Vines and Stems :
Round 1 :
With Sage Green, ch 60 (or desired vine length). Sl st back along chain to make a flat vine look, or work sc back for fuller vine. Make several lengths (approx 6-8) to interconnect motifs.
Round 2 :
For dimensional stem: ch 40, work a row of hdc across then a row of BLO sc to create a ridge. Fasten off and leave tails for sewing to background.
Info :
Vines can be crocheted directly onto the background medallions with surface slip stitch if you want a continuous piece. Otherwise, make separately and sew in place for flexibility when arranging motifs.
— Joining Motifs into Runner :
Info :
Lay out medallions, sunflowers, blooms, small flowers and leaves on a flat surface to decide placement. The pictured runner alternates large medallion, clustered flowers, medallion, cluster, forming an organic repeating layout. Pin motifs in place before sewing.
Round 1 :
To join: place two motifs right sides together at overlap point. Using long tail from one motif, whipstitch about every 3-4 sts for a secure seam. Continue joining all motifs following pinned layout.
Round 2 :
Once primary motifs are joined, use small daisies and leaves to fill gaps, sewing through both pieces securely. For strength, sew twice in high-traffic areas (where cups will sit).
Info :
For a cleaner join, you can use slip-stitch join from the right side: place motifs right sides together and sl st through both loops. This gives a flatter seam but requires more precision in alignment.
— Decorative Surface Stitching and Veins :
Round 1 :
With olive yarn, use surface slip stitch to draw veins along leaves: pull yarn along wrong side and work surface sl st along the top following natural leaf curve.
Round 2 :
Add french knot-style clusters around flower centers by tightly wrapping yarn around needle and stitching through center for a textured seed cluster effect. Alternatively, use small brown puff stitches.
Info :
Surface stitches are best done after motifs are joined so veins align across seams. Use a contrasting but harmonious color (olive or deep tan) for subtle definition.
— Edge and Scallop (Final Border) :
Round 1 :
Work 1 rnd of sc around entire runner edge, keeping fabric flat; place 3 sc in corners or points to maintain shape. This tidies raw edges and prepares for scallop.
Round 2 :
Scallop round: *sk 2 sts, 6 dc in next st, sk 2 sts, sl st in next st* repeat around. Adjust spacing to keep scallops even. Fasten off and weave ends neatly to back.
Info :
If your runner feels too floppy, add a backing fabric fused to the wrong side with a thin fusible interfacing or slip a thin felt backing and baste in place with matching thread.
— Finishing Touches and Blocking :
Round 1 :
Steam-block the assembled runner while pinned to a flat surface to help petals and scallops set. Use a low-heat steam and avoid pressing directly on puffy petals — steam from above or use a cloth.
Round 2 :
Weave all ends to the back, trimming close. If any flower layers lift too much, secure with a couple of hidden stitches through the flower base and the background medallion.
Info :
For extra durability, apply a small dab of textile glue at hidden anchor points on the underside of heavy blooms. Allow to dry fully before using on a high-traffic table.
— Notes on Scaling and Color Variations :
Info :
To scale up the runner, add extra medallions and repeat motif clusters. Swap color palettes: rich reds and burnt oranges for a bolder fall, pastels for spring, or white and green for year-round cottage style. Changing to a dk/light worsted yarn will reduce size; adjust hook accordingly and add rounds to medallions to keep proportions.
Info :
If you encounter a stitch count discrepancy, recount stitches at the start of the round and compare with previous round totals. Unravel back to last correct round rather than inventing an offset — this maintains circular symmetry and prevents ripple distortion.
This Sunflower Harvest runner brings the warmth of the season to any table with layered petals and lush leaves. Each motif is a small project that comes together to form a radiant centerpiece you�ll be proud to display. The textured sunflowers and soft sage background create a cozy, handcrafted vibe perfect for harvest gatherings. Enjoy the mindful pace of assembling each bloom — and delight in the finished beauty! 🌻🍁✨