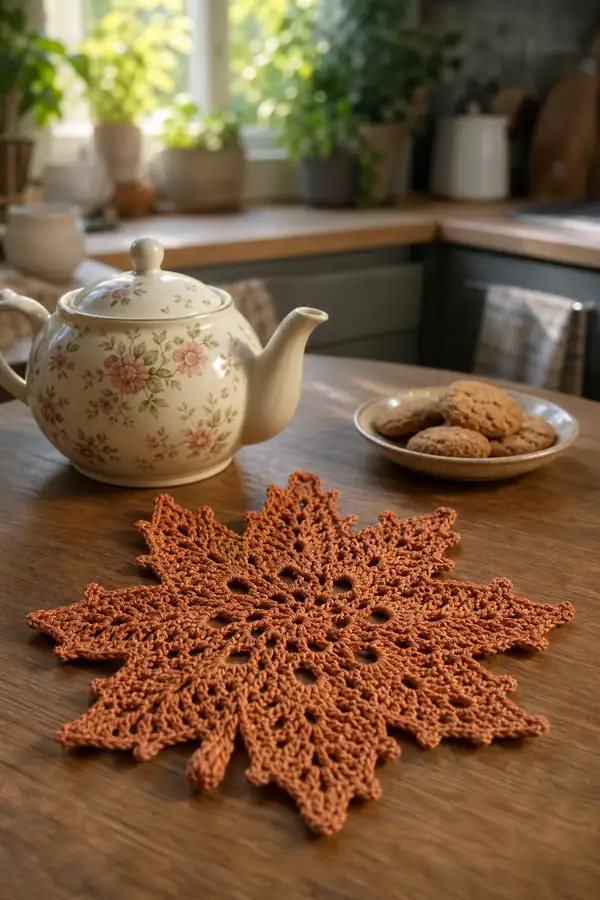
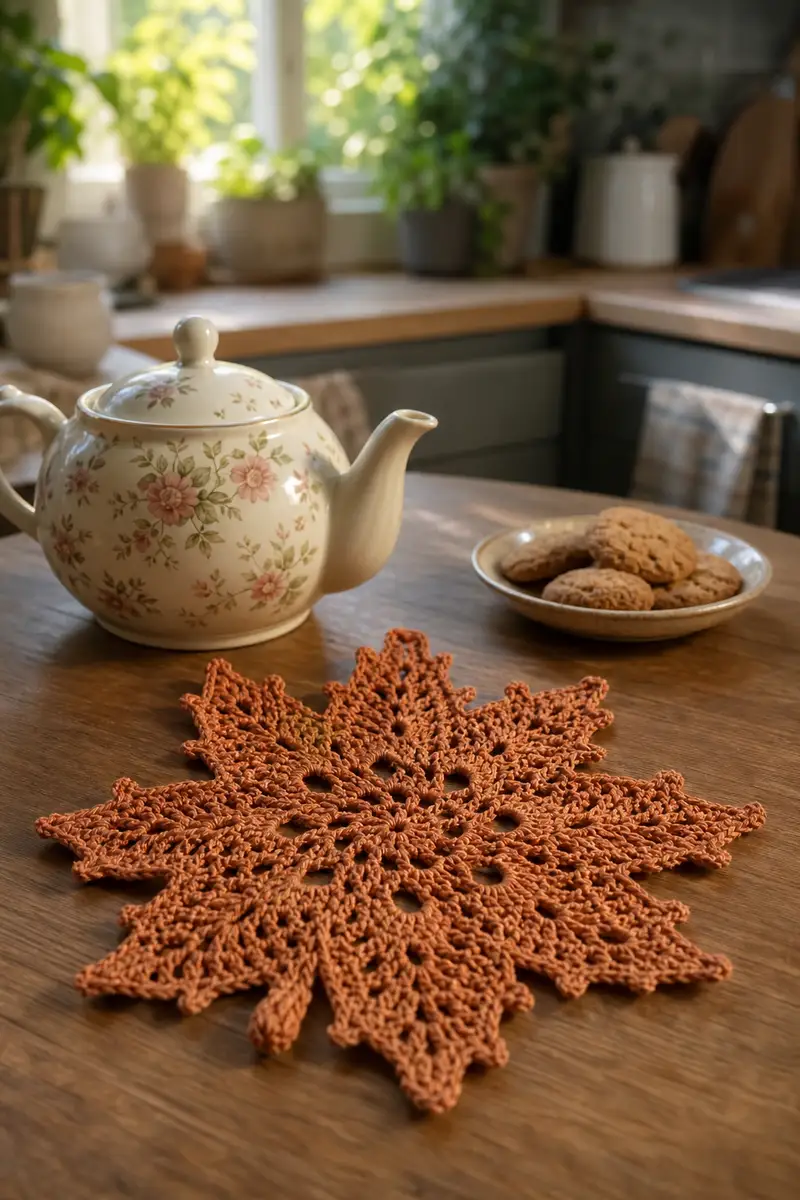
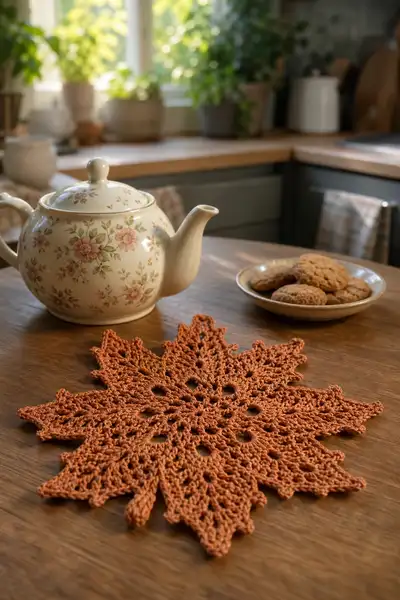
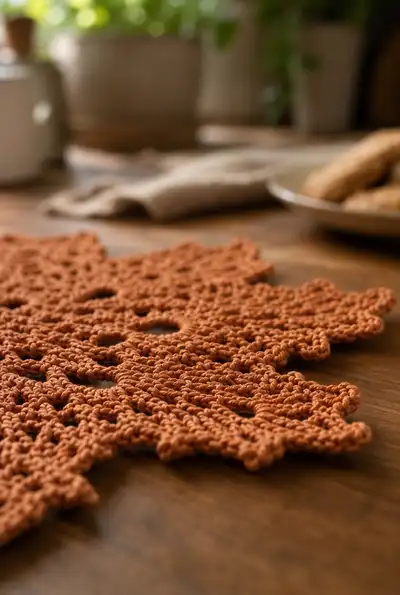
A warm, rust-orange leaf-shaped lace placemat inspired by autumn foliage. Worked in a cotton-weight yarn, this flat lace motif features an open center, radiating spokes, and sharply pointed lobes finished with a delicate picot edge. Perfect for a tea setting or seasonal table accent, it blocks beautifully to show off the texture and points.
Progress Tracker
0% Complete
— Notes & Gauge :
Info :
This leaf placemat is worked flat in joined rounds with repeating 8-fold symmetry (eight leaf points). Gauge is not critical but for reference the sample measures approximately 12-14" (30-36 cm) across from point to point using DK/light-worsted cotton and a 3.5mm hook. The pattern keeps an 8-repeat structure; where you see ( ) x8 you will repeat that sequence for each leaf section. Use stitch markers to mark the beginning of each round and the divisions between lobes for easier counting.
— Center & Foundation Rounds :
Round 1 :
Make a magic ring. 8 sc in magic ring (8)
Round 2 :
(1 sc, inc) x8 (16)
Round 3 :
(2 sc, inc) x8 (24)
Round 4 :
(3 sc, inc) x8 (32)
Info :
Keep tension even and place a stitch marker at the first stitch of each round. These first increases create the small central circle and begin forming the eight radiating sections.
Round 5 :
(4 sc, inc) x8 (40)
Round 6 :
(5 sc, inc) x8 (48)
Round 7 :
(6 sc, inc) x8 (56)
Round 8 :
(7 sc, inc) x8 (64)
Info :
At the end of Round 8 you have a stable circular disk. From here forward we will work texture and chained eyelets into these 8 anchor points. Keep markers at each 1/8th point — you can mark every 8 stitches or at your repeat boundaries to help placement.
Round 9 :
(8 sc, inc) x8 (72)
Round 10 :
(9 sc, inc) x8 (80)
Round 11 :
(10 sc, inc) x8 (88)
Round 12 :
(11 sc, inc) x8 (96)
Info :
Round 12 establishes the working stitch count of 96 (12 stitches per repeat x8). From this point onward most rounds preserve the 96-stitch count for even fabric and symmetry; lace and eyelet patterns are worked into these 96 anchor stitches.
— Open Lace Body (Rounds 13-36) :
Round 13 :
1 sc in each st around (96)
Round 14 :
1 hdc in each st around (96)
Round 15 :
(sc in next 4 sts, ch3, sk next 2 sts) x12 (96 anchors remain; this creates 12 small chain-loops spaced around which fall naturally into the repeat)
Info :
Round 15 creates preliminary chain loops to read as small open eyelets. Although chains and skips are used internally, the number of anchor stitches around remains 96 because work is anchored into specific base stitches; count your anchors rather than total loops for accuracy.
Round 16 :
Into each ch-3 sp: (sc, ch3, sc) to form tiny ring loops; into remaining base stitches: sc so you finish with (pattern balanced to 96 anchors) — 1 sc/blended loop pattern across (96)
Round 17 :
1 dc in each st around (96)
Round 18 :
1 sc in each st in BLO (96)
Info :
Working in the BLO creates a slight raised ridge to suggest veins that will read better after blocking. If you prefer a flatter look, work these rounds in regular sc instead.
Round 19 :
(sc in next 3 sts, ch3, sk next st) x24 (anchors maintained, lace forming)
Round 20 :
*Into each ch-3 sp from previous round: (3 dc, ch2, 3 dc) shell; into the next 6 base stitches: sc in each* — repeat across to create balanced shells across (96)
Info :
Shells open up the motif and push the lace outward. Keep shells evenly centered in each repeat; pin shells slightly when blocking to make the lobes open evenly.
Round 21 :
1 sc in each st around, working into shells' central spaces as indicated (96)
Round 22 :
(hdc in next 2 sts, ch2, sk next st) across — maintain anchors as charted for 96-stitch foundation
Round 23 :
Into ch-2 spaces: (dc, ch1, dc) clusters to create small eyelets. Into regular sts: sc or hdc as needed to finish round with (96)
Info :
When the pattern references spaces (ch-1, ch-2, ch-3), treat them as placement points. Keep a consistent method for counting — mark the repeats with a removable marker if needed to avoid miscounting when switching between shells and simple sc stitches.
Round 24 :
1 sc in each st (96)
Round 25 :
(sc, ch4, sk 2, sc in next 3) x24 to create larger lace arches — anchors remain aligned to the 96 structure (96)
Round 26 :
Work (sc into top of each previous sc, 3 dc into each ch-4 arch) across — distribute dc clusters evenly to maintain 96 anchors
Info :
This phase is where the 'veins' of each leaf begin to take form. Notice that the stitch count stays the same; clusters are anchored into spaces or individual stitches — each cluster counts as one anchor in the round's stitch math.
Round 27 :
1 sc in each st around (96)
Round 28 :
1 hdc in each st around (96)
Round 29 :
(sc in next 5 sts, ch3, sk next 2) x12 (repeats arranged to keep 96 anchors)
Round 30 :
Into each ch-3 sp work (sc, ch3, sc) to form decorative eyelets; sc in remaining stitches to preserve overall count (96)
Info :
At Rounds 29-30 the motif has regular eyelets forming a circular ring; this ring will help guide the later shaping of leaf points. Maintain neat, evenly sized chain loops for crisp shaping during blocking.
Round 31 :
1 dc in each st around (96)
Round 32 :
1 sc in each st BLO to accent the underlying texture (96)
Round 33 :
(sc in next 3 sts, 3 dc cluster in next st, sc in next 3 sts) x8 (96)
Round 34 :
1 sc in each st around, smoothing the surface and anchoring the clusters (96)
Round 35 :
(hdc in next 2 sts, ch2, sk next st) x32 pattern for subtle scalloped shaping (anchors remain aligned to 96)
Round 36 :
Into each ch-2 sp work (dc, ch1, dc) to form a ring of small shells around the motif, sc in remaining stitches (96)
Info :
These rounds prepare the fabric for point shaping — the shells and clusters create texture that will be extended outward into leaf points. Keep your tension consistent and count anchors carefully before proceeding to point construction.
— Texture & Vein Rounds (Rounds 37-60) :
Round 37 :
1 sc in each st around (96)
Round 38 :
(FLO) 1 sc in each st around to make a defined ridge (96)
Info :
Working in the FLO for an entire round will create a raised inner ridge that reads as a vein when the fabric is blocked. Use this to create alternating textures across the leaf surface.
Round 39 :
1 hdc in each st around (96)
Round 40 :
(sc, ch3, sc) into every 6th stitch then sc in remaining stitches — creates small spaced loops around motif (96)
Round 41 :
1 sc in each st around (96)
Round 42 :
(2 sc, ch4, sk 2) x24 — larger loops to begin elongating the outer fabric (96)
Round 43 :
Into each ch-4 sp: (sc, 3 dc, sc) to convert arches into fan-shaped petals across the circumference (96)
Info :
By converting chain arches into fans, you add surface area and begin the outward movement needed for defined leaf points. This outward push is what later allows you to shape individual lobes without changing the base stitch count.
Round 44 :
1 sc in each st around (96)
Round 45 :
(sc in next 2 sts, fpdc around next st, sc in next 2 sts) x16 — working front post double crochet (fpdc) raises and defines linear veins across surface (96)
Round 46 :
1 sc in each st around (96)
Round 47 :
(hdc in next 3 sts, ch3, sk 1) x24 to build elongated open arches (96)
Round 48 :
Into each ch-3 sp: (2 dc, ch1, 2 dc) to make diamond-shaped eyelets; sc evenly across remaining stitches (96)
Info :
Take time to count the diamond eyelets and ensure they line up with the earlier markers; these diamond shapes will fall on the centers of each eventual leaf point and should be symmetric across the eight repeats.
Round 49 :
1 sc in each st around (96)
Round 50 :
FLO: (sc in each st) to create a shallow ridge that helps the outer rounds read as separate from the body (96)
Round 51 :
(sc in next 4 sts, ch5, sk next 3) x16 — long chain arches placed to be later converted into the eight major lobes (96)
Round 52 :
Into each ch-5 sp: (sc, 4 dc, ch2, 4 dc, sc) forming large fans; sc in remaining stitches to keep anchors even (96)
Info :
Rounds 51-52 create large fans that will be extended into leaf points; ensure each fan is centered on one of the eight repeat divisions for uniform leaf point placement.
Round 53 :
1 sc in each st around (96)
Round 54 :
(sc, ch3, 2 tc cluster into next st, ch3, sc) across anchors to begin sculpting ridges (96)
Round 55 :
1 sc in each st around (96)
Round 56 :
FPdc and BPdc interplay: (fpdc around next st, bpdc around next st, sc in next 4) x16 — creates alternating raised veins (96)
Round 57 :
1 sc in each st around (96)
Round 58 :
(hdc in next 2, ch2, sk 1) x32 to refine outer spacing (96)
Round 59 :
Into ch-2 spaces: (dc, ch1, dc) to reinforce small triangular openings for the leaf texture; sc in other stitches (96)
Round 60 :
1 sc in each st around (96)
Info :
At this stage the body has plentiful texture and defined fans positioned to be extended into points. Place removable stitch markers at the center of each of the eight fans — these markers indicate the center of each leaf point for the next shaping rounds.
— Leaf Point Shaping (Rounds 61-86) :
Round 61 :
(sc in next 5 sts, ch7, sk next 6) x8 — long chain loops placed at the center of each intended point (96 anchors preserved)
Round 62 :
Into each ch-7 sp: (sc, 6 dc, sc) to form a tall fan. In remaining stitches, work sc to keep round count at (96)
Info :
These tall fans are the core of each leaf point. Work them evenly and keep stitch counts exact across repeats. The tall fan will be extended in subsequent rounds to produce elongated, serrated points.
Round 63 :
1 sc in each st around (96)
Round 64 :
(sc in next 3 sts, fpdc around next dc of fan, ch2, sk 1, fpdc around next dc, sc in next 3) x8 (96)
Round 65 :
1 sc in each st around (96)
Round 66 :
Working into each fan center: (sc, ch5, 5 dc, ch5, sc) to add height and a bridge for the point tip; sc evenly in remainder to keep anchors at (96)
Round 67 :
1 sc in each st around (96)
Round 68 :
Begin serration: (sc in next 2 sts, ch3, 3 dc in same st, ch3, sc in next 2) x8 across fans, sc elsewhere to maintain (96)
Info :
Serrations are built by adding small clusters and picot-like motifs within the fan; keep the clusters positioned toward the outermost fabric so they will read as points after blocking.
Round 69 :
1 sc in each st around (96)
Round 70 :
(sc, ch3, sc, ch3, 3 dc in next st, ch3, sc, ch3, sc) x8 — doubling the outer serration for more pronounced points (96)
Round 71 :
1 sc in each st around (96)
Round 72 :
Into outermost ch-3 spaces: (sc, picot, sc) to convert some arches into tiny pointed tips; sc in remaining stitches (96)
Round 73 :
1 hdc in each st around (96)
Round 74 :
(sc in next 3 sts, ch4, sk 2, sc in next 3) x8 — small final arches that will be shaped into teeth-like points (96)
Round 75 :
Into each ch-4 sp: (sc, 3 dc, sc) to make strong little wings at each serration; sc in remainder (96)
Info :
Rounds 68-75 create the complex serrated edge you see in the photo. Build these carefully and ensure each serration aligns to the center marker of its leaf point. Small changes in tension here will dramatically change the final silhouette; keep consistent.
Round 76 :
1 sc in each st around (96)
Round 77 :
(fpdc around next 2 sts, sc in next 4) x16 — reinforcing veins into each point area (96)
Round 78 :
1 sc in each st around (96)
Round 79 :
(sc, ch3, sc into next 2 sts, picot) x24 — tiny points laid into serration for crispness (96)
Round 80 :
1 sc in each st around (96)
Info :
By Round 80 the leaf points should clearly extend outward and the serrated edges are forming. If any section seems flat, carefully add a few extra picots or small clusters in that repeat to balance the look (make the same adjustment in each of the eight repeats).
Round 81 :
(sc in next 4 sts, ch5, sc into tip dc of fan, ch5, sc in next 4) x8 — creating a tall bridge across each tip for a sharpened silhouette (96)
Round 82 :
Into each ch-5 loop: (sc, 6 dc, sc) to elongate tip; sc elsewhere across round to preserve anchor count (96)
Round 83 :
1 sc in each st around (96)
Round 84 :
Form final serrations: (sc, picot, sc, 3 dc cluster, sc, picot, sc) across each point center — balance to end with (96)
Round 85 :
1 sc in each st around (96)
Round 86 :
FLO: 1 sc in each st around to create a neat ridge just inside the edge (96)
Info :
Rounds 81-86 are the refining rounds that yield the sharply defined leaf points seen in the picture. If your points are too soft, add an extra round of picots spaced evenly along the extreme edge (but be sure to repeat identically across all eight repeats).
— Final Edge & Decorative Picot Row (Rounds 87-100) :
Round 87 :
(sc in next 2 sts, picot) x32 — place picots evenly across the final ridge to make a crisp serrated border (96)
Round 88 :
1 sc in each st around (96)
Round 89 :
(sc, ch3, sc) into every outermost stitch to soften transition from serration to edge; continue sc in remaining stitches to finish with (96)
Round 90 :
Working back into the base of each outermost sc: (sl st, sc) pairs to tighten the edge and reduce curling (96)
Info :
These rounds pull the outermost points together and tidy up raw loops. Take care not to over-tighten; the goal is a neat, stable edge ready for blocking.
Round 91 :
1 hdc in each st around (96)
Round 92 :
(sc, picot) across every other stitch for a uniform dotted edge (96)
Round 93 :
1 sc in each st around (96)
Round 94 :
Finishing ridge: FLO 1 sc in each st to create elegant inner contour (96)
Round 95 :
Final decorative row: (sc, ch2, sl st) around to produce a subtle rope-like border (96)
Round 96 :
1 sc in each st around (96)
Round 97 :
Optional contrast round: change to contrasting color here if desired. Work 1 sc in each st (96)
Info :
If you choose a contrasting round, carry unused yarn inside or break and weave tails; small contrast can accentuate the serrations and make the leaf silhouette pop.
Round 98 :
1 sc in each st around (96)
Round 99 :
Light picot finish: (sc in next 3 sts, picot) x24 — distribute picots to highlight each large serration evenly (96)
Round 100 :
Fasten off, weave in ends securely, and trim tails close to work
Info :
After fastening off, gently weave ends through 6–8 stitches with a yarn needle. Wet-block or steam-block to open the lace and shape the points: pin each point out on a blocking mat to the desired distance and allow to dry completely.
— Blocking & Finishing :
Info :
To achieve the crisp points shown, wet the placemat thoroughly (spray or dunk in lukewarm water), gently squeeze out excess water, then pin the center flat and stretch each of the eight points outward and slightly forward. Use rust-proof pins and allow to dry fully. Optionally use a light spray starch or fabric stiffener if you want a more rigid placemat.
Info :
Check symmetry after blocking and, if necessary, add a small reinforcing stitch under the base of each point on the underside to hold shape. Store flat to maintain the lace shape and avoid folding along the points.
You've just finished a charming autumn leaf placemat — what a beautiful seasonal accent! The lacework and serrated points come together to create a piece that's both decorative and practical. Pin and block carefully, and enjoy the satisfaction of a perfectly shaped finish. 🧶🍂 Share your finished mat and relish your cozy table styling — happy stitching! ✨