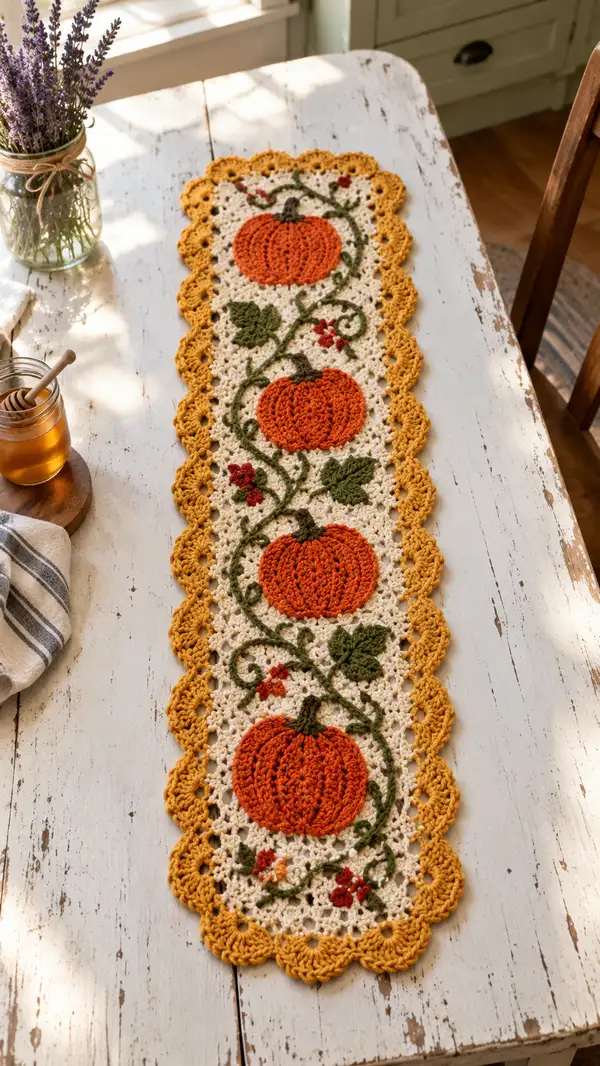
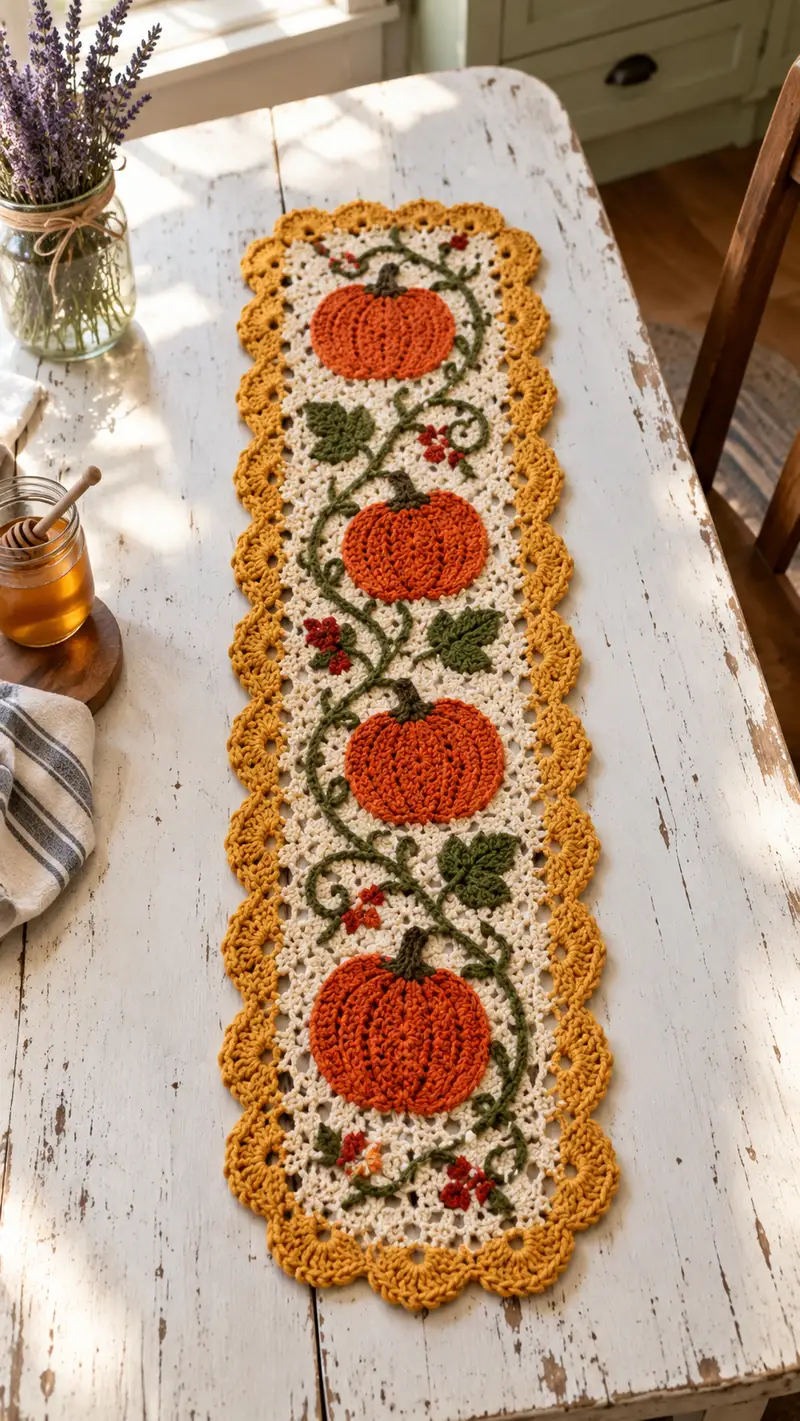
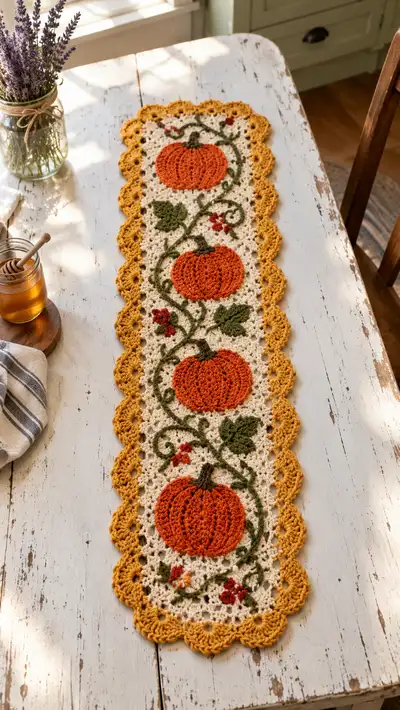
Create a warm, farmhouse-style table runner featuring three plump crocheted pumpkins, curling vines, textured leaves and a scalloped golden border. This runner combines a lacy neutral background with bright pumpkin orange, olive green vines and a mustard scallop for a cozy seasonal accent. The pattern is worked in modular motifs and appliques so you can adjust length easily. Clear, step-by-step instructions and helpful info boxes guide you through placement, assembly and finishing touches.
Progress Tracker
0% Complete
— Abbreviations and Notes :
Info :
Worked in US terms. Surface crochet vines are worked with a simple sl st and chain embroidery. The pattern is modular: create the center lacy rectangle, make three identical pumpkin applique9s, make leaves and small flower motifs, then block and assemble. Use the yarn weights and hooks listed to achieve similar gauge and drape. Gauge is not critical for look but will affect final size.
— Center Lacy Panel (long rectangle) :
Round 1 :
Foundation chain 81 (this creates an interior width suitable for 3 pumpkins and spacing). Ch 1, sc in 2nd ch from hook and in each ch across (80 sc) (80)
Round 2 :
Ch 3 (counts as dc). *Skip 2 sc, (3 dc) in next sc (shell made), skip 2 sc, dc in next sc* rep across to last st, dc in last st. Turn (pattern established; 12 shells, plus edge dc) (approx 80)
Round 3 :
Ch 1, sc in first stitch, *ch 2, sk next 2 dc, sc in center dc of shell (between shells)* rep across; sc in last st. Turn (creates lacy ladder spaces) (80)
Round 4 :
Ch 3, *3 dc in ch-2 sp (shell), sk next sc, dc in next sc* rep across; dc in top of beginning ch-3 (keeps edges straight) (80)
Info :
Work these four-row lacy repeats to build the length of the runner. You will make enough repeats so that the rectangle measures the distance required to fit three pumpkins with even vertical spacing, approximately 44-48 cm / 17-19 inches in total length for the photographed size. In this pattern we will work 32 repeats of the 4-row lace to create the long base. Adjust repeats to lengthen or shorten as needed.
Rounds 5-36 :
Repeat Rounds 2-4 twelve times (that is 12 x 3 rows = 36 rounds including first 4). This establishes the main lacy body; check after every 6 repeats to keep edges square. (80)
Info :
At this point the lacy rectangle is the base for applique9 placement. Block the rectangle: dampen lightly, pin to shape on blocking mat keeping edges square and spacing consistent. Allow to dry thoroughly before attaching applique9s.
— Pumpkin Applique9 (Make 3 identical) :
Round 1 :
With Pumpkin Orange and 3.5mm hook: mr, ch 1, 6 sc in magic ring (6)
Round 2 :
Inc in each st around (12)
Round 3 :
(1 sc, inc) x 6 (18)
Round 4 :
(2 sc, inc) x 6 (24)
Round 5 :
(3 sc, inc) x 6 (30)
Info :
At this small stage your disc is forming. We will create a slightly flattened round to mimic a pumpkin. Keep tension even. Do not fasten off; we will work a few textured rounds next.
Round 6 :
1 sc in each st around (30)
Round 7 :
1 sc in each st around (30)
Round 8 :
Change to 4.0mm hook. (Optional to relax gauge for final size.) 1 sc in each st around (30)
Round 9 :
To create vertical ribs: *fpdc around next 5 sts, bpdc around next 0 sts* rep to end. (This round is worked as 30 fpdc in sequence to create ridges; you will be essentially working front post dc across groups to form eight to ten visual ribs; maintain count of 30 posts) (30)
Info :
The classic pumpkin look is achieved by working alternating front post and back post stitches across the face to create channels. We will form visible ribs by repeating a textured round that groups stitches into segments; maintain 30 post stitches and compress slightly with your fingers to flatten the disc into a pumpkin shape.
Round 10 :
1 sc in each st around (30)
Round 11 :
(3 sc, dec) x 6 (24)
Info :
Begin gentle decreases to create a slightly domed back so the pumpkin sits nicely when sewn down. Stuff very lightly with a bit of fiberfill if you want a more plump applique; usually applique9s are left mostly flat to sew on.
Round 12 :
(2 sc, dec) x 6 (18)
Round 13 :
(1 sc, dec) x 6 (12)
Round 14 :
6 dec (6) - Fasten off leaving long tail for sewing and weave tail through remaining sts to close if desired; but for applique9 leave a small opening so the pumpkin remains slightly domed when sewn. (6)
Info :
We will add a contrast stem and deepen the ribs by surface crochet. Use a yarn needle and Brown yarn to stitch a small stem loop at the top center: bring the needle up through back, add a small loop of brown yarn with a few whip stitches to secure (about 6 stitches) and knot on the wrong side. For a more sculpted stem, work a short tube in brown: ch 6, sl st back into chs to make a tube, fold and sew closed.
Round 15 :
Surface Crochet Ribbing: With Pumpkin Orange and a contrasting technique, use a 3.5mm hook to surface slip stitch around the pumpkin following 8 equally spaced vertical lines from center top to bottom - create spokes by inserting hook into side of the stitch and working a sl st back towards center and out to edge; repeat to create 8 ribs that give the pumpkin a carved look. (visual lines; no stitch count)
Info :
To space ribs evenly, fold pumpkin disc into quarters and mark positions with pins on the wrong side before surface crocheting. Work the surface sl sts from top edge to bottom edge producing raised ridges. This is a decorative step but is key to the pumpkin aesthetic.
— Pumpkin Stem (Make 3) :
Round 1 :
With Brown yarn, ch 6, sl st in 2nd ch from hook and across (5 sl st) (5)
Round 2 :
Ch 1, 1 sc in each st across (5)
Round 3 :
Fold tube lengthwise and sew along edge with whip stitch to close, leaving top and bottom open. Fasten off leaving tail for sewing. (closed)
Info :
Sew the stem to the top center of each pumpkin applqiue by inserting tail into center back and sewing through several rounds of the apple disc to secure; hide ends inside applique.
— Large Leaf Motif (Make 6) :
Round 1 :
With Olive/Forest Green and 3.5mm hook: mr, ch 1, 6 sc in ring (6)
Round 2 :
Inc in each st around (12)
Round 3 :
(1 sc, inc) x 6 (18)
Round 4 :
Ch 1, sc in next 4 sts, hdc in next 4 sts, dc in next 4 sts, hdc in next 4 sts, sc in last 2 sts - this shapes a pointed leaf (18)
Info :
Work the leaf flat, shaping the tip with dc cluster. Optional: work BLO on round 3 to give the leaf a folded central vein.
Round 5 :
1 sc around entire leaf edge to create a neat border (18)
Round 6 :
Fasten off leaving a long tail for sewing. Use tail to tack leaf into position beside pumpkins later. (close)
— Small Leaf Accent (Make 4) :
Round 1 :
With Olive and 3.5mm hook: ch 6, sl st in 2nd ch from hook and next 2 chs, hdc in next 2 chs, dc in last ch, turn and sl st into base to form a small leaf shape. Fasten off leaving tail for sewing. (visual)
Info :
These tiny leaves are worked on a short chain and flattened into a petal; they work well near flowers to add detail.
— Tiny Flower Motif (Make 6) :
Round 1 :
With Red/Burgundy and 3.5mm hook: mr, ch 1, 6 sc in ring (6)
Round 2 :
*Ch 2, (3 dc) in next st, ch 2, sl st in next st* rep around to form 3 tiny petals (visual)
Round 3 :
Fasten off leaving tail for sewing. Add a tiny French knot using peach yarn at center for contrast. (visual)
Info :
Sew flowers in clusters near vine intersections to echo the photograph. Use small stitched tacking stitches to keep them positioned flat on the lacy background.
— Embroidered / Surface Crochet Vine :
Round 1 :
With Olive green and a yarn needle or crochet hook: plan vine path starting near lower pumpkin and curling up, swooping around each pumpkin in an S-curve. Using a removable marker or pins, mark main path on the blocked rectangle.
Round 2 :
Surface crochet method 1: using 3.5mm hook, insert hook from wrong side to front at vine starting point, pull up loop, ch 1, then working from front, insert hook into next stitch along marked path and work a sl st, repeating to form a raised corded line. Continue sl st chain along the path to create a vine. Fasten off and weave ends. (visual)
Info :
Keep vine thickness uniform. If you prefer a corded vine, make a short I-cord or crocheted chain tube and sew it down with small stitches. Leave small tendrils by chaining 6-8 and sew chain tip into place as a curl.
Round 3 :
Add tendrils: at marked positions work a chain 8, sl st back along 3-4 chs to create a spiral curl, anchor on the wrong side. Repeat for each vine curling.
— Joining Applique9s to Center Panel (Placement & Attachment) :
Round 1 :
Layout: Place the first pumpkin applqiue approx 6 shells from bottom edge centered horizontally (count shells or use ruler for center). Space pumpkins evenly — for 3 pumpkins on our 81-ch width rectangle, place centers at thirds of the length so there is about equal gap between them. Use pins to secure in place.
Round 2 :
Sew each pumpkin using long tail from applique9: mattress stitch or whip stitch around the edge into the lacy panel, making small, evenly spaced stitches. Work through both layers so applique9 lays flat and is secure. Stitch count is visual; 18-24 stitches around per pumpkin depending on stitch size.
Info :
Sew stems first, then add surface crochet ribbing if you wish to cinch the top around the stem by couching a few stitches at the top center. Attach leaves and flowers around pumpkins and along the vine path using the yarn tail and hidden stitches; place leaves slightly overlapping vine for natural appearance.
— Scalloped Border (Works around entire rectangle) :
Round 1 :
With Mustard/Golden yarn and 4.0mm hook: join yarn at lower right corner of rectangle with sl st. Ch 3, *work 2 dc in next edge space (or next st at sides), ch 1, 3 dc in next sp* along short end to create repeating shell groups. Continue around the short end, along long edge placing shells into the ch-2 ladder spaces created earlier in the lacy panel. Aim to place shells evenly keeping count so scallops are symmetrical. (visual)
Round 2 :
At corners work (3 dc, ch 2, 3 dc) to create a rounded corner. On long edges place shells in same pattern. Turn as needed. (visual)
Round 3 :
For added height and visual weight, work one more scallop row: sl st to center of each previous shell, ch 3, (2 dc, ch 2, 3 dc) into center of shell, sl st to next shell center. Repeat around. Fasten off and weave tails. (visual)
Info :
The scalloped border visually frames the runner - keep tension consistent. If your scallops look tight, go up one hook size for the border to let them bloom. Block again after border to flatten and set scallop shape.
— Finishing Touches & Extra Rounds for Texture :
Round 1 :
Optional antique stitch wash: very lightly block and steam or use diluted fabric whitener for a vintage contrast. Spot test on scrap yarn to ensure no color bleeding.
Round 2 :
Weave all loose ends securely on the wrong side. Use small stitches to hide yarn tails into the body of nearest shells or densest stitches.
Info :
If you want more dimension, add an extra row of popcorns in Pumpkin centers using (ch2, 5 dc in same st, ch2, sl st) to make tiny raised clusters near pumpkin edges or flower centers. This is decorative and optional.
— Alternate Modular Variation (If adding more pumpkins) :
Round 1 :
To lengthen runner add additional repeats of the lacy four-row repeat before attaching applique9s. Each 4-row repeat adds approximately 0.5-0.7 inches depending on tension. Adjust until desired length is reached.
Info :
Because applique9s are sewn on after the rectangle is complete, you can change spacing without reworking base stitches. Mark new placement with pins or fabric chalk prior to sewing.
— Care Instructions :
Info :
Hand wash cold and reshape while damp. Lay flat to dry. Avoid high heat when ironing; use a pressing cloth on low setting if needed. Store folded flat to avoid stretching the scallop edge.
This Autumn Pumpkin Table Runner brings the warmth of the season straight to your table—textured pumpkins, curling vines and a sunny scalloped edge create a cozy, handcrafted accent that's both charming and practical. Ite280a6s a joyful, relaxing project with a beautiful payoff, perfect for gifting or brightening your own kitchen this harvest season. 🧶🍂🎃