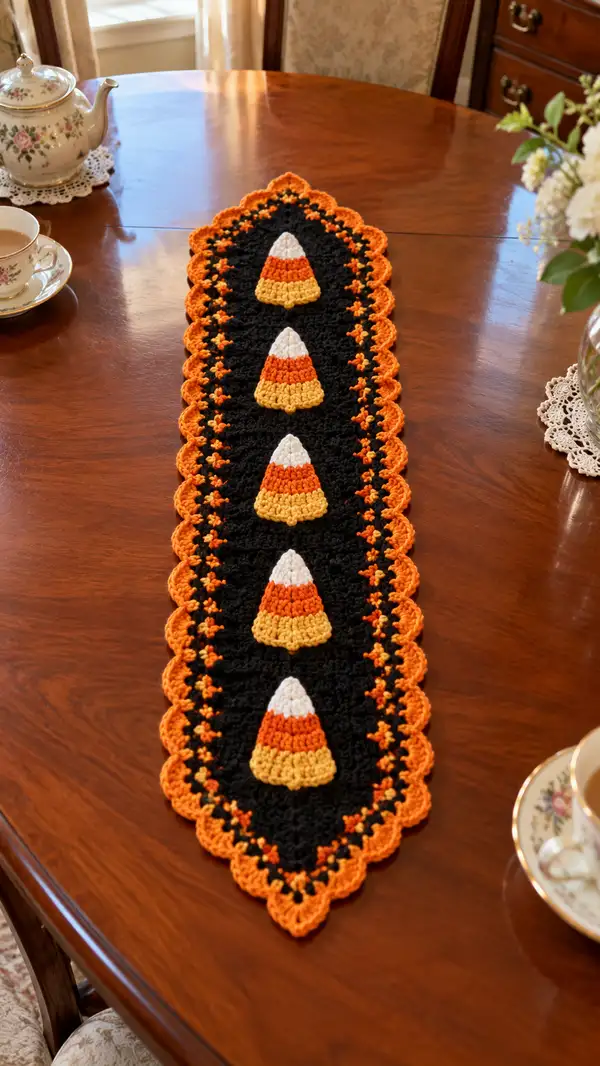
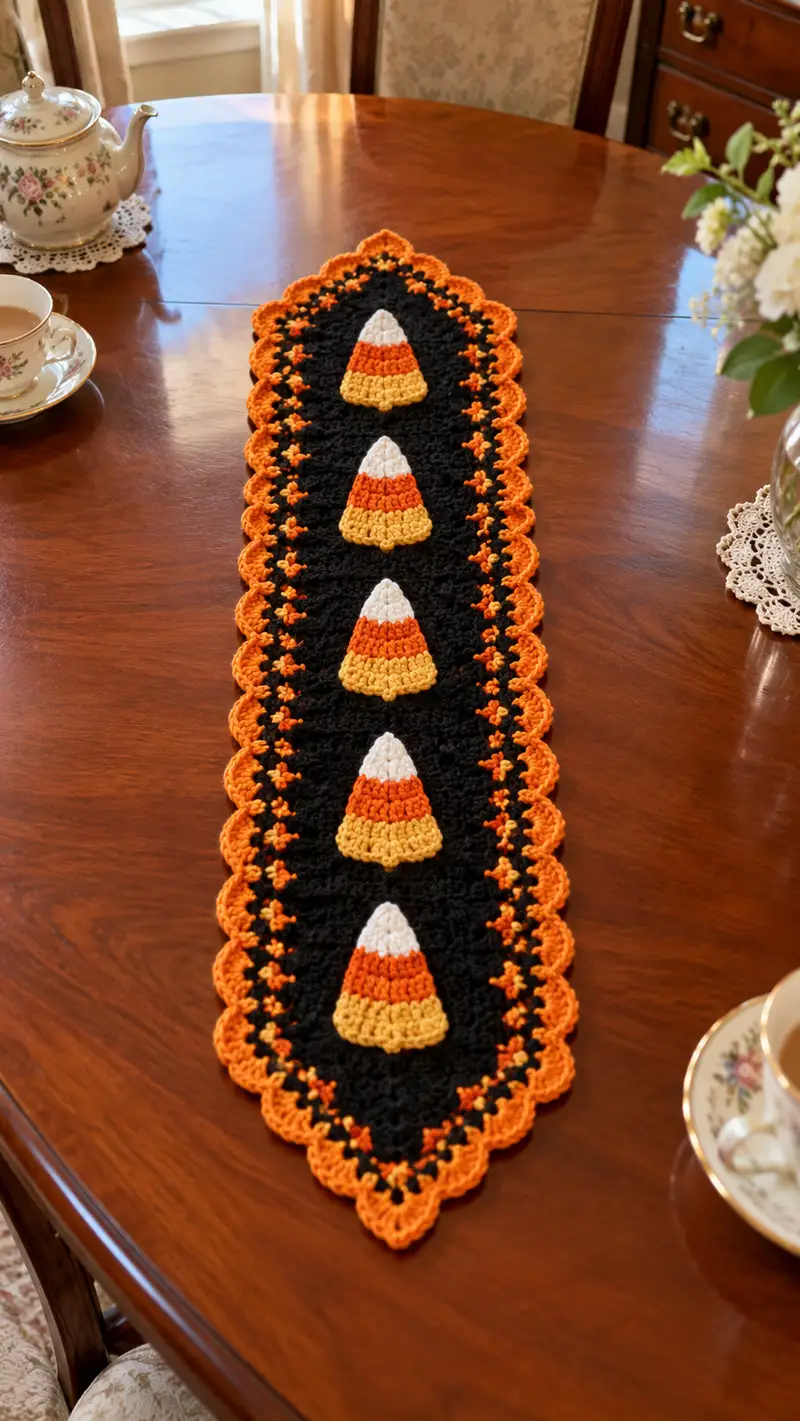
A festive Halloween table runner featuring five raised candy-corn motifs on a deep black ground, framed with a bright orange scalloped border and tiny orange accent clusters. This pattern uses simple crochet clusters and shells to create textured candy corn cones and a lacy decorative edging. Finished runner is narrow and elegant, perfect for a dining table or sideboard during autumn and Halloween celebrations.
Progress Tracker
0% Complete
— Materials & Gauge :
Info :
Gauge is not critical for the look of this runner, but for proportions follow worsted weight and hooks listed. If you prefer a denser fabric, go down a hook size. The sample measures approximately 34" long by 6.5" wide with five candy corn appliques spaced evenly; change spacing to lengthen or shorten.
— Center Panel (Base Field) :
Info :
The center panel is worked in continuous rounds to form an elongated oval. We begin with a small foundation chain joined to form an oval and increase only at the short ends to elongate the shape. Use black yarn for all rounds in this section.
Round 1 :
Ch 16, sc in 2nd ch from hook and in next 12 ch, 3 sc in last ch; now work on opposite side of starting chain: sc in next 12 ch, 2 sc in last ch (join to first sc with sl st) [34]
Round 2 :
Ch 1, sc in same st, sc across 12 sts, 2 sc in next 3 sts (these are the end loops), sc across opposite 12 sts, 2 sc in last 1 st (join) [40]
Round 3 :
Ch 1, sc in same st and across 14 sts, (2 sc in next 1 st) x3 at the short end, sc across 14 sts, (2 sc in next 1 st) x3 at other short end, join (count) [46]
Round 4 :
Ch 1, sc in each st around (46)
Info :
We are now creating the long body by adding increases only at each end of the oval every other round. Place temporary markers at the three end-increase clusters to find ends easily each round.
Round 5 :
Ch 1, sc in next 16 sts, (inc, sc, inc) in next st (first end cluster), sc in next 16 sts, (inc, sc, inc) in next st (second end cluster), join (count) [50]
Round 6 :
Ch 1, sc in each st around (50)
Round 7 :
Ch 1, sc in next 18 sts, (inc, sc, inc) in next st, sc in next 18 sts, (inc, sc, inc) in next st, join (54)
Round 8 :
Ch 1, sc in each st around (54)
Round 9 :
Ch 1, sc in next 20 sts, (inc, sc, inc) in next st, sc in next 20 sts, (inc, sc, inc) in next st, join (58)
Info :
At this stage the panel is beginning to lengthen. Make sure to keep your tension even; place markers at the three-stitch increase clusters to maintain symmetry.
Round 10 :
Ch 1, sc in each st around (58)
Round 11 :
Ch 1, sc in next 22 sts, (inc, sc, inc) in next st, sc in next 22 sts, (inc, sc, inc) in next st, join (62)
Round 12 :
Ch 1, sc in each st around (62)
Round 13 :
Ch 1, sc in next 24 sts, (inc, sc, inc) in next st, sc in next 24 sts, (inc, sc, inc) in next st, join (66)
Round 14 :
Ch 1, sc across each st around (66)
Info :
Check the width now. If you want a wider runner, continue the increase cycles two more times; for the sample width we will keep this as the stable width for building height (length).
Round 15 :
Ch 1, sc in each st around (66)
Round 16 :
Ch 1, sc around (66)
Round 17 :
Ch 1, sc around (66)
Round 18 :
Ch 1, sc around (66)
Info :
These even rounds build the long central column where candy corn appliques will be attached. Work evenly until you reach the spacing for your first candy corn. In the sample the panel between the pointed ends and between each candy corn is 7 even rounds; adjust spacing to fit your table length and the number of motifs.
Round 19-25 :
Ch 1, sc around (66) for 7 rounds total (66)
Round 26 :
Ch 1, sc around (66)
Info :
Mark the center of the runner lengthwise to ensure candy corn placement is centered. The sample runner uses five candy corn motifs spaced evenly down the center with 7 rounds of black between each motif. Leave a 7-round buffer at top and bottom before working the narrowing section for the pointed ends.
Round 27-33 :
Ch 1, sc around (66) for 7 rounds to create second spacer region (66)
Round 34 :
Ch 1, sc in next 24 sts, (dec over next 3 sts) at short end, sc in next 24 sts, (dec over next 3 sts) at other short end, join (62)
Round 35 :
Ch 1, sc in each st around (62)
Round 36 :
Ch 1, sc in next 22 sts, (dec over next 3 sts) at short end, sc in next 22 sts, (dec over next 3 sts) at other short end, join (58)
Round 37 :
Ch 1, sc around (58)
Round 38 :
Ch 1, sc in next 20 sts, (dec over next 3 sts) at short end, sc in next 20 sts, (dec over next 3 sts) at other short end, join (54)
Info :
Begin shaping the pointed ends by decreasing only at the short end clusters as shown every other round. Keep decreases balanced so the point comes gradually and sits flat.
Round 39 :
Ch 1, sc around (54)
Round 40 :
Ch 1, sc in next 18 sts, dec over next 3 sts, sc in next 18 sts, dec over next 3 sts, join (50)
Round 41 :
Ch 1, sc around (50)
Round 42 :
Ch 1, sc in next 16 sts, dec over next 3 sts, sc in next 16 sts, dec over next 3 sts, join (46)
Round 43 :
Ch 1, sc around (46)
Round 44 :
Ch 1, sc in next 14 sts, (dec over next 3 sts) x2 at the short end, sc in next 14 sts, (dec over next 3 sts) x2 at other short end, join (38)
Round 45 :
Ch 1, sc around (38)
Round 46 :
Ch 1, sc in next 8 sts, (dec over next 3 sts) x2 to finish the point, sc in remaining sts, join (26)
Round 47 :
Ch 1, sc in each st around (26)
Info :
Fasten off and weave ends for this pointed tip. Repeat the same decrease sequence at the opposite end of the runner to create a matched second point — that is, continue working even rounds across the long central column until you reach the same distance from the center that you started shaping the first point, then reverse the decrease steps (Rounds 34-46) at the far end.
— Candy Corn Appliques (Make 5) :
Info :
Each candy corn is worked in the round and left flat with no stuffing. Use white for the tip (Band A), orange for the middle (Band B) and yellow/mustard for the base (Band C). These are worked from top (tip) to bottom with increasing rows to create a slightly domed petal effect using dc clusters and chains.
Round 1 :
Using white yarn, MR, ch 2 (counts as first hdc), work 5 hdc into ring, pull tight and join with sl st to first hdc (6 hdc) — this forms the tip base
Round 2 :
Ch 2, (hdc, inc hdc) x3 around join (9 hdc) — increase evenly to widen tip
Round 3 :
Ch 2, (1 hdc, inc hdc) x3, 1 hdc in next 0 sts — rearranged to a total of 12 hdc (12)
Info :
Fasten off white and join orange in the last sl st to begin middle band (Band B). For clean color joins, complete the last stitch of the white band leaving the final yarn-over, then yarn-over with orange and pull through to finish the stitch with new color.
Round 4 :
Join orange, ch 2, (dc, dc) in same st, dc in next 3 sts, (dc, dc) in next st, dc in next 3 sts, join (16 dc) — this starts the broader middle of the cone
Round 5 :
Ch 2, dc around (16)
Round 6 :
Ch 2, (dc, inc dc) x4, dc in remaining spaces to finish 24 dc (24)
Info :
Change to yellow/mustard for bottom (Band C). Use the last yarn-over color join trick for a tidy transition. The yellow band will be slightly ruffled for a base that sits flat when sewn to the runner.
Round 7 :
Join yellow, ch 2, (dc, ch 1, dc) shell in first st, dc in next 2 sts, shell in next st, dc in next 2 sts, shell in next st, dc in next 2 sts, join (shell counts create a small ruffled base; total sts appear as 30 counted half-stitches)
Round 8 :
Ch 1, sc in each visible stitch and chain spaces around to tidy the base edge (work 30 sc evenly around). Fasten off and weave ends (this leaves a small seam allowance to sew to center panel).
Info :
Make 5 identical candy corn appliques. For an even look, block each applique lightly on a flat surface to set shape. No stuffing is necessary; the domed texture comes from stitch height differences.
— Small Side Accent Clusters (Make 18 pairs) :
Info :
These tiny orange clusters form the row of little crosses/stars that sit between the center panel and scalloped edge. Work them in pairs across both long sides to mirror the sample photo.
Round 1 :
With orange yarn, MR, ch 2, work 6 dc into ring; pull tight and sl st to first dc (6 dc)
Round 2 :
Ch 1, sc in same st, *ch 3, sl st into center of cluster (MR center) to create a small star point*, rep across 6 times to make a tiny 6-point cluster; fasten off leaving a 10" tail for sewing
Info :
Make 36 individual small clusters (18 per side) and hold them to be sewn into the panel later. Position them so that each cluster pair aligns with the scallop edge centers as seen in the picture.
— Scalloped Border & Decorative Row :
Info :
We will work rounds around the whole runner using orange yarn to create a decorative inner stitch row (tiny crosses) followed by a scalloped shell round. Join orange yarn at any point and work uniformly around; place markers at the 4 corner/point centers to maintain symmetry at the runner tips.
Round 1 :
With orange, join with sl st on one long side where you want your edging to begin. Ch 1, sc evenly around the entire runner edge working 3 sc in each short point row to create a smooth join; aim for a final count of approximately 180 sc (this count will vary slightly by tension) — do not join, work in continuous rounds or join each round with sl st if preferred.
Info :
Adjust the number of sc around so shells will land symmetrically. The sample has 30 scallops total (15 per side including tips). Use your stitch count to space scallops evenly.
Round 2 :
Ch 1, *sc in next 4 sts, ch 3, sk 2 sts* repeat to create small picot channel around both long edges and across short points; join or continue (this sets the foundation for the small orange crosses)
Round 3 :
Ch 2, (hdc, ch 1, hdc) in each ch-3 space across to form a purl-like little cross tucked into the ch-3 space; in sc areas work hdc to keep evenness; (this produces the small contrasting row of crosses adjacent to the scallops)
Info :
Space small accent clusters as you wish between the purl crosses: sew one small cluster into every other ch-3 space for the sample pattern. Use the tails from the clusters to attach them with an invisible whip stitch into the ch-3 spaces now while rounds are still loose.
Round 4 :
Ch 3 (counts as dc), *skip 1 st, 5 dc in next st (shell), skip 1 st, dc in next 2 sts* repeat around to form scallops (work 5-dc shells into every other sk 2 position), join with sl st (shells across long sides and 3 shells across each short point for a balanced finish)
Round 5 :
Ch 1, sc in each st around to tidy the base of shells and create defined scallop lobe edges (final shell apex count equals number of scallops from Round 4)
Round 6 :
Ch 2, *5 dc in the center dc of each shell worked into previous round (this creates an over-shell to make scallops more pronounced), sl st into next sc between shells* repeat around; fasten off and weave in ends
Info :
If preferred, add a tinted edging row in a slightly darker orange afterward for depth by working 1 sc around each shell apex to add shadow. Block scallops gently if needed to open them up evenly.
— Assembly & Placement :
Info :
Before attaching appliques and clusters, block the runner lightly to flatten any slight waves. Pin appliques in place along the center axis at equal intervals based on your measurements. The sample spacing has 7 black rounds between motifs with equal margins to the ends.
Round 1 :
Position the first candy corn applique centered across the width; place the top of the applique approximately 8 rounds down from the top point (adjust to taste)
Round 2 :
Sew each applique down using a matching thread and a neat whip stitch around the yellow base only so the orange band and white tip retain a gentle lift and dimension; secure tails on the back.
Round 3 :
Sew the small orange clusters into the ch-3 spaces along the inner edge now: each cluster pair is stitched on either side of the scallop base. Secure firmly with multiple passes if runner will be handled often.
Info :
Check that all seams are even and that the candies sit aligned down the center. If any applique sits too flat, slide a tiny bit of leftover yarn or a whisper of batting under the center when sewing to create a slight dome.
— Finishing Touches :
Round 1 :
Weave in all remaining ends on the wrong side. Tidy any back knots and trim close. If you used safety tack or glue for motifs, ensure glue is fully dry before blocking.
Round 2 :
Lightly steam or wet-block the entire runner on a flat surface; pin scallops to shape if needed. Allow to dry fully before using.
Info :
Final check: count scallops and clusters on each side to ensure symmetry. If adjusting runner length, add or remove rounds in the long even section of the center panel (Rounds 15-33) before beginning end shaping.
This Candy Corn Table Runner brings a playful yet elegant seasonal accent to any dining table. Each raised candy corn and bright scalloped edge add cheerful texture and vintage-inspired charm. With careful assembly and light blocking your finished runner will look polished and professional. 🎃🧶 I hope this project brings as much joy to your table as it did while I designed it — enjoy every stitch and display with pride! ✨