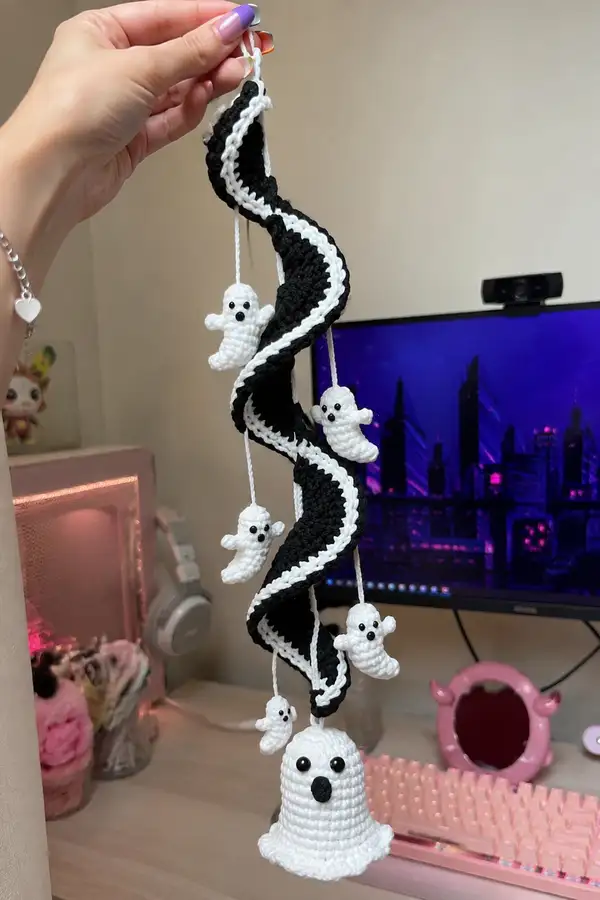
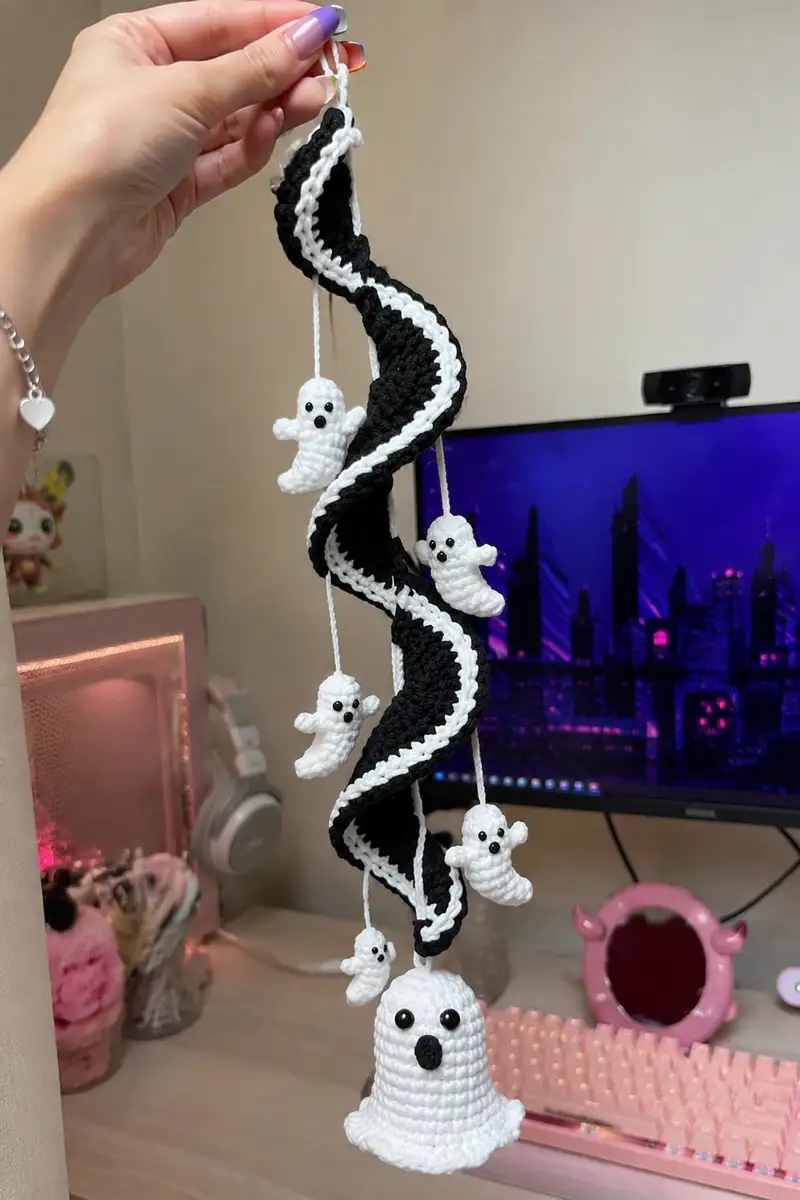
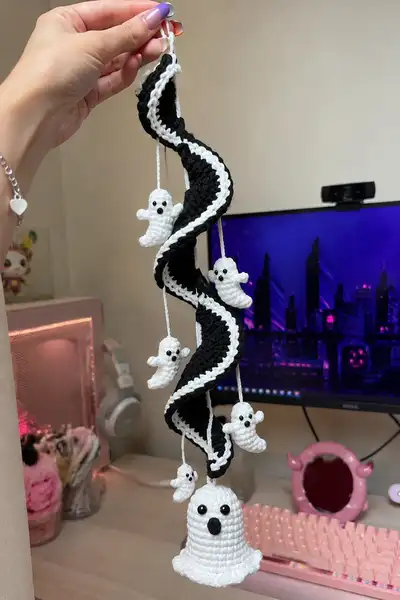
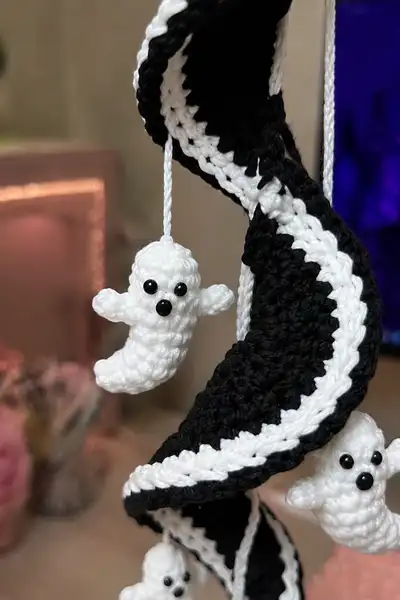
Create a dramatic twisted spiral garland strung with tiny floating ghosts and one large bell-ghost at the base. Worked in black and white worsted yarn, this hanging decoration features a tall spiraling ribbon with a white scalloped edge and five dangling mini ghosts for a spooky, kawaii Halloween display. The pattern includes step-by-step rounds, eye placement details, stuffing guidance and assembly tips to make a sturdy, shapely spiral that holds its twist. Perfect for seasonal decor, porches, doorways or party backdrops.
Progress Tracker
0% Complete
— Materials + Gauge :
Info :
Gauge is not critical for a decorative garland but will affect size and drape. With worsted weight yarn and 3.5mm hook, a 10-round tube (48 sts around) measures about 6cm / 2.25in circumference and each round is ~3-4mm tall. Keep tension consistent. This pattern uses continuous rounds (do not join) unless noted. Use stitch marker for round starts.
— Large Bell Ghost (Bottom Ornament) :
Round 1 :
6 sc in magic ring (6)
Round 3 :
(1 sc, 1 inc) x 6 (18)
Round 4 :
(2 sc, 1 inc) x 6 (24)
Round 5 :
(3 sc, 1 inc) x 6 (30)
Round 6 :
(4 sc, 1 inc) x 6 (36)
Round 7 :
(5 sc, 1 inc) x 6 (42)
Round 8 :
(6 sc, 1 inc) x 6 (48)
Info :
Rounds 1-8 create the bell crown. Place a stitch marker in the first stitch of every round and count often; eyes will be placed later between rounds 11-12. Keep stitches tight to avoid visible stuffing showing through.
Round 9-12 :
1 sc in each st (48)
Info :
Position safety eyes between rounds 11 and 12, approximately 8-10 stitches apart for a friendly expression. If using 6-8mm eyes, place them about 9 sts apart; mark placement before attaching backs. If embroidering eyes, use black yarn and secure with several passes.
Round 13 :
1 sc in each st (48)
Info :
Begin lightly stuffing the bell from the top through the opening. Add stuffing gradually so the crown stays rounded but still soft — this bell is hollow at the flared edge so avoid overstuffing the bottom area.
Round 14 :
(6 sc, 1 dec) x 6 (42)
Round 15 :
(5 sc, 1 dec) x 6 (36)
Info :
Stuffing :
Continue stuffing through round 14-15 so the body retains girth. Use small tufts to shape the head-crown transition. Stuff firmly at the top but keep the lower area less packed to allow a nice bell drape.
Round 16 :
(4 sc, 1 dec) x 6 (30)
Round 17 :
(3 sc, 1 dec) x 6 (24)
Round 18 :
(2 sc, 1 dec) x 6 (18)
Round 19 :
(1 sc, 1 dec) x 6 (12)
Info :
Close the top crown with a yarn needle after round 20 if you prefer a fully closed head. For this bell design we will leave the top opening slightly flexible to slip a hanging cord through; fasten off leaving a long tail (approx 40cm) for sewing to the spiral base or for threading the hanging cord.
Round 21 :
Reattach yarn at base (bottom edge) of bell if you closed top. Join at last round of crown and work 1 sc in each st BLO for 1 round to create a defined edge (48)
Round 22 :
Change to white if not already white. (1 sc, 1 inc) x 24 (72)
Round 23 :
(2 sc, 1 inc) x 24 (96)
Info :
Rounds 22-23 flare the bell base to create the ruffled skirt. Work increases evenly to keep the flare uniform. If you prefer a more subtle ruffle, stop increasing at 72 stitches and work even rounds before finishing with a scallop.
Round 24 :
*Skip 1 st, 5 dc in next st, skip 1 st, sl st in next st* rep around for decorative ruffle (creates ~16 ruffles depending on gauge)
Info :
Use this decorative shell edge to mimic the wavy hem shown in the photos. If your dc shells are very large, you can substitute a smaller shell (3 dc) for a tighter ruffle. Fasten off and weave in ends. Add a small crocheted oval for the bell's nose in black: ch 4, sc in 2nd ch from hook, sc, sc (3 sts), fasten off leaving long tail. Sew nose just below the eyes.
— Spiral Ribbon (Main Column) :
Info :
The spiral ribbon is worked as a long amigurumi tube in Black yarn, then a white scalloped inner edge is added. The tube uses subtle shaping (periodic increases on one side and compensating decreases on the other) to encourage a natural spiral twist when blocked and hung. Make one spiral column approximately 70-95 rounds long depending on how many twists you want. Below is a 90-round sample for a long spiral—adjust length by adding or removing even rounds in the middle.
Round 1 :
6 sc in magic ring (6)
Round 3 :
(1 sc, 1 inc) x 6 (18)
Round 4 :
(2 sc, 1 inc) x 6 (24)
Round 5 :
(3 sc, 1 inc) x 6 (30)
Round 6 :
(4 sc, 1 inc) x 6 (36)
Round 7 :
(5 sc, 1 inc) x 6 (42)
Round 8 :
(6 sc, 1 inc) x 6 (48)
Info :
Rounds 1-8 form the tube circumference. At this size your tube will be about 2-2.5cm wide. If you want a wider spiral, continue increasing in the same pattern for additional rounds until you reach desired circumference (e.g., (7 sc, inc) x6 = 54).
Round 9-16 :
1 sc in each st (48)
Info :
These even rounds build height. Keep these rounds tight and even. Place marker in first stitch of round 9 and move marker each round to avoid losing your place. The spiral will benefit from an overall even tension so it twists cleanly when shaped.
Round 17 :
(6 sc, 1 inc) x 6 (54)
Round 18-20 :
1 sc in each st (54)
Info :
To begin shaping, we add a single round of increases distributed along the left-hand seam (as you hold the tube). These extra stitches make that side slightly longer, encouraging a twist. You will alternate subtle increases and compensating decreases further along to create a smooth curve rather than a bulge.
Round 21 :
(7 sc, 1 inc) x 6 (60)
Round 22-24 :
1 sc in each st (60)
Round 25 :
(6 sc, 1 dec) x 6 (54)
Info :
Round 25 reduces the opposite side slightly to balance the earlier increases; this contrast promotes the ribbon to curl and twist into a helix when suspended. If you find the twist too tight or too loose, you can adjust by making fewer or more increases on shaping rounds.
Round 26-30 :
1 sc in each st (54)
Round 31 :
(5 sc, 1 inc) x 9 (54) NOTE: alternative shaping — if you prefer a more gradual swell, work (8 sc, inc)x6
Info :
Continue alternating shaping rounds every 4-6 rounds — increase on one round, keep even for several rounds, then slightly decrease on another round. This sequence over many rounds creates a gentle, consistent spiral rather than abrupt bulges. Keep a small notebook to track where you placed shaping rounds so symmetry is consistent along the full length.
Round 32-36 :
1 sc in each st (54)
Round 37 :
(6 sc, 1 inc) x 6 (60)
Round 38-42 :
1 sc in each st (60)
Round 43 :
(6 sc, 1 dec) x 6 (54)
Round 44-48 :
1 sc in each st (54)
Info :
Work a few shaping cycles until you reach approximately 70-90 rounds total (this pattern gives a 90-round sample). If you decide to make a shorter spiral, stop at round 60-70. If you want a longer, more dramatic spiral, continue repeating shaping cycles and even rounds until your spiral reaches the desired hanging length.
Round 49 :
(7 sc, 1 inc) x 6 (60)
Round 50-54 :
1 sc in each st (60)
Round 55 :
(6 sc, 1 dec) x 6 (54)
Round 56-60 :
1 sc in each st (54)
Round 61 :
(6 sc, 1 inc) x 6 (60)
Round 62-66 :
1 sc in each st (60)
Round 67 :
(6 sc, 1 dec) x 6 (54)
Round 68-72 :
1 sc in each st (54)
Info :
At rounds ~72-75 you'll be approaching the main area where the small ghost charms will be attached. Use pins to mark attachment points now and plan staggered lengths: topmost ghosts should hang higher, bottom ones lower to avoid collisions when the garland twists.
Round 73 :
(7 sc, 1 inc) x 6 (60)
Round 74-78 :
1 sc in each st (60)
Round 79 :
(6 sc, 1 dec) x 6 (54)
Round 80-84 :
1 sc in each st (54)
Round 85 :
(6 sc, 1 inc) x 6 (60)
Round 86-88 :
1 sc in each st (60)
Round 89 :
1 sc in each st BLO (60) - prepare edge for scallop
Info :
Work the final round in BLO to create a crisp edge for attaching the white scallop. You can adjust the last rounds to reach the exact length you want — the sample ends here and adds the scallop before finishing with a hanging loop.
Round 90 :
Fasten off leaving a long tail (~1m) to sew down any final curves. If you plan to stiffen or insert a wire, leave a longer tail to close the top later.
Info :
Before adding the white scallop, shape the tube into a spiral on a flat surface and pin the curves. If you want extra stiffness, insert a thin floral wire along the inner seam before adding the scallop and sew wire in place by stitching over it. The photos show a pronounced spiral; blocking and gentle steaming (for acrylic yarn do not steam; instead shape with pins and a damp cloth) will help hold the form.
— White Scalloped Inner Edge :
Info :
With the spiral tube in place, we crochet the white scallop along the inner edge where the spiral faces inward. The scallop is worked in rows around the edge: one foundation round of sc into the inner-loop stitches, followed by alternating sc and small shell clusters. Work as many repeats as necessary to trace the inner edge length.
Round 1 (Scallop) :
Join White yarn at inner edge: sc in next 30 stitches along inner seam (30) — count across the inner-facing stitches you pinned earlier
Round 2 (Scallop) :
*Skip 1 st, 5 dc in next st, skip 1 st, sl st in next st* rep across. Adjust repeat to match ends, fasten off leaving tail to sew ends under spiral.
Round 3 (Optional edging) :
Join same White yarn at base of scallops and work 1 sc in each st around to tidy edge and secure scallops (approx 30 sc)
Info :
If scallops look too large, replace 5 dc shells with 3 dc shells. After adding scallop, weave in ends and sew the starting/ending edges together so scallop joins seamlessly. If you added a wire, tack the wire down to the inner seam with small stitches so it doesn't shift when hanging.
— Hanging Loop (Top) :
Round 1 :
At the top of your spiral, create a sturdy hanging loop: ch 40 (or length desired), sl st into top stitch to anchor, sc around top 6 stitches to secure. Fasten off and weave in ends. This loop can be covered with a short sewn chain to look neat.
Info :
If you plan to hang the garland outdoors, reinforce the hanging loop by threading a length of nylon cord through the chain and knotting both ends inside the tube for added durability.
— Mini Floating Ghost (Make 5) :
Info :
These small ghosts are elongated teardrop shapes with tiny arms. They are worked in continuous rounds; use smaller hook (3.0mm) for a tighter fabric if you prefer smaller ghosts. Each mini is about 3.5-4.5cm tall depending on yarn and tension.
Round 1 :
6 sc in magic ring (6)
Round 3 :
(1 sc, 1 inc) x 6 (18)
Round 4 :
1 sc in each st (18)
Round 5 :
(2 sc, 1 inc) x 6 (24)
Round 6-7 :
1 sc in each st (24)
Info :
At round 6-7 the ghost has a plump head. Place mini safety eyes between rounds 4 and 5 about 4-6 sts apart depending on desired expression. If using 4mm eyes, place 5 sts apart.
Round 8 :
(3 sc, 1 dec) x 6 (18)
Round 9 :
1 sc in each st (18)
Round 10 :
(2 sc, 1 dec) x 6 (12)
Info :
Begin stuffing the ghost lightly at the head area so it keeps a rounded top but remains soft for a bobbing motion when hung. Do not overstuff — the ghost should be light enough to sway.
Round 11 :
(1 sc, 1 dec) x 6 (6)
Round 13 :
Change to shaping the tail: ch 1, hdc in next st, hdc in next st, (hdc in next st, ch 1) around to form a curved tail. Alternatively work 6 hdc and do 3-4 rows of hdc to lengthen tail.
Round 14 :
Create tiny arms: With white yarn and working into round 5 area, find 2 stitches facing front and work: ch 2, 2 sc in 2nd ch from hook, sl st into adjacent stitch of ghost body to anchor. Repeat on other side symmetrically. Fasten off and weave ends.
Info :
For a little more life, thread a 12-15cm length of white yarn through the top center of the ghost and tie a knot leaving a loop for hanging. Position the knot inside the head so it is not visible; secure knot with a couple of small stitches.
Round 15 :
Fasten off leaving a long tail for sewing or hanging. Make five of these mini ghosts and vary hanging cord lengths so they dangle staggered along the spiral.
— Mini Ghost (Alternate Slightly Larger) (Make 1-2) :
Round 1 :
6 sc in magic ring (6)
Round 3 :
(1 sc, 1 inc)x6 (18)
Round 4 :
(2 sc, 1 inc)x6 (24)
Round 5-6 :
1 sc in each st (24)
Round 7 :
(3 sc, 1 dec)x6 (18)
Round 8 :
1 sc in each st (18)
Round 9 :
(2 sc, 1 dec)x6 (12)
Round 10 :
1 sc in each st (12)
Round 11 :
Create tail: 6 hdc in a row working around the remaining stitches and then 2 rows of hdc to create a curved, tapered tail. Fasten off leaving long tail.
Info :
This slightly larger ghost pairs well as a mid-level charm on the spiral to add variety. Sew small arms same as minis if desired.
— Small Features (Eyes, Nose) :
Info :
Use safety eyes for a glossy look and quick finish. For tiny ghosts use 4mm safety eyes (2 per ghost) and a tiny black seed bead or 3mm safety nose for a mouth-dot. For the bell ghost use 6-8mm eyes and a slightly larger black oval nose crocheted and sewn on. If making this for small children, embroider eyes and nose instead of using safety eyes.
— Final Shaping & Blocking :
Info :
Once all parts are made, lightly damp-block the spiral: pin the tube to the desired spiral on a blocking mat and allow to dry with pins in place. For acrylic yarn, you can set the twist with a warm iron over a cloth briefly — test a scrap first. If you used floral wire for stiffness, carefully bend to the desired spiral curve and stitch the wire into place at several anchor points along the inner seam.
— Cords and Hanging Details :
Round 1 :
Make hanging cords by chaining to desired length (approx 10-20cm per mini ghost). Fold chain in half and slip-stitch ends to create a sturdier cord, or braid three strands of yarn for thicker cords.
Info :
To prevent fraying or rugging, knot the cord securely inside the head of each ghost and tack the knot with 2-3 small stitches. Make cords slightly different lengths so ghosts hang staggered along the spiral and do not overlap when hung.
— Assembly & Attachment :
Info :
Attach the large bell ghost to the very bottom center of the spiral by sewing the long tail from the bell crown into the bottom-most rounds of the spiral. Attach mini ghosts by threading their hanging cords through selected inner-edge scallop stitches and knotting inside the tube, or by sewing cords to inner seam stitches for a clean look. Use pins to audition positions before sewing.
Round 1 :
Sew the bell ghost to the bottom tip of the spiral: align center of bell crown with the spiral’s inner seam bottom, pin, then whip stitch around the top of the bell using the long tail left from crown. Use 30-40 secure stitches to avoid rotation when hung.
Round 2 :
Sew each mini ghost’s hanging cord to inner seam at pinned points along the spiral. For extra security tie an overhand knot inside the tube and tack with a few small stitches. Trim excess cord and weave ends inside the tube.
Info :
Spacing suggestion for five minis: start approx 8-10cm down from top loop for first mini, then place subsequent minis at 9-12cm intervals. The largest bell ghost sits centered at the bottom. Stagger cords left-center-right to create depth when the garland twists.
Round 3 :
Optional: add tiny beads or pom-poms between ghosts on cords for extra interest. Secure beads with knots and tack into place with thread if needed.
Info :
Check all safety eyes and sewn seams for security before displaying. If hanging where children or pets can access it, use embroidered features instead of plastic eyes and avoid small detachable parts.
This spiral garland brings playful Halloween spirit to any room — dramatic black curves, crisp white scallops, and little floating ghosts make a memorable handmade decoration. Each section is designed to be approachable yet highly customizable so you can create multiple variations for gifts or party decor. I hope stitching this piece brings you joy and a little spooky fun — happy crocheting and share a photo when your garland is hung! 🎃🧶