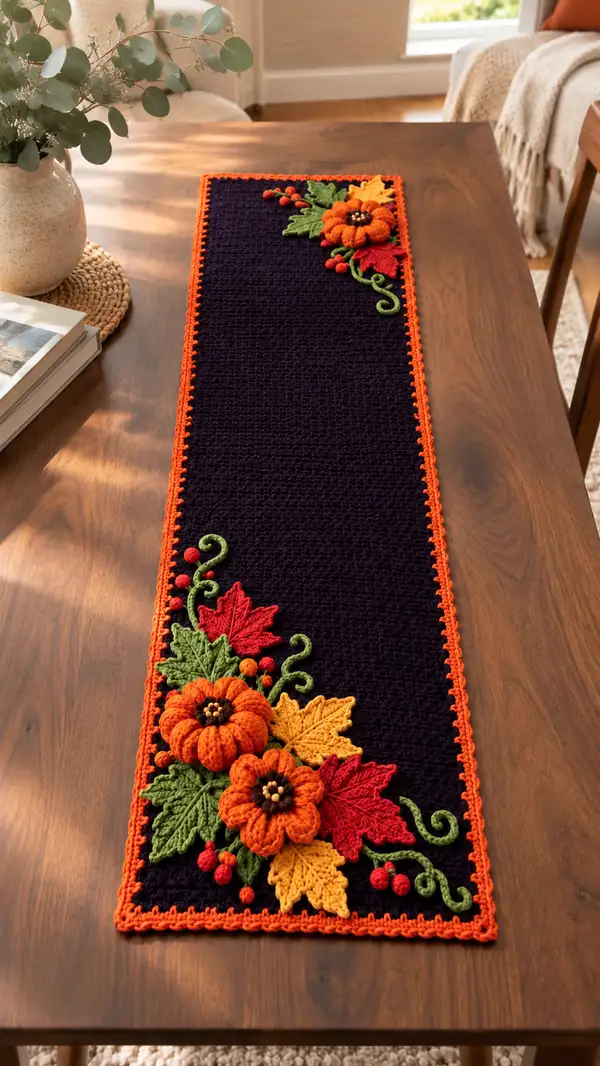
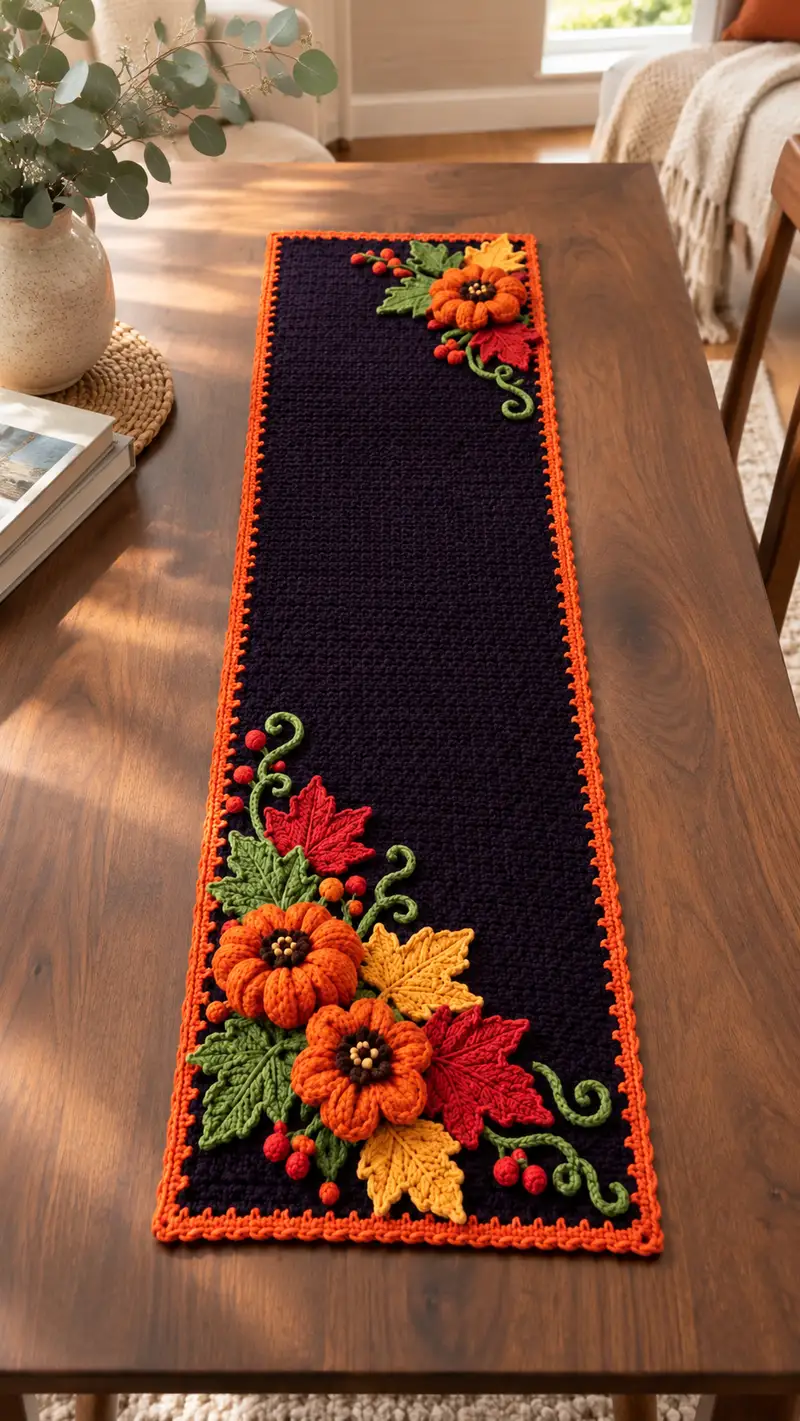
This elegant autumn table runner combines a deep navy rectangular panel with a vivid pumpkin-orange scalloped border and lush crocheted pumpkin, leaf, and berry appliques. The design features layered 3D pumpkins, textured maple-style leaves in gold, red and green, curly vines, and clustered berries for depth and seasonal charm. The finished piece creates a warm, sophisticated centerpiece for fall gatherings and is designed to lie flat with secure appliques for long-lasting use.
Progress Tracker
0% Complete
— Base Panel (worked flat as rows) :
Row 1 :
Foundation chain 121 (or any even number to desired width; this gives approximately 12" / 30 cm width). Starting in 2nd ch from hook, 1 sc in each ch across (120)
Row 2 :
Ch 1, turn. 1 sc in each st across (120)
Row 3 :
Ch 1, turn. 1 sc in each st across (120)
Row 4 :
Ch 1, turn. 1 sc in each st across (120)
Info :
Keep tension even and relatively firm for a dense fabric. Use a stitch marker to mark the first stitch of every row to ensure straight edges. This panel is worked in rows not rounds; we number rows as rounds for clarity in this pattern
Row 5 :
Ch 1, turn. 1 sc in each st across (120)
Row 6 :
Ch 1, turn. 1 sc in each st across (120)
Row 7 :
Ch 1, turn. 1 sc in each st across (120)
Row 8 :
Ch 1, turn. 1 sc in each st across (120)
Info :
If you prefer a subtle rib texture like the sample, alternate ROWS of sc with rows of sc in BLO every 6-8 rows: for a BLO row, work 1 sc in each st BLO across; this creates a faint horizontal ridge without changing width
Row 9 :
Ch 1, turn. 1 sc in each st across (120)
Row 10 :
Ch 1, turn. 1 sc in each st across (120)
Row 11 :
Ch 1, turn. 1 sc in each st across (120)
Row 12 :
Ch 1, turn. 1 sc in each st BLO across (120)
Info :
Repeat the sequence of 8 rows (7 sc rows + 1 BLO row) until the runner reaches desired length. For the pictured runner, repeat this block sequence 52 times to obtain a length of approximately 48" (122 cm). Continue reading for exact counts to match sample size
Row 13-60 :
Work rows 1-8 pattern repeat (use even tension) maintaining 120 sts across per row. Continue until the runner measures about 45-48" (approx. 114-122 cm) from end to end (this corresponds to roughly 60-64 total rows depending on your tension). (120)
Info :
Fasten off leaving long tail (approx 18" / 45 cm) if you plan to slip-stitch border directly later; otherwise fasten off and weave ends. Blocking the panel flat at this stage is recommended to square the sides and keep appliques aligned
— Pumpkin Applique (Make 3: 2 large, 1 medium) :
Info :
These pumpkins are assembled from a round of puff petals forming a ribbed pumpkin. Yarn: pumpkin-orange. Use 3.5-4.0mm hook. Each pumpkin is worked in joined rounds then gathered in center. Make two large (approx 3" / 7.5cm diameter) and one medium (approx 2" / 5cm) using same pattern; adjust rounds for size.
Round 1 :
With orange, make magic ring. Ch 1, 6 sc in MR (6)
Round 2 :
2 sc in each st around (12)
Round 3 :
(1 sc, inc) x 6 (18)
Round 4 :
(2 sc, inc) x 6 (24)
Info :
These increase rounds form a small disc that will be the base around which puff petals are worked. Keep center small and tight. Place a stitch marker at the start of next round
Round 5 :
Ch 2 (counts as first dc here as a foundation for puff rows), *yarn over, insert hook in next st, pull up loop (do not complete), repeat 4 more times in same st to form a 5-loop cluster on hook, yo and pull through all loops, ch 1 to close puff (this is counted as puff), sl st in next st; rep from * around to make 12 puff petals evenly spaced (12 puff petals)
Round 6 :
Working behind the puff petals, sc evenly around through the back loops of the base round (24) — this secures petals and forms a ruffled edge
Info :
Begin lightly stuffing the center with a small pinch of fiberfill to give the pumpkin a slight dome. Do not overstuff; the pumpkin needs to compress when gathering later
Round 7 :
Slip stitch to next space between puffs, *ch 1, sc in back loop around the base between two puffs, ch 1, sl st behind next puff to anchor; rep around to create small spaces between petals (24 anchor points)
Round 8 :
Surface gather: Using darning needle and a long tail, weave the tail through the base of each puff petal across from the center to the outer edge in a spiral path. Pull to gather pumpkin into its natural ribbed sections; secure with a few stitches and knot. Weave tail back into work. (No st count)
Round 9 :
Make a small brown center disk: With brown, MR, ch 1, 6 sc in MR (6). Sl st and leave long tail for sewing. Sew the center onto the gathered center of pumpkin; sew through gathered loops to secure (6)
Info :
For a larger pumpkin, repeat Rounds 5-7 once more increasing the number of puff petals to 16 by changing Round 5 to create 16 puffs (work puffs in every base st and evenly across). Add light stuffing between the petals as you gather to maintain shape
Round 10 :
Optional: Embellish center with 6 tiny tan seed beads sewn in a small circle around brown center. Secure tightly and knot on underside
Info :
Create the medium pumpkin by stopping after Round 7 for a smaller, denser pumpkin or by making 10% fewer puff petals. Keep stitch math consistent when altering petal counts
— Pumpkin Stem (Make 3) :
Round 1 :
With brown, ch 6, turn, sl st in 2nd ch from hook and each ch back creating a small tube (5 sl st). Fasten off leaving a long tail and sew into center top of pumpkin, curving slightly to one side (no st count)
Info :
For sturdier stems, work in 6 sc in magic ring and then work a short cylinder of 6 sc rounds for 3-4 rounds before closing. Optionally insert a short piece of wire wrapped in yarn for stability
— Large Leaf (Maple-Style) (Make 6 total: mix of green, gold, red) :
Info :
These leaves are worked flat with a central spine and symmetrical shaping using increases and decreases and finishing with post stitches to make veins. Use 4.0mm hook. Each leaf is worked from base to tip in rounds numbered as shaping rows.
Round 1 :
With leaf color, ch 12. In 2nd ch from hook, sc across to end (11). Turn — this foundation will act as the leaf spine base (11)
Round 2 :
Ch 1, turn. Work along first side: 1 sc in first 3 sts, inc in next, 1 sc, inc, 1 sc — now work across base chain into opposite side: 1 sc in each remaining st (total now increases to 13) (13)
Round 3 :
Ch 1, turn. 1 sc in first 2 sts, (inc, 2 sc) twice, (inc, sc) once, 1 sc across spine, then mirror decreases on opposite side to keep leaf symmetrical. (Approx 15-17 depending on increases) (15)
Round 4 :
Ch 1, turn. Continue shaping: sc across adding an additional inc near tip to create point; at tip work 3 sc, then work back down the other side mirroring increases (17)
Info :
From Rounds 5-9, work textured veins using front post and back post dc. Insert a post stitch every 2-3 sts to create raised central and side veins. Keep stitch count stable to preserve shape
Round 5 :
Ch 1, turn. 1 sc in each of first 3 sts, *dc in FLO in next 2 sts (making a ridge), 1 sc in next 2 sts; rep across to tip and back down opposite side. (17)
Round 6 :
Ch 1, turn. Work 1 sc in each st, but replace center stitch with fpdc around the central stitch of the leaf to create a prominent central vein (17)
Round 7 :
Ch 1, turn. Add decorative edging: *sc, ch 1, sk next st, sc in next; rep across to create a slightly scalloped edge (17)
Round 8 :
Fasten off leaving long tail for sewing. Block leaf to open stitches and flatten veins. Use tapestry needle to embroider extra veins by couching a contrasting shade on top of raised fpdc if desired (no st count)
Info :
For small leaves, use ch 8 foundation and reduce increase rounds proportionally. Use different colors for layered leaves to achieve fall palette depth
— Small Decorative Leaf (Make 6-8) :
Round 1 :
Ch 8, sc in 2nd ch from hook across (7)
Round 2 :
Ch 1, turn. Inc in 2nd st, sc in next 3 sts, inc, sc across remaining, (9)
Round 3 :
Ch 1, turn. Sc across working a fpdc down the center st to form a vein, sc to end (9)
Round 4 :
Sl st around edge to finish and leave long tail for sewing. Block gently to open shape (no st count)
Info :
Use the smaller leaves in contrasting colors layered beneath the larger maple-shaped leaves; pin placement before sewing to adjust overlap
— Berry (Make 18 small berries and 6 medium) :
Round 1 :
With red (or berry color), MR, ch 1, 6 sc in MR (6)
Round 2 :
Inc in each st around (12)
Round 3 :
Sc around (12). Fasten off leaving a tail. Add a tiny bit of stuffing if desired. Stitch closed and form a small knot to create a round berry (12)
Info :
For the smallest berries, stop after Round 1 and pull ring closed without stuffing. Use bright red and darker red for variation. Sew berries in clusters of 3-5 when attaching
— Curled Vine (Make 4) :
Round 1 :
With green, ch 40 (or desired vine length). Turn, sk first ch, 1 sc in each ch back toward start (39)
Round 2 :
Ch 1, turn. Sl st in each st back to the end to create a flat, cord-like vine with minimal bulk (39)
Round 3 :
Working from one end, coil the vine into a spiral and secure with small whip stitches at approximately every 6th ch to keep the curve. Fasten off with long tail for sewing
Info :
For a thicker vine, work 2 hdc in each ch on Round 1 making a wider cord, then coil. Optionally insert a length of thin floral wire before completing the last 10 sts to create a fully poseable vine
— Leaf Vein Embroidery & Surface Details :
Info :
Use a tapestry needle and a contrasting or slightly darker shade of each leaf color to couch short lengths of yarn along the center and side ribs of leaves. Work from base to tip with small backstitches or couching to emphasize veins. Tie off on underside and weave ends in
— Assembly Prep :
Info :
Block the base panel flat to the exact finished dimensions; pin the corners square. Lay out appliques to the two opposite corners as pictured (one cluster at each end). Use pins to secure arrangement before sewing on to ensure symmetry and balance
Info :
Suggested placement for pictured runner: start placement approximately 2.5" (6 cm) in from the short edge and 3" (7.5 cm) in from side edges. The top and bottom clusters should mirror each other in placement but not necessarily in exact orientation for a natural look
— Sewing Appliques to Base (Detailed) :
Info :
Attach pieces in layers: layer 1 (large leaves), layer 2 (small leaves), layer 3 (pumpkins), layer 4 (berries and vines). Use a yarn needle and matching thread color for each layer; use small whip stitches through back loops of the panel for a neater look
Step 1 :
Pin the largest leaf first. Using matching yarn tail from leaf, sew down the base of leaf along the spine with small stitches every 3-4 mm. Secure and weave in tail inside the panel fabric
Step 2 :
Layer the smaller leaves overlapping the large leaf base by 5-10 mm. Sew through both leaf and base panel to secure. Keep stitches small so they are not visible from the front
Step 3 :
Position pumpkins last on top of layered leaves. Sew through the bottom of the pumpkin into the panel at several points around the gathered base — at least 6-8 evenly spaced stitches to ensure the 3D pumpkin cannot shift
Step 4 :
Sew vines last, anchoring with tiny stitches along their length where they cross leaves or enter the panel edge. Tuck vine ends under pumpkins or leaves for a polished finish
Info :
Sew berries in tight clusters of 3-4 using a single long tail, sewing through the center of each berry base into panel, tying off securely underneath the panel fabric
— Pumpkin and Applique Final Touches :
Round 1 :
Once all appliques are sewn in place, add embroidered highlight stitches on pumpkin ribs with a darker orange or light brown using single straight stitches radiating from center to outer edge; use 6-8 evenly spaced stitches
Info :
Optionally add a tiny loop of green at the base of stem to mimic tendrils. Use a simple chain of 6 and anchor both ends to the panel so it forms a small curl
— Border Edging (Pumpkin Orange) :
Info :
This border is worked in joined rounds around the entire rectangle after the panel is blocked and appliques attached. Work evenly: count sts along each side and work corners with extra sts to keep edges flat. You will work into the sides of rows by inserting hook under both loops or in bar between rows.
Round 1 :
With orange, join yarn at a corner with sl st. Work 1 sc in same edge and evenly around the perimeter placing 1 sc in each end row and 1 sc in the side row every 4th row. For a panel with 60 row repeats and 120 sts width, you should aim for approximately 120 sc across each long side and 60 sc across each short side. Work 3 sc in each corner stitch to maintain flatness
Round 2 :
Ch 3 (counts as dc), *sk 1 sc, dc in next sc, ch 1, sk 1 sc, dc; rep across each side. In corners work (dc, ch 1, dc, ch 1, dc) to create a defined corner shell. This forms a lacy scalloped edge (st count will vary slightly with corners)
Info :
If your border ripples, adjust corner increases (use only 2 sc in a corner instead of 3) or add an extra shell in each corner. If border pulls, use fewer shells and more evenly spaced sc on edges
Round 3 :
Switch to a decorative picot round: *sc in next 2 sts, ch 3, sl st into 3rd ch to form picot, sc in next 2 sts, sl st in space between shell stitches; rep across to create a neat picot scallop. Fasten off and weave ends (no strict numerical st count)
Info :
Alternatively, you can work a simple crab stitch (reverse sc) round for a subtle twisted rope edge that looks neat on tabletops. Choose whichever finish matches your decor
— Final Securement and Weaving :
Info :
Weave all tail ends under the base by threading tails through several stitches of the panel and knotting inside where possible. Trim ends close. If desired, apply tiny dots of fabric glue beneath heavy appliques to prevent edge lifting on frequent use
Round 1 :
Block runner one last time and press gently with a steam iron held slightly above work if yarn allows. Allow to dry fully before use to preserve shape
Info :
Store flat when not in use. If folded, place acid-free tissue between folds to avoid creasing long-term
This autumn table runner combines textured stitches, sculpted pumpkins and layered leaves to create a warm seasonal centerpiece you will love displaying. Each element is worked separately and assembled to achieve a high-end, dimensional result that looks like a boutique textile. The combination of navy ground and bright orange edging gives a modern twist to classic fall tones — perfect for Thanksgiving or cozy dinners. 🧡🍂 Make a set for holiday tables and give your dining room an instant seasonal upgrade. Happy stitching! 🧶