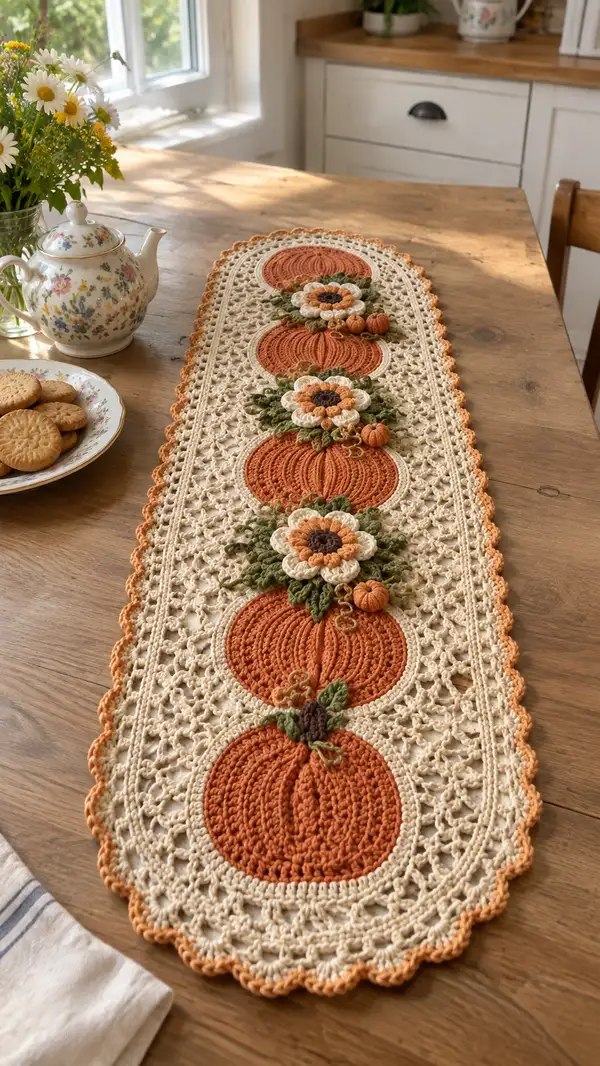
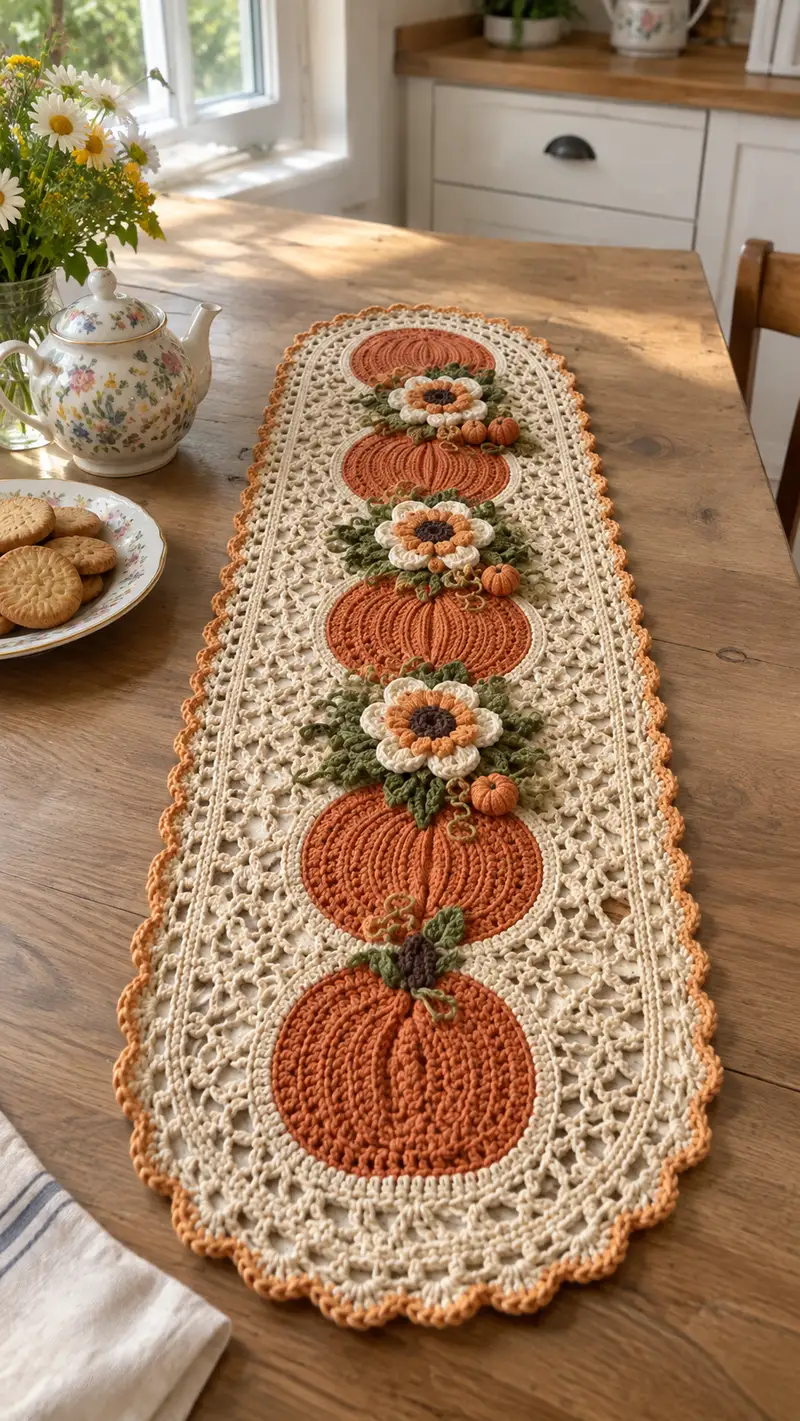
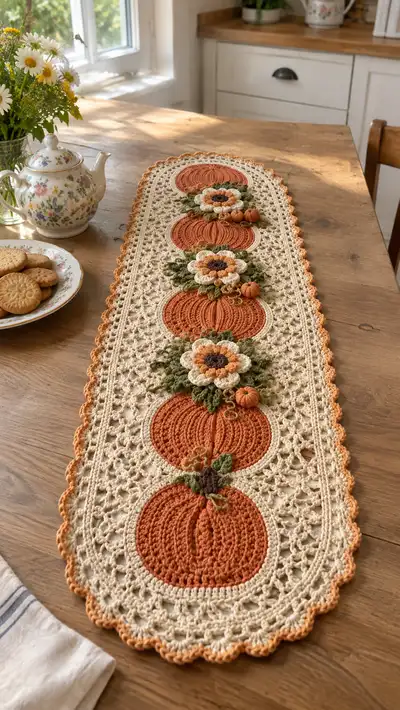
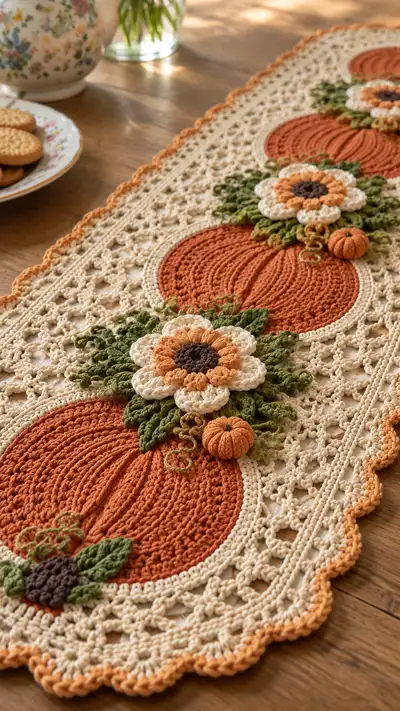
A warm, vintage-inspired pumpkin table runner featuring textured pumpkin medallions, layered floral appliques and delicate lace mesh. This runner uses autumn tones — rust orange, cream, moss green and brown — with 3D pumpkins and curled vines for charming seasonal detail. Designed to lie flat on a dining table, it pairs beautifully with rustic or cottage decor for cozy fall styling.
Progress Tracker
0% Complete
— Pumpkin Medallion (Make 5 identical) :
Round 1 :
6 sc in magic ring (6)
Round 2 :
Inc in each st around (12)
Round 3 :
(1 sc, inc) x 6 (18)
Round 4 :
(2 sc, inc) x 6 (24)
Round 5 :
(3 sc, inc) x 6 (30)
Round 6 :
(4 sc, inc) x 6 (36)
Info :
Use main pumpkin color. Keep a tight tension to create a compact, table-stable disc. Place marker at round start and move up each round
Round 7 :
(5 sc, inc) x 6 (42)
Round 8 :
(6 sc, inc) x 6 (48)
Round 9 :
1 sc in each st (48)
Round 10 :
1 sc in each st (48)
Info :
These two even rounds build the flat face of the pumpkin. If your disc buckles slightly, steam-block lightly on a flat surface before proceeding
Round 11 :
1 sc in next st, *fpdc around next st, bpdc around next st; rep from * across to end (48)
Round 12 :
1 sc in each st (48)
Info :
Round 11 begins the ribbing foundation: the alternating front and back post double crochets create vertical ridges. Keep posts tall and consistent
Round 13 :
(1 sc, 1 inc) x 16 (64)
Round 14 :
1 sc in each st (64)
Round 15 :
1 sc in next 2 sts, *fpdc around next 3 sts, bpdc around next 3 sts; rep from * across (64)
Info :
Adjust tension on fpdc/bpdc so the ribs lay gently from top to bottom. After this round, lay the medallion flat and count ribs — you should have 8-10 prominent ribs depending on fp/bp repetition.
Round 16 :
1 sc in each st (64)
Round 17 :
(3 sc, 1 dec) x 16 (48)
Round 18 :
(2 sc, 1 dec) x 12 (36)
Info :
Begin gentle decrease to flatten the outer edge and define the pumpkin round edge. If the medallion appears domed, reduce stuffing or block flatter.
Round 19 :
(1 sc, 1 dec) x 12 (24)
Round 20 :
1 sc in each st (24)
Round 21 :
Fasten off and weave in ends from underside (pumpkin medallion finished)
Info :
Make five medallions. Block each flat to 9.5-10cm (3.75-4in) diameter, adjusting to your gauge so all medallions are uniform.
— Pumpkin Outline Halo (Make 5) :
Info :
Worked in cream to create a halo around each pumpkin medallion. Use same hook. Join to the outer round of each pumpkin medallion from the right side to create an inset border that visually separates pumpkin from lace.
Round 1 :
With cream, join to any st on outer edge via sl st, ch1, 1 sc in same st, 1 sc in each st around (48). Adjust to match medallion circumference (48) (48)
Round 2 :
*(1 sc, ch1, sk1) x across to form small picot-like chain spaces around medallion (48 ch-1 sps)
Round 3 :
1 sc in each sc and into each ch-1 sp to create a neat halo (48)
Info :
This halo will be used later as the anchor for lace joining. Make sure your final halo sits flat — if it ruffles, adjust by removing or adding a few picot spaces to match medallion circumference.
— Textured Pumpkin Ribs (Surface Treatment on each Pumpkin) :
Info :
These instructions describe surface slip-stitch ribs worked from front to back. Work on the right side of the completed medallion. You will make 8 ribs per medallion for balanced look.
Step 1 :
Join pumpkin color at top center between two post areas via sl st, ch1
Step 2 :
Surface sl st along a vertical path toward bottom, making 10-14 evenly spaced sl sts to create a rib; fasten off and repeat at 7 evenly spaced positions around the medallion to form ribs (8 ribs total)
Info :
Keep surface stitches slightly raised by pulling yarn gently; secure ends on underside. Alternatively, use a thick chain couching if you prefer more pronounced ribs.
— Layered Flower Applique (Make 5 for top of each pumpkin) :
Round 1 :
With dark brown, mr, ch1, 8 sc in mr, sl st to first sc (8)
Round 2 :
Change to pale orange, ch2 (counts as hdc), 2 hdc in each st around (16)
Round 3 :
Change to cream, ch1, *(sc in next st, ch1, 3 dc in next st, ch1, sc in next st) repeat 4 times to create 4 petals (16 petals sections but forming 4 rounded petals)
Info :
The petals are layered: round 2 will form the inner petals and round 3 the outer. Use a hook one size smaller for petals if you want them firmer and more sculpted.
Round 4 :
Work slip stitch around petal bases to tidy join; fasten off leaving a long tail for sewing (flower finished)
Info :
Sew flower centers to pumpkins with whipstitch through halo and pumpkin top. Position slightly off-center toward where you will make the stem cluster.
— Small 3D Pumpkin (Make 5 small pumpkins for accent) :
Round 1 :
With pale orange, mr, ch1, 6 sc in mr (6)
Round 2 :
Inc in each st around (12)
Round 3 :
(1 sc, inc) x 6 (18)
Round 4 :
1 sc in each st (18)
Round 5 :
(2 sc, inc) x 6 (24)
Info :
Stuff lightly. The small pumpkin is decorative and should be soft with a slight give. Use small amounts of fiberfill applied gradually.
Round 6 :
1 sc in each st (24)
Round 7 :
(2 sc, dec) x 6 (18)
Round 8 :
(1 sc, dec) x 6 (12)
Round 10 :
Fasten off leaving long tail; thread tail through front loops of remaining sts, pull to close and secure. Create 6 equal vertical channels by stitching through the pumpkin from top to bottom using the long tail and pulling slightly to form ridges; tie off and weave ends.
Info :
Wrap a short brown yarn piece to form a tiny stem and attach at top. Sew the small pumpkin to the halo area next to the flower cluster on each pumpkin medallion.
— Leaves (Make 10-12 varied leaves) :
Round 1 :
With moss green, ch8, sc in 2nd ch from hook, hdc, dc, tr, dc, hdc, sc across returning along other side of chain to base to create a pointed leaf shape; sl st to base and fasten off (approx length 6-7cm)
Info :
Make a mix of larger and smaller leaves by varying starting chains (ch6-ch10). For texture, work BLO on a few leaves to create a ribbed center.
Alternative Texture :
For curled leaves, after finishing leaf, steam-block with a slight curl and secure with pins until cooled.
— Curled Tendrils (Make many) :
Step 1 :
With light green, ch20, 2 sc in each chain from 2nd ch to end to create a spiral tube; fasten off and shape into a natural curl. Make 10-15 tendrils per runner for fullness.
Info :
Tendrils are decorative and should be sewn so they drape naturally. Vary lengths and curl tightness for a pleasing organic look.
— Lace Mesh Background Panel (Make 1 large panel to join pumpkins) :
Info :
Worked in cream. This panel contains an open lattice of chain spaces and dc groups. Panel will be rectangular with rounded short ends to match runner shape and accommodate five pumpkin halos along its centerline.
Round 1 :
With cream, ch152 (or length to fit five halo centers spaced evenly), join to form an oval foundation by joining first and last with sl st to form a long ring. Ensure length matches your medallions spacing. For a working example, ch152 gives ~85cm length depending on gauge.
Round 2 :
Ch3 (counts as dc), *sk 2 ch, (dc, ch2, dc) in next ch, sk 2 ch, dc in next ch; rep from * around to create a spaced lattice (adjust repeats to match starting foundation). Join with sl st (foundation edge formed).
Round 3 :
Ch3, dc in each dc and the ch-2 sps across; work (dc, ch2, dc) in each ch-2 sp across; join (this fills and balances lattice)
Round 4 :
Ch1, sc in each dc across and sc into ch-2 sps to create a tidy row (maintains count from round 3)
Info :
Measure and mark the centerline of the panel. Using removable stitch markers, mark 5 evenly spaced positions centered along the length where pumpkin halos will be sewn later. Exact spacing depends on your chain foundation length; for ch152 use markers at roughly every 28-30 ch interval centered symmetrically.
Round 5 :
Ch3, *(dc in next 3 sts, ch1, sk1) repeat across for airy mesh; join
Round 6 :
Repeat round 5 for two more rows to build height (keeps count equal)
Round 7 :
Ch1, sc in each st across along panel edges to create a firm vertical rib on both sides
Info :
At this point the central lattice should be stable. Continue alternating airy mesh rows and solid sc rows so the panel has both openness and firmness. Work a total of 18-22 mesh/square rounds to achieve about 24-28cm (9.5-11in) width for the runner center
Round 8-22 :
Work alternate mesh and sc rows: 3 rounds mesh (as Round5 pattern), 1 round sc along whole row; repeat until desired width achieved (maintain same stitch counts across rounds)
Round 23 :
Ch1, sc around entire perimeter of the panel, placing 3 sc in each corner/rounded end to ease curvature; join
Info :
At this point your panel should be a stable rectangle with long sides and gently rounded short ends. If your panel is too wide or narrow compared to medallion diameter, adjust by adding/subtracting mesh rows before the perimeter round.
— Joining Pumpkin Halos to Lace Panel :
Info :
Place the five pumpkin medallions along the centerline markers you set on the panel. Each halo (cream picot ring) should align with the panel mesh. Pin each medallion so its outer halo falls across two adjacent mesh rows for a neat inset.
Step 1 :
Using a yarn needle and matching cream, baste sew through halo and mesh every 6-8 stitches around to tack medallion in place. Keep stitches small and even.
Step 2 :
After basting all medallions, use a more secure whipstitch through halo and the mesh to permanently attach each pumpkin. Reinforce the under edge with a few small stitches so the pumpkin sits slightly raised but stable.
Info :
Sew one medallion at a time and step back frequently to ensure alignment and symmetry. Remove basing pins as you finish sewing each medallion.
— Assembly of Flowers, Leaves and Small Pumpkins :
Step 1 :
Pin one layered flower above each pumpkin top, overlapping the cream halo by 6-8 sts. Arrange leaves and tendrils around the flower in a natural cluster, varying sizes for depth.
Step 2 :
Sew flower centers and petals to halo and pumpkin body with long tails from the applique; attach leaves by stitching at base only so tips remain free and dimensional; baste tendrils with a few stitches near their base and let ends curl freely.
Info :
Add the small 3D pumpkins to each cluster by sewing through their base and into the halo/panel. Secure firmly with multiple passes but keep a small gap of stitches to make them sit upright.
— Outer Scalloped Border :
Round 1 :
With background cream, join at any perimeter stitch, ch1, sc in each st around; when approaching a rounded short end place 3 sc in corner to ease curve; join (perimeter sc applied evenly)
Round 2 :
Ch3, dc in same st, *sk 2 sc, 5 dc in next sc (shell), sk2, dc in next sc; rep across each long side. At short rounded ends work shells to follow curvature; join
Round 3 :
Sl st to center of each shell, ch1, *(sc, hdc, dc, hdc, sc) in shell center to form picot scallop; sl st to next shell center; rep across entire perimeter
Info :
For the final outer edge work one round of single crochet in warm orange (or pale orange) to create a subtle colored rim. This will draw the eye and echo pumpkin color.
Round 4 :
Change to orange, sc in each sc and into scallop centers to highlight edge; join and fasten off, weave in ends
— Finishing Touches and Blocking :
Info :
Lightly block the entire runner on a flat surface, pinning scallops into shape. Use a damp cloth or steam on low — avoid saturating because cotton shrinks. Allow to dry completely.
Step :
Check all sewn joins and reinforce any area where appliques meet the panel with extra hidden stitches. Trim and weave all yarn tails securely into the runner underside.
Info :
For long-term use, consider backing the runner with lightweight cotton or muslin to reduce wear and stabilize embellished areas if it will be used under heavy objects.
This pumpkin table runner brings the warmth of autumn to your table with handmade charm and textural detail. Each medallion and applique is a small labor of love that comes together to create a seasonal centerpiece you can be proud of 🧶. The layered flowers, tiny 3D pumpkins and curly tendrils give the runner personality and dimension. Enjoy making it for your home or as a thoughtful, autumn-ready gift 🎃🍂.