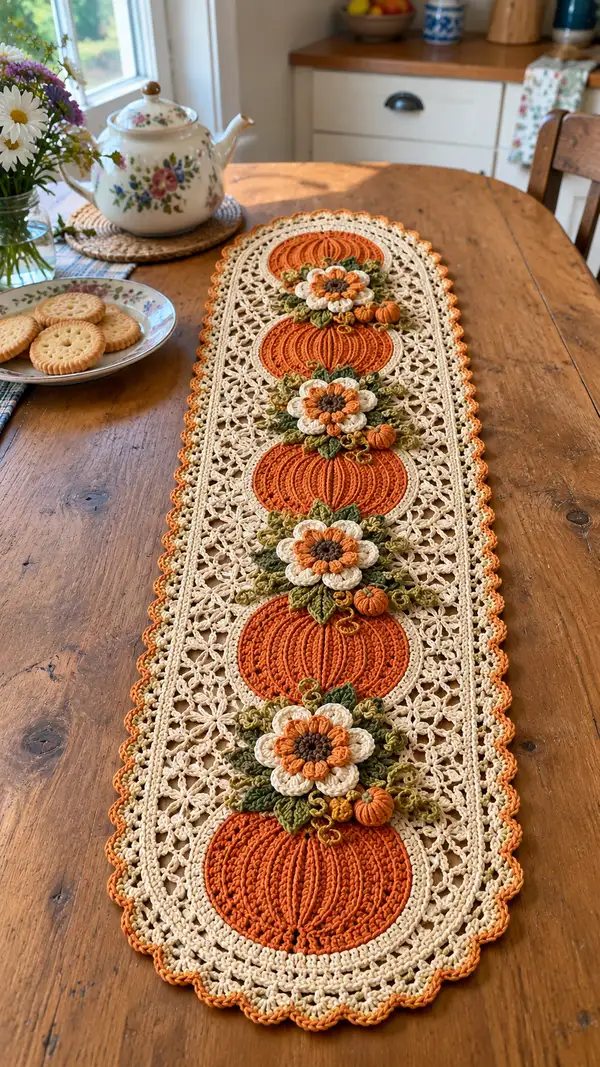
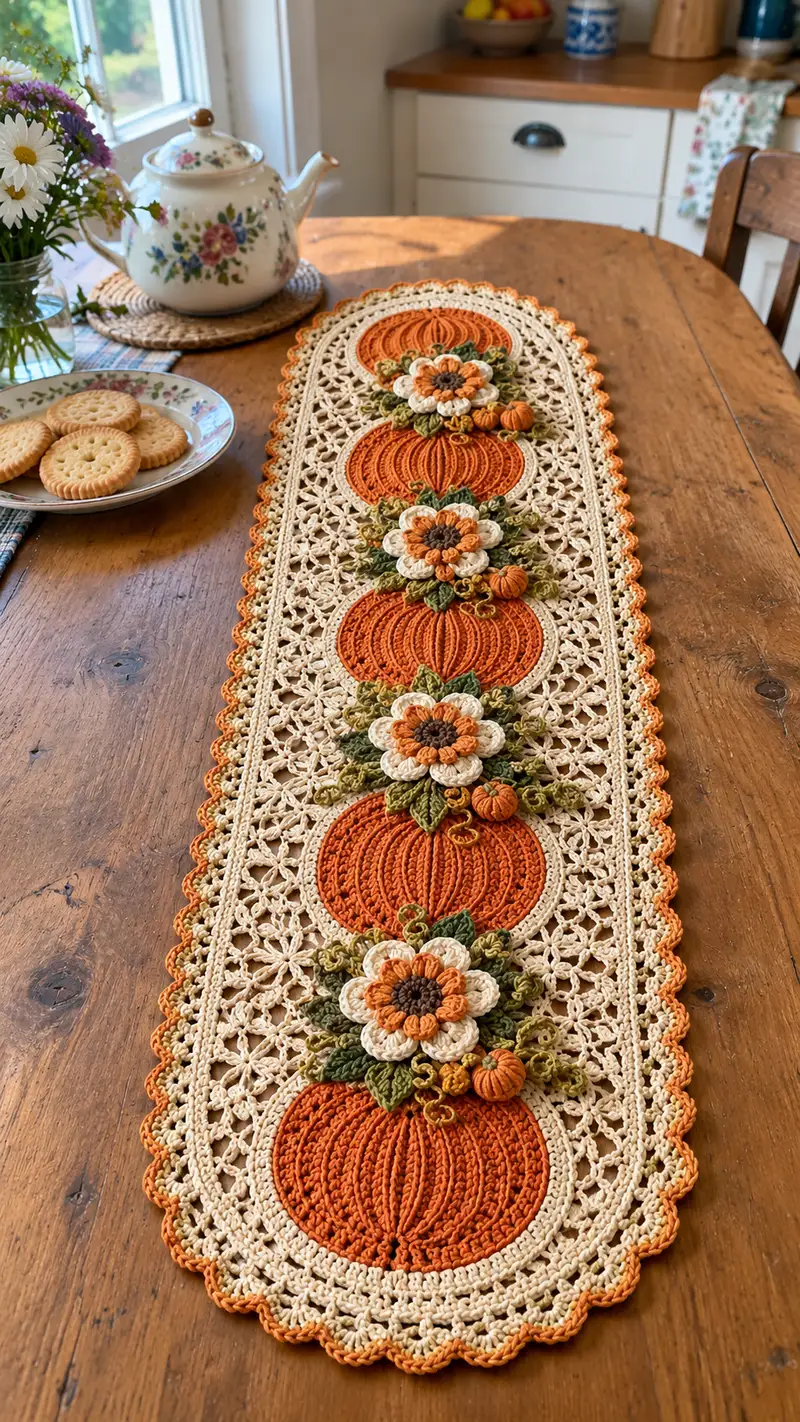
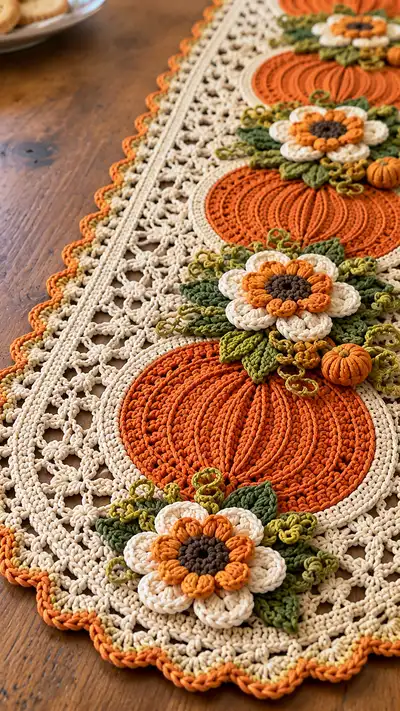
Create a beautiful fall table runner featuring deep orange pumpkin medallions, layered cream-and-orange flowers, olive green leaves and delicate lacy lattice panels. This detailed pattern reproduces the textured ribs of pumpkins, 3D floral appliques and a scalloped edging for a charming, heirloom centerpiece. Perfect for seasonal decorating, this runner combines cotton yarn, layered surface texture, and thoughtful assembly for a professional finish.
Progress Tracker
0% Complete
— Materials & Gauge :
Info :
This runner is shown worked in worsted cotton yarn with a 3.5mm hook for crisp stitch definition. Gauge is not critical for fit, but consistent tension ensures pumpkins align across the lattice. Each pumpkin medallion should measure approx 5.5-6 in (14-15 cm) across after blocking. Block all components before assembly for accurate joining.
— Pumpkin Motif (Make 5) :
Round 1 :
6 sc in magic ring (6)
Round 3 :
(1 sc, inc) x 6 (18)
Round 4 :
(2 sc, inc) x 6 (24)
Round 5 :
(3 sc, inc) x 6 (30)
Round 6 :
(4 sc, inc) x 6 (36)
Round 7 :
(5 sc, inc) x 6 (42)
Round 8 :
(6 sc, inc) x 6 (48)
Round 9 :
(7 sc, inc) x 6 (54)
Info :
At this point you have a flat circle. We will create the pumpkin ribs using surface post stitches and working in joined rounds to maintain a circular shape. Place a stitch marker at the start of each round.
Round 10-14 :
1 sc in each st around (54)
Round 15 :
Change to BLO: 1 sc in each st BLO (54)
Info :
Rounds in BLO create a subtle ridge that helps the raised ribs read cleanly. Keep tension steady; do not pull too tight when working in BLO.
Round 16 :
1 sc in each st (54)
Round 17 :
Establish rib marker: Work 6 sc, place removable marker (this marks start of first rib position), continue 6 sc, move marker every 6 sts to create 9 equally spaced rib anchors (54)
Round 18 :
Surface rib round 1: With the right side facing, attach yarn at marker. *Ch1, insert hook around post of next 6 sts from front to back and work 6 fpdc in each of next 6 sts (work fpdc tightly but without puckering), sl st into next st between ribs; rep from * 8 more times to create 9 raised ribs total. Join with sl st to starting point. (54, 9 raised ribs)
Info :
When making fpdc ribs keep the hook entry consistent (under both loops and around post) so ribs sit evenly. You are not adding or subtracting stitches in this round; you are working post stitches on existing stitches to create height.
Round 19 :
1 sc evenly around in reserved spaces between fpdc ribs (54)
Round 20 :
Repeat rib pass: Work another pass of fpdc directly beside the first fpdc rows to deepen the ribs: work 6 fpdc into the same 6-st groups used previously, sl st between ribs; join. (54)
Round 21 :
1 sc in each st (54)
Info :
To accentuate pumpkin sections, you can make the rib passes slightly taller by substituting fptr (front post treble) for fpdc on one of the passes — only do this if your tension allows without distorting the circle.
Round 22 :
Begin outer rim: (5 sc, inc) x 9 (63)
Round 23 :
1 sc in each st (63)
Round 24 :
(6 sc, inc) x 9 (72)
Round 25 :
1 sc in each st (72)
Info :
At rounds 22-25 we create a sturdy rim to sew the pumpkin into the lattice base. If you prefer a narrower pumpkin, stop after round 23; for a wider motif continue to round 25.
Round 26 :
BLO 1 sc in each st (72)
Round 27 :
Finish rim and fasten: 1 sc in each st; sl st join, fasten off leaving long tail for joining (72)
Info :
Make 5 identical pumpkin medallions. Block each flat and press gently to maintain the ribs. Reserve long tails for whip-stitch joining into lattice openings.
— Large Layered Flower Applique (Make 5) :
Round 1 :
With dark brown for center: mr, 6 sc in mr (6)
Round 3 :
Switch to mustard/orange: (1 sc, inc) x 6 (18)
Round 4 :
Bloom petal base: *ch 4, sc in next st; rep from * around to form small loops (18 ch-4 loops)
Info :
These ch-4 loops are the foundation for the inner petal round. Keep loops even in size; you can pull slightly on chains to equalize.
Round 5 :
Inner petals: In each ch-4 loop: (sc, hdc, 3 dc, hdc, sc) in same loop. Fasten and change to cream yarn. (18 petals)
Round 6 :
Switch color: Join cream in the back of a petal loop; ch1, sc around the bases between petals to create a round foundation (18)
Round 7 :
Outer petals: *In next petal base: ch5, (sc, hdc, 5 dc, hdc, sc) in ch-5 loop; sl st to base; rep from * around to make 9 large petals (9 large petals)
Info :
Make sure large petals are evenly spaced. If your petals look uneven, adjust by working the next petal into the next sc instead of relying on spacing by eye. Use pins to block petals outward.
Round 8 :
Edging: 1 sc in each st around flower base; sl st join; fasten off leaving long tail for stitching (approx 72 if worked tightly)
Round 9 :
Add puff ring: With burnt orange, embroider small puff dots between petals by working 5 dc together clusters worked into the base sc; secure and fasten. (9 small puff clusters)
Info :
Make 5 of these layered flowers. Lightly stuff center with a tuft of fiberfill if you want a raised center before sewing to the runner.
— Small Pumpkin Applique (Make 5-6) :
Round 1 :
mr, 6 sc in mr (6)
Round 3 :
1 sc in each st (12)
Round 4 :
Change to BLO if desired: 1 sc in each st BLO (12)
Round 5 :
Finish rim: (2 sc, inc) x 3 (15)
Round 6 :
Draw-up shaping: Draw yarn through all sts leaving a small hole, stuff lightly and cinch closed to form pumpkin. Fasten off leaving tail for sewing.
Info :
Wrap a length of contrasting yarn around the pumpkin a few times and pull to create chestnut-style ribbing on the mini pumpkin, then secure and hide ends. Make 5-6 of these for clusters.
— Leaves (Make 20-24) :
Round 1 :
With olive green: ch6, sc in 2nd ch from hook, hdc in next, dc in next, hdc in next, sc in last (5 sts across chain)
Round 2 :
Work along other side of chain: sc, hdc, dc, hdc, sc to mirror (10 stitches total across leaf)
Round 3 :
Edge picots: *sc in next, ch3, sl st in top of picot for decorative leaf edge; rep across both sides, fasten off leaving tail (approx 12 edge points)
Info :
Vary leaf sizes by starting with ch7 or ch8 for slightly larger leaves. Make sets of mostly 3-5 leaves per floral cluster for a natural arrangement.
— Curly Vines (Make many coils to taste) :
Round 1 :
With olive or chartreuse: ch 40 (or desired length), sc in 2nd ch from hook and in each ch to end, turn; this forms a flexible cord
Round 2 :
To curl: wind cord around a pencil and spritz with water, let dry; or for intrinsic curl, work 3 sc in each ch across to create a tighter spiral cord; cut lengths and shape into coils
Info :
Make many short curly vine lengths (about 20-30 coils) to scatter around clusters. These are purely decorative and are sewn or glued under flowers.
— Lattice Base Panel (Make 1 long oval) :
Overview :
The runner is worked as a long central lace panel with circular openings for pumpkins. The panel is worked in joined rows and a repeating mesh pattern. You will create two long strips and join them with central connecting rows, or work in one continuous piece if your workspace allows. Below is a single-piece approach for clarity.
Round 1 :
Start foundation chain to match length of runner: ch 160 (example length for a 40-45 inch runner) plus 1 for turning (160)
Round 2 :
Row 1 mesh base: sc in 2nd ch from hook, *ch5, skip 4 ch, sc in next ch; rep from * to end (approx 32 ch-5 loops across)
Round 3 :
Turn and work lacy row: sl st into first ch-5 loop, ch3 (counts as dc), 4 dc in same loop, *sc in space between loops, 5 dc in next ch-5 loop; rep across; end with sc, turn
Round 4-8 :
Repeat rounds 2-3 alternating to build an open lattice of approx 8 rows high (maintain consistent number of loops and dcs to keep edges straight)
Info :
The lattice rows form the background for pumpkins; mark the positions where pumpkin rims will be inserted. Measure and mark centers at regular intervals along the central line so pumpkins will be evenly spaced (for 5 pumpkins, mark centers every ~8 in depending on total length).
Round 9 :
Working across, create reinforced inner ring at each pumpkin center by crocheting a round of sc circles where each pumpkin will attach: *ch6, join into a ring with sl st, sc 12 into ring; rep at each marked center (create 5 small sc rings across)
Round 10 :
Work mesh rows around the rings: sc in available spaces, ch3 loops to integrate rings into mesh; the rings will be expanded to accommodate pumpkin rims (do not fasten off)
Round 11-18 :
Continue alternating mesh rows (ch-5 / dc groups) and reinforcing sc rows to create a broad panel with 5 circular openings. As you reach each ring, leave the ring area slightly open (work sc into its outermost scs and ch spaces to create a neat circular opening about 6-7 in diameter once rims are whip-stitched in). Count stitches carefully so openings remain circular and consistent across the runner.
Info :
Block and pin the panel flat. The openings may be slightly smaller; you will sew the pumpkin rim (round 27-27 tail) into the aperture so plan the size so pumpkin rim edge (72 sts) sits snugly into the opening's edge.
Round 19-22 :
Work 4 rows of even sc around the entire panel to create a sturdy join line for the final border. Keep stitch counts even and mark beginning of each round. (counts will depend on initial foundation length)
Round 23 :
Finish central panel with decorative row: *ch3, skip 2, sc in next 2 sts; rep to create a gentle scalloped lattice row for clean joining to edging
Info :
Before adding edging, pin pumpkins centered into each opening and make sure they sit level. Use spare yarn tails to baste them in place temporarily, then remove and sew permanently after border rounds are complete.
— Joining Pumpkins into Lattice :
Info :
With the lattice panel flat and blocked, position a pumpkin so its rim matches the circular opening. Using the long tail from round 27 of each pumpkin, whip-stitch through pumpkin rim and through the lattice scs around each opening. Use even stitches spaced about every 3-4 mm. Once sewn all around, weave tail to back and secure. Repeat for each pumpkin. Aim for a slightly inset attachment so pumpkins sit flush with the lattice surface.
— Assembling Flowers, Leaves and Mini Pumpkins to Clusters :
Info :
Arrange one layered flower above each pumpkin center and position 3-5 leaves behind each flower along with 2-3 curly vine coils and 1 mini pumpkin. Pin the arrangement then sew securely using yarn tails and a tapestry needle. Sew through base of flower and through lattice to anchor in place. Keep clusters low profile; avoid heavy stuffing that lifts applique off the plane of the runner.
— Outer Border & Scalloped Edging :
Round 1 :
With cream yarn, join at a corner edge of runner: ch1, sc evenly around entire runner edge, working 3 sc in each corner curve for smoothness; join with sl st (counts depend on panel perimeter)
Round 2 :
BLO 1 sc in each st around to create a defined ridge for final scallop (perimeter count unchanged)
Round 3 :
Scallop foundation: *ch5, skip 2 sts, sl st in next st; rep around to create small looped arches for scallop bases
Round 4 :
Scallop shells: In each ch-5 arch: work (sc, hdc, 5 dc, hdc, sc) to form scallop shell; sl st to next base; rep around. Join and fasten off.
Round 5 :
Optional color accent: With Pumpkin Orange, work a contrasting slip-stitch border: join, *sl st in next scallop tip, ch1, sl st in next; rep around to outline scallops; fasten off and weave ends.
Info :
The scalloped edge gives a finished, framed look. Block the entire runner again after attaching scallops to set the final shape and ensure scallops lay flat and even.
— Final Finishing Touches :
Info :
Weave all ends on the reverse side of the runner. Light steam-block the finished runner (use a pressing cloth and steam carefully over cotton yarn) to set stitches. If any clusters feel loose, tack them down with a few invisible stitches to anchor them to the lattice behind.
Info :
Trim stray fibers and trim ends close to the work after secure weaving. For extra stability, you can add a layer of interfacing or thin felt behind the panel where the pumpkins attach, stitched in place, to prevent sagging under heavy centerpieces on the runner.
This autumnal table runner pattern blends openwork lace with bold textured pumpkin medallions and layered flowers for a classic seasonal centerpiece. Each step invites careful attention to detail so the finished piece looks like an heirloom treasure. Enjoy the rhythmic meditative work of lace stitches and the joy of assembling sculptural appliques — the result is a charming, cozy addition to your fall decor. 🍂🧶