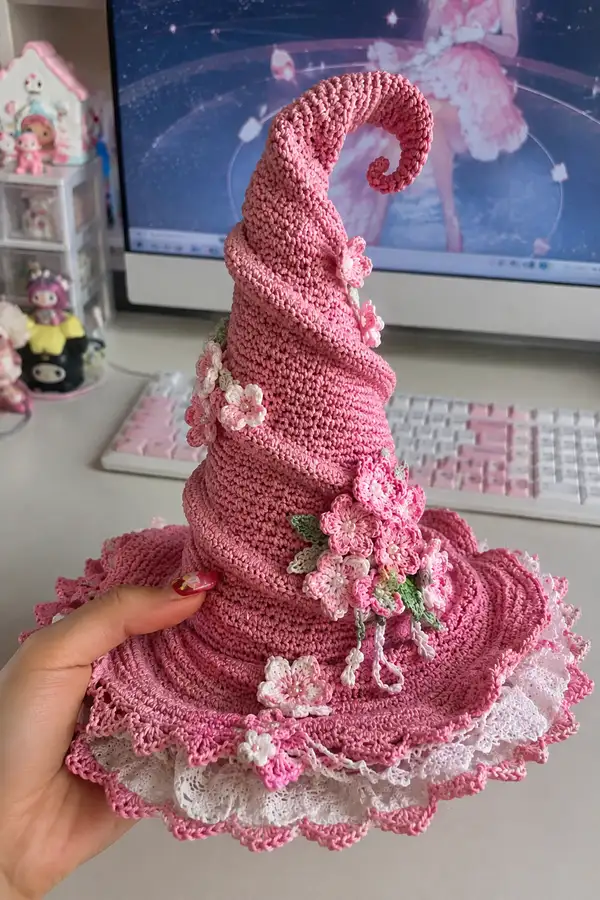
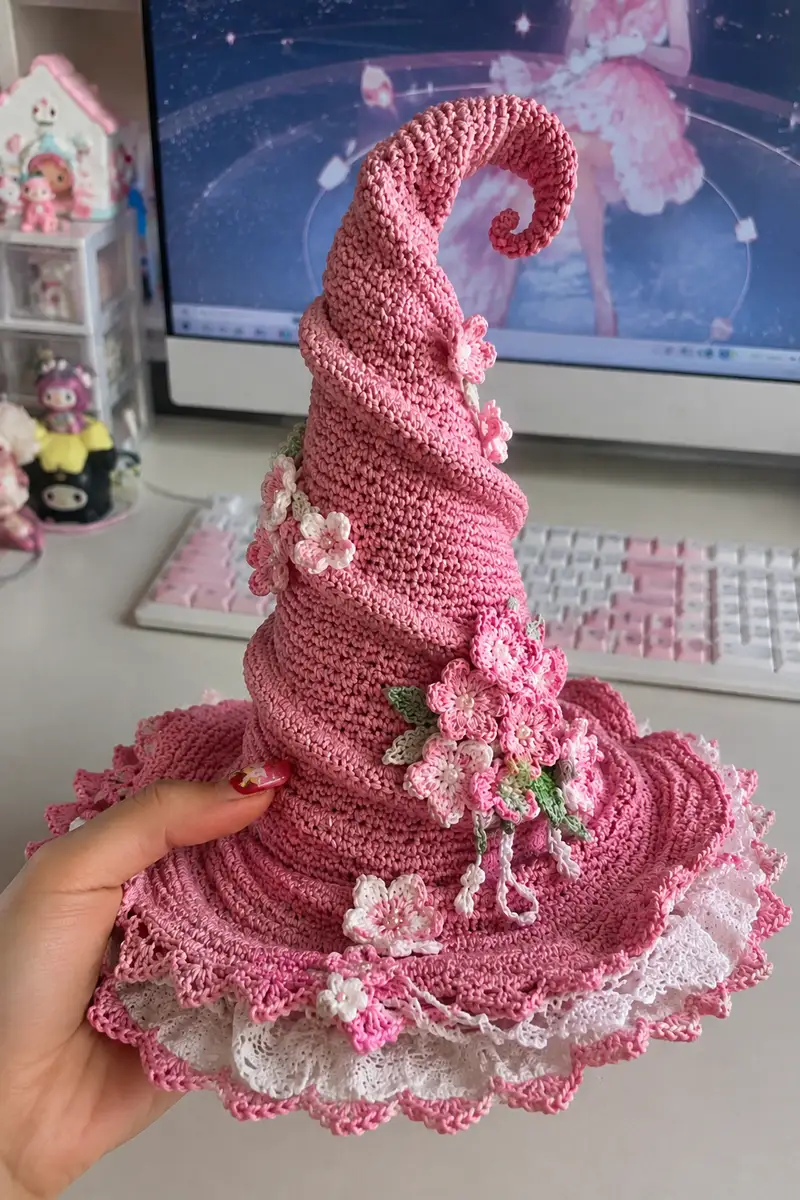
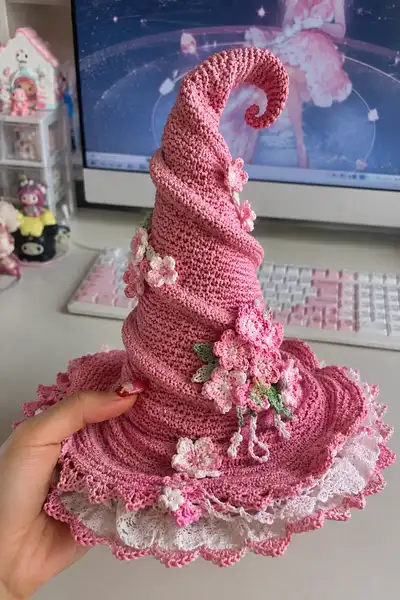
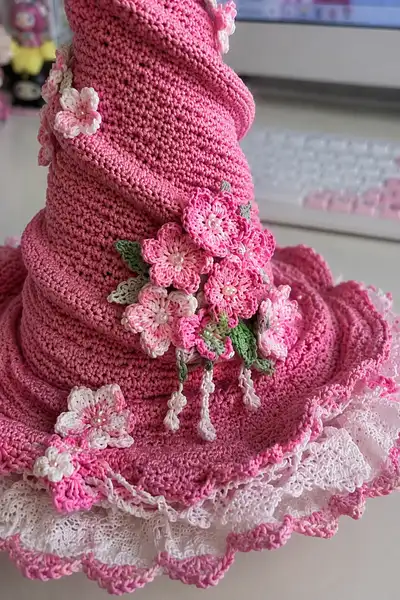
A whimsical tall witch hat worked in delicate rose-pink cotton with a graceful spiral tip, layered ruffled brim and clusters of cherry-blossom appliques. This decorative accessory features contrast white lace trim, tiny bead centers and soft green leaves for a vintage garden-fairy look. Detailed shaping and many small motifs combine to create a statement piece perfect for display, costuming, or a special handmade gift.
Progress Tracker
0% Complete
— Materials & Gauge :
Info :
Gauge is not critical for shape but affects final size. Using 2.0mm hook with fingering cotton, 10 sc = 3.5 cm in single crochet. Choose a hook one size smaller than yarn recommendation for firm fabric.
— Hat Crown (Top Spiral) :
Round 1 :
6 sc in magic ring (6)
Round 3 :
(1 sc, 1 inc) x 6 (18)
Round 4 :
(2 sc, 1 inc) x 6 (24)
Round 5 :
(3 sc, 1 inc) x 6 (30)
Round 6 :
(4 sc, 1 inc) x 6 (36)
Round 7 :
(5 sc, 1 inc) x 6 (42)
Round 8 :
(6 sc, 1 inc) x 6 (48)
Round 9 :
(7 sc, 1 inc) x 6 (54)
Round 10-16 :
1 sc in each st (54)
Info :
These rounds form the initial cylinder of the crown. Keep tension consistent; place a marker at the start of round 10 and move it each round to track rounds in continuous spiral style.
Round 17 :
(7 sc, 1 dec) x 6 (48)
Round 18 :
1 sc in each st (48)
Round 19 :
(6 sc, 1 dec) x 6 (42)
Round 20 :
1 sc in each st (42)
Info :
Begin shaping the crown into a gentle cone here. The decreases above will make the crown slope inward; to create a spiral curl, we will perform asymmetric decreases on a single quadrant in the next rounds.
Round 21 :
In first 12 sts: (1 sc, 1 dec) x 4 then 18 sc in remaining sts (30). Note: worked continuously (30)
Round 22 :
1 sc in each st (30)
Round 23 :
On first 8 sts of round: dec every other stitch (4 dec) then 22 sc across remaining stitches (26)
Round 24 :
1 sc in each st (26)
Info :
These asymmetric decreases on a small section of the crown begin the bias that will make the entire top tip lean and later spiral. Visualize the quadrant where you want the curl to form; do the decreases on that side each time.
Round 25 :
(3 sc, 1 dec) x 6 (24)
Round 26 :
1 sc in each st (24)
Round 27 :
(2 sc, 1 dec) x 6 (18)
Round 28 :
1 sc in each st (18)
Round 29 :
(1 sc, 1 dec) x 6 (12)
Info :
If you want a very hollow tip, fasten off and leave long tail for finishing. For a spiral with structure, continue to work a small spiral coil on top (see Spiral Coil section). Lightly stuff the cone if you want a rounded look; otherwise leave unstuffed for a flatter spiral.
Round 31 :
Sl st into next st, chain 1, then continue to build the interior tip with 6 sc around for 2 rounds to give a tidy edge (6)
Round 32 :
1 sc in each st (6)
Info :
Fasten off and weave in tail here if you are making just a pointed tip. If you want a curling spiral tip as shown, do not fasten off—proceed to the Spiral Coil section to extend and curl the tip outward.
— Spiral Coil (Extend & Curl Tip) :
Info :
The spiral is created by making a narrow strip worked in rounds and wrapping it around itself, or by working continuous rounds around the existing small tip with slight increases and specialty stitches so the fabric naturally coils. Here we will work an attached narrow tube that gradually increases in length and is coaxed to curl.
Round 1 :
Join rose pink at top center (if already fastened, join where closed). Ch 2 (counts as hdc), 5 hdc into same st, rotate and join with sl st to first hdc to form a small round tube; 6 hdc total (6)
Round 2 :
2 hdc in each st around (12)
Round 3 :
(1 hdc, 1 inc) x 6 (18)
Round 4 :
1 hdc in each st (18)
Round 5 :
(2 hdc, 1 inc) x 6 (24)
Round 6-7 :
1 hdc in each st (24)
Info :
To create a spiral curl, after round 7 begin alternating 1 round with 1 hdc in each st and a second round where you do several increases concentrated on one side of the tube (for example, add 6 increases spread across 8 consecutive stitches). This pushes the tube to curl toward the side with fewer increases.
Round 8 :
Work increases across 8 sts: (2 hdc in st) x 6 across the designated quadrant, 1 hdc across remaining sts (30)
Round 9 :
1 hdc in each st (30)
Round 10 :
Repeat Round 8 but add 4 increases instead of 6 in same quadrant to tighten curl (34)
Round 11-16 :
Work 1 hdc in each st for 6 rounds to build length and allow the tube to be coiled manually. Keep the increases concentrated on the same side to maintain curl (34)
Info :
Wrap this tube around itself while still pliable to form the spiral tip. Block or lightly steam to set the curl, or insert thin floral wire inside the tube for a poseable tip. If using wire, fold wire ends inside and wrap with small amounts of yarn before stuffing.
Round 17 :
If desired, taper the end by decreasing: (4 hdc, 1 dec) x 6 (30)
Round 18 :
(3 hdc, 1 dec) x 6 (24)
Round 19 :
(2 hdc, 1 dec) x 6 (18)
Round 20 :
(1 hdc, 1 dec) x 6 (12)
Round 21 :
6 dec (6) - fasten off and weave tail inside the curl to hide
Info :
When you wrap the tube around the tip, position the increases outward so the outside edge is fuller and the inside of the curl is slightly drawn in. Pin in place and sew through several wraps to secure the spiral. Use invisible whip stitch to hide joins.
— Crown Texture & Decorative Spiral Band :
Round 1 :
Resume working around base of crown where you stopped increases earlier. 1 sc in each st for 4 rounds to even out (st count will depend on where you are; if you finished crown at 54 earlier, work 54 sc)
Round 2-5 :
1 sc in each st (54)
Info :
To create the raised spiral band that wraps the cone in the picture, work a narrow cord separately and sew it spirally around the crown, or use a ridged round worked in BLO to create a continuous raised spiral. Below we give ridged BLO rounds for a continuous spiral effect.
Round 6 :
1 sc in each st BLO (54)
Round 7 :
1 sc in each st (54)
Round 8 :
1 sc in each st BLO (54)
Round 9 :
1 sc in each st (54)
Info :
Alternate BLO rounds and normal rounds until you have 6-8 ridges that can serve as visual spiral guides for flowers and embellishments. If you prefer to sew a 6 mm cord around the cone, work ch 3 - sc in 2nd ch from hook across to make a cord, then attach by sewing.
— Brim (Main Expansion) :
Round 1 :
From base of crown, join yarn and work 1 sc in each st (54) - this is brim join round (54)
Round 2 :
(5 sc, 1 inc) x 9 = (6-repeat pattern) create gentle flare. Using math: if working with 54 sts, (5 sc, inc) x 9 = 63 (63)
Round 3 :
1 sc in each st (63)
Round 4 :
(6 sc, 1 inc) x 9 (72)
Round 5 :
1 sc in each st (72)
Round 6 :
(7 sc, 1 inc) x 8 + (6 sc, 1 inc) x 1 = (Approximately 81) Be sure total increases match stitch geometry. Example: (7 sc, inc) x 9 = 81 (81)
Round 7 :
1 sc in each st (81)
Round 8 :
(8 sc, 1 inc) x 9 (90)
Round 9-12 :
1 sc in each st (90)
Info :
If your brim becomes too floppy, reduce increases or use a smaller hook for brim rounds. The aim is a wide circular brim with gentle ruffle. Check flatness by blocking every few rounds. For a deeper ruffle you can add alternating increase rounds (e.g., every other round increase).
Round 13 :
(3 sc, 1 inc) x 18 (108)
Round 14 :
1 sc in each st (108)
Round 15 :
(4 sc, 1 inc) x 18 (126)
Round 16-18 :
1 sc in each st (126)
Info :
The brim pictured is deep and layered — after reaching a broad diameter, we will add a scalloped edge and an under-layer of white lace. Keep counts even so the lace can be attached smoothly. If you prefer a smaller brim, stop increasing earlier and proceed to edging.
— Brim Scalloped Edge :
Round 1 :
Switch to slightly finer hook if desired for crisp scallops. *Sk 1 st, 5 dc in next st, sk 1 st, sl st in next* rep around to form scallops. If you have 126 sts, adjust repeats to achieve whole number scallops; for 21 scallops do (scallop over 6 sts) pattern. Example: (sc 1, skip 2, 5 dc in next) x 21 (approx)
Round 2 :
Sl st into center dc of each scallop and work 3 sc into center for a neat edge (63 total depending on scallop count)
Info :
Count scallops and measure brim circumference to ensure lace underlayer will fit. This scallop count will determine how many points the lace attaches to for a neat ruffle. Adjust scallop stitch spacing to match your lace repeat.
Round 3 :
Work a picot round: *sc in next st, ch 3, sl st into first ch (picot), sc in next 4 sts* rep around to accent scallops.
Round 4 :
Fasten off and weave in ends. Block brim flat and shape scallops gently while damp. Pin out the shape and allow to dry completely.
— Lace Underskirt (White Ruffle) :
Info :
The white ruffle seen under the pink brim is worked separately in fine thread or pre-made lace sewn on. Below is an optional worked ruffle to replicate the look.
Round 1 :
With white thread, ch a foundation approx equal to brim circumference (use long chain or foundation sc). For our brim assume 126 ch to start the ruffle waistband; join forming a ring if using foundation sc.
Round 2 :
Work 1 sc in each ch around to create base band (126)
Round 3 :
For ruffle: *In next st work (3 dc, ch 1, 3 dc) - shell, skip 1 st* repeat around to create airy ruffle. This produces approx 63 shells if starting with 126 base sts.
Round 4 :
Work a second shell round inside each shell to deepen ruffle: *ch 2, 3 dc in center, ch 2* across shells; adjust to produce double ruffle effect.
Info :
Block the white ruffle first. Then using small whip stitches, attach it to the underside of the pink brim aligning the peaks of the shells with the scallops or picot points. Pin securely before stitching so the ruffle sits evenly.
— Cherry Blossom Motifs (Make 12–18) :
Info :
Each blossom is made in a few rounds—center, petal rounds and optional edging. Vary color by using variegated pink or white for a soft ombre effect. Add a small bead to each center for the pearly look in the photos.
Flower Round 1 :
With variegated pink, 6 sc in mr (6)
Flower Round 2 :
(1 sc, inc) x 3 = (3 units) to prepare for petals: work in front loop only to create a slightly domed center. Example: (1 sc, 1 inc) x 3 (9)
Flower Round 3 :
*Ch 4, sl st into next st to form a loop; into that loop work (sc, hdc, dc, hdc, sc) to make one petal* Repeat around for 5 petals total. After 5 petals join and fasten off (5 petals)
Flower Round 4 :
Optional: Work picot edge on each petal by sl st to outer dc then ch 3, sl st back into same point. Sew a small pearl or bead in center and secure with clear-drying glue if desired.
Info :
Make at least 12 medium blossoms and 4–6 smaller blossoms. For smaller blossoms use ch3 loops and fewer stitches in each petal. Vary petal counts (5–6) for a natural look.
— Small Layered Blossom (Make 6) :
Round 2 :
*Ch 3, sl st in next st* x 4 to make 4 small petals. Tighten and fasten off. Add bead to center (4 small petals)
Info :
These small layered blossoms are perfect to scatter along the spiral and brim edge for dimension. Stack a small blossom onto a medium blossom and stitch through centers for added volume.
— Leaves (Make 10–14) :
Leaf Round 1 :
Ch 8, sc in 2nd ch from hook, hdc in next, dc in next 2, hdc in next, sc in next, sl st in last. Turn to work other side into foundation chain: sc, hdc, dc, dc, hdc, sc; sl st to base. Fasten off (approx 12 stitches total)
Leaf Round 2 :
Optional: Work BLO or sl st edging in a slightly darker green to create veins. Embroider 1 central vein with contrasting green if desired.
Info :
Make a mix of small and slightly longer leaves. Stiffen leaves lightly with dilute fabric stiffener if you want a sculpted look. Place leaves behind blossom clusters for depth.
— Dangles & Buds (Make 6–8) :
Round 1 :
Ch 12, join to form small ring if you prefer; into chain work picot cluster: *ch 3, sl st in 2nd ch from hook* across to make a chain tassel. Fasten off and trim to desired length.
Round 2 :
Or make a small tubular bud: 6 sc in mr, (inc) x 6 (12), 2 rounds sc (12), fasten off and leave tail to sew as bud tip (tight bud)
Info :
These little dangly chains emulate the cascading cherry blossom strings in the photo. Use 3–4 chains per cluster and secure with a few stitches to hold them where the bloom cluster meets the brim or cone.
— Assembly & Placement of Embellishments :
Info :
Before sewing anything, block and press all pieces. Pin every blossom, leaf, and chain in place. Photographs show a large cluster on the side front of the crown, smaller blossoms trailing up the spiral, and tiny groups at the brim edge.
Step 1 :
Decide which side will be the front. Place a large cluster (3 medium blossoms stacked with 1 or 2 small blossoms and 2–3 leaves) approximately 6–9 stitches below the top of the brim where the crown meets brim. Pin securely.
Step 2 :
Sew blossoms using long yarn needle and matching thread. Use small stitches through flower centers and weaving into base rounds so tension sits flush. Sew leaves behind blossoms, catching a few crown rounds to anchor.
Step 3 :
Attach dangle chains and budtips beneath the cluster: tuck ends into stitch spaces and secure with several stitches and a knot. Hide tails inside crown or secure with small dab of fabric glue if needed.
Info :
For a natural cascade, stagger blossoms and angle some petals slightly outward. Use pins to view from different sides before final stitching. Add beads to centers and tack them from back with thread to secure.
— Final Edge Embellishments :
Round 1 :
With variegated pink, work a picot-edge round around brim scallops to echo flower color: *sc into center of scallop, ch 3, sl st into first ch (picot), sc in next 4 sts* repeat around.
Round 2 :
Sew small single blossoms or tiny shells at intervals along brim edge - use 6–8 small blossoms total spaced evenly. Secure with matching thread and knot tightly.
Info :
Weave in all ends on the underside of the brim to keep the visible surface tidy. If you made the white ruffle separately, now whipstitch it to the underside aligning shell peaks to scallop centers using invisible stitches.
— Blocking & Shaping :
Info :
Wet-block the entire hat on a hat block or over a bowl that approximates head shape. Pin the brim scallops and the spiral tip to the desired curl shape. Allow to dry fully. Steam lightly to set lines if using mercerized cotton. If you prefer a permanently stiff brim, brush with diluted fabric stiffener following manufacturer instructions, and allow to cure fully.
Round 1 :
Check symmetry: adjust any embellishments or trim after blocking since sizes and tensions may change slightly after drying.
Info :
Optional: add a hidden comb or thin elastic within the brim to keep hat steady on head if you intend to wear it. Sew combs at three equidistant points to hold the hat on your hairstyle.
— Notes on Customizing Size :
Info :
To make a smaller or larger hat, alter the crown base increases (work to 42 or 60 base sts instead of 54) and reduce or increase the number of brim increase rounds proportionally. Maintain increase ratios so scallop and lace count remain even.
This rose-pink spiral witch hat pattern is a beautiful project that combines shaping and small-motif work into one enchanting accessory. The layered ruffle and cascading cherry blossoms create a romantic, vintage feel that is incredibly satisfying to make. Whether you display it, use it for a costume, or gift it to someone special, each stitch adds personality and charm. 🧶🌸 Enjoy the process and show off your finished creation — it’s a real keepsake! ✨